Build your Citrix Disaster Recovery environment with Microsoft Azure Site Recovery
One of the great Platform Services of Microsoft Azure is DRaaS, what stands for Disaster-Recovery-As-A-Service or also named as Recovery Services in the Azure ARM Portal. A simple, cost-effective and fast solution to build up a complete Recovery Site in the Azure Cloud, with no need to buy own hardware that needs to be available for stand-by! What makes old solutions very expensive, in operational costs. It also gives you the flexibility to simply start individual servers, in case of a single server or hypervisor outage. At this moment, there is no official Citrix solution to provide any out-of-the-box disaster recovery capabilities to the cloud, and because of the increased collaboration between Citrix and Microsoft, this is the solution that Citrix advise you to use these days, what makes this solution definitely one to remember!
Also one text I like to mention, last week Prasanna Padmanabhan from the Citrix Azure Engineering team, tweeted this following message, what exactly symbols the way of thinking about the Azure DRaaS solution;

With the ASR (Azure Site Recovery) service Microsoft offers a new way to secure replicate your on-premises VMware, Hyper-V and physical servers to Azure and back to your on-premises site over an SSL encrypted channel – with VMware support – without the need to uninstall the VMware tools first! The on-premises site needs to be prepared with a Process server installation, also called the Management server. This server will be proceeding the server synchronization to the Azure site. When you failover to azure, the Recovery Services – Recovery plan creates all the protected Virtual Machines groupwise in Azure for you.
This solution can also be used to perform a quick and simple migration for your VMware servers to Azure, without the needs to convert your servers to VHD format first. Afterwards, you can remove all the Site Recovery services, like the vault, and let your server fully run in the Azure Cloud. A simple and smart way of thinking, and big time saver!
For the Data Channel connection to the Azure Cloud, you have 3 different flavors, the most common one is the IPsec VPN connection, that can take place from Firewall or Router to the Azure Virtual Gateway. The second, and also the most valuable, and with the highest uptime and network latency, the Microsoft ExpressRoute. A MPLS connection to the Azure Cloud from one of the Partner Datacenters all around the globe (like Equinix). The ExpressRoute connection, can integrate with your corporate MPLS WAN network, so all your branch offices can connect to your Azure Virtual Network. And there is also a 3rd option, the point-to-site connection. The client VPN solution to connect to your Azure vNet.
Normally, the Azure Site Recovery replication traffic, runs over the internet, but there is also a way to separate your replication traffic, to run dedicated over the ExpressRoute connection, instead of default over the internt. If you want do to this, you must activate the ExpressRoute | Public Peering service, since july this year, you need to proceed a network assessment to get approval for this service, costs are about 15k.
All the replicated server will be stored in the Storage Account (Blob Container), that you select to use while configuring the recovery services vault.
There is also a possibility to failback to your on-premises site, I will cover that process in a later article. In the meanwhile, you can check this official article to get further.
Some history
In July, 2014, Microsoft overtakes of the company InMage, on that moment, one of the leaders of Disaster Recovery synchronization/conversion to Hyper-V (VHD) with VMware as hypervisor. After 2 months, Microsoft added the support for VMware hypervisors to their Recovery Services solution, first for the ASM (Service Management, v1) platform, and also after a short while, for the ARM (Resource Manager) platform.
Table of Contents
Click on the title to get forwarded in the article:
- Creation of the Azure Recovery Services Vault
- Set Azure vNet to Azure DNS
- Set Azure vNet to Custom DNS
- Troubleshooting
Limitations you need to be known with
- The replication through the replication agent of existing on-premises MCS or PVS machines are not supported. To create a MCS strategy recovery setup, you must (re)create a separate Machine Catalog based on the Azure ARM Host Connection after a disaster take place, i will cover all these steps in this article;
- A test failover in the production vNet, is not separate from your production network. So if you want to test the setup in production time, by starting a Recovery Plan – test failover, example; for audit reasons. Please proceed the test failover in a separate vNet instead of the one that is production. This can cause interaction with the production environment! For this article i use the production vNet, and I shutdown my on-premises virtual machines before.
- DHCP in Azure is not supported, when your system or site is down, switch then to a other DHCP server/network device, so addresses will still be broadcast;
- OS partitions cannot be bigger than 1023 GB/1 TB;
- OS Partitions cannot be dynamic disks;
The installation guide will include the following Citrix Components
- Clone of the on-premises MCS master image, for the replication to Azure.
- Creation of an (VMware) Azure Recovery Services Vault;
- Installation of VMware Process Server;
- Configuration of Replication/Protected servers;
- Configuration of Recovery plans;
- Creation of a separate MCS Strategy-Azure ARM Machine Catalog – host connection, based on the VDA-Clone;
- Starting a test-failover Recovery Plan
Shortnames
In this blog article I use a lot of short names for configuration items, these can be random, and of course be changed to your own naming convention
- IS stands for InfraShare;
- VAU stands for Vault;
- AZ stands for Azure;
- RG stands for Resource Group;
- SA Stands for Storage Account;
- XA stand for XenApp;
Requirement
-
- VMware vSphere 5.1/5.5/6.0 including vCenter;
- A VMware replication server (virtual or physical), with Server 2012 R2 installed;
- Azure subscription (or request a trial);
- Storage account;
- Resource group;
- Citrix XenApp/XenDesktop 7.11 or higher (for Azure ARM Host Connection)
- Minimum of 1 Azure vNet (I prefer: 1 production – 1 test | for the test failover);
- IPsec VPN – (If you haven’t got this; please check my other Azure blog / step 1 – 13);
- In case of a full primary site outage, and you want to move to another location, you must build up a IPsec VPN to a second (Co-existence VPN) site also. If you haven’t got this, then only Remote Access (ICA_PROXY) to your Citrix site will be possible, so the NetScaler setup in Azure is then required also!;
- Or a ExpressRoute, then is a IPsec not needed;
- 5-10 Mbit/s (for this particular setup) free upload (idle) allocated bandwidth for the synchronization traffic, for the delta changes. You can check the Microsoft capacity planner to calculate your bandwidth needs!;
- Note: for the initially sync, if you haven’t any QoS or load balancers active, the full bandwidth will be throttled! In that case you can throttle your traffic on the Microsoft Azure Backup Software that will be installed automaticly on the Process/Managementserver, to prevent bandwidth problems;
Requirement Process/Config Server (Sync-to-Azure server)
This is depending on the total amount of servers that need to be replicated, see this table for all the scalability requirements:
Prepare the Azure MCS Clone VDA
Unfortunately, does the Azure Recovery Services, not Support MCS or PVS out-of-the-box. The Azure sync agent, cannot be enrolled over all the (non-persistent) machines, if you install this in the on-premises master image. The Passphrase will lose his validation, and the MCS XenApp Workers wont be able to sync to Azure.
Note: If you have only persistant XenApp/XenDesktop worker, without any MCS or PVS imaging strategies, then you can skip this part, and begin at step 16.
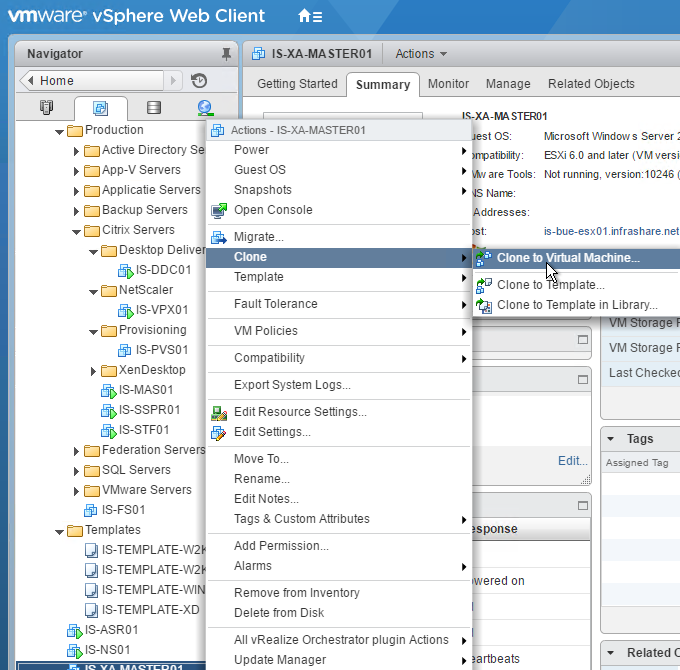
Step 1: To work around this limitation, you can fully clone the on-premises Master image, to create a separate “stand-by” master-clone image, with only one function, syncing to Azure. In case of a failover, a new Machine Catalog will be created, based on this VDA-Clone, and to enroll all the XenApp server you want. One importent note: This machines always needs to be updated, to make sure both images do have the same software and updates at the moment of a failover. I advice you to make use of RES ONE Automation or Login AM for doing this.
For PVS master images you first need to reverse/convert the image through BNImage.exe back to a (non-streamed) Virtual Machine, afterwards you can proceed these steps also.
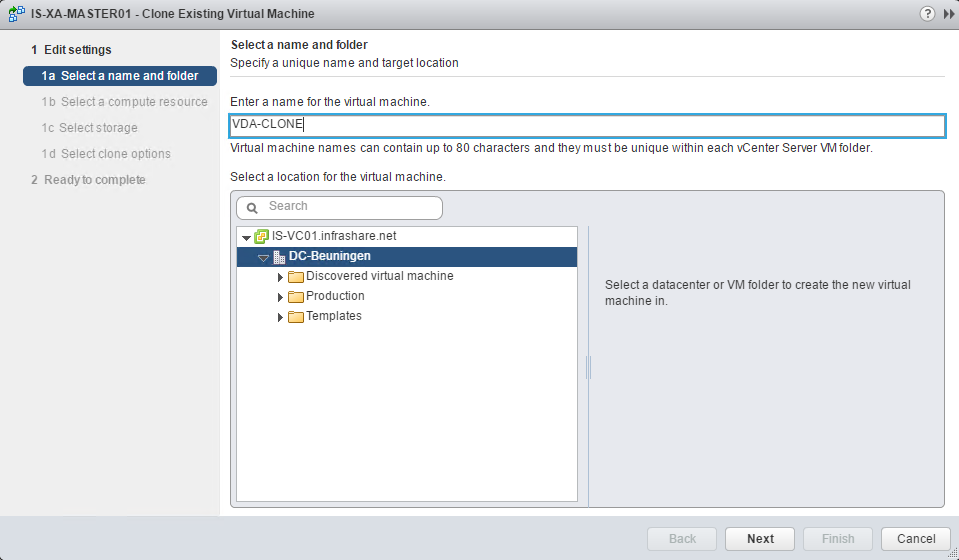
Step 2: Name the clone, something like VDA-CLONE, so you will remember that this is the replication master image to Azure
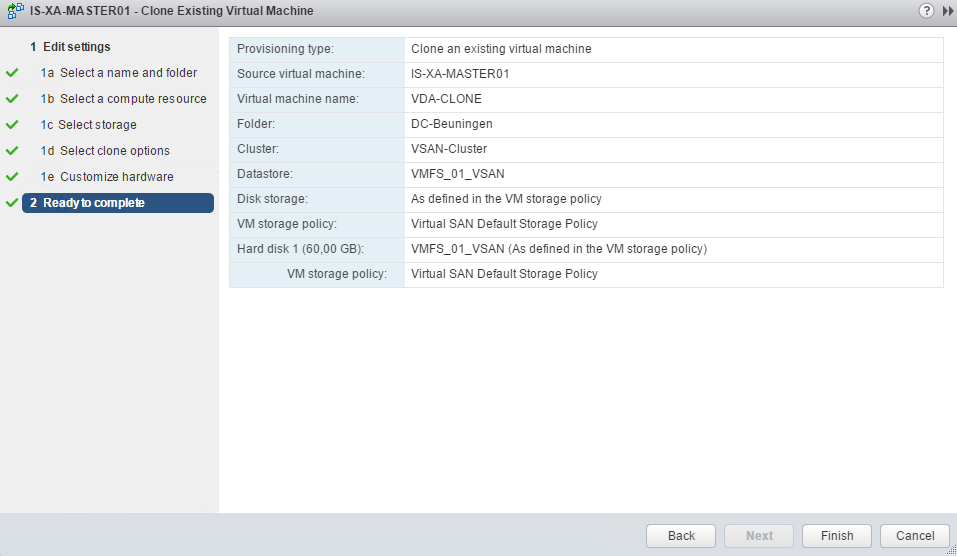
Step 3: Select the resource, Datastore location you prefer, use the same hardware setup and finish the clone. I will name the clone VDA-CLONE
Step 4: Before you boot the machine, disconnect the network interface, otherwise the original master image may be effected, and loses his domain validation.
![]()
Step 5: Afterwards, boot up the Clone machine, login with the local administrator account, run a sysprep /Generalize (c:\Windows\System32\Sysprep\sysprep.exe) and reboot the machine
Step 6: After the reboot, re-connect the network interface, follow the sysprep wizard; set the timezone, license key
![]()
Step 7: Rename the computer to VDA-CLONE, or your own preferred name, rejoin this machine back to the domain, and reboot the machine
Note: By proceeding the sysprep, we make sure that the on-premises production master image won’t be effected by this clone (SID).
Creation of the Azure Recovery Services Vault
Step 8: Go to the Azure portal https://portal.azure.com and login with your credentials
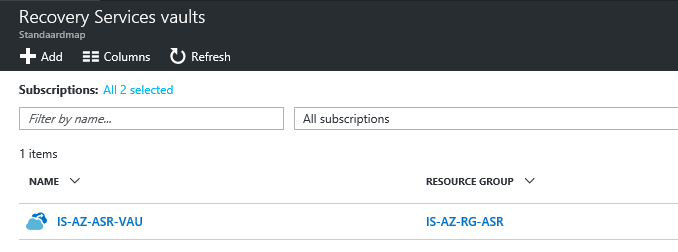
Step 9: Open the Recovery Services vaults menu option
Note: You probably need to make this option visible first, by selecting the More Services option
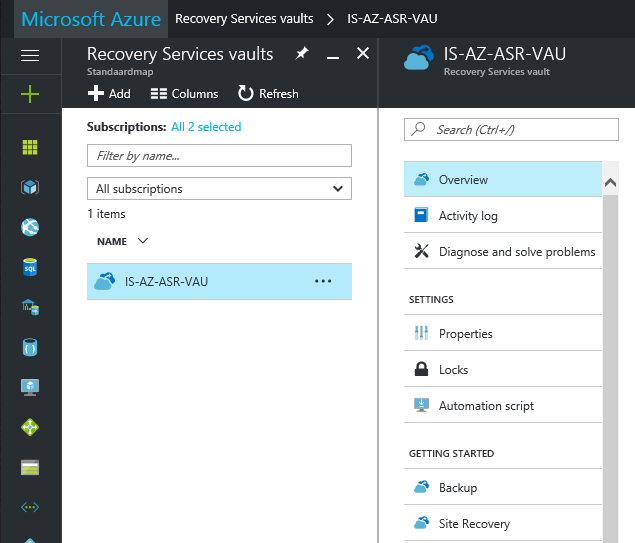
Step 10: As known, there are no Recovery Services yet,to create one, simply click on the Add button
Step 11: Give in a name for the Vault, select your Azure subscription, resource group, location and press on Create
Deployment is in progress…
Step 12: When the deployment is finished, click on the Vault name to continue
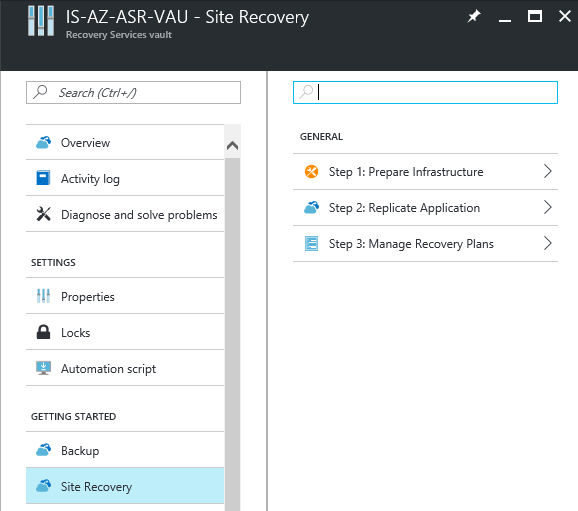
Step 13: Open the Site Recovery option, under the Getting Started section
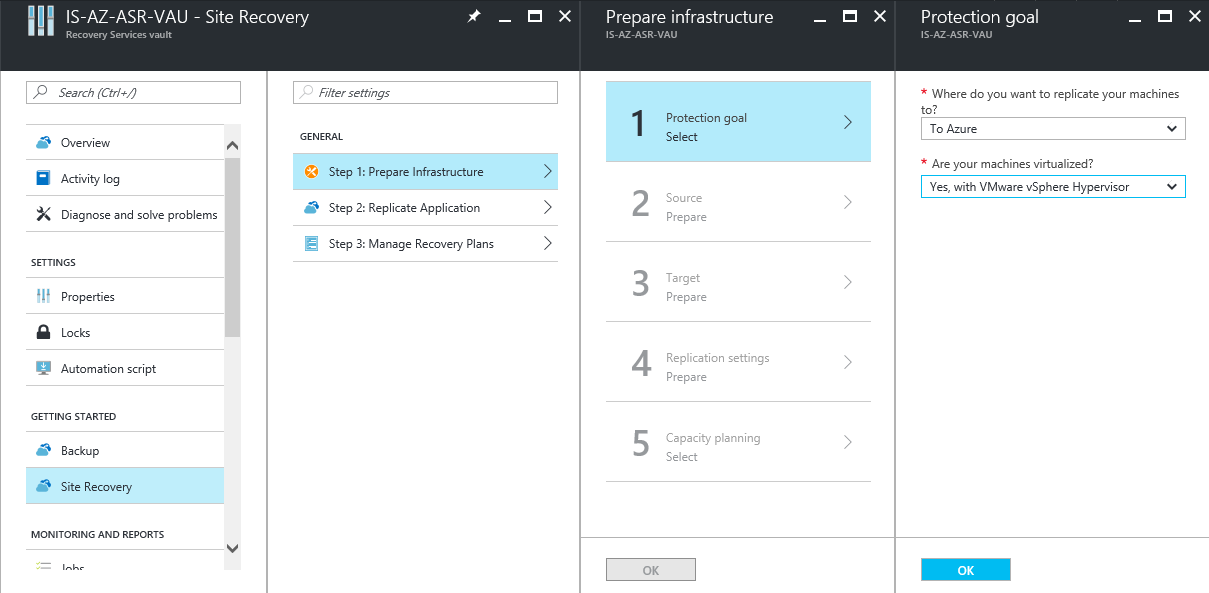
Step 14: Click on Step 1: Prepare Infrastructure
Step 15: Select your protection goal, the first; To Azure, second; Yes, with VMware vSphere Hypervisor and click on the Ok button
Installation of the on-premises –Process/Configuration Server
In case you didn’t created a new VMware machine on your on-premises network and the Windows Server 2012 R2 initial setup yet, you need to start this now.
Look at the form that I mentioned in the begin of this article (name; Requirement Process/Management Server Sync-to-Azure server) for your server requirements.
For this article, the underlined configuration is enough to do the synchronization of my lab Citrix environment. If you add more replication machines, you must level up the resources.
Step 16: When deployed in VMware, start the machine, allow Remote Desktop trough the console, and proceed to the next step
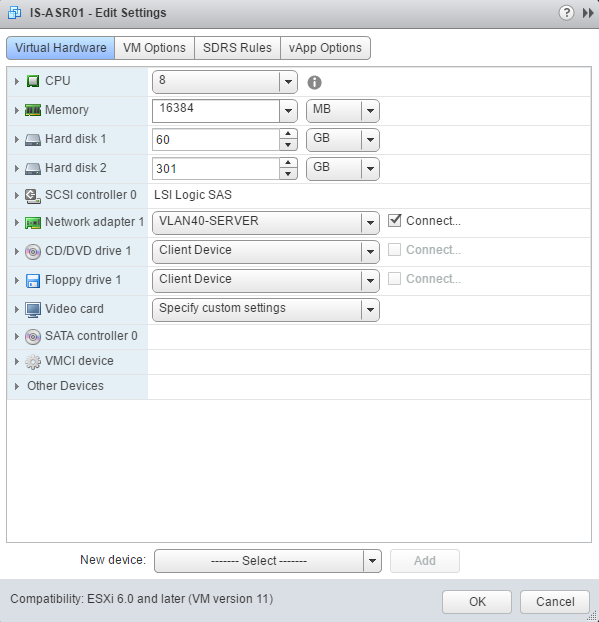
Server name: IS-ASR01 (you can name this random)
OS: Windows Server 2012 R2 Standard
Joined Domain: infrashare.net
IP: 10.0.40.70
VM Settings: 16GB RAM – 8 vCPU – 60 GB – 301 GB Hard disk
Other settings: Allow Remote Desktop / VMware tools installed
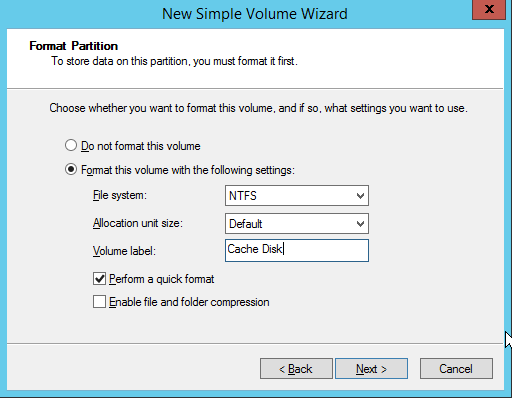
Step 17: Prepare the second hard drive, so start the diskmgmt.msc (Disk Management) mmc console, initialize the disk, create a Simple volume with the drive letter D:\ and name it something like Cache Disk
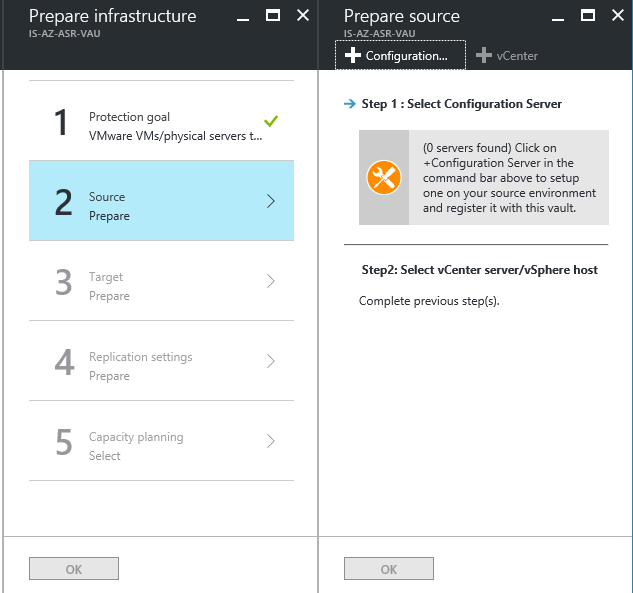
Step 18: Now we need to prepare the Configuration Server, click on the + next to configuration
Step 19: Click on Download– the Microsoft Azure Site Recovery Unified Setup – button/text
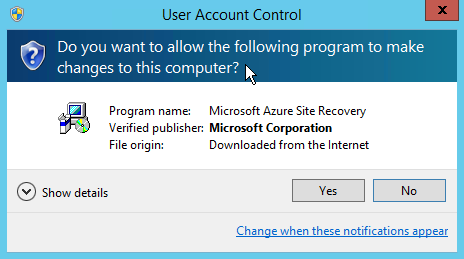
Step 20: Save the software on the VMware replication server, and start the MicrosoftAzureSiteRecoveryUnifiedSetup.exe setup
Note: You can also open this url into the brower, if that is easier instead of copying; http://aka.ms/unifiedinstaller
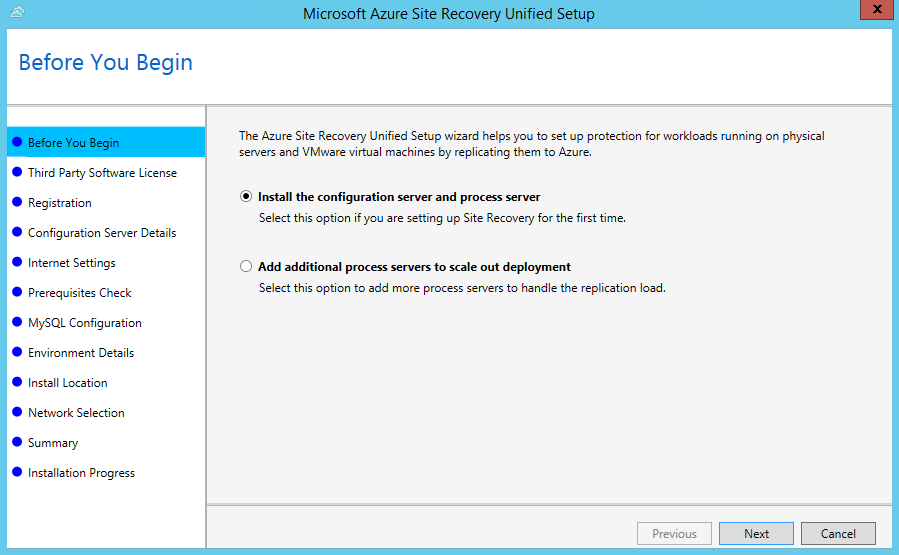
Step 21: Choose for the first option – Install the configuration server and process server – and click on next
Note: The second option is to add additional servers, if you upgrade your environment, to replicate more servers, it might be needed to increase the numbers of Processing/Management servers
Step 22:The InMage software is build on a MySQL database, so we first need to install the community edition of this software by clicking on the – Direct Download Link – text/button to run the mysql-x.x.x-win32.msi installation file
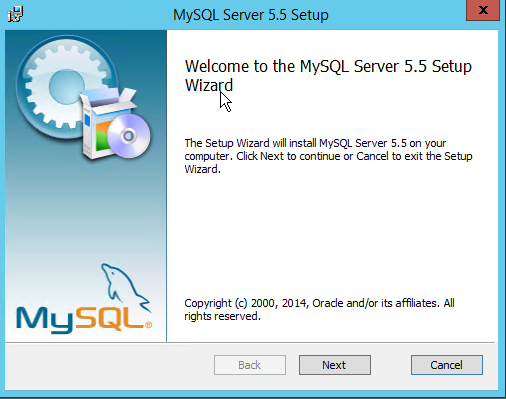
Step 23: Get through the MySQL initial installation process, click next
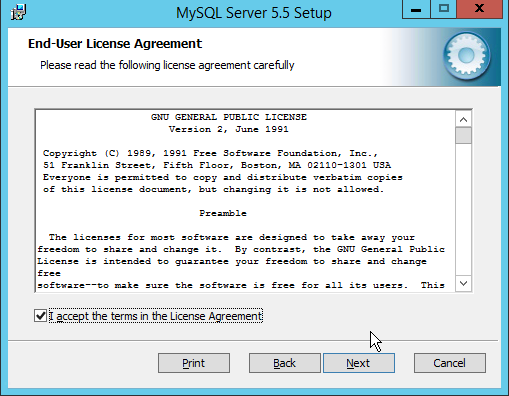
Step 24: Accept the license terms, click on next
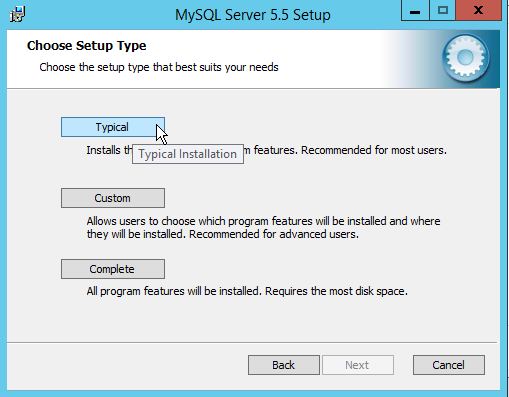
Step 25: The typical version covers all the needed features, so click on this option
Step 26: Click on the install button
The software is being installed…
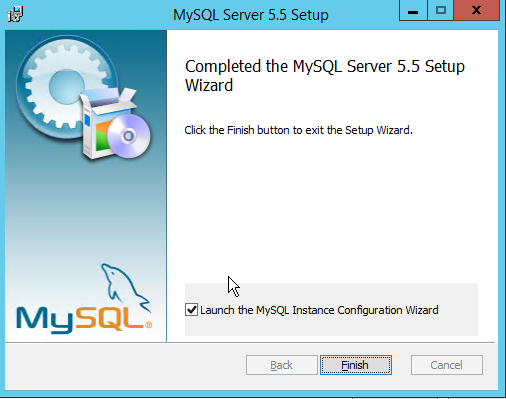
Step 27: Click twice on the Next button in the MySQL Enterprise screen to proceed to the Launch Instance Configuration Wizard, click finish
Step 28: Click on next
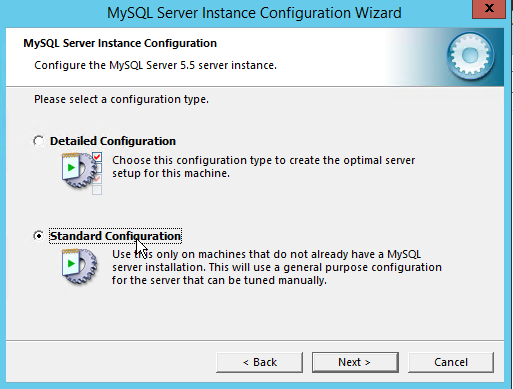
Step 29: Choose for the – Standard Configuration – option, click on next
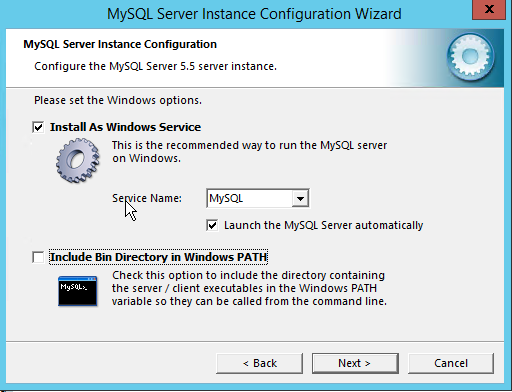
Step 30: Let these settings be default, click on next
Note: You can activate the include bin directory, so you can launch MySQL commands from the Microsoft command prompt
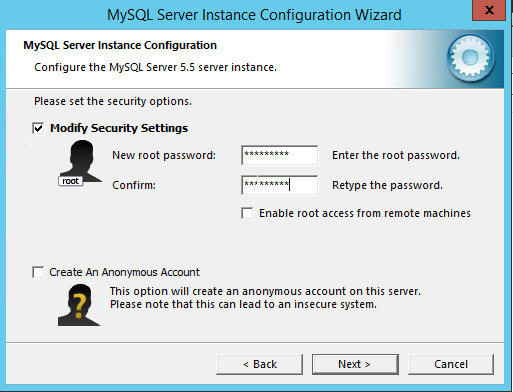
Step 31: Fill in a root password and save it somewhere secure, click on next
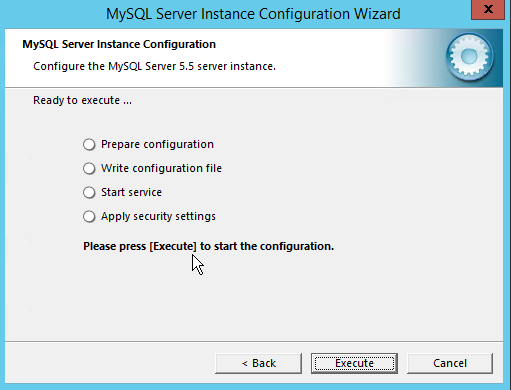
Step 32: You are now ready to execute, so click on execute
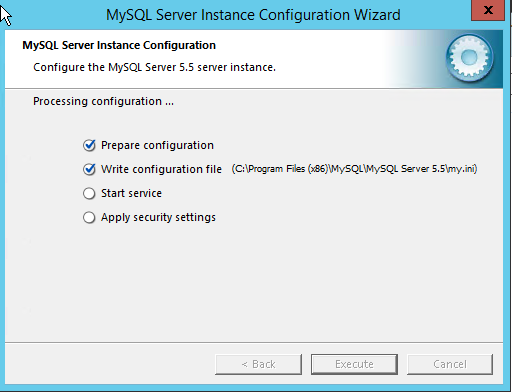
Processing configuration…
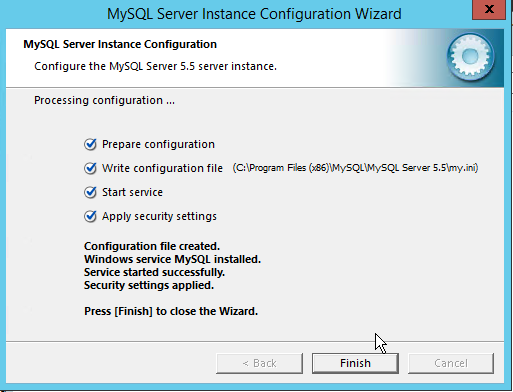
Step 33: The MySQL setup is finished, click on finish
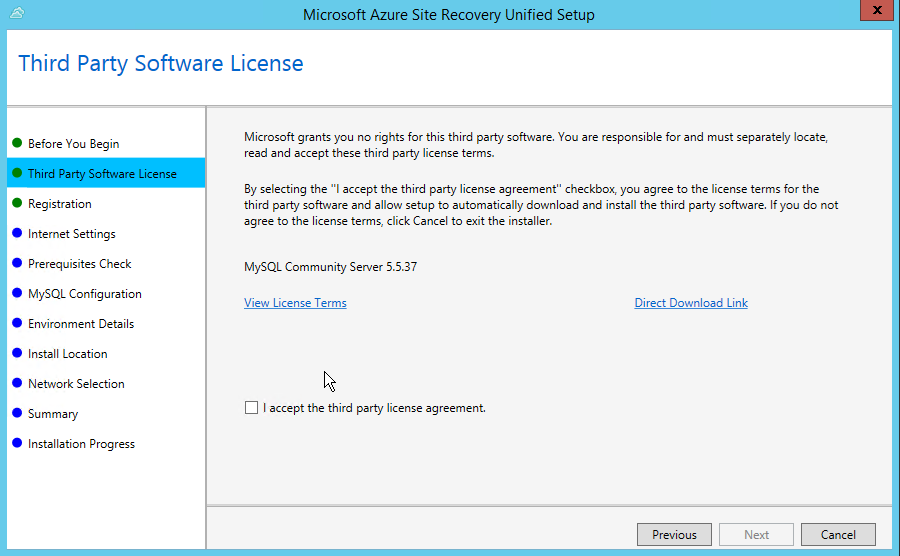
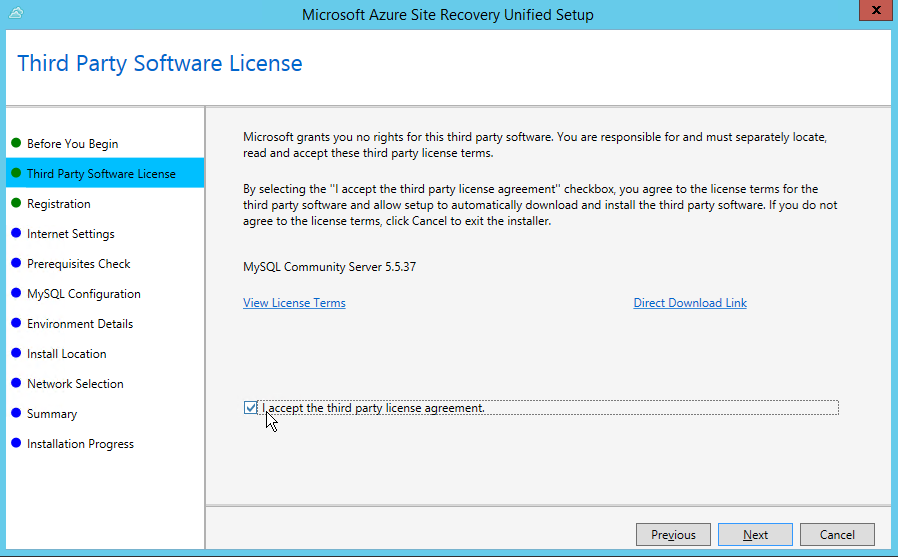
Step 24: Switched back to the Unified setup – Tick on the box before – I Accept the third party license agreement – and click next
Step 35: Now we need to go back to the Azure Portal – to download the Vault Key from set 4 – in the preparation screen. Save the file somewhere on the ASR – Process/Configuration server, like C:\tmp
Note: If the link doesn’t work, you need to re-open the preparation screen
The file is being downloaded…
The file name must be something similar like this
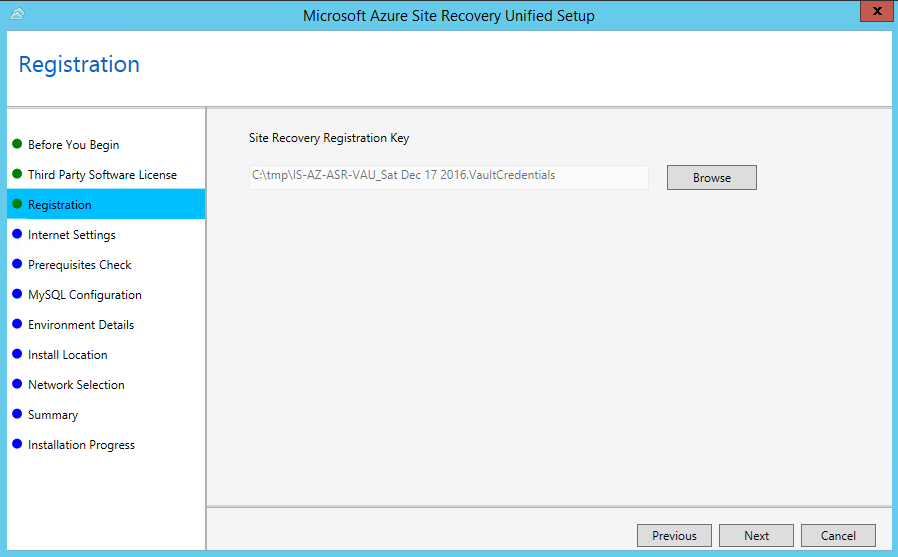
Step 36: Browse to the VaultCredentials file and click on next
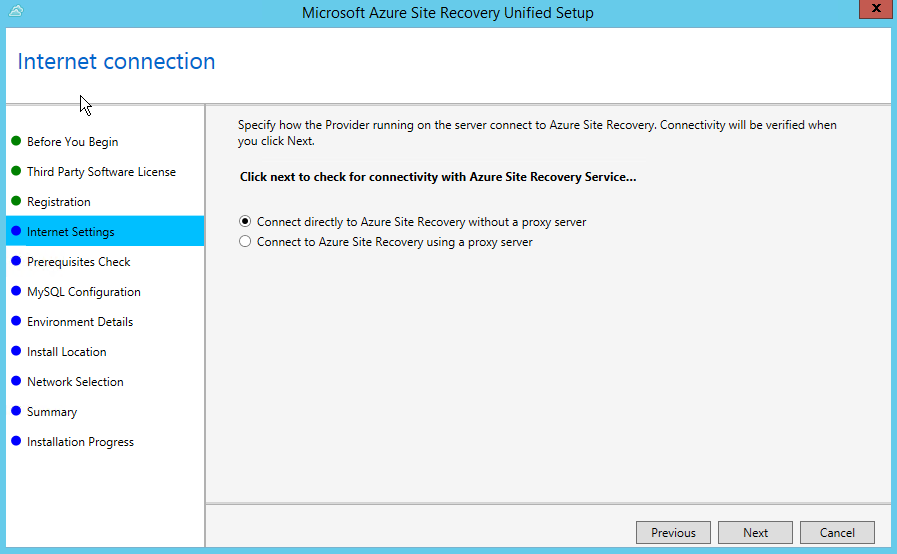
Step 37: Choose the settings that fits with your environment, for this article I let it default on – Directly – and click on next
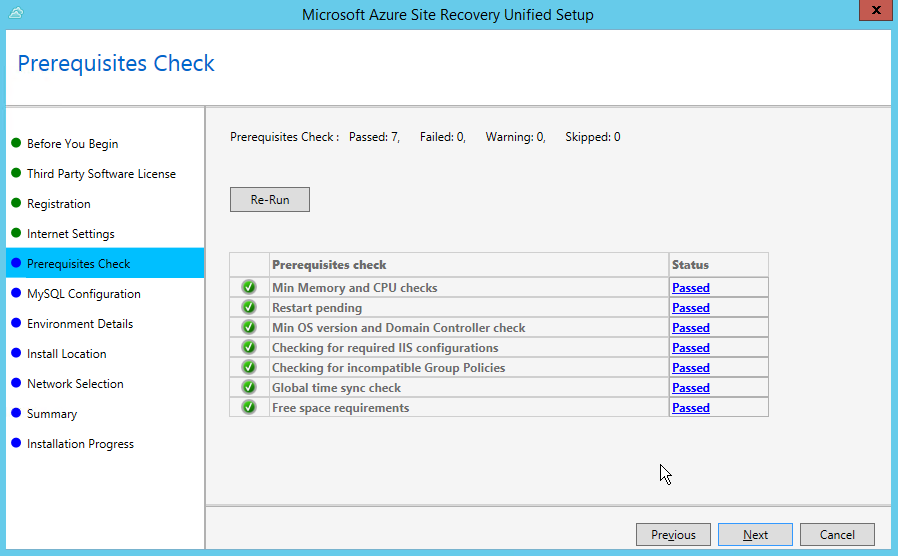
prerequisites are being checked…
Step 38: When all the requirements have green checkmarks, click on next
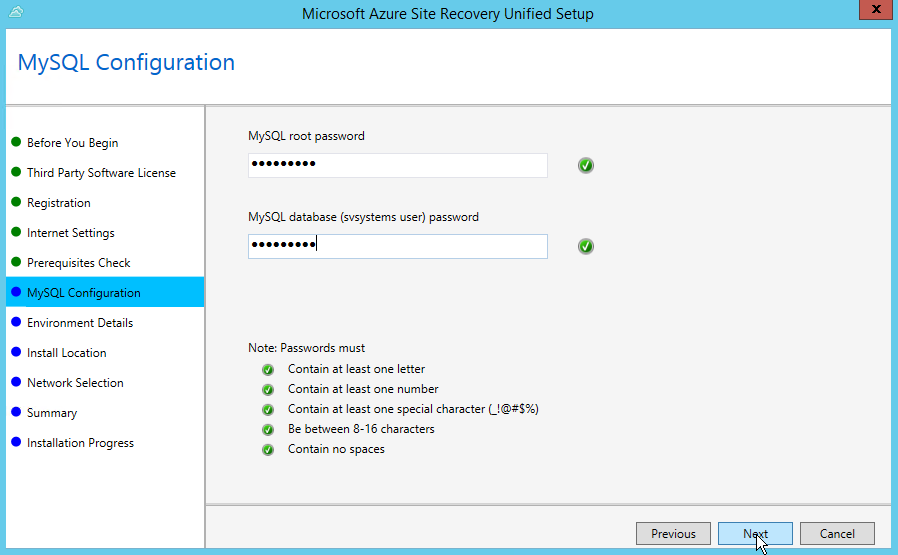
Step 39: Fill in the earlier created MySQL root password and click Next
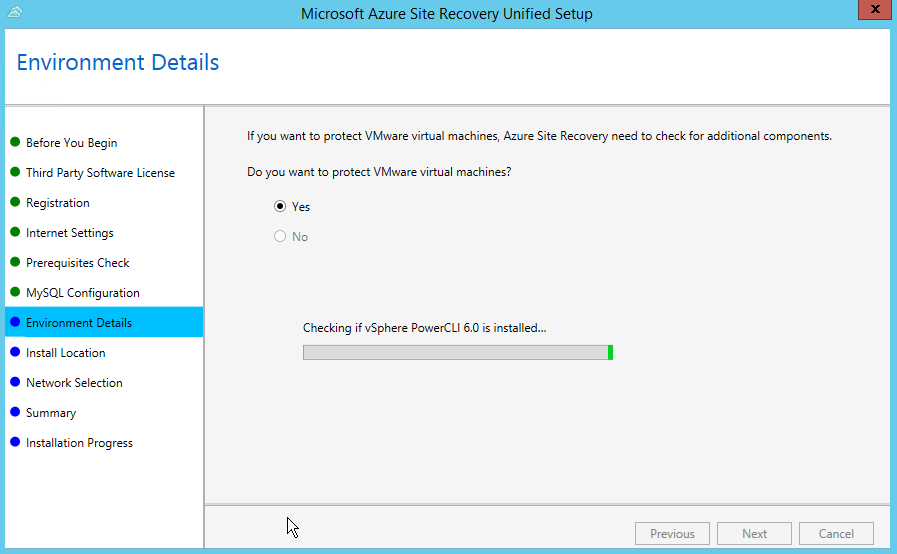
Step 40: Choose for yes, and the setup will be checking if the VMware PowerCLI software is installed
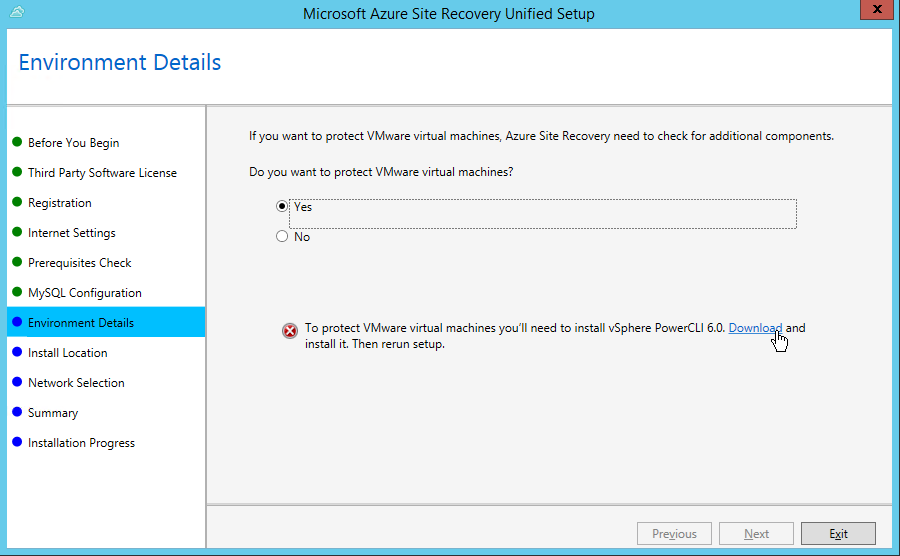
Step 41: Click on the Download text/button to download and install the PowerCLI software from the VMware website
Step 42: Choose for the latest version, at the moment of writing this is 6.0 R3, click Download
Note: If you have no VMware account yet, you must create this first before you can proceed downloading
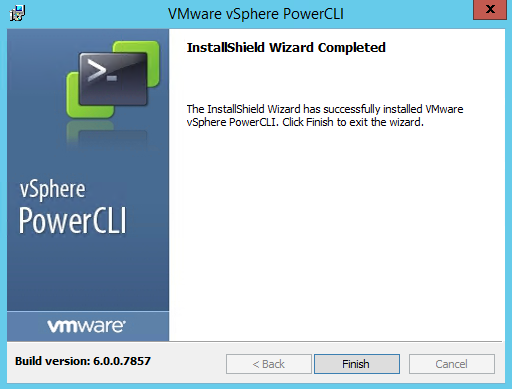
Step 43: Install the VMware PowerCLI software, it’s a simple next-next finish installation, with no special choices to made
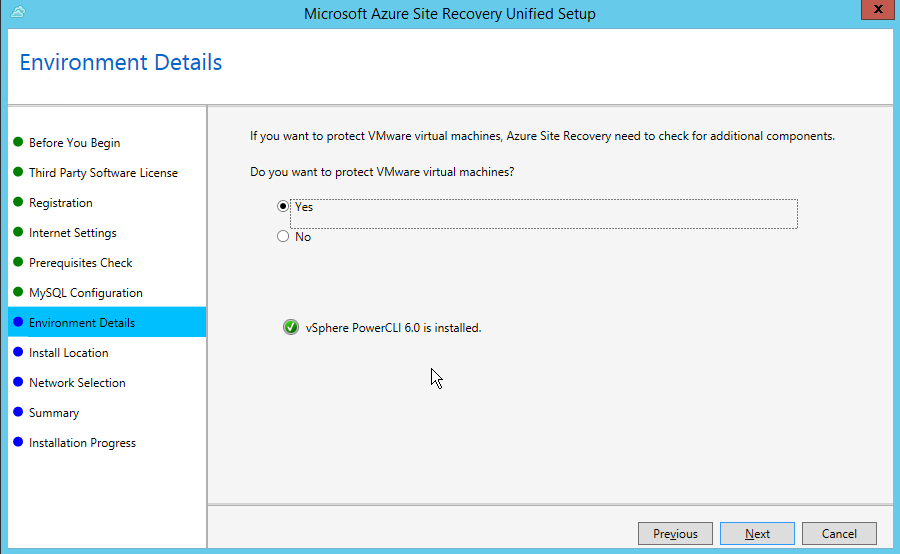
Step 44: When you finished the PowerCLI installation, please switch back to the Unified Setup screen, and click on the No circle checkbox and back to Yesto check the setting again, the green checkmark must be visible now, click next
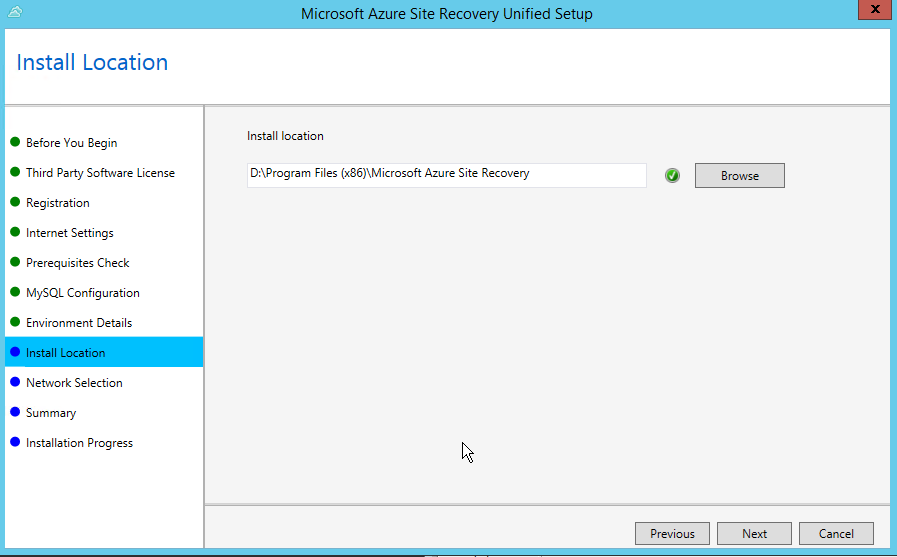
Step 45: The software will be installed on the D:\ Cache Disk partition, click on next
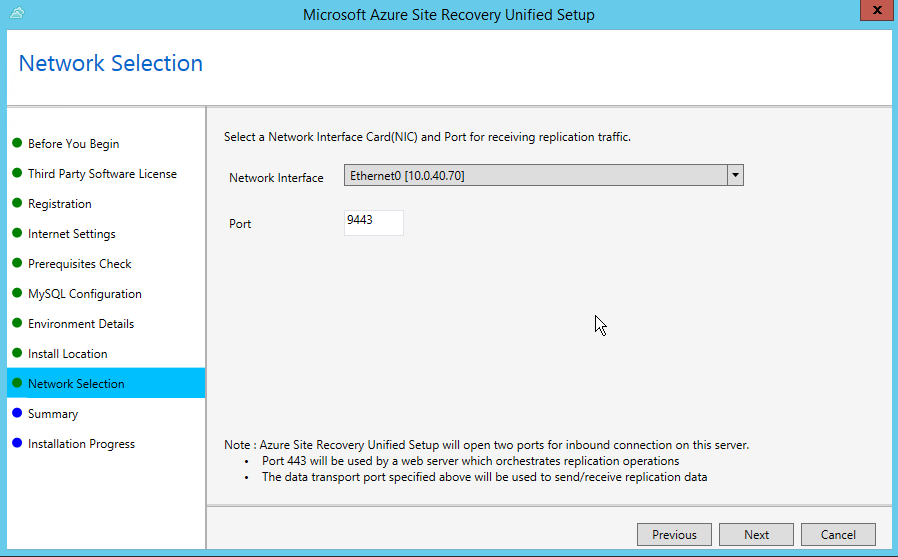
Step 46: Choose the Network Interface of your machine, let the port be default, click on next
Step 47: The configuration summary is displayed, click on install
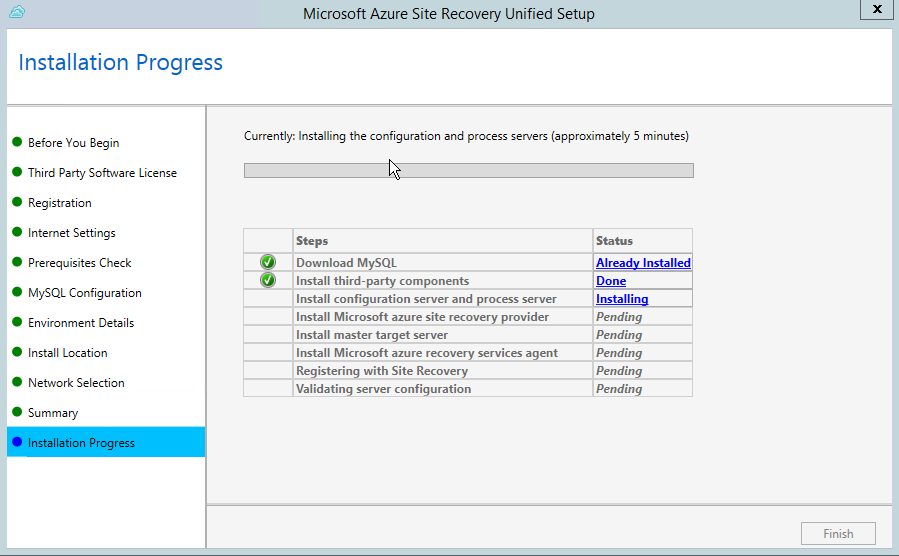
All the components are being installed, this can take up to 5 minutes…
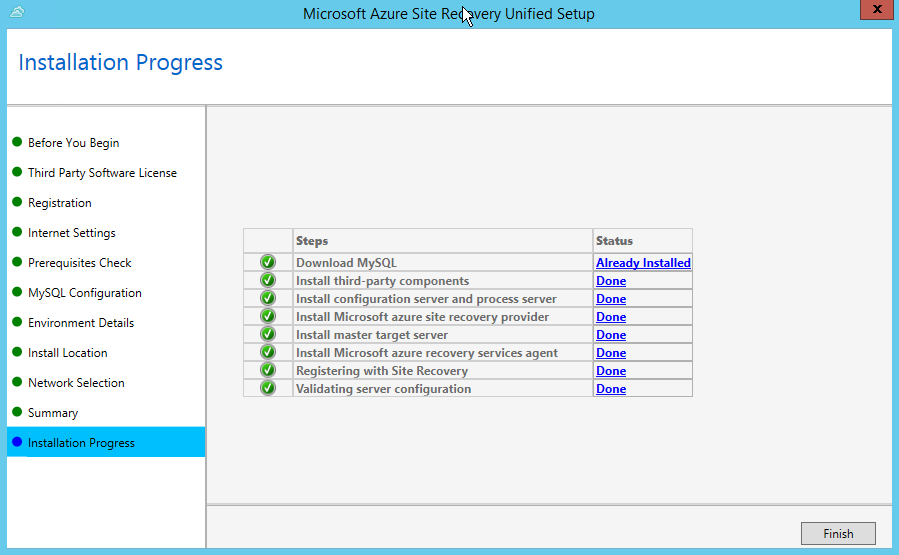
Step 48: The installation process is finished, click on finish
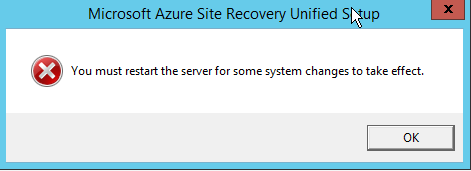
Step 49: Restart server warning, click OK to get to the next screen
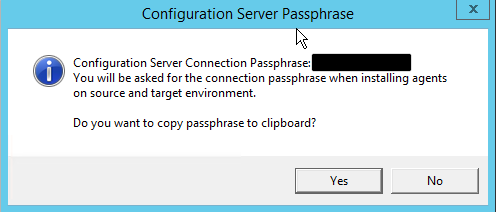
Step 50: This part is very important, you will get a – Configuration Server Passphrase – prompt, with the connection Passphrase. Make a screenshot, or paste this passphrase directly into a save place. This passphrase is needed to proceed the installation/connection from the synced servers!
Step 51: Fill in the service account credentials that will be used for the connection to VMware vCenter. The server connection, will be take place in Azure in just a few steps ahead.
Note: If you’re adding the vCenter server or ESXi host with an account that doesn’t have administrator privileges on the vCenter or host server, then make sure the vCenter or ESXi accounts have these privileges enabled: Datacenter, Datastore, Folder, Host, Network, Resource, Virtual machine, vSphere Distributed Switch. Please check out this official Microsoft Azure form, in case you need more information
Friendly Name: VMware vCenter Host Account
Username: username@christiaanbrinkhoff.comdomain.com
Password: thepassword
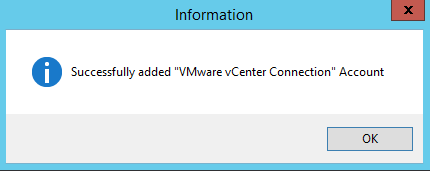
The account is successfully added…
Step 52: Click on close and switch back to the Azure Portal to proceed the step 1 configuration to finish step 2 Source
Note: It can take up to 15 to 30 minutes to see your Process/Management server in the Azure Portal.
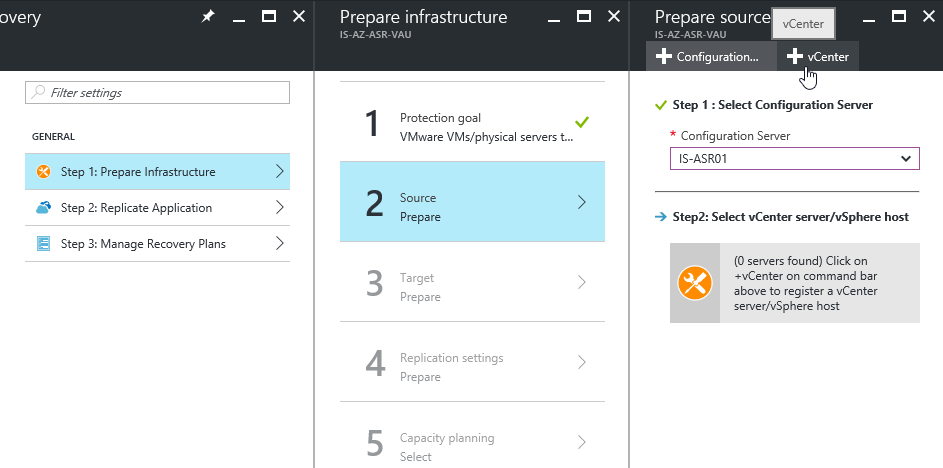
Step 53: After a short while, will the Process/Management server be visible in the Portal, select the server and click on the + vCenter button
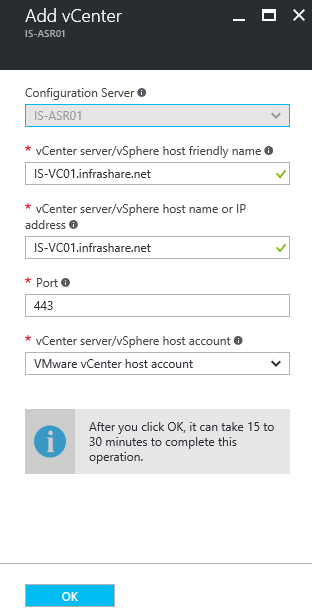
Step 54: Fill in the vCenter server information, select the just created host account, and click on ok to Add the vCenter connection
vCenter Server friendly name: Your vCenter FQDN servername
vCenter Server host name: Your vCenter FQDN servername
Port: 443 (default)
Step 55: The vCenter connection will now be made and added to the Azure Portal, you can check the status in the right upper head corner
Step 56: If all the steps went fine, this notification must be come around
Step 57: The vCenter server is now added to the – Prepare source – screen, click on ok to proceed to part 3 of step1
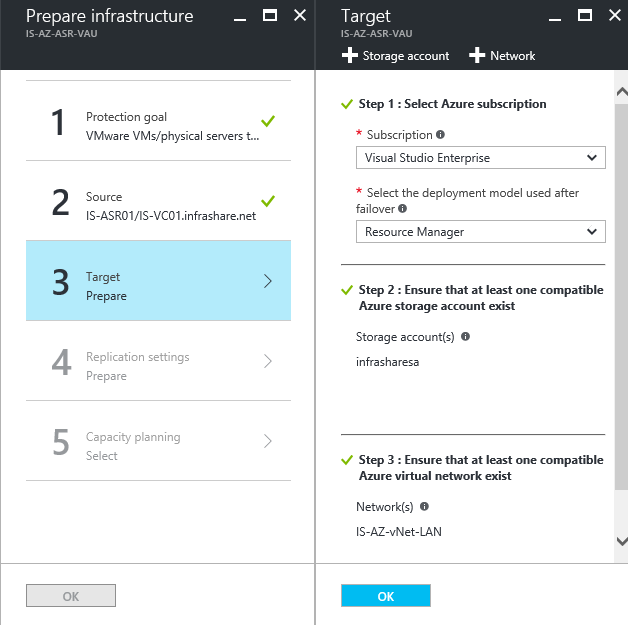
Step 58: Select the Azure subscription that you want to use, choose for Resource Manager, and if you have more Storage Accounts and vNets, select the one you want to use, click on ok
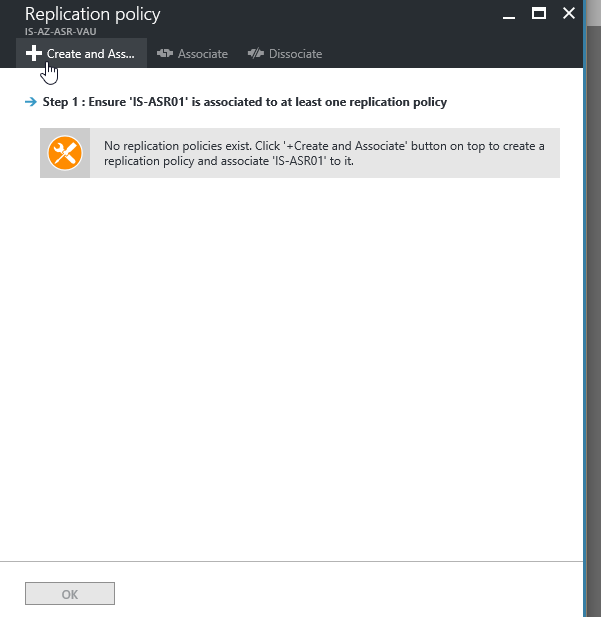
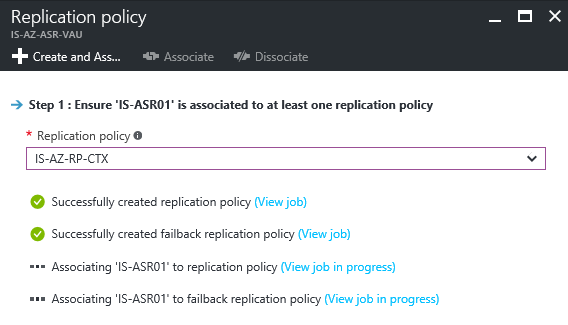
Step 59: We now must create a Replication policy, where all the RPO settings will be defined into. Click on the + next to – Create and Ass..
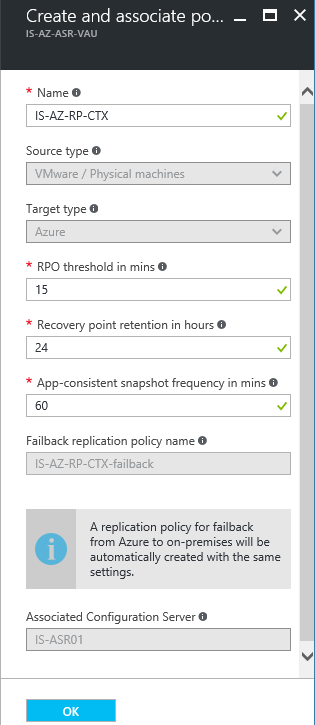
Step 60: Configure the policy to your Company’s disaster plan needs. I name it IS-AZ-RP-CTX and let the other settings default. Click on Ok when finished
Some information about the settings:
- RPO threshold: Sets the RPO. Alerts will be generated when the continuous data protection replication exceeds the configured RPO threshold value.
- Recovery point retention: Specifies the retention window. Protected machines can be recovered to any point within this window.
- Application-consistent snapshot frequency: Specifies how frequently recovery points containing application-consistent snapshots will be created.
The policy is now being created…
You can check the status in the previous screen.
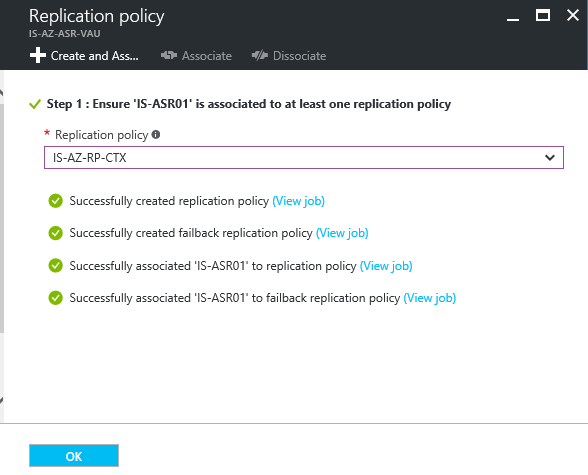
Step 61: If all the steps are green, click on Ok
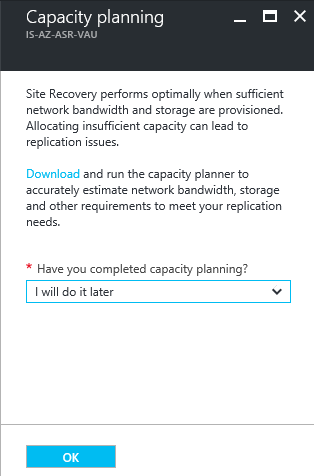
Step 62: As mentioned in the begin part of this blog, you can calculate the network bandwidth, if you need this, please check this out. For this blog, I choose I will do it later, and click on ok and ok again to proceed step 2
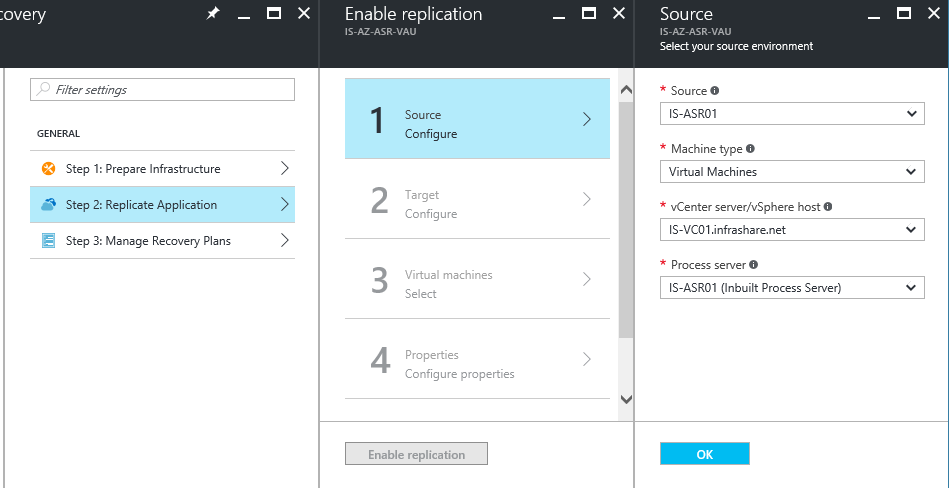
Step 63: Now we are at step 2: Replicate Applications | step 1 – source. Fill in the information (the most will be automatically filled in) and click on ok
Source: Your Process/Management server
Machine type: Virtual Machines
vCenter server: Your vCenter server
Process server: Your Process/Config server
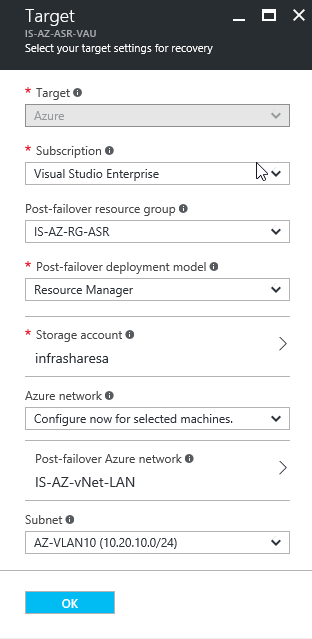
Step 64: The target settings must now be applied, fill in all the requested information and click on ok
Subscription: Your subscription
Post-failover resource group: The resource group where the machine will be placed into in case of a disaster
Post-failure deployment manager: Resource Manager
Storage account: Your storage account
Azure network: You’re vNet where the virtual machines will be placed into in case of a disaster
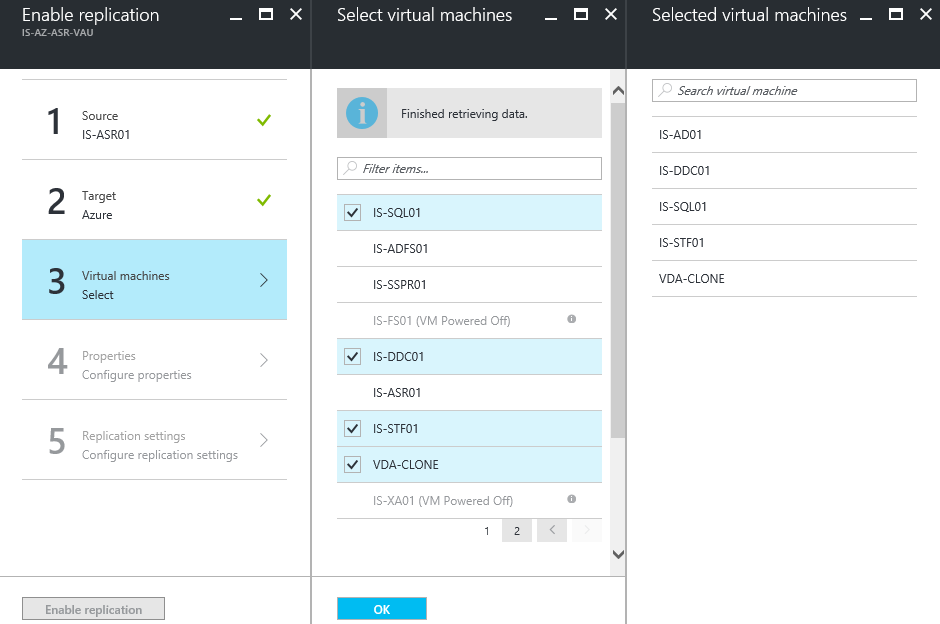
Step 65: Now we need to select the Virtual Machines that we want to make available in case of a Disaster – site outage. The minimum servers that must be selected; StoreFront, License, Desktop Delivery Controller, VDA-CLONE, SQL and, of course, the domain controller. For this article, the license server is installed on the DDC server, so this makes it 4 in total. Click on the ok button, after selecting the servers
Note: For the first part of this article, I use a persistent XenApp server for the failover, because there is no direct replication solution for MCS or PVS imaging. Later in this article I will describe how you can work around this!
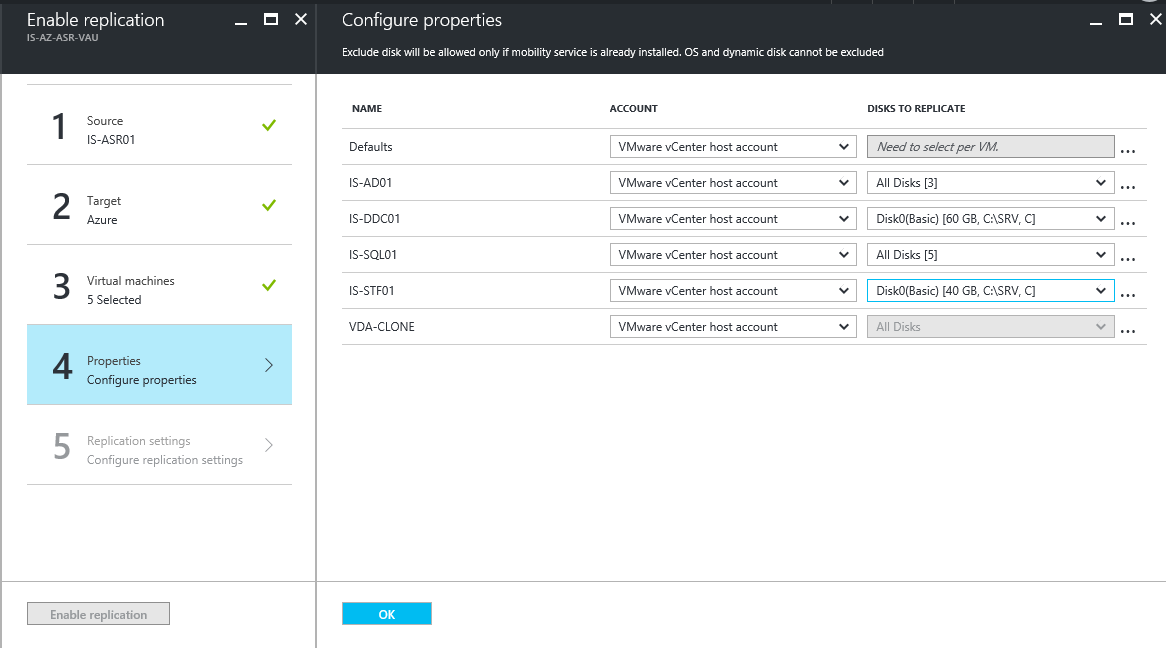
Step 66: This setting can be left default, click on ok
Step 67: The earlier created replication policy is now automatically selected, let everything default and click on ok
Note: If you add multiple server afterwards, like application servers that are sensitive for different timestamps in Database timestap and Application server, then you must activate the Multi-VM consistency setting. For this article it is not needed
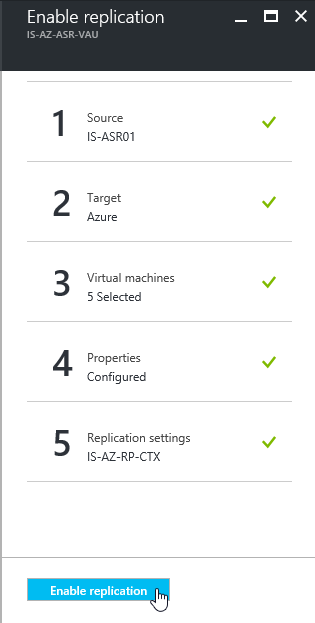
Step 68: All the steps are now having a green checkmark, and are ready to proceed. Click on Enable replication
The protection activation process is ongoing; the Azure replication agent is now being installed on the protected server we just selected. This process is take place from the Process/Management server
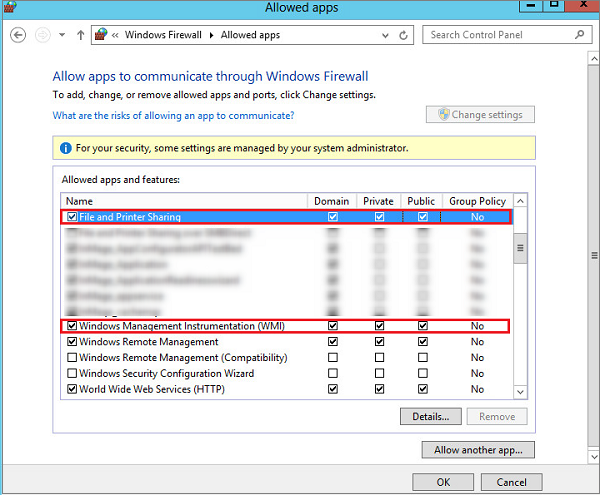
Step 69: If some of the agent cannot be installed automatically, there is probably a firewall setting that needs to be set on the protected server first.
Note: You can install this agent also manually to the protected server, you can run the following MSI file from the server that did not get protect properly, by running the following UNC location.
\\MANAGEMENTSERVERNAME\D$\Program Files (x86)\Microsoft Azure Site Recovery\home\svsystems\pushinstallsvc\repository\Microsoft-ASR_UA_9.4.0.0_Windows_GA_07Dec2016_Release.exe
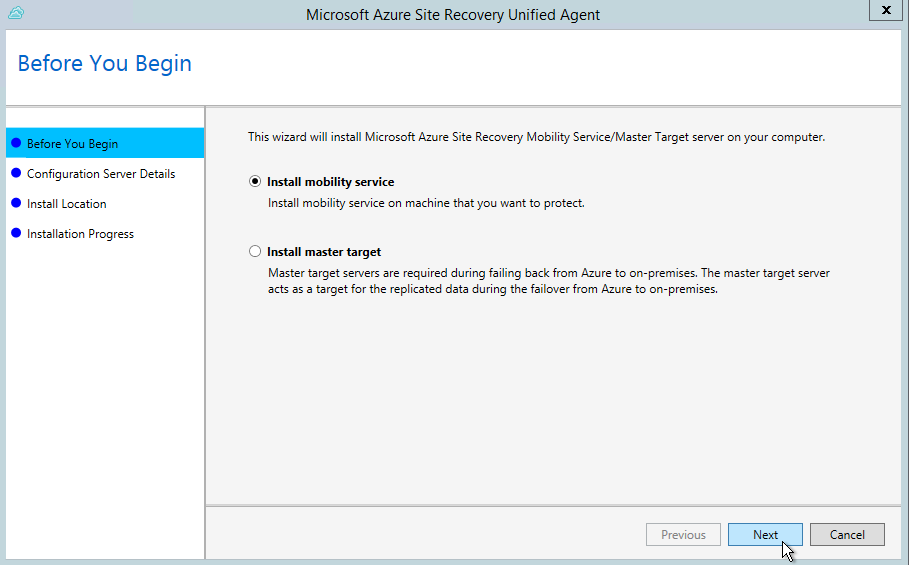
The Unified setup wizard is opened, choose for – Install Mobility Service – click on next
The setup asks for the Process/Management servers IP and for a passphrase, here you must paste the passphrase from step 50
Click on next
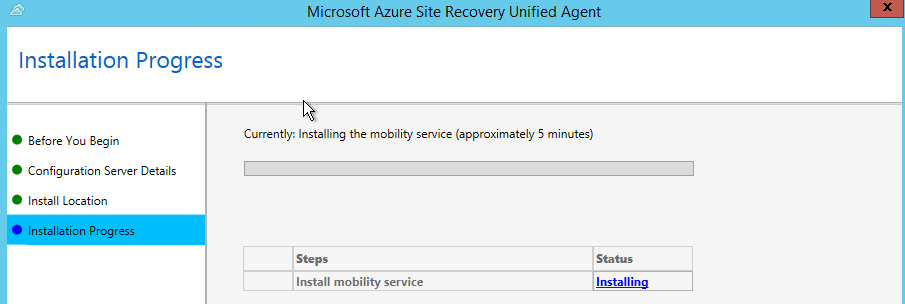
The manual installation is in progress…
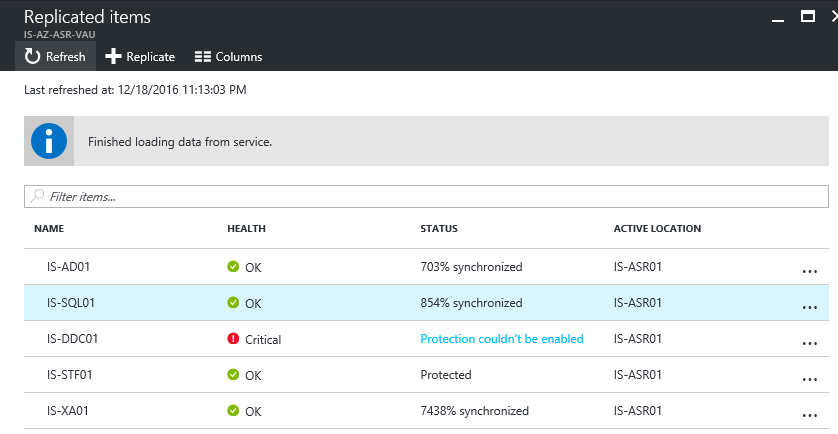
When the manually installation is finished, you need to re-add the machines to the Vault, you can do this by clicking on the Overview, and then on Replicated items
Click on the 3 … points next to the server that Couldn’t be enabled, and choose for Delete
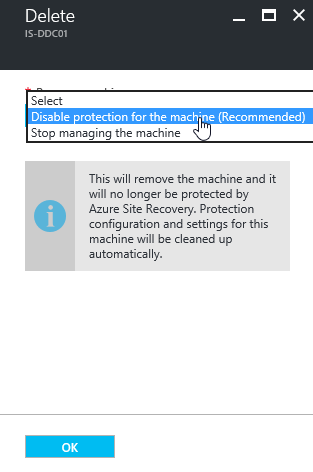
Choose – Disable protection for the machine – and click on ok
Now you can re-add the machine by clicking on the + Replicate button
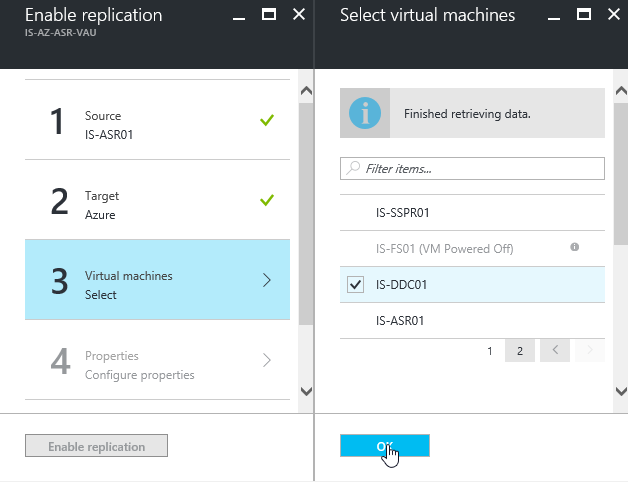
Proceed all the steps, just like in the previous step 54 – 59, and select the unprotected machine at step 3 and press ok, ok in the second screens, and Enable replication
The machine is now added again…
And now added successfully!
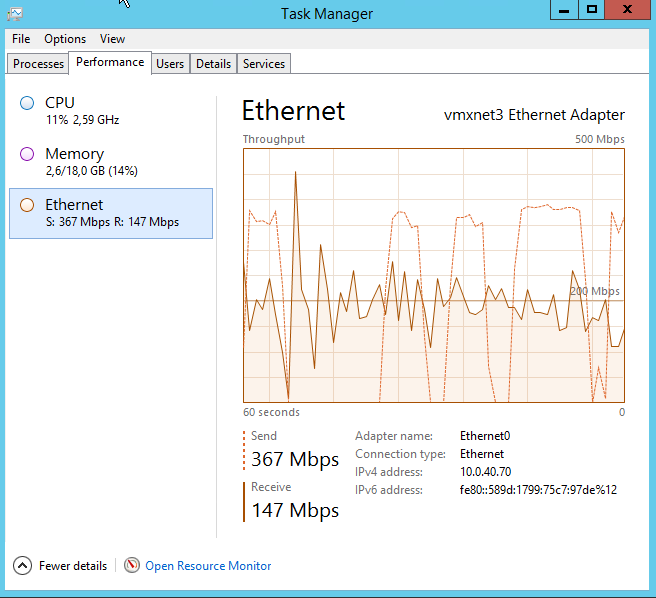
Step 70: On the network interface of the Process/Management server, you can now see that there is a lot traffic in between. The synchronization process, depending on your network speed, can take up a for while
Note: As mentioned in the beginning of this article, in case of an initial sync, your total bandwidth is being used. You can use the Azure Backup software to simply limit the bandwidth, this is automaticly installed when u perform the Unified Setup. The shortcut will be places on the Desktop, when starting, click on the tab Throttling, to provide different bandwidth settings
My Router traffic status at the moment…
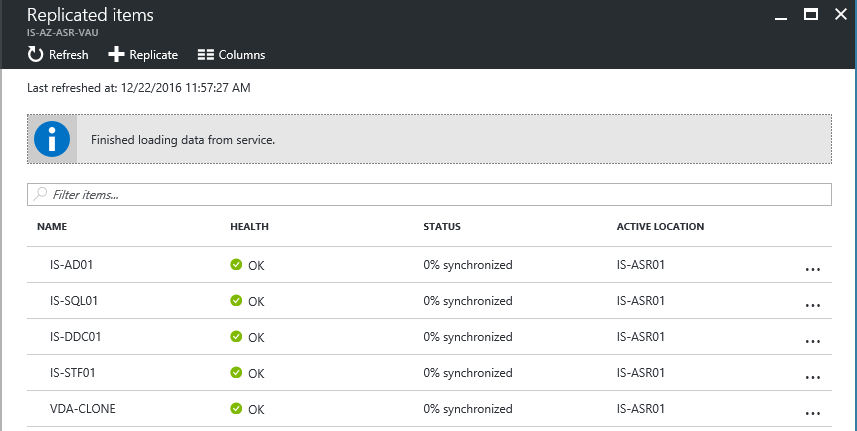
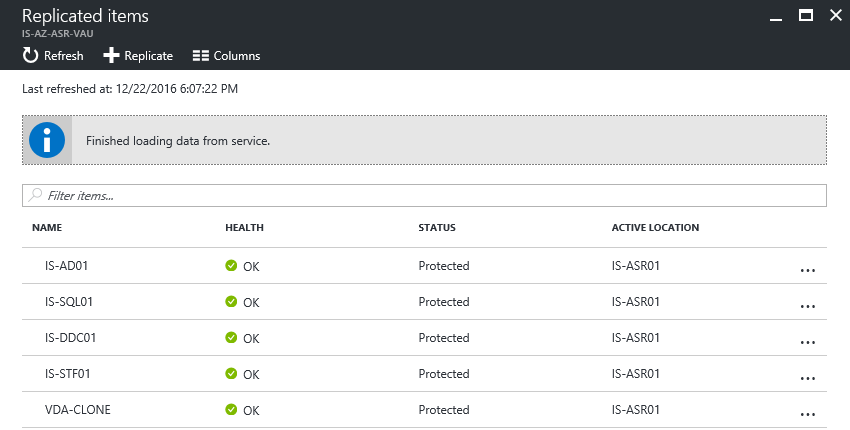
All the machines are replicated, and have the status protected…
Set the target IP of protected items (Static IP Address)
Before we setup the recovery plan, we first need to set the IP Addresses for the protected items. In this case, we already know what address the machine get after starting the Recovery Plan. What is needed to setup the Azure vNet custom DNS settings.
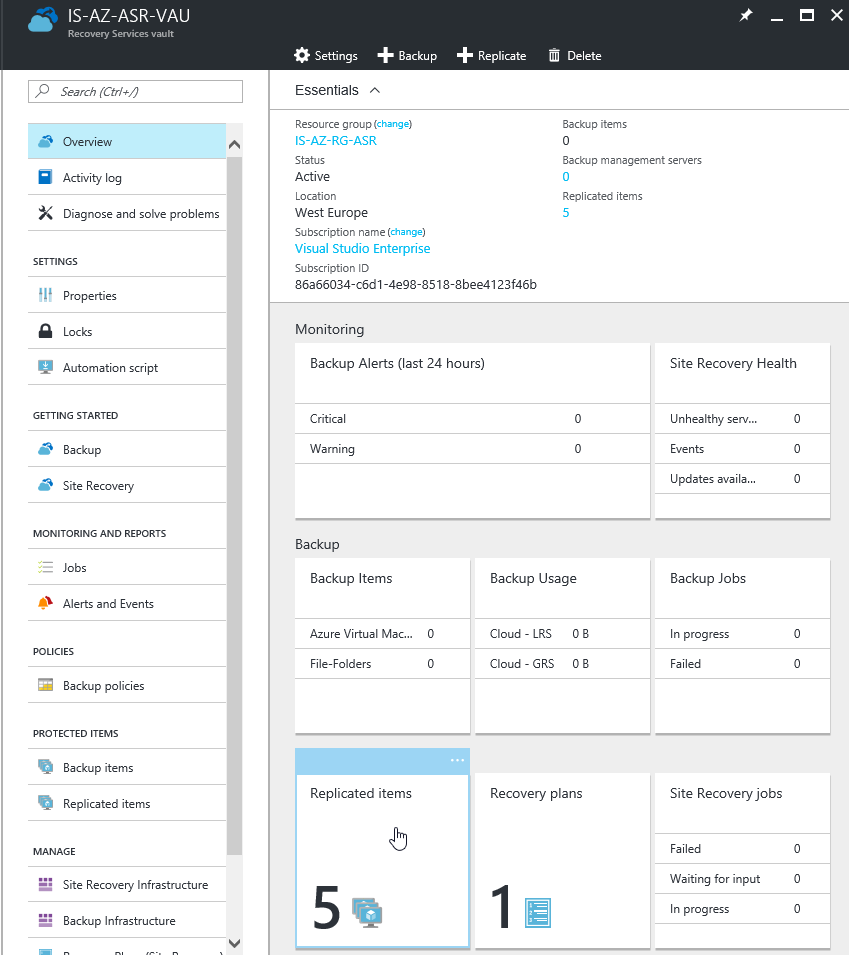
Step 71: Go to the Vault overview and click on the Replicated items option
Step 72: Click on the machine name, and the Essentials screen will be showed. Click on the Settings button
Step 73: Click on the Compute and Network button
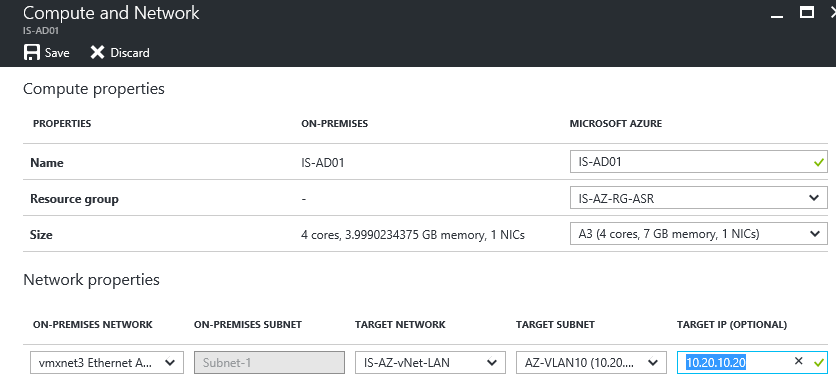
Step 74: The Compute and Network screen is opened, this is the place where you can change the vNet, subnet, set the target IP address, Resource group, name, but also the machine size (sku).
For this article, I will give the AD server the address 10.20.10.20, the rest can be default.
Give a free network address that will fit in your Production vNet, that you must use as primary DNS afterwards, click on the Save button
Note: If you test your Recovery plan, you need to change the vNet to the separate test-failover vNet. Otherwise the protected items will be available in your production environment, when the production servers are still responsive. This can cause many problems!
Note 2: You only can modify these settings, when the machine is fully synced/protected
The machine target IP is updated…
Create a Recovery Plan
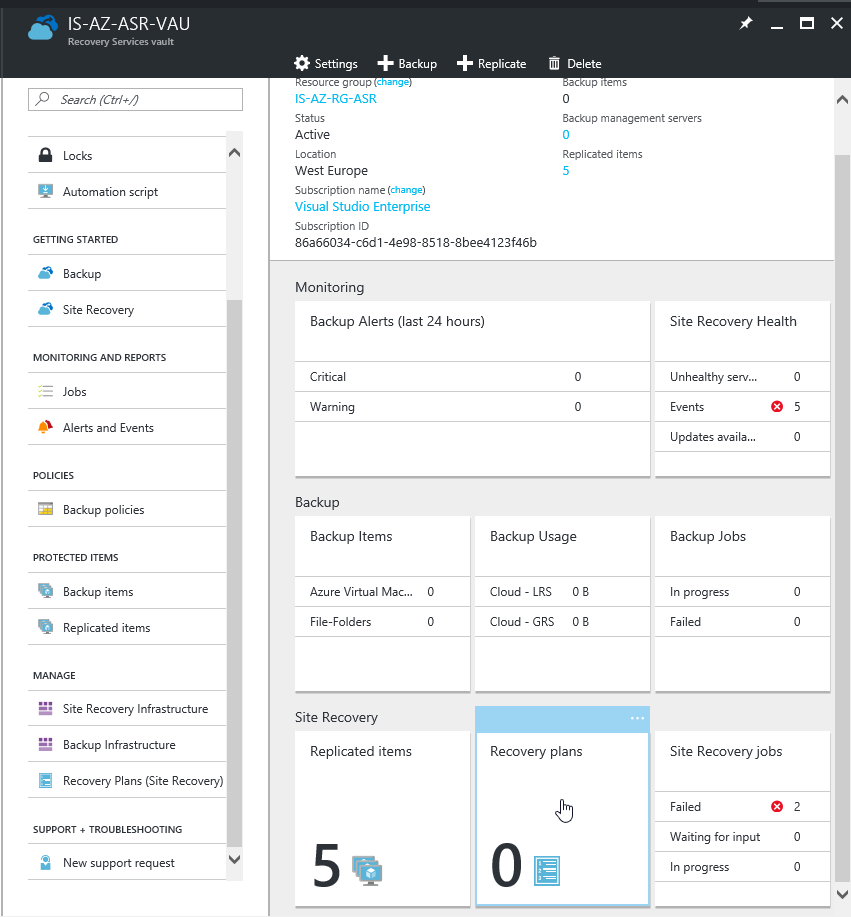
Step 75:We now can proceed to the Recovery Plan setup, in the overview screen, click on – Recovery Plans – option
Step 76: Click on the – + Recovery Plan – button
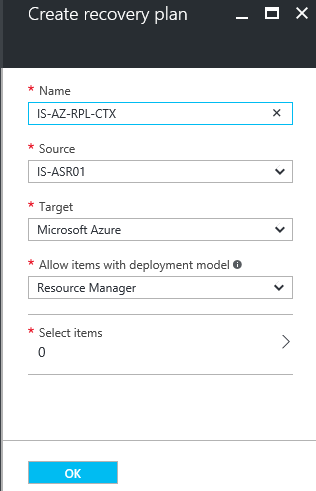
Step 77: Fil in a Recovery Plan name, the Process/Management server as source, Microsoft Azure as target, Resource Manager as Deployment Model and click on Select item
Step 78: Select all the machines, that needs to be protected in the Azure site. Click on ok and ok in the Create Recovery Plan screen
the plan will now be created…
Step 79: Click on the 3 … next to the just created plan, click on Customize
Step 80: All the servers are placed under the same Group 1, to provide a boot sequence strategy, we need to create 2 Groups, to have 3 in total. You can add the group by clicking on the + Group button, do this action twice
Step 81: Open Group 1, by clicking on the arrow next to it.
Step 82: Click on the 3 points next to the servers, and place them in the right Group number, you can do this by clicking on the ![]() button. And select the group number.
button. And select the group number.
Group-1: Active Directory servers
Group-2: SQL servers
Group 3: Citrix servers
Step 83: When you placed all the servers in the right groups, press the save button
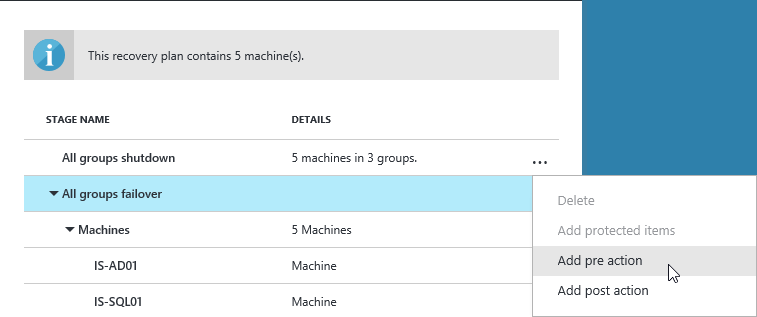
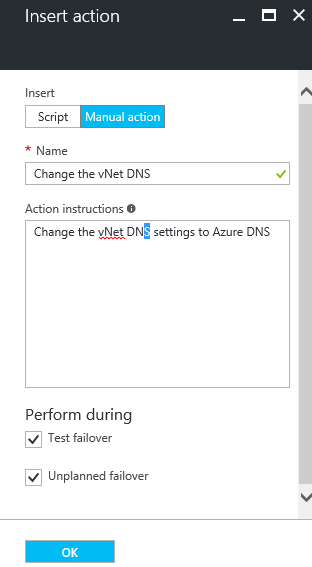
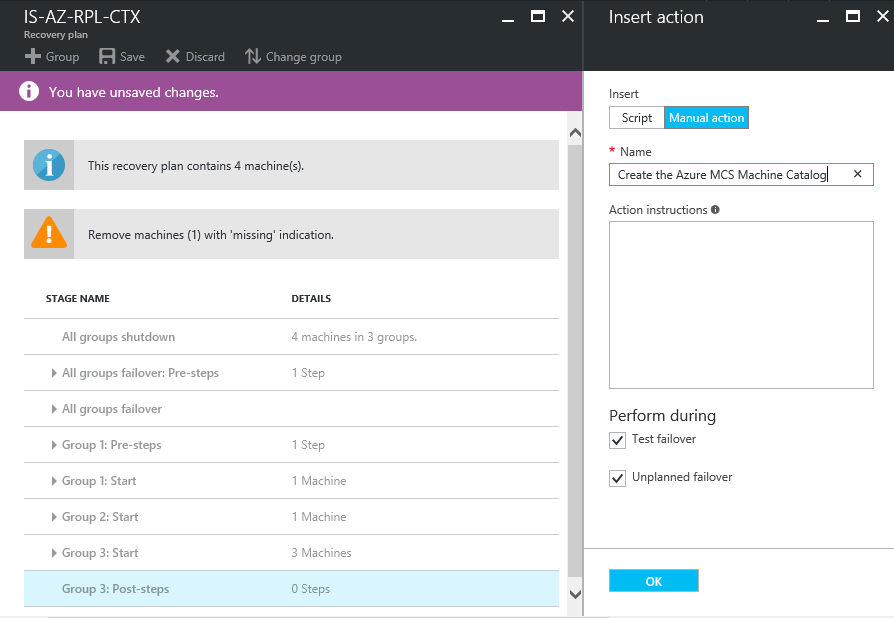
Step 84: The Recovery plan is now configured default, before the recovery plan can successful start the preparation of the protected machines, the Azure vNet must be placed on Azure DNS. For this particular reason, I add a manual pre-action, that stops the process, before the enrollment starts. If you don’t set this, the test or unplanned failover will fail to run.
To do this, create a Pre-action before the All Groups failover job. You can add this by clicking on the 3 points … next to All groups failover
Fill in the information like the picture below and click on the ok button
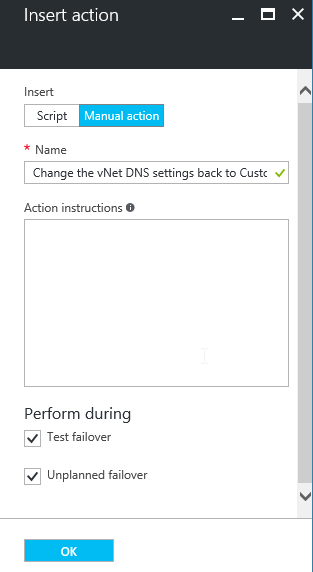
Step 85: After the All groups failover step, we need to change the vNet DNS setting back to custom, so all the server connects to the right AD/DNS server. To add this, click on the 3 points … next to Group 1: Start to add this step

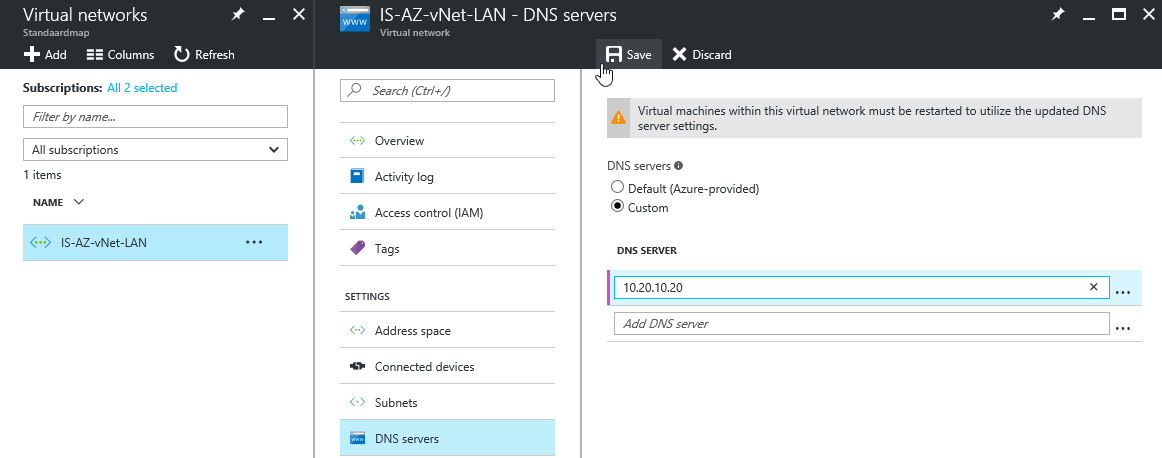
The vNet must be changed manually to custom at this step, and the AD server that is going to restore, must be set as primary. As we know this IP Address already, that we defined in step 65
Click on the Save button to save the recovery plan
Step 86: And the last manual step, the creation of the MCS Machine Catalog. This must be placed on the Group 3 as Post-action. To create the Catalog, the VDA-CLONE machine must be deployed first, as we need to use this .VHD file as master image. Click on the save button
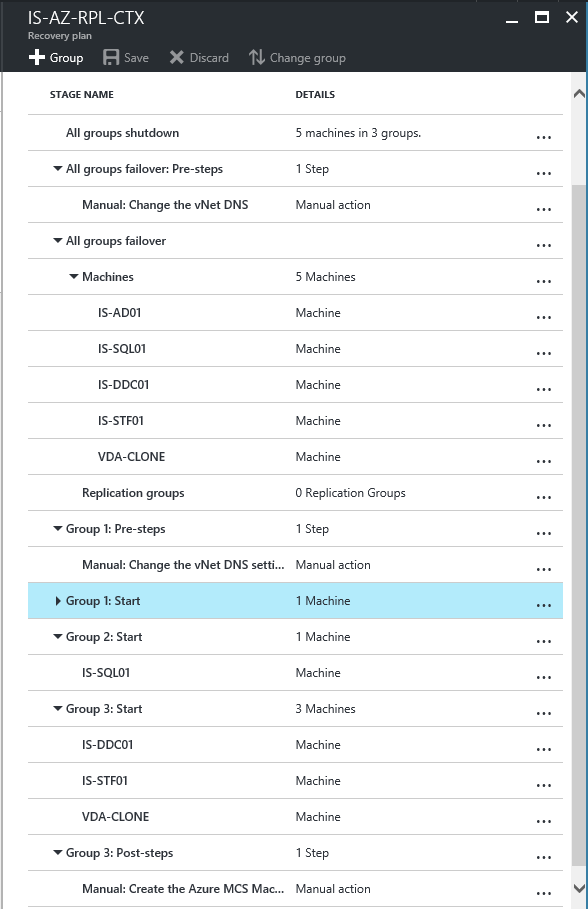
The plan in total will be like:
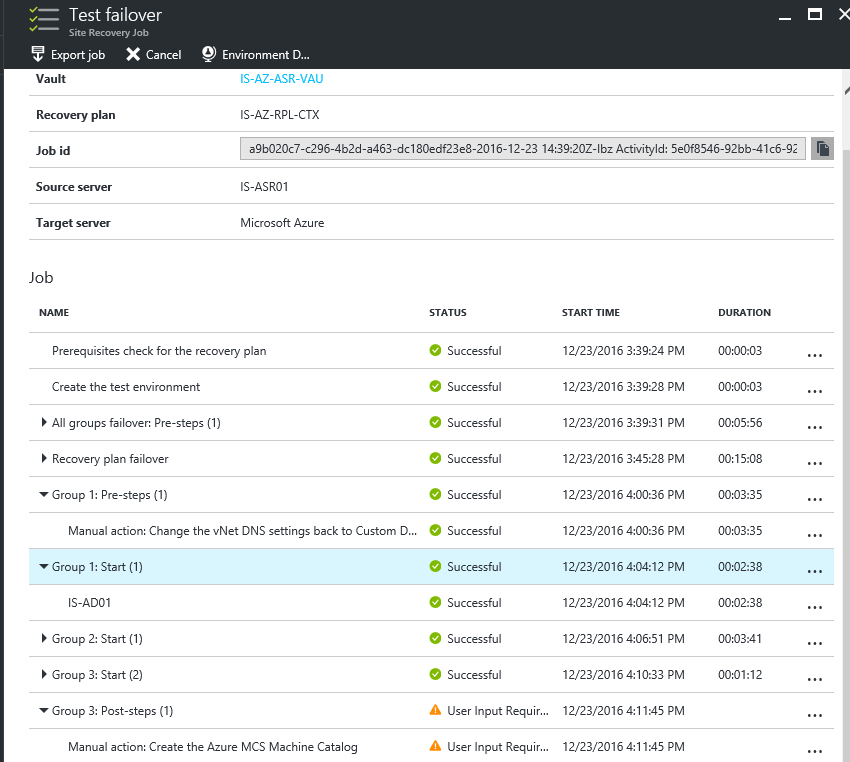
All groups failover– pre-action: Change the vNet DNS settings to Azure DNS
Group-1: Start– Pre–action – Change the vNet DNS settings back to Custom DNS
Group-1: Start – Active Directory servers
Group-2: Start – SQL servers
Group 3: Start – Citrix servers
Group 3: Start – Post–action – Setup the Azure ARM Machine Catalog
Advanced Note: There is also a possibility to include Automation Runbook scripts into this Recovery plan.
If you want to make use of this, instead of doing the manual actions. First load in the Networking modules in the Runbook account, see this 2 example scripts, that you can use to make the recovery plan fully automated afterwards:
Set Azure vNet to Azure DNS
$rgName="<Resource Group Name>"
$vNetName="<vNet Name>"
$vnet=Get-AzureRmVirtualNetwork -ResourceGroupName $rgName -name $vNetName
$vnet.DhcpOptions.DnsServers=$null

Set-AzureRmVirtualNetwork -VirtualNetwork $vnet
Set Azure vNet to Custom DNS
$rgName="<Resource Group Name>"
$vNetName="<vNet Name>"
$DNSIPs="<Primary DNS server>"
$vnet=Get-AzureRmVirtualNetwork -ResourceGroupName $rgName -name $vNetName
$vnet.DhcpOptions.DnsServers=$null

foreach ($IPin$DNSIPs)
{
$vnet.DhcpOptions.DnsServers+=$IP
}

Set-AzureRmVirtualNetwork -VirtualNetwork $vnet
Step 87: If the steps are setup correct, similar like picture below. You’ve setup the right Recovery plan.
Step 88: Repeat this steps for all the others servers, so you will know which server will get which IP address. As mentioned at the previous step, the AD server is the most import one, because of the startup process (more later in a few steps)
Test the Recovery Plan – test failover
When we finished all the previous setup parts, we can now start the (test) failover part. For this test scenario, I will simulate a full Citrix server environment outage, by shutting down all the servers, so all the servers will be unavailable at the on-premises site, but the network layer, will still be active.
The main difference between the test and unplanned failover is that the protected items stop with syncing when choosing for an unplanned failover. When u choose for a test failover, the protected items are keep syncing at the background, and after the test failover, the environment will be cleaned automatically from Azure. I will demonstrate a test failover in the next following steps, in case of a real disaster, then choose for unplanned.
In most customer site scenario’s, the whole primary site will be down, and you want to move to a seperate location. In that case you need 2 IPsec (Co-existence) VPN tunnels to Azure. One in the primary site, and one in the site that you want to use as backup site, where users can go to, for internal access to Azure.
For both cases, you must change the DNS address after a failover, so all the clients will get the right (new) DNS server. Also, if your AD server runs DHCP, change your DHCP server to a network device. Azure doesn’t support DHCP broadcasting.
Note: As mentioned in the beginning of this article, it is recommended that for a test failover you use a network different from production network, the test failover is not separate from the vNet. So there will be interaction with other production servers (or shutdown all your servers first).
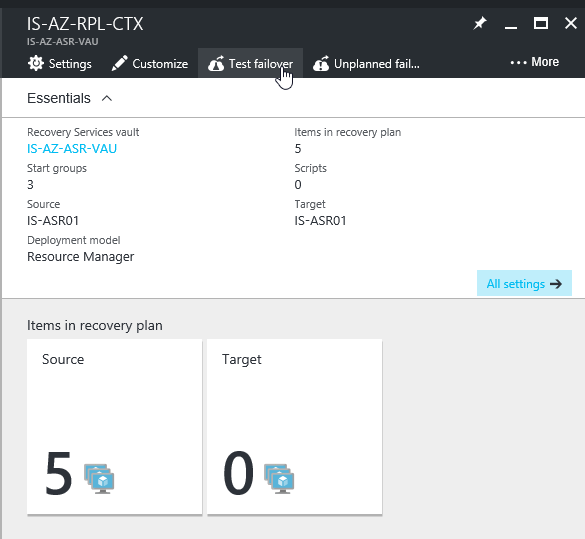
Step 89: Open the Recovery Services Vault in the Azure Portal, click on the Recovery Plan option and click on the Testfailover button
Step 90: Make sure the on-premises server are shutdown properly, the Azure IPsec tunnel (data channel) is connected and the following underlined settings are defined before starting, click on the ok button to start the Recovery Plan
From: Process/Management on-premises server
To: Microsoft Azure
Recovery Point: Latest (lowest RPO)
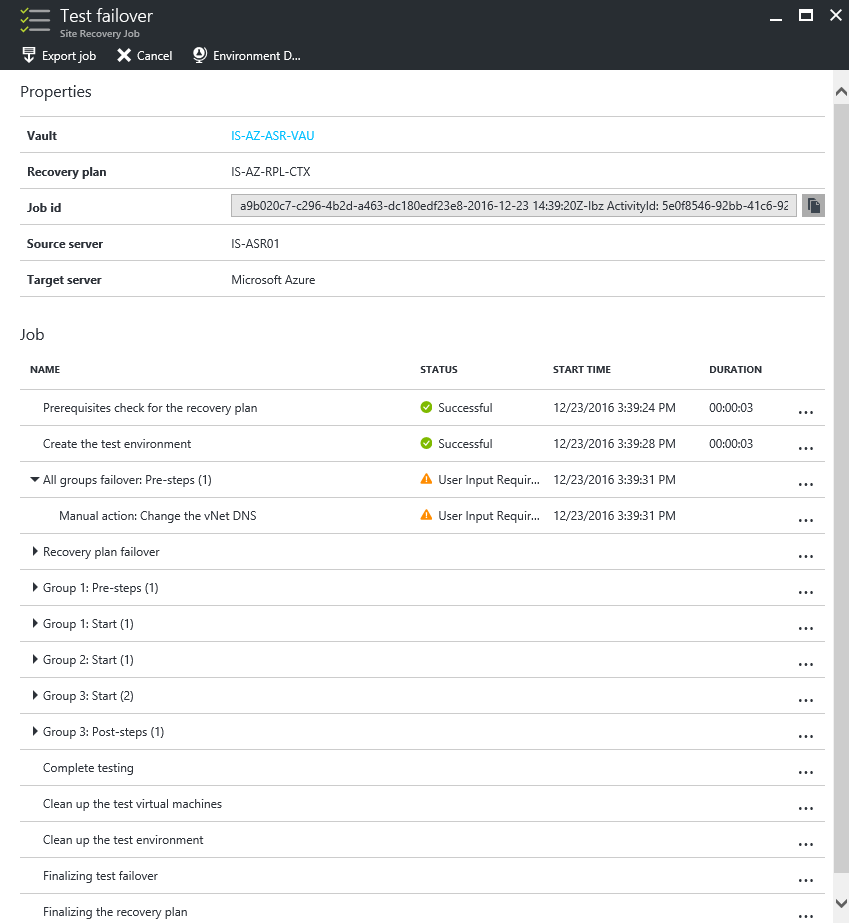
The unplanned failover is started…
If you click on this notification, you can see the Recovery Plan status
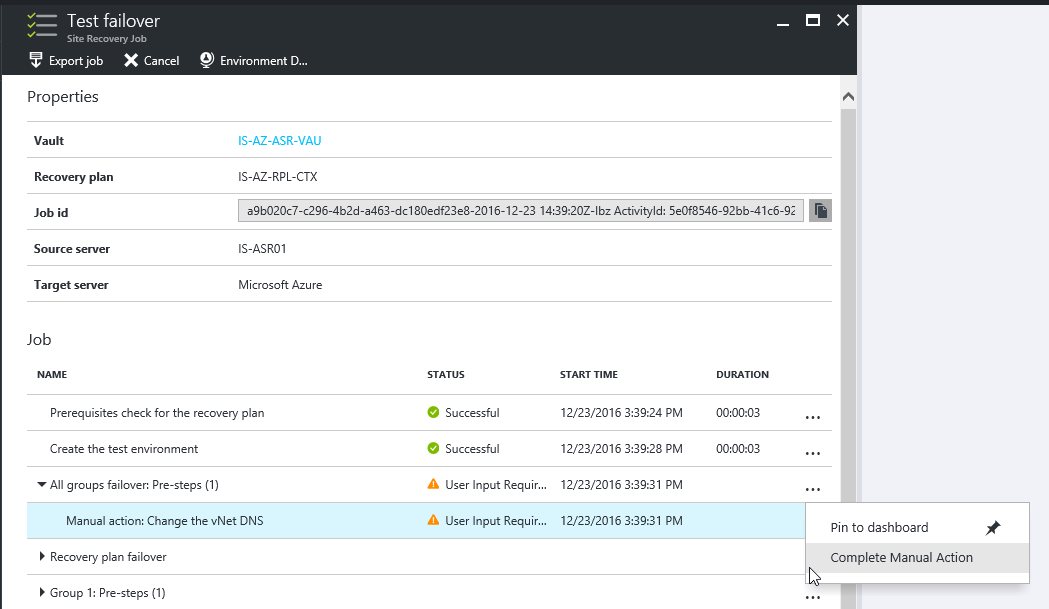
The first manual action is asking for input
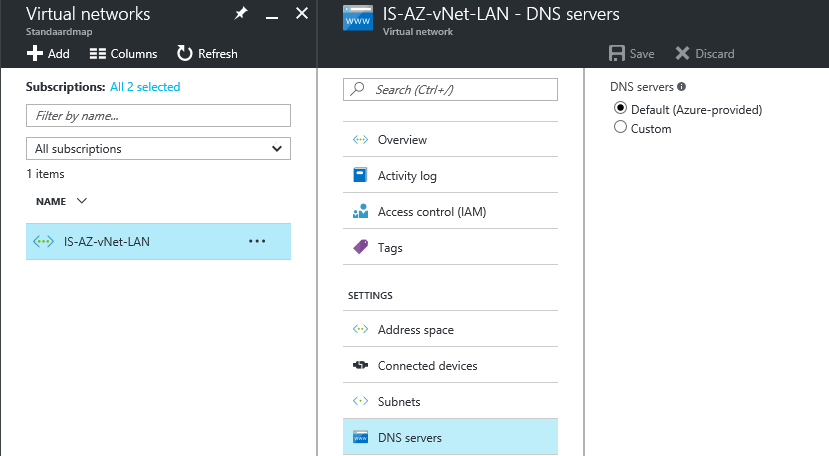
Go to your Virtual Network, vNet DNS settings, and place it on Azure DNS
Step 91: Click on the waiting notification to proceed further
Or open the running Recovery Plan job, and click on Complete Manual Action
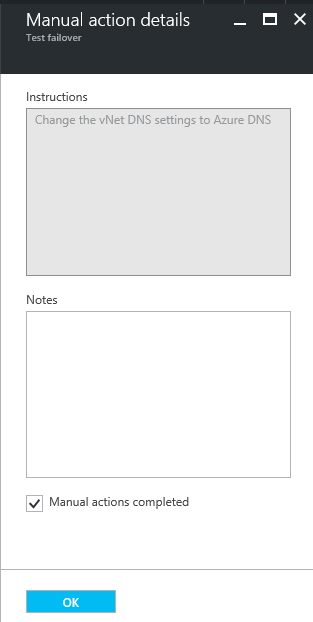
Step 92: Check the – Manual actions completed – checkbox, click on Ok
The plan is now resuming…
The machines are now being prepared, for the startup process, this can take up to 30 minutes
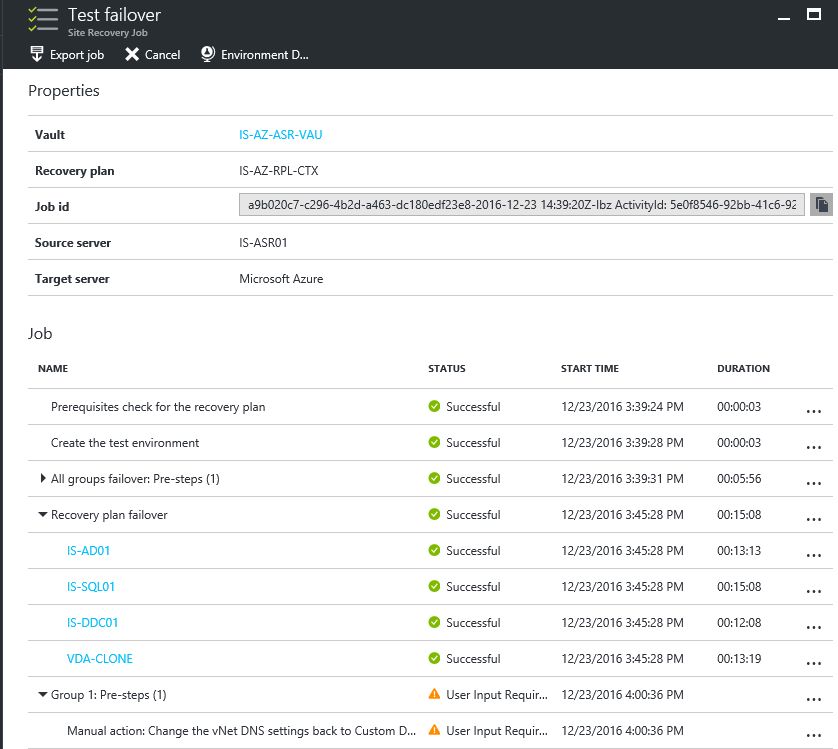
Step 93: The preparation is now finished, new user input required; change the vNet DNS setting back to Custom, and set the AD pre-defined IP Address as primary
Note: At this moment, you can also change your primary DNS settings of the client devices!
Step 94: Set the vNet DNS setting to your Domain controller IP Address, click the save button
Click again on the notification to proceed this manual step further…
Or open the running Recovery Plan job, and click on Complete Manual Action
Mark the checkbox, click on ok
The failover is resuming, the real startup process is now beginning…
Step 95: All the servers are now successfully started; before we are creating the MCS Machine Catalog, we must proceed some test, so try to RDP the servers by entering the internal IP Address to check if all the services did start properly!
Ping to the domain controller works!
Remote Desktop is also responding!
Note: In case your IPsec isn’t working, or you choose to separate the vNet for testing purposes, you can attach a Public IP address to the virtual machine – network interface in Azure
Step 96: Check if the server DNS A records did automatically get updated to the new IP Address, by checking the time stamp. If not, run an ipconfig /registerdns from that specific server.
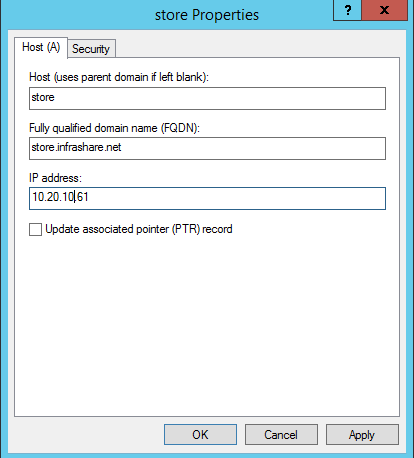
You must also change the Change the StoreFront Static DNS record now, to the new IP Address of the StoreFront server!
Check all the services of the different servers, and they did all start properly!
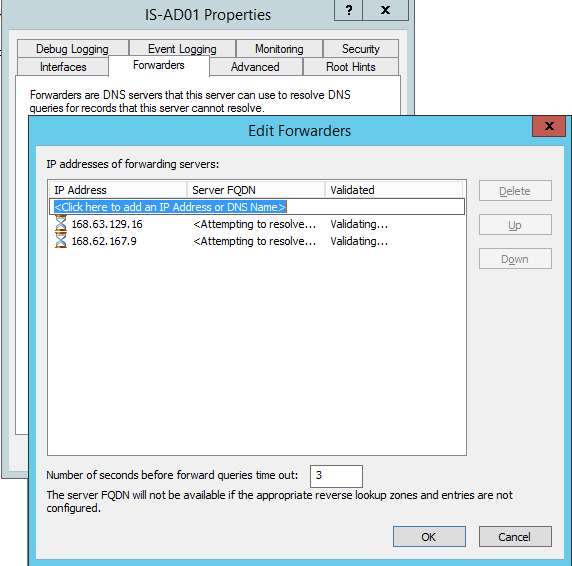
Step 97: Now we need to arrange internet, if you are running a DNS server as forward on the AD/DNS server to your ISP, and that is limited in access to other public subnets. Then you must change the DNS forward address to the Azure DNS servers, primary: 168.63.129.16 | Secondary: 168.62.167.9
Build up a MCS Machine Catalog in Azure ARM
At the beginning of this blog, we created a Clone of the on-premises MCS master image, so we can proceed to use this for the MCS strategy in Microsoft Azure.
In the next steps, I will use the VDA-CLONE server as master image for the MCS as master image.
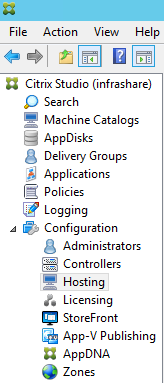
Step 98: Log in to your Desktop Delivery Controller, start the Citrix Studio and open Hosting to add the Host Connection for Azure ARM
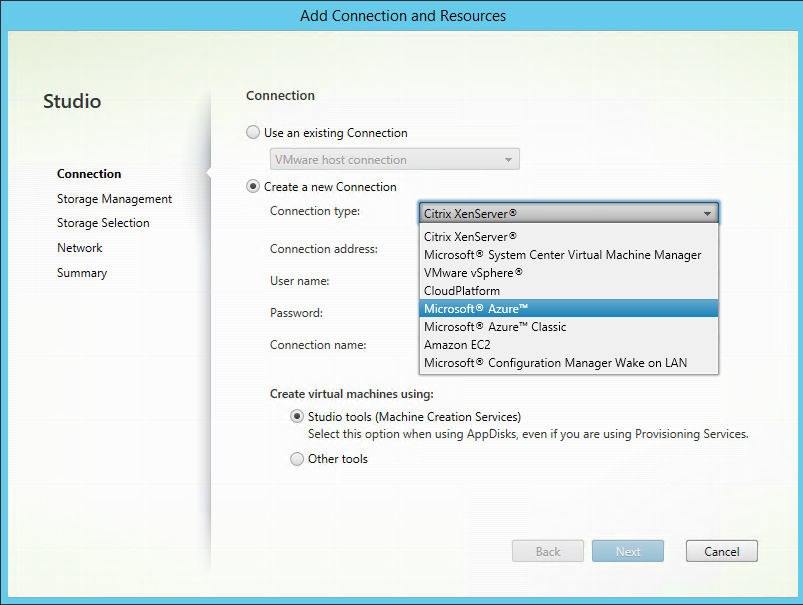
Step 99: Click on – Add Connection and Resources – to proceed to the setup
Step 100: Click on the checkbox next to – Create a new Connection – choose for Microsoft Azure
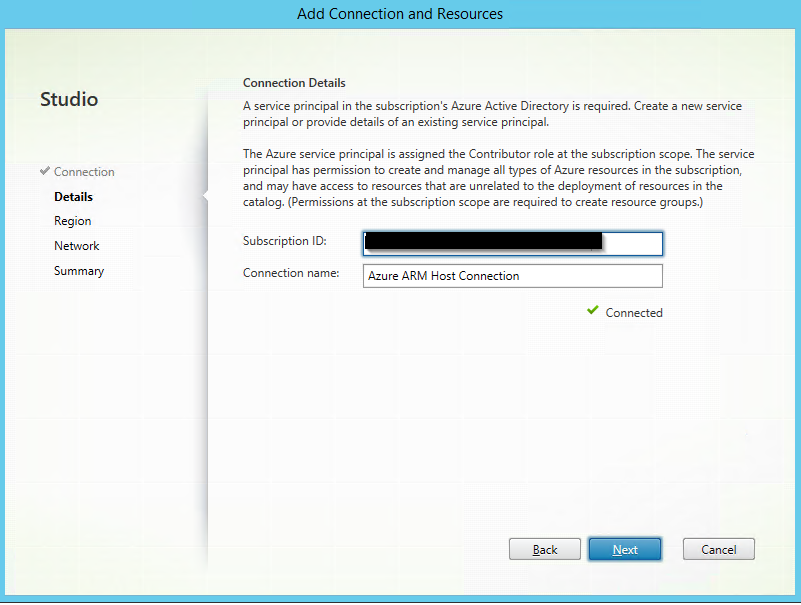
Step 101: Enter your Azure subscription ID, a name for the new Host Connection to Azure and click on the Create new button
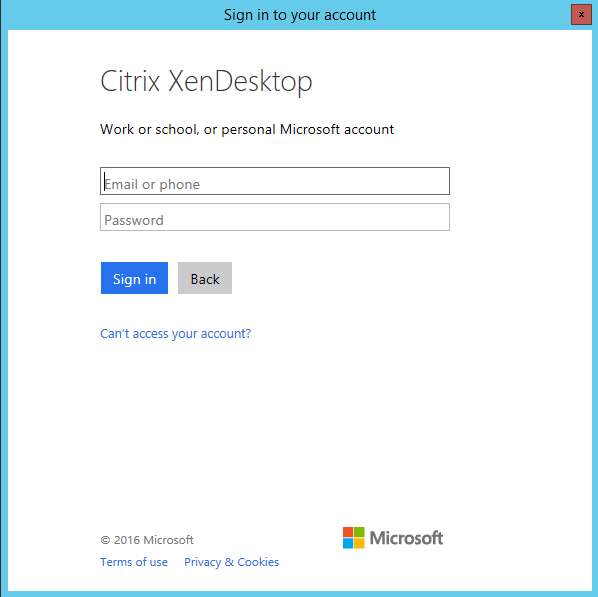
Step 102: Enter your Azure administrator username and password, click on Sign in
Note: Is the account delegated by RBAC, then assign the Computre Contributor role to that account
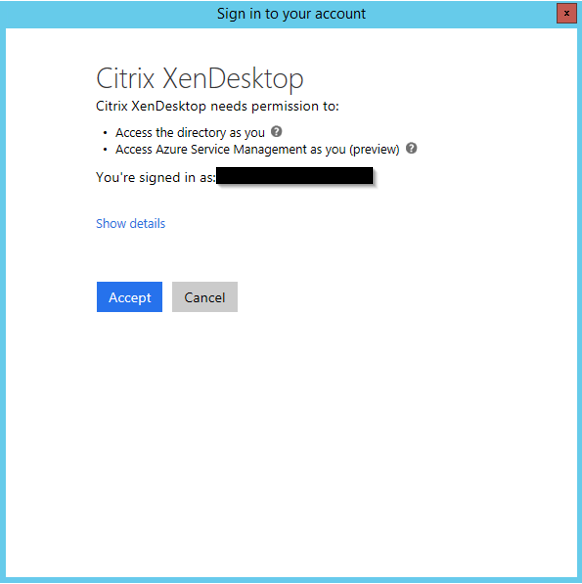
Step 103: Accept the permission request
Authorization is requested…
Step 104: If the Connected checkmark is visible, click on Next
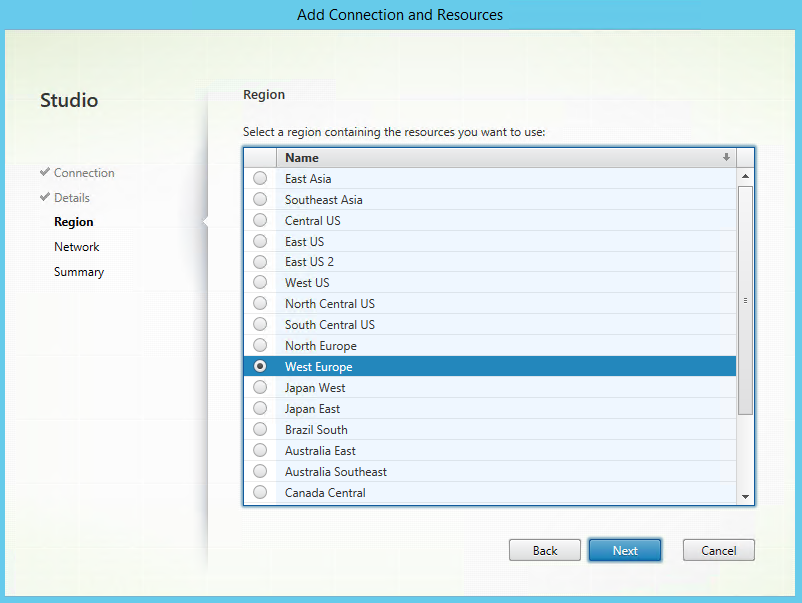
Step 105: Select your Azure region, click next
Step 106: Give in a name for the Resource, select the default vNet and Subnet, click on Next
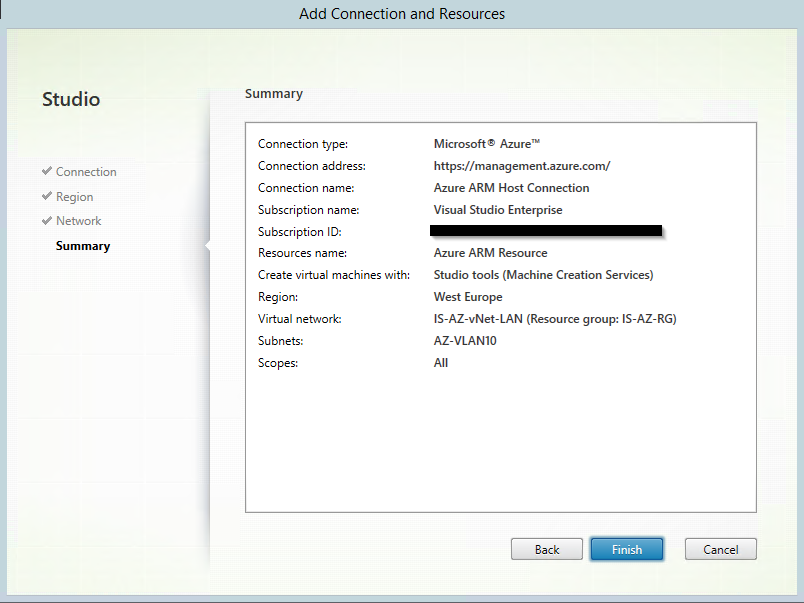
Step 107: Check out the Summary screen, when confirmed, click Finish
Sep 108: The new connection is now listed at the Host Connections screen and is now ready to use for the Machine Catalog configuration
Step 109: Open the Machine Catalogs part in the menu, and click on the – Create Machine Catalog – option, in the right menu
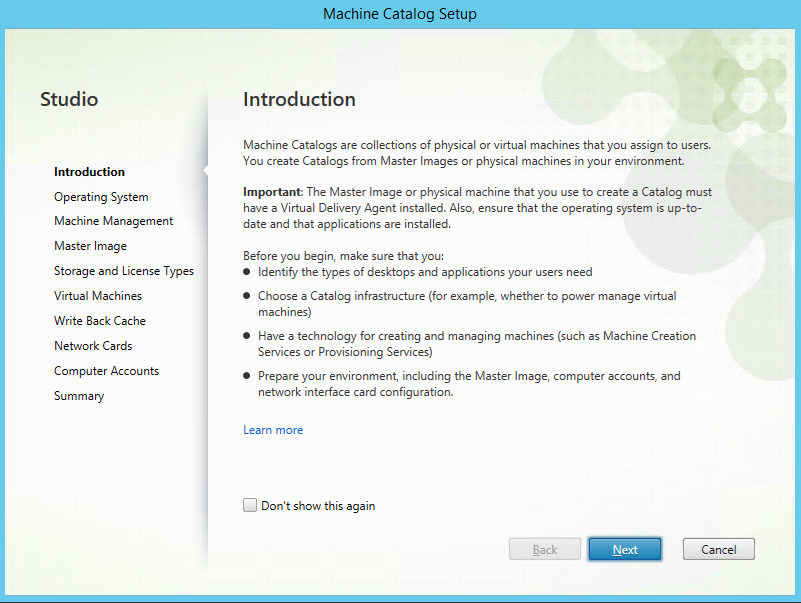
Step 110: Click on next at the introduction screen
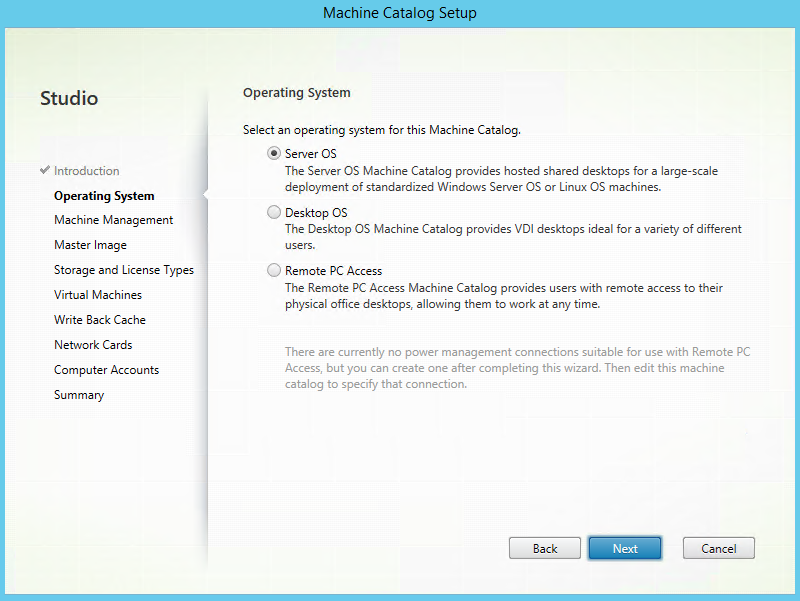
Step 111: Choose for your Operating system type, for this article I choose for Server OS and click on Next
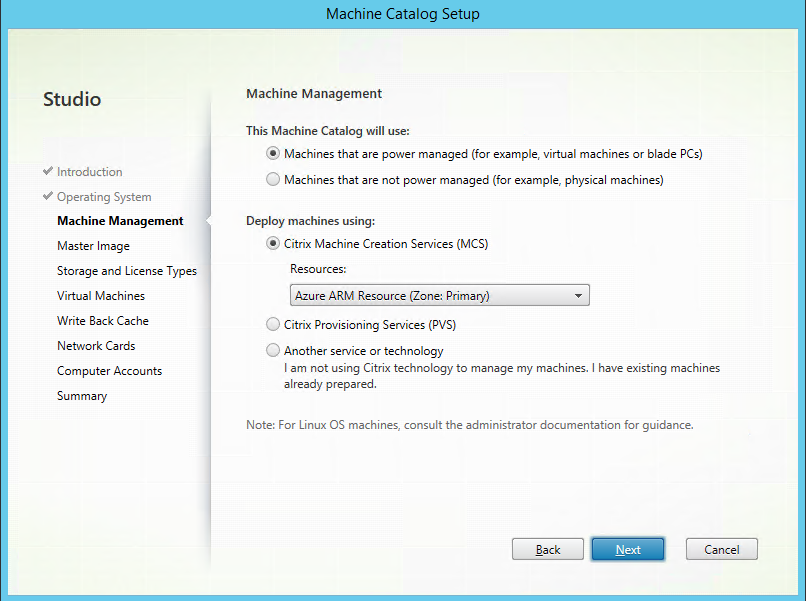
Step 112: Choose for – Machines that are power managed – and select the newly created Azure ARM Connection resource as MCS machine deployment, click on Next
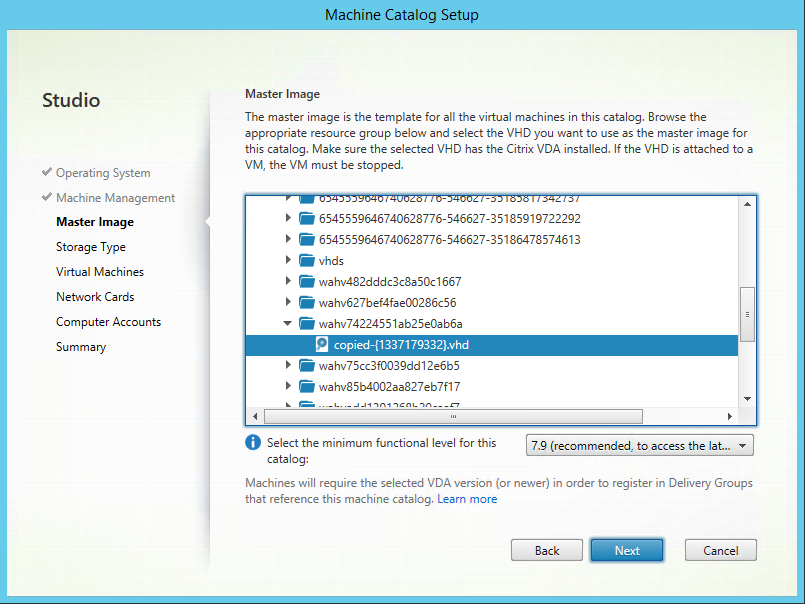
Step 113: Now we need to select the master image for the MCS Machine Catalog, because of the automated creation process, the .VHD file in the Storage Blog container, won’t be containing the server name, that you see in the Azure Portal. To check the name and exact location of the VDA-CLONE, we must open the Disks Settings option of the Virtual Machine, click on the OS DISK, and check the location in the right upper head corner, after checking, shutdown the server
Note: All the recovered machines did get the name –test behind the server name, this is because we used the test-failover recovery plan. When we run an unplanned failover, the exact machine name will be created after plan runs successful
Step 114: Select the master image (.VHD) file of the VDA-CLONE server, click on Next
Note: The master image VM must be turned off with status deallocated
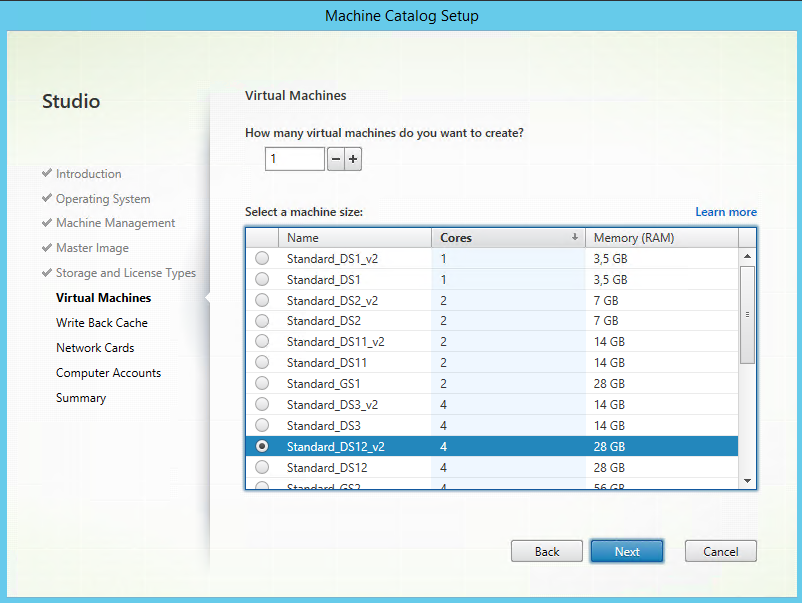
Step 115: Are you want to use SSD Premium storage machines, with a high speeds and disk I/O, then choose for Premium (more user capacity), then choose for Premium. For normal speed, choose for standard
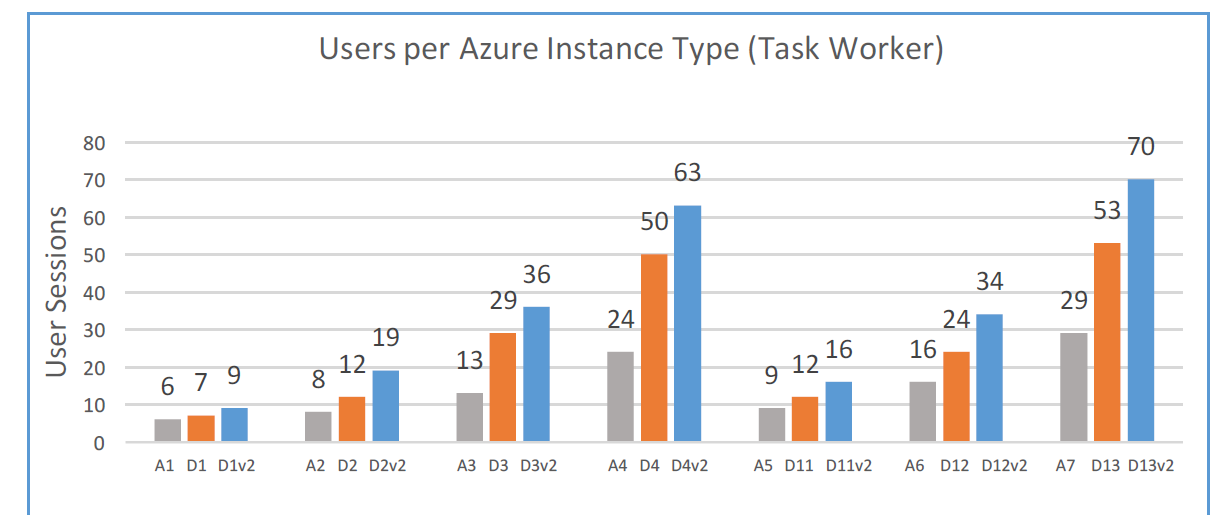
Step 116: We need to choose our Disk size (sku) for deployment, this is very important for the user scalability of your environment. Please check out the following – user session per machine type – picture to make your own decision that will fit your company needs
I choose for SSD storage, will use the D12v2 sku, and deploy 1 machine, Click on next
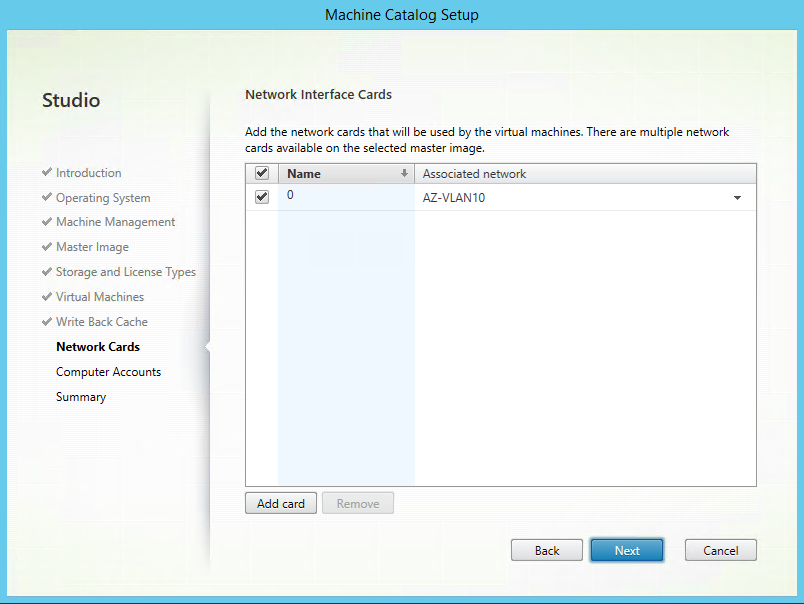
Step 117: Associate the right Subnet to the Network Interface, click on next
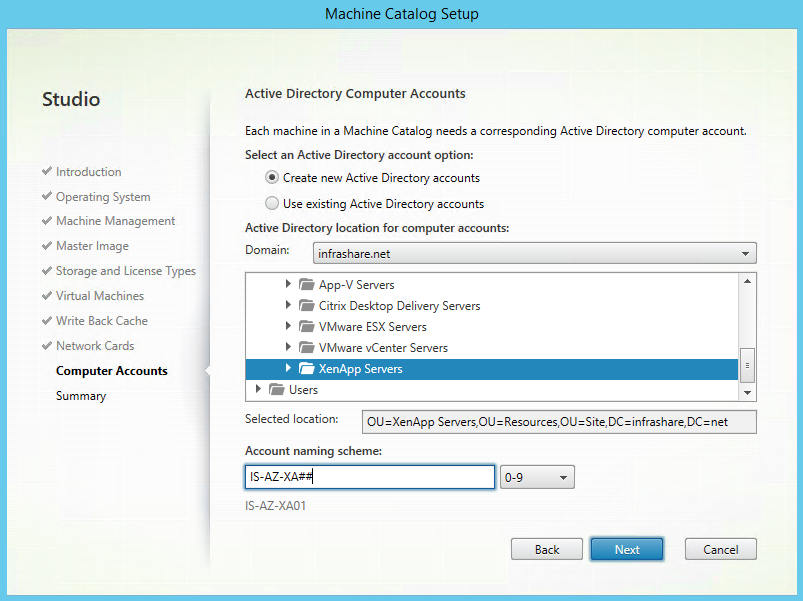
Step 118: Select the deployment OU, and server name convention, click on next
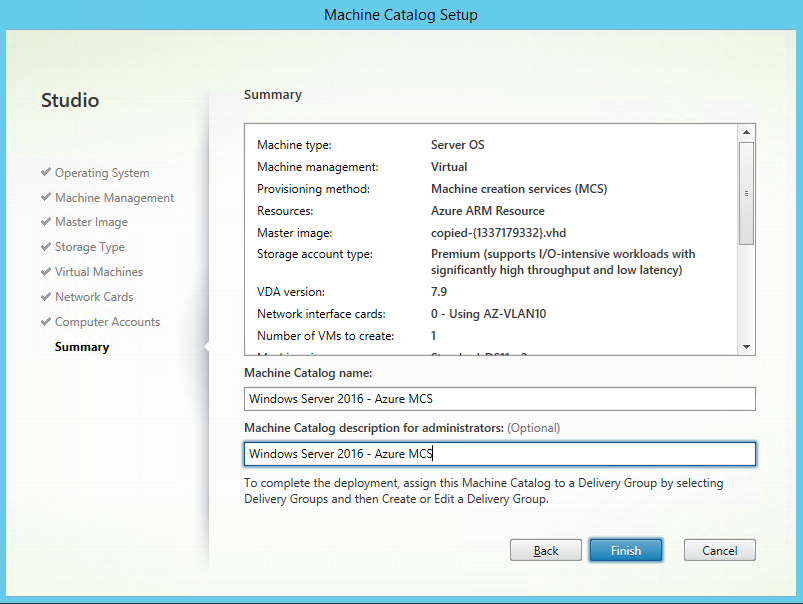
Step 119: Give in a name for the Machine Catalog and (optional) description and check all the settings, if agree, click on Finish to start the preparation/enrollment
Note: the process can take up a while, depending on the VM disk size
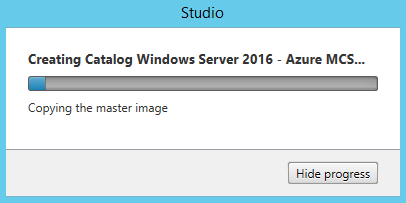
The master image is copying…
For the preparation, there will be – preparati – VM’s created….
Almost finished…
The creation process is finished and the machine catalog is added!
The new created Virtual Machine is added in Azure
Note: As you can see, there is a random Resource Group created. This is as design, maybe in a later time, Citrix will add the possibility to add your own Resource group.
Create the Delivery Group
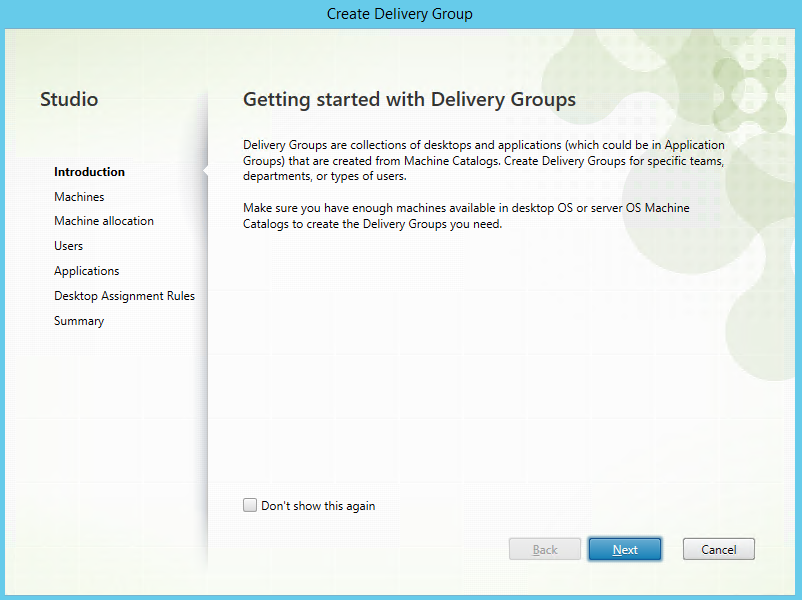
Step 120: Go in the left menu to Delivery Groups, and afterwards in the right menu, click on – Create Delivery Group
Step 121: Click next on the Welcome screen
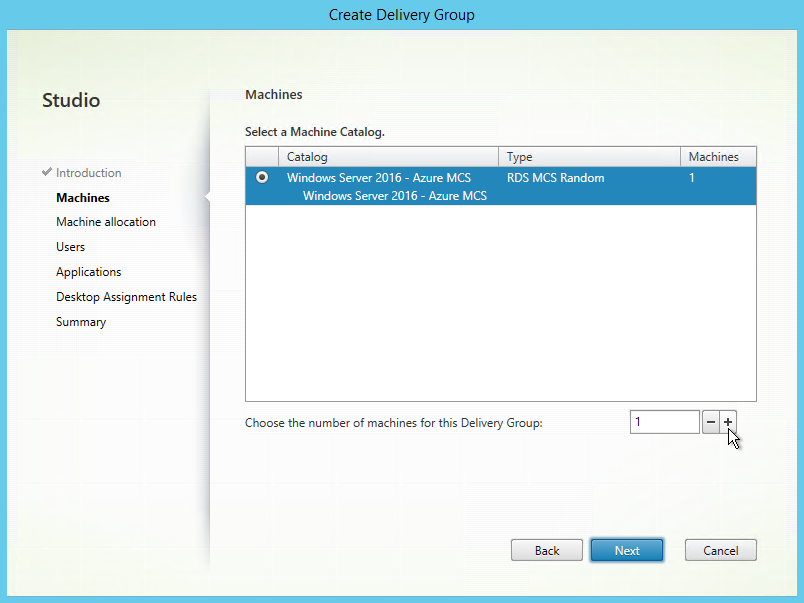
Step 122: Increase the number of servers you want to add, by clicking on the + button and click on next
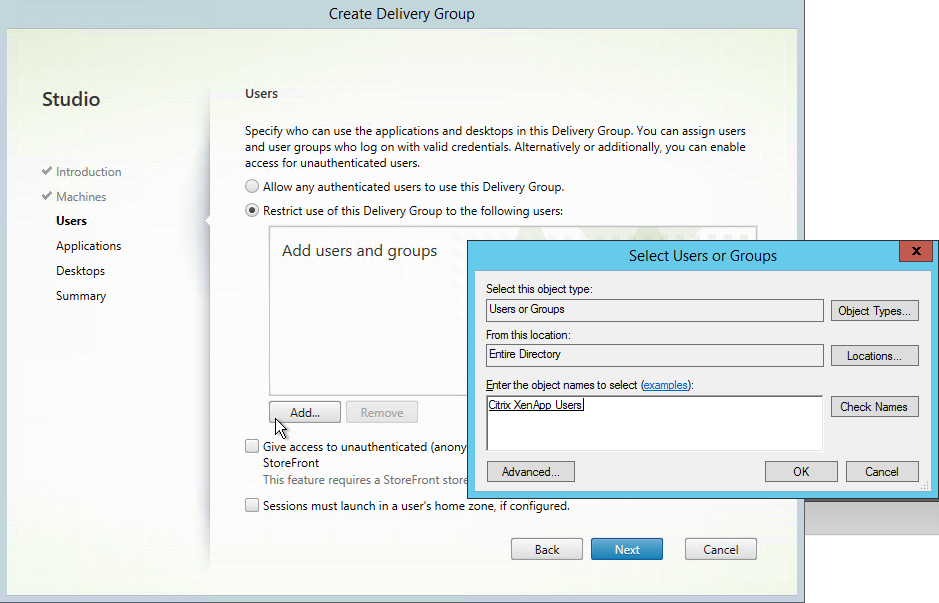
Step 123: Tick the box next to – Restrict use of this Delivery Group…- Add a Security Group to limit the access to the XenApp environment, click on next when added
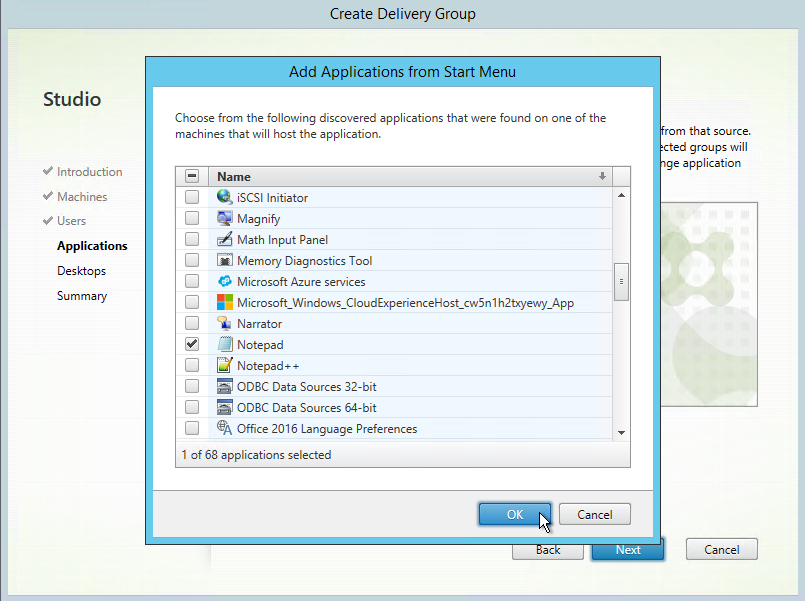
Step 124: Add your Published applications, if the machine is turned off, then the wizard will start the machine to proceed the discovery. As example I choose for Menu Start, and will add Notepad. Click on ok and next afterwards
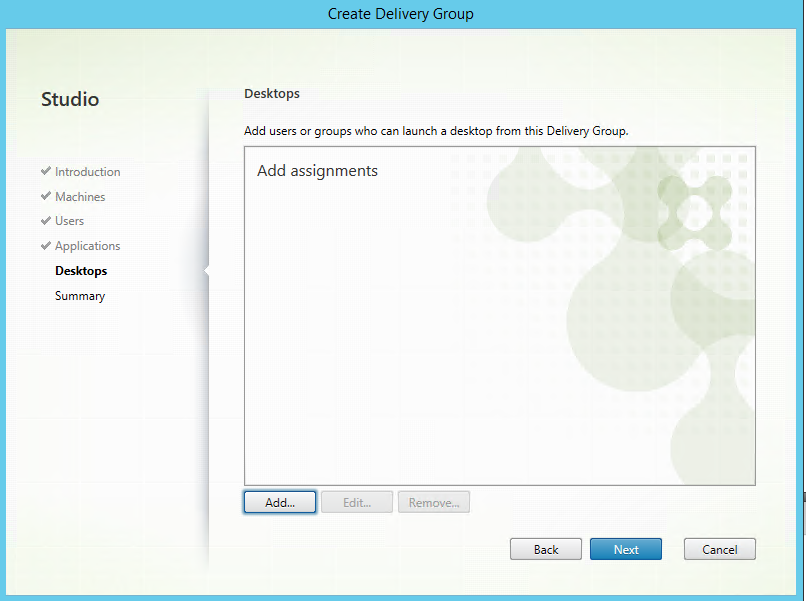
Step 125: Click on Add to configure the Desktop function (XenApp) of the Delivery Group
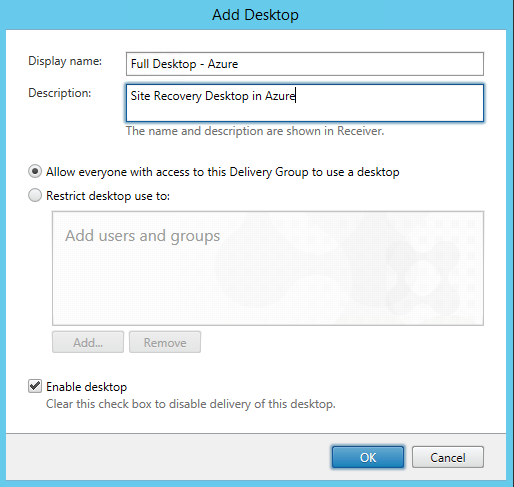
Step 126: Fill in a Display name, that users will see in StoreFront, let the – Allow everyone with access to this Delivery Group –and – Enable desktop – be default, click on ok and next
Note: You can separate access to the published applications and Desktops on this Delivery Group, if you want this, you then must check the – Restrics desktop use to – and add a security group to provide Desktop access seperate
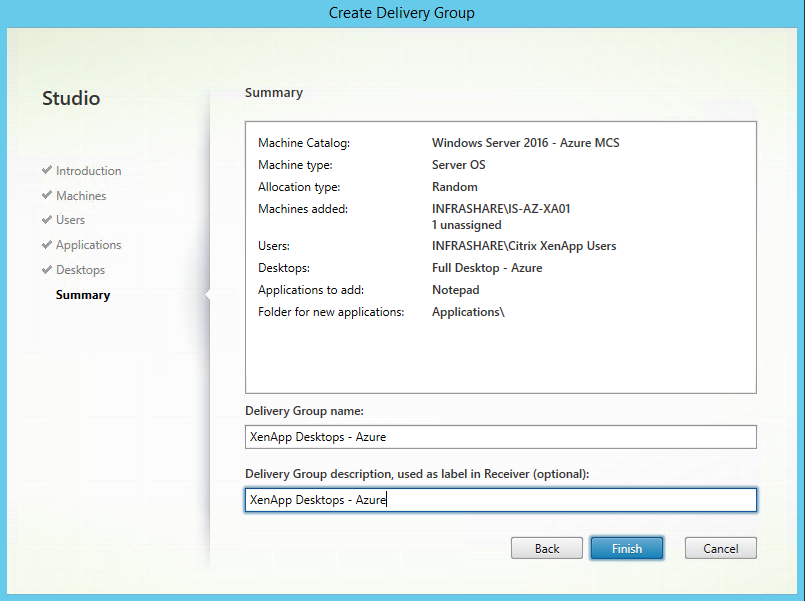
Step 127: The final configuration part, name the Delivery Group and click on Finish
Final testing the Application and Desktop Connection
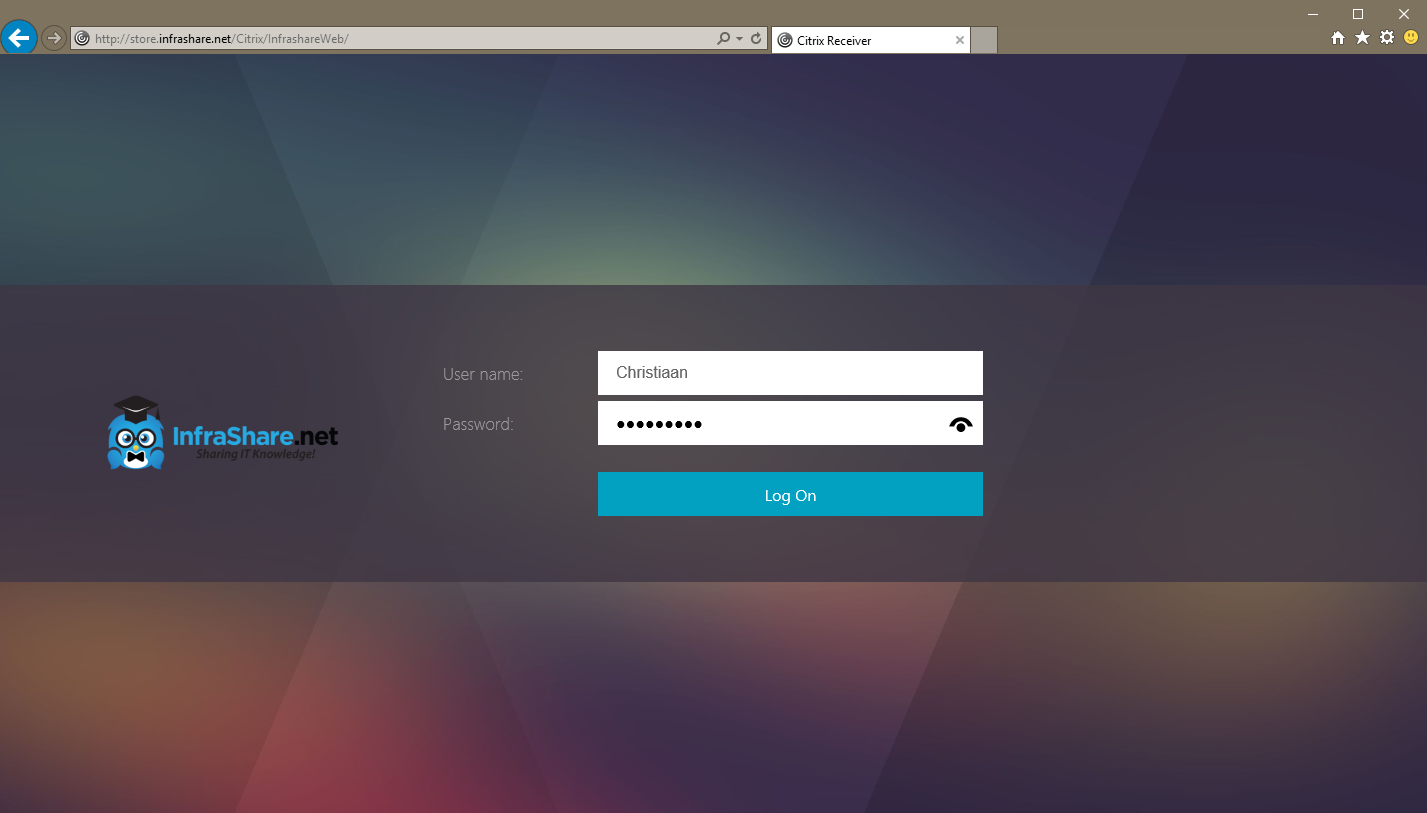
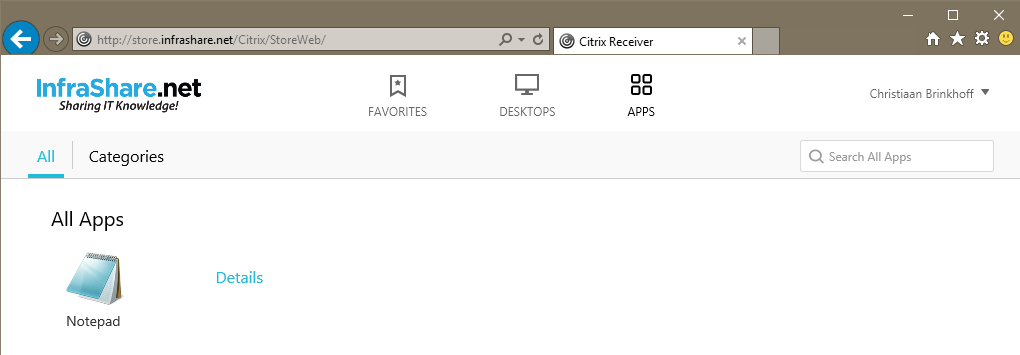
Step 125: Open an internet browser and check if the StoreFront page loads, try to logon afterwards
Entering my credentials, StoreFront login works again!
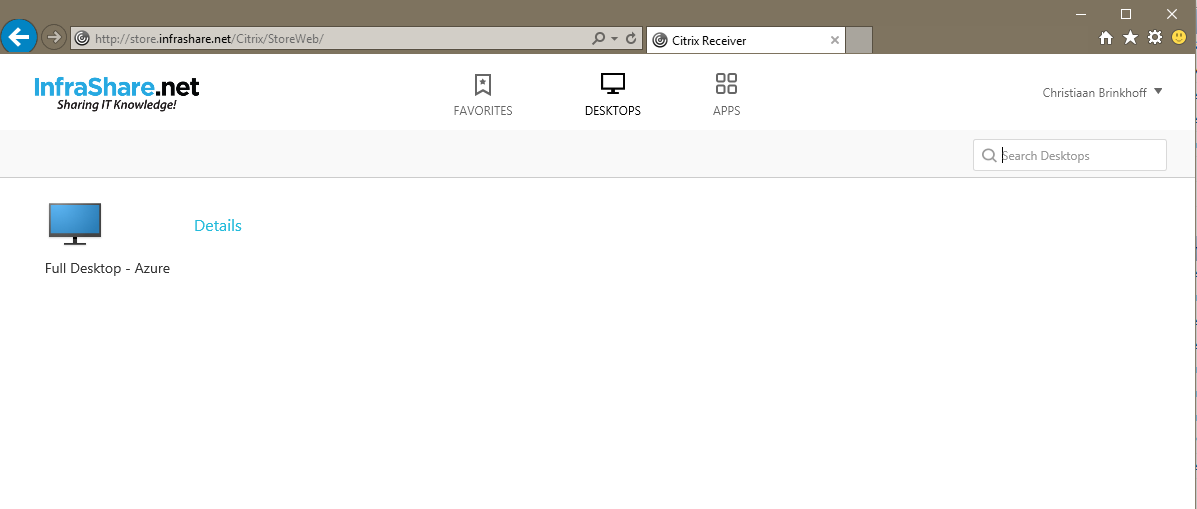
Click on the Desktop, and check if remote logon is possible…
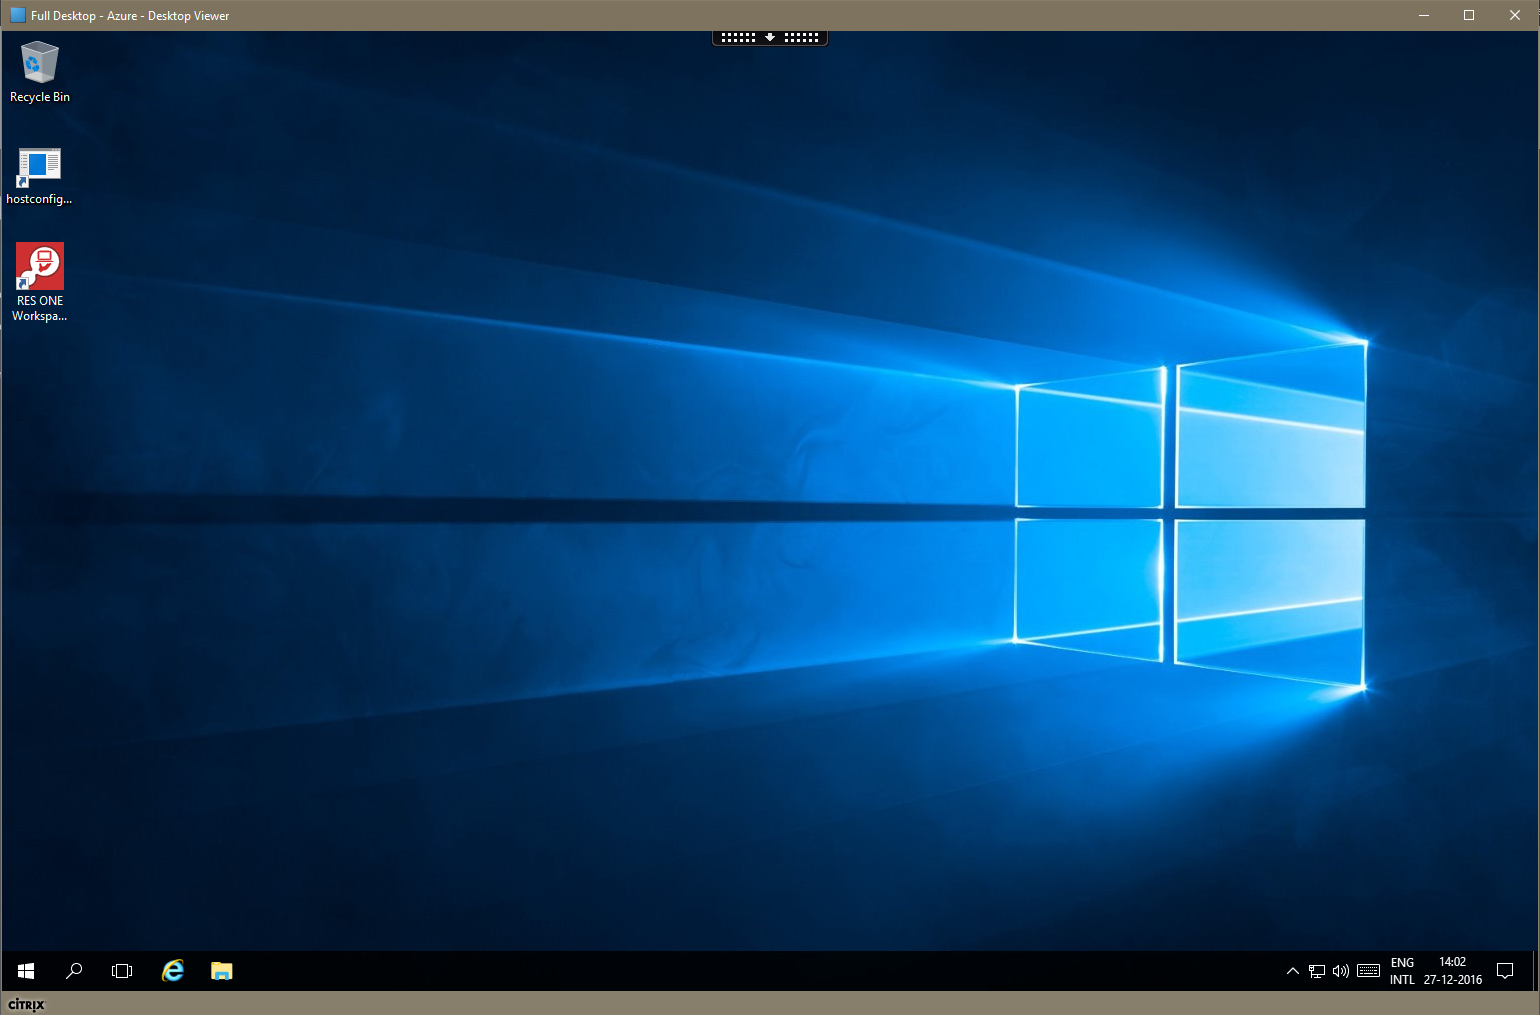
And Yes, the connection is made successfully! I now fully work on my Azure Site Recovery Environment, with internal network access through the IPsec VPN Connection!
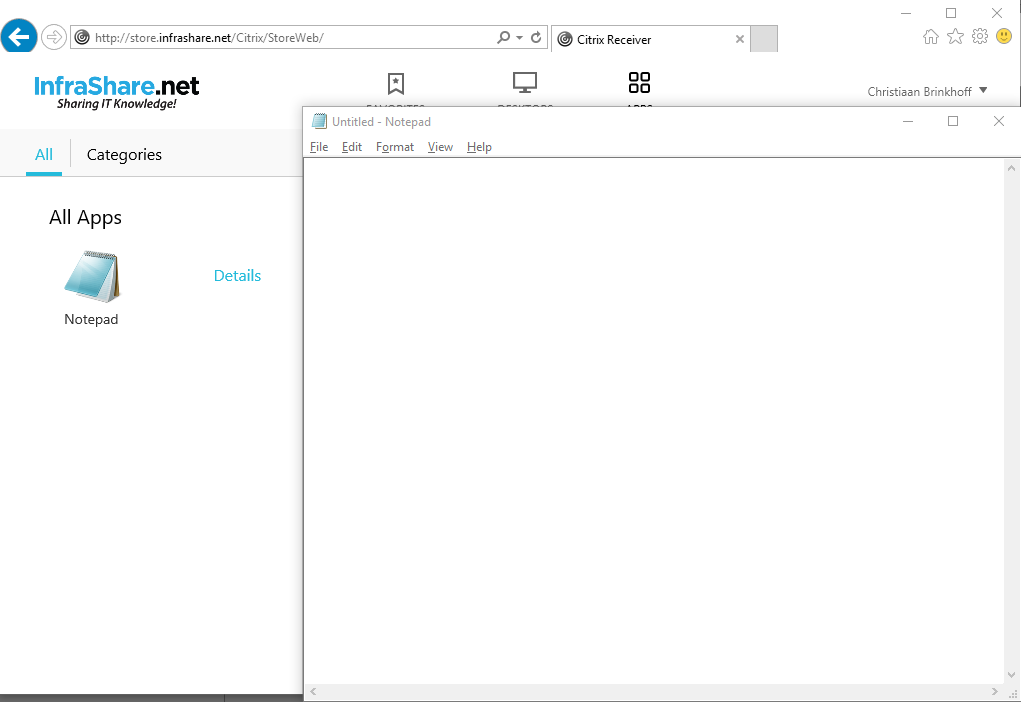
Last check, the Notepad Published application
also works like a charm!
Troubleshooting
- When you use Citrix 7.12 and the creation of my Azure MCS machines fails, with the following ErrorID : FailedToStartImagePreparationVm | TaskErrorInformation : Terminated
Please check this support article or this forum discussion.
- The MCS process fails, when creating the machines in Azure
Make sure that the master (CLONE-VDA) is shutdown, and has the status de-allocated before you start the Machine Catalog creation process
You can force this process, with the following PowerShell cmdlets
Stop-AzureRmVM -ResourceGroupName "ResourceGroupName" -Name "VirtualMachineName"


