
Configuring Citrix Virtual Apps – XenApp Essentials in Microsoft Azure, including Azure Active Directory authentication to Citrix Cloud


One of the biggest Citrix and Microsoft partnership announcements over the last year was definitely the replacement of Azure RemoteApp by Citrix Virtual Apps – XenApp Essentials. The new cloud-based virtualization solution from Microsoft Azure, delivered through the Citrix Cloud.
Citrix XenApp Essentials is the most simplified and fastest way to deliver Windows apps from Microsoft Azure to any device. The solution is available for public since March, but still hasn’t got the attention that it deserves, but hopefully that will change after reading this article…
At Synergy, there were a lot of session around existing and upcoming Azure and Citrix Cloud features, as result of the new Cloud first – Multi-Cloud strategy. I personally love all the innovations around the Cloud. Keep up the good work Citrix! If you seen all the announcements at this years Synergy, you know there is more innovation coming soon!

All the steps that must be taken to perform a XenApp Essentials deployment, such as the image preparation steps, image update procedure, and Azure Active Directory Management preparation for the Citrix Cloud, including all the best practices and other useful information, will be covered in this article.
Table of Contents
Click on the title to get forwarded in the article:
- Register for a Citrix Cloud trial account
- Activate the XenApp Essentials Service in Azure
- Enroll the Virtual Machine base image in Azure
- Prepare the XenApp Base Image for Essentials
- Configure XenApp Essentials in the Citrix Cloud
- Scale your environment to save costs using Smart Scale
- Publish Apps and Assign User(s)
- Setup Citrix Profile Management
- Configure the Microsoft RDS License Server
- Monitor XenApp Essentials through the (online) Director
- How to perform an image update
- Test the XenApp Essentials environment
- Configure Azure Active Directory authentication to Citrix Cloud
Did you know?
- Azure RemoteApp will become End-Of-Life (EOL) on the August 31th, 2017
- You are limited to only Publish Applications, Desktops cannot be published directly – for that you need XenDesktop Essentials or the XenApp and XenDesktop Citrix Cloud service.
- The Citrix environment will be build-up in the Citrix cloud and the XenApp machines in Azure Virtual Machines services, the Citrix Cloud Connectors will be installed on 2 different Edge servers to provide the connection between the Citrix Cloud and Azure. For this part, it is not required to have a ExpressRoute or IPsec VPN tunnel to Azure.
- The Essentials deployment process will create 2 separate HA Edge servers in your Azure subscription, and are part of your Azure IaaS subscription payments
- It was previously announced as the XenApp Express Service.
- The supported Operating systems are Windows Server 2012 R2 and 2016
- You are able to join your XenApp servers to your Azure Active Directory domain through Azure AD Domain Services, just to save on monthly VM usage costs.
- Remote Access via NetScaler-As-A-Service is all included in the license and available through the same internal StoreFront url that will be provided after the deployment.
- The imaging strategy that is being used on the background is based on Machine Creation Services (MCS).
- Citrix Essentials licensing is included in the Azure service and costs $12 per-users and you need to buy a minimum of 25 users.
- Your bill for XenApp Essentials usage will appear directly on your Microsoft Azure bill.
- Citrix XenDesktop Essentials requires a Microsoft Enterprise license agreement for the use of Windows 10 in the Azure Cloud.
- You can scale up and down your environment, based on different time schedules. Servers will be automatic be turned-off on off-work times, just to save resource costs in Azure! All delivered by Smart Tools: Smart Scale on the background.
- Users RDS CALs are included in the costs, with a current price is $6.25 per user per month, but you still have the possibility to use your own RDS licenses.
- XenApp Essentials includes 1GB of NetScaler Gateway Service data transfer per user per month.
- The XenApp Essentials base image doesn’t need to be joined to a domain, the Essentials imaging wizard is automated to do this for you
- New TCO calculator for Citrix XenApp and XenDesktop (Essentials) in Azure calculations available, including all kinds of extra’s, for example, user density integration on Azure machine sizing –https://costcalculator.azurewebsites.net/costCalculator (user numbers are LoginVSI testing results)
- A Citrix Cloud account is required to setup XenApp Essentials
- It offers you a SLA for 24/7 Citrix Support
- XenApp Essentials trials are currently available on a limited basis. Priority is being given to current Microsoft Azure RemoteApp customers to try the service first.
XenApp Essentials in Azure supports Published Desktops
I’ve been (and my customers) waiting for this feature for a very long time. As you probably know, since the release of XenApp Essentials, it was only possible to provide Published Apps. For 2 weeks, Citrix changed that opened a lot of new doors for potential new Citrix customers in the Microsoft Azure Cloud.
Note: XenApp Essentials also supports the Workspace Experience, including AzureAD and MFA authentication.

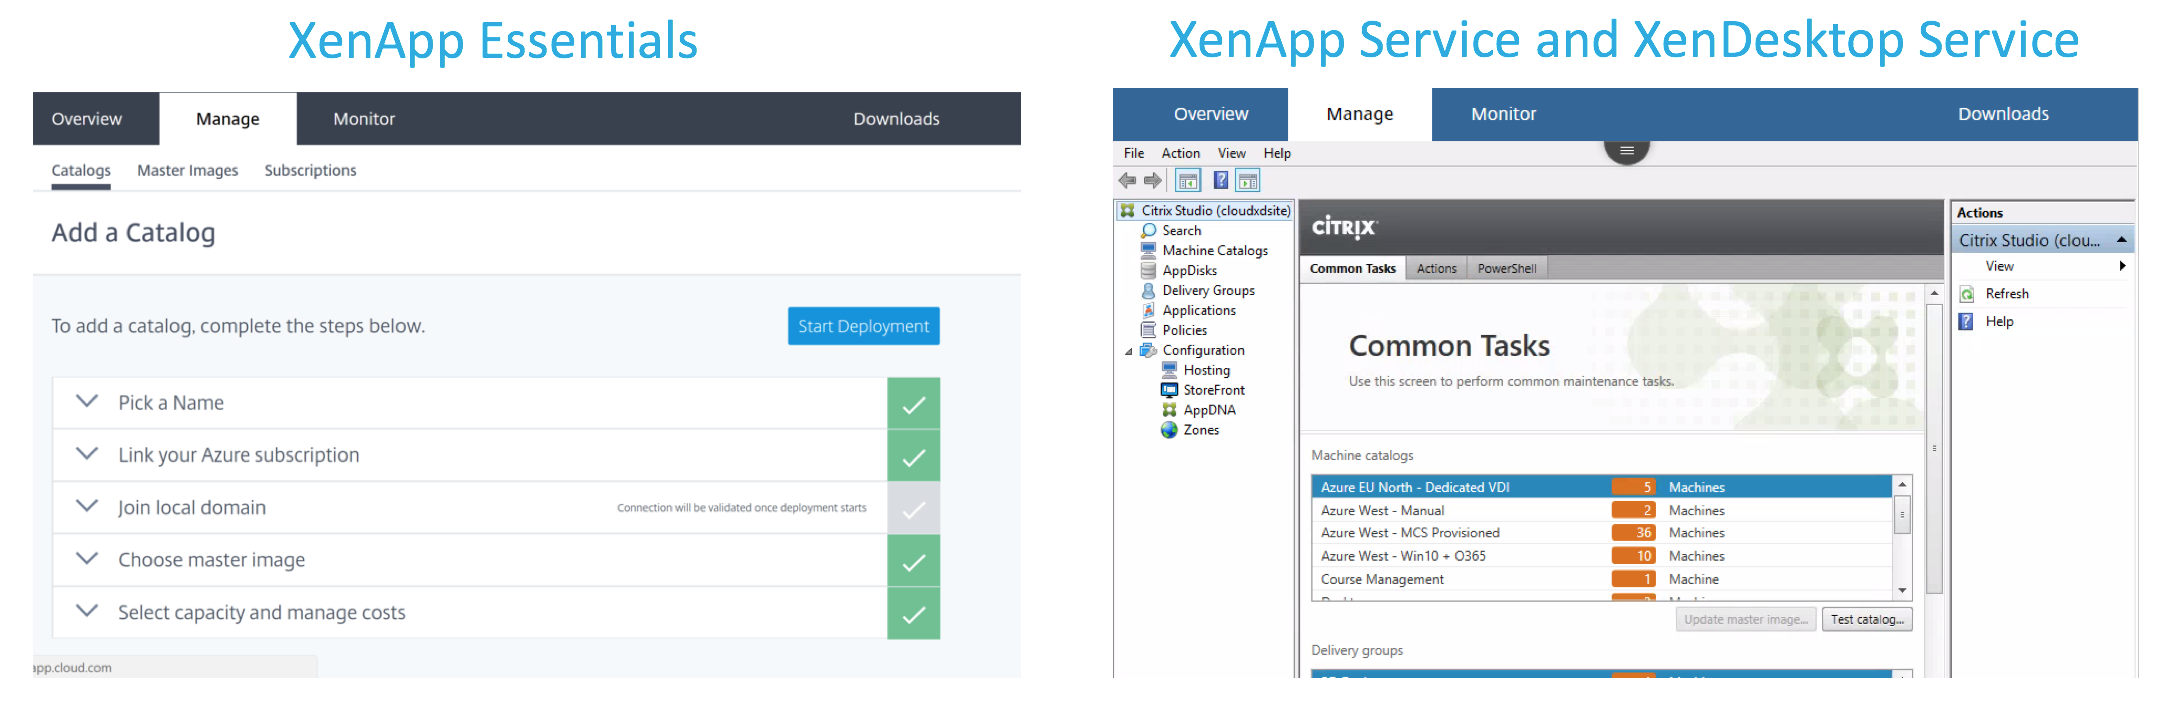
Compare the different Consoles (Studio)
The XenApp Essentials Console is tripped-off and walks you through a simplified wizard. Compare to the on-premises version or the XenApp and XenDesktop Citrix Cloud service, the possibilities are limited.
Consider Availability Set(s)
Never think that Public Cloud always solves your HA or redundant configurations. The same exists for the virtual machine service in Azure. When you configure a VM, there is an option called Availabilty Set, what makes it possible to place servers on different resources. For example, a physical server in Azure crashes and both of your XenApp Essentials servers are active on that same machine, the change that your environment becomes unavailable is pretty high. This can all be solved by the configuration of Availability sets, that can be configured in 2 options:
Fault domains – fault domains define the group of virtual machines that share a common power source and network switch. By default, the VMs are separated across up to three fault domains and can be changed to between 1 and 3.
Update domains – five update domains are assigned by default and this can be set to between 1 and 20. Update domains indicate groups of virtual machines and underlying physical hardware that can be rebooted at the same time. For example, if we specify five update domains, when more than five virtual machines are configured within a single Availability Set, the sixth virtual machine will be placed into the same update domain as the first virtual machine, the seventh in the same UD as the second virtual machine, and so on. The order of the reboots may not be sequential, but only one update domain will be rebooted at a time.
The Availability Set needs to be created before the Virtual Machine creation process, the base image must be placed in the Availability Set and the XenApp Essential Machines will take over those settings in the deployment process.
Note: The Citrix Cloud Connector – Edge servers – will standard be placed in a custom created Availability Set, all automated performed by the Essentials Deployment Wizard.
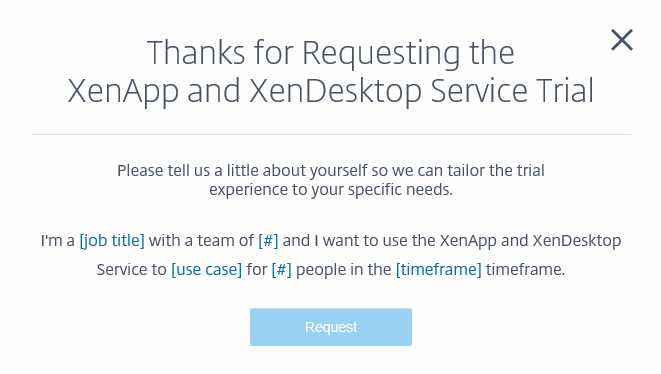
Register for a Citrix Cloud trial account
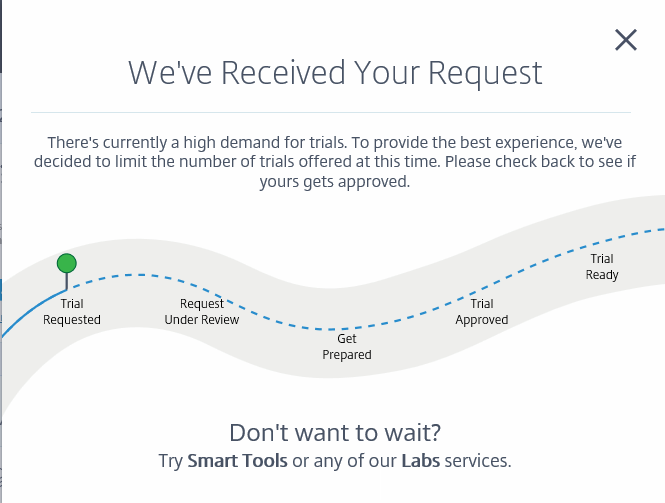
Trials are limited, so you need to wait for approval before you can start with the setup.
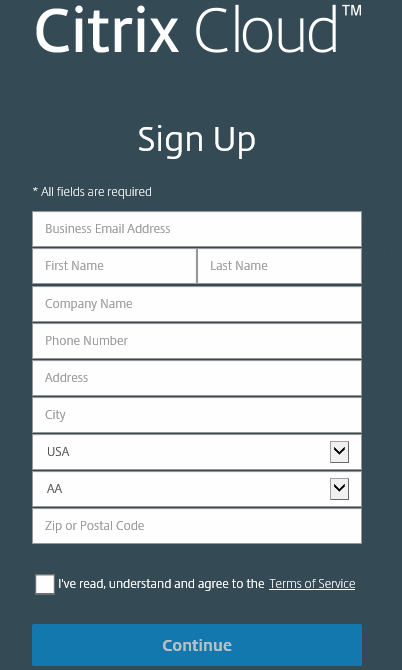
Pre-step 1: To get started, you first need to create a Citrix Cloud account, this can be doing through the following url: https://onboarding.cloud.com/
Pre-step 2: Enter in all the information and confirm your email address
Pre-step 3: When the account is activated, please go to http://citrix.cloud.com and log in with your Citrix credentials
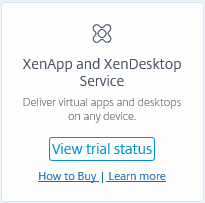
Pre-step 4: Request the – XenApp and XenDesktop Service – in dashboard landing screen. Click on – Request Trial

Click on view trial status
Activate the XenApp Essentials Service in Azure
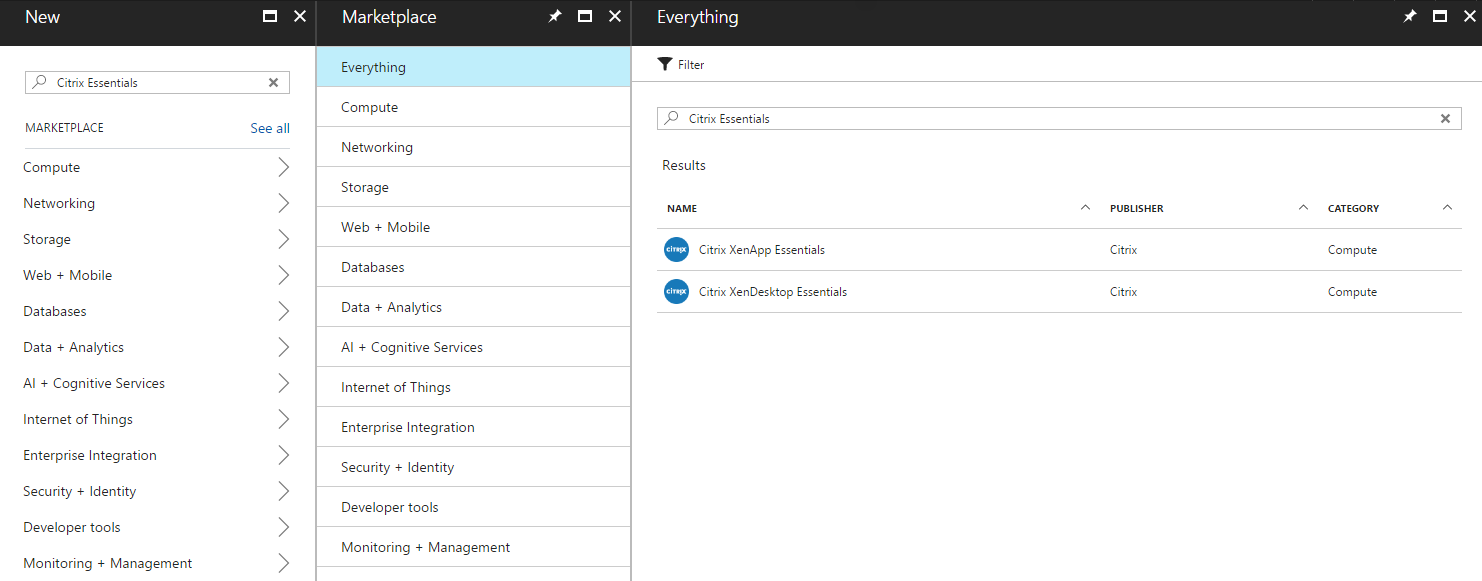
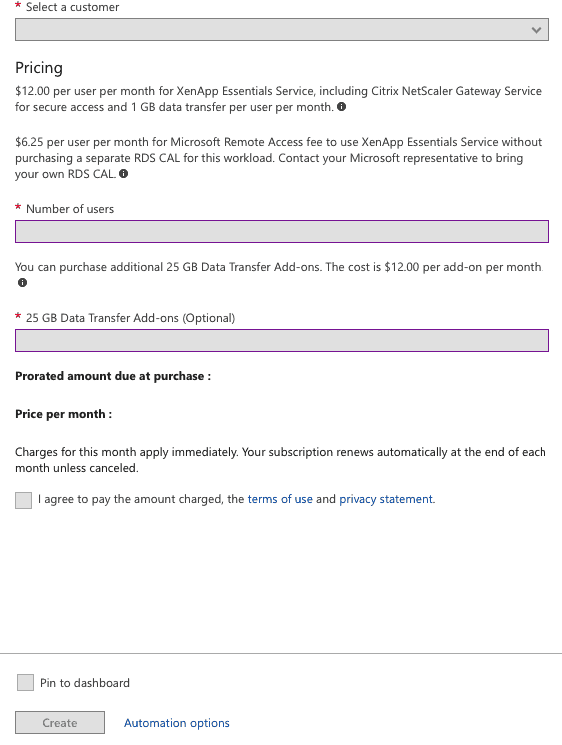
Step 1: Open the Azure Marketplace– search for – Citrix XenApp Essentials
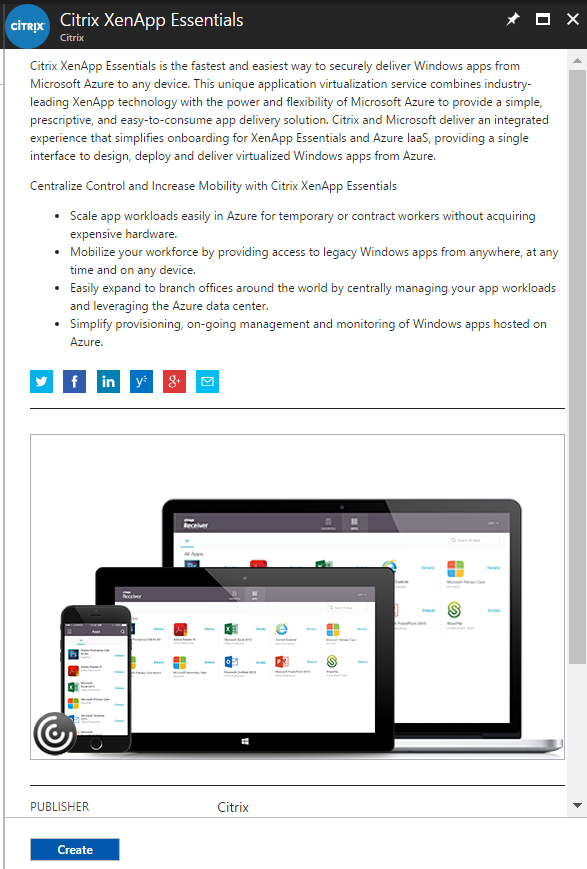
Step 2: Click on Create
Step 3: Fill in a Resource Name – Select your Azure subscription – Select your Resource Group and the Azure datacenter location, to place your services in. Click on Connect to redirect to the Citrix Cloud portal logon page

Step 4: Enter in the Citrix Cloud credentials – Click on Sign in

Step 5: Enter the numbers of users (minimum amount of 25) to license – fill in the amount of 25 GB transfer add-ons that you want to buy. Click on Create
Note: If you are using the trial, the connect button won’t work. Trials need to activate directly through the Citrix Cloud portal -> https://xenapp.cloud.com
The service is currently being deployed in Azure…
Step 5: When the deployment is finished – open the XenApp Essentials resource – that just became available at your resources list.
The following warning will be showed to you, all the services are now being prepared on the Citrix Cloud environment and can take up to 4 hours to complete. This means that we now have time left to create our base-image

Enroll the Virtual Machine base image in Azure
Just like the on-premises XenApp version, it is required to create an base image for providing the applications or desktop environment with all the applications pre-installed. I’ll walk you through all of those steps
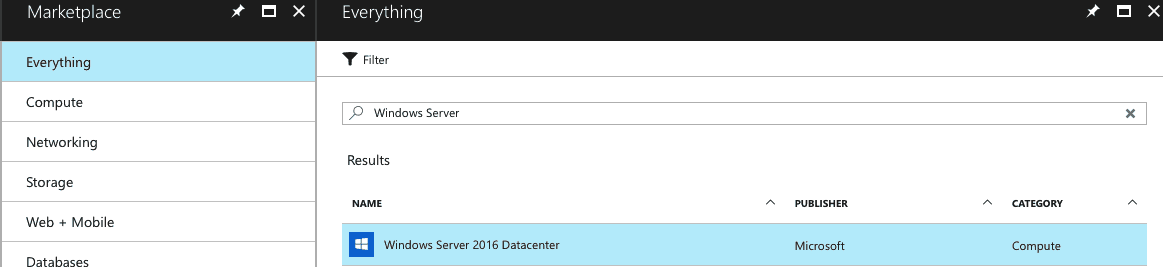
Step 6: Open the Marketplace – search for the OS – click on the Name
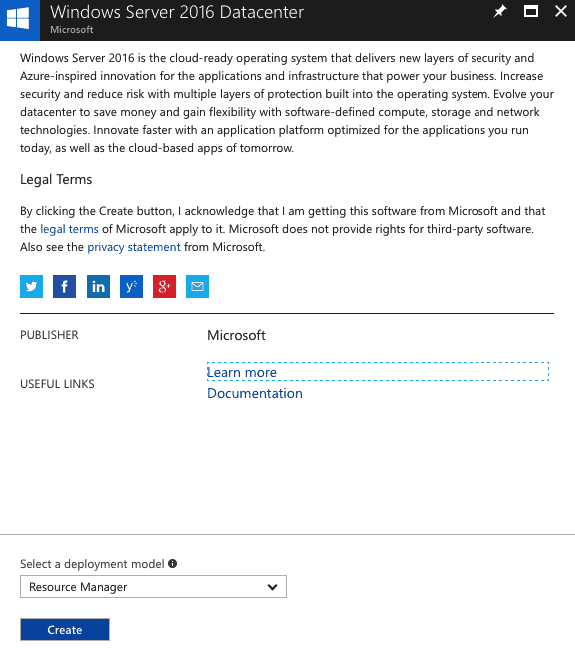
Step 7: Click on Create
Step 8: Fill in all the requested information – random virtual machine name – type: HDD – random username – password – select your Azure subscription – resource group and the (nearest) datacenter location. Click on Ok
Note: Create the VDA template with standard (non SSD) storage. Later on the process, we can select SSD for better performance!
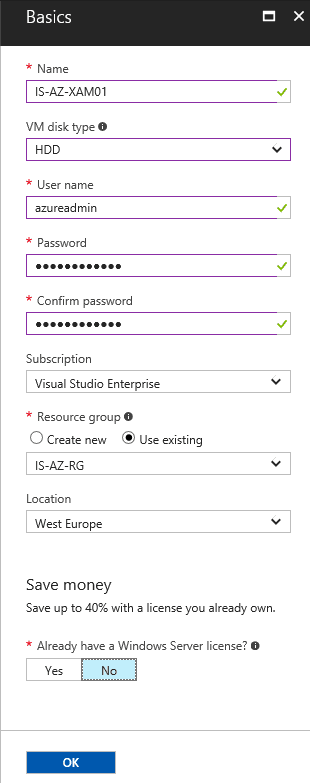
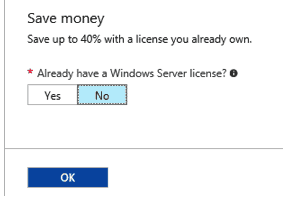
Note: Having an Enterprise Agreement subscription and on-premises Windows Server licenses, including a Software Assurance? Select – Yes – at the Save money section. You can save up to 40% by using the Hub (Hybrid Use Benefit) program, on annual Virtual Machine usage costs!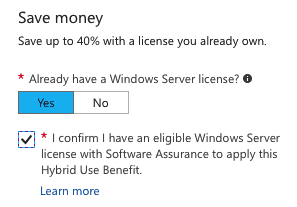
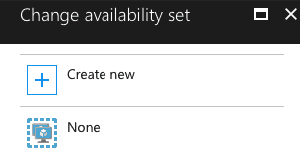
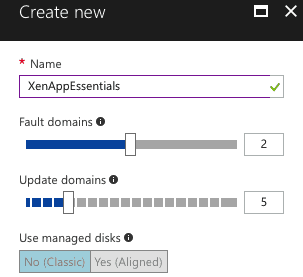
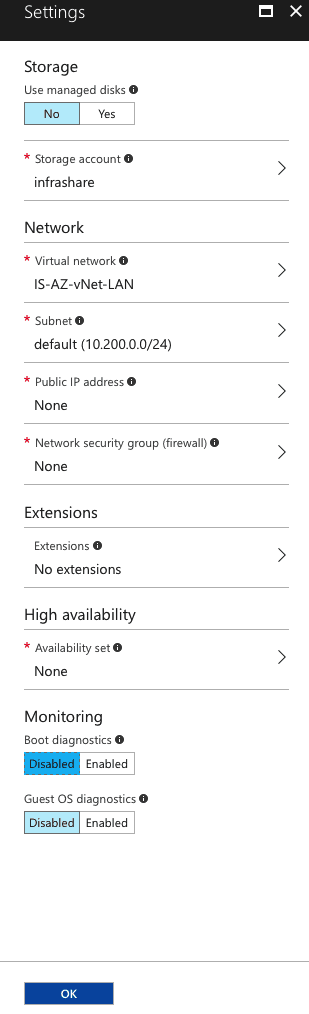
Step 9: Enter in the required information – make sure to set the – Use managed disks – to No. Click on the High Available option to create the mentioned Availability Set – Create new
Give in a name and a minimum of 2 fault domains and 5 update domains, all depending on the size of your environment. Click Ok to save
Click on Ok
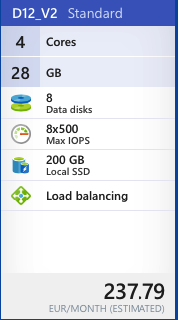
Step 10: Select the sizing of your Virtual Machine – I recommend the D12v2 – for the lowest costs / highest user density. Click on Select
Note: When you haven’t got any IPsec or ExpressRoute active, make sure that you create or select a Public IP to the machine, to provide the RDP connection for installing the applications
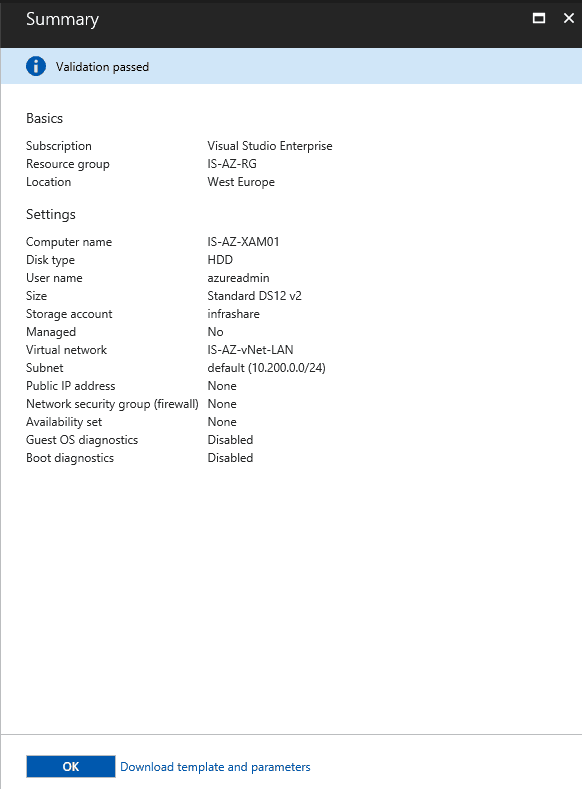
Step 11: Check the summary – Click on Ok to start the deployment
Step 12: Connect to the machine through Remote Desktop and install all the applications that you want to publish in the XenApp Essentials Console.
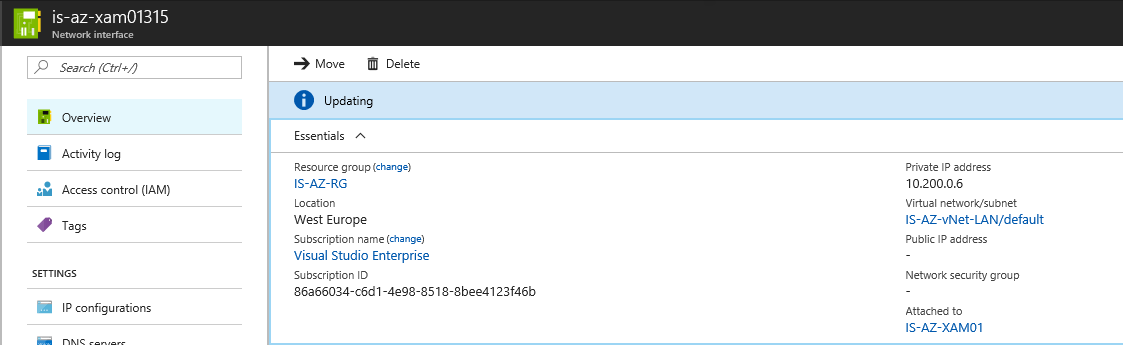
No VPN or ExpressRoute to Azure? Don’t forget to attach a Public IP to the Virtual Machine and open the RDP 3389 (inbound rule) port on the network security group (NSG). Click on Connect
Use a IPsec VPN or ExpressRoute connection? Open the Network interface settings of the Virtual machine and connect directly to the – Private IP address – through a Remote Desktop console in your local network that is shared with the Azure vNet
Prepare the XenApp Base Image for Essentials
Step 13: Leave the machine out of the domain – don’t join the machine to any domain – the Essentials image process will perform these steps automatic at the imaging procedure
Step 14: Install all the applications that you want to publish through XenApp Essentials in the image. You can discover all the application afterwards in the XenApp Essentials Console in the Citrix Cloud
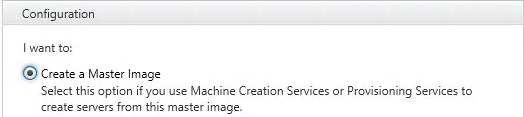
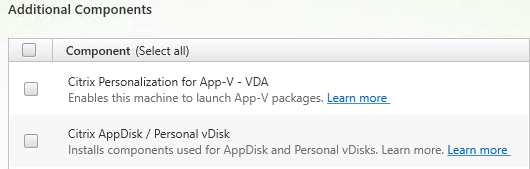
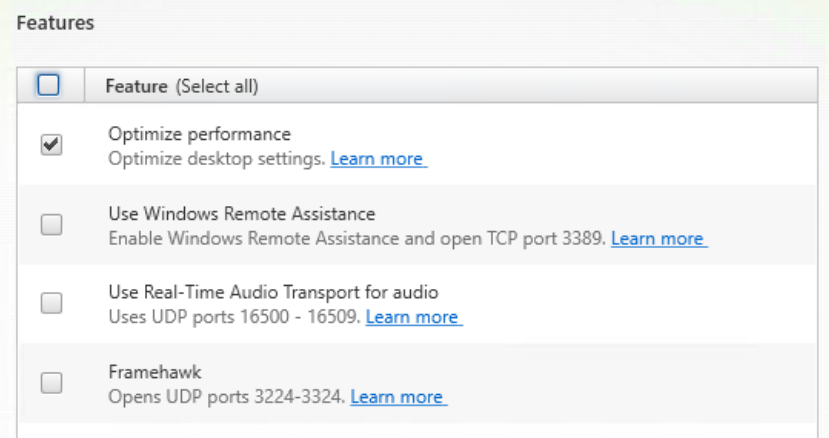
Step 15: As last installation step – install the Citrix 7.14.1 VDA software in the Virtual Machine and make sure to set the following important configuration decisions. All the others settings can be left default enabled
Let the Configuration default on the – Create a Master Image – option
Additional Components are not needed – can be disabled
Change the Delivery Controller setting to – Let Machine Creation Services do it automatically
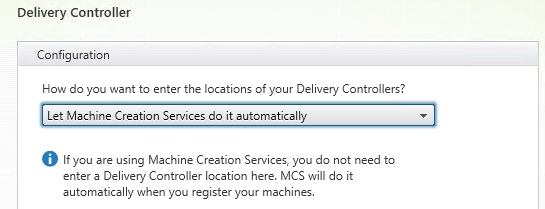
If you choose to enable this option, important services can be causing problems in your published applications, for example Windows Search. Check out https://support.citrix.com/article/CTX125874 to see what settings are effected before you enable this option
Start the installation – a reboot will be required
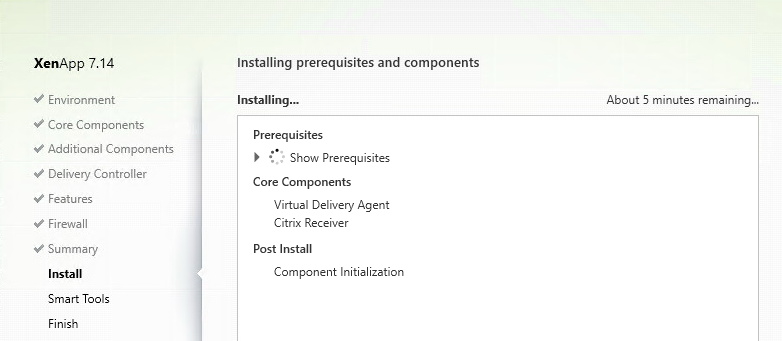
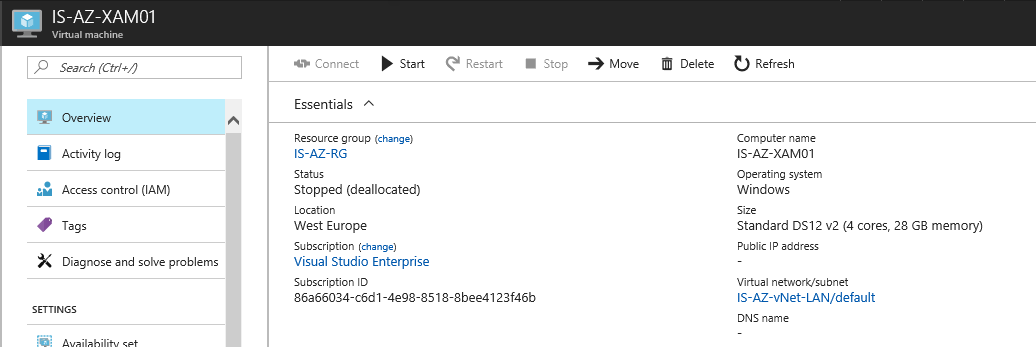
Step 16: Switch back to the Azure portal – go to Virtual Machines and shutdown the – XenApp Base image – Virtual Machine
Note: Be sure that the Virtual Machine status is Stopped (de-allocated), otherwise the machine will fail in the imaging process
Configure XenApp Essentials in the Citrix Cloud
Step 17: Now we can start with the actual deployment of XenApp Essentials service. Open a browser – go to https://xenapp.cloud.com – logon with your Citrix Cloud Credentials.

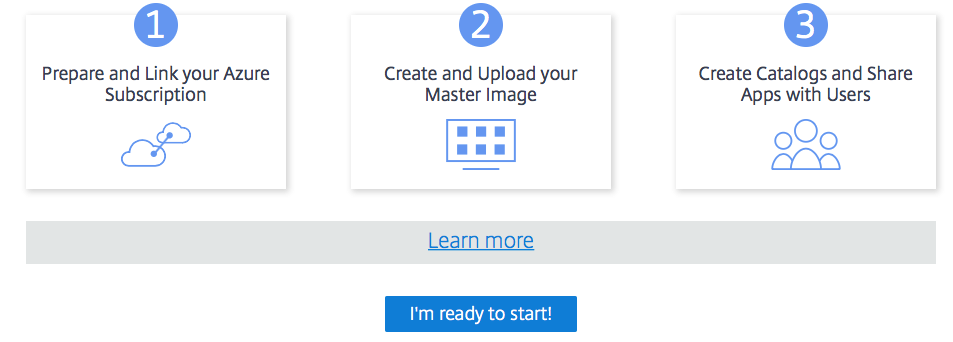
Step 18: Click on – I’m ready to start – to start the configuration
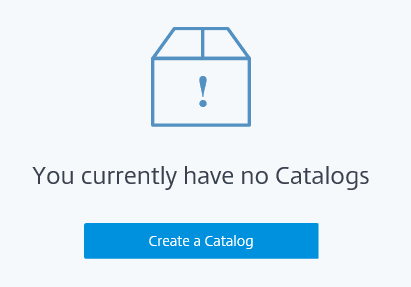
Step 19: Click on Create a Catalog
Step 20: Enter in a name for the – Machine Catalog – and click on Save

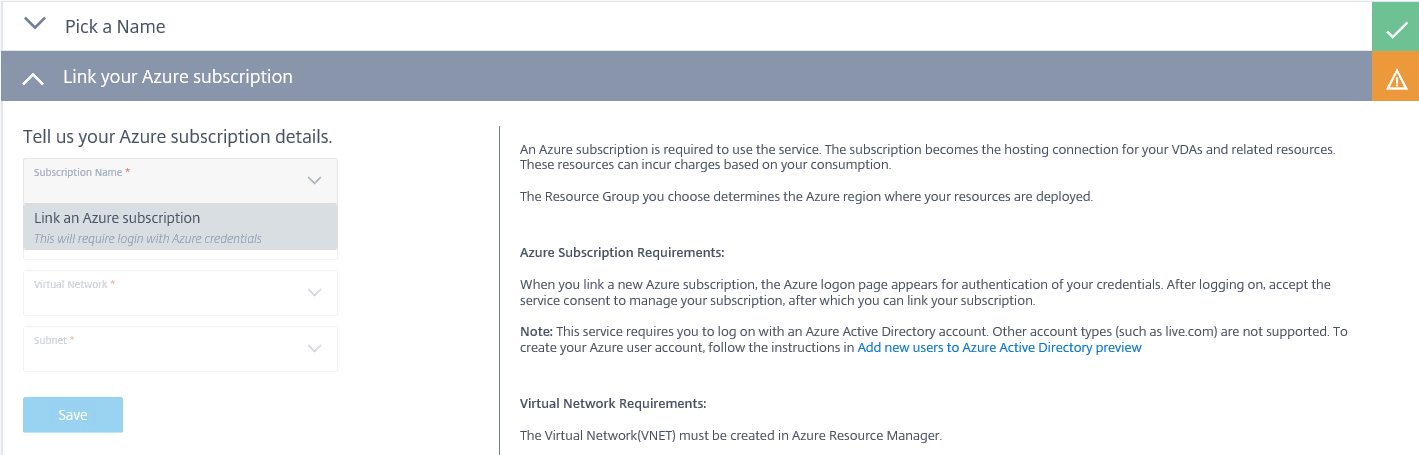
Step 21: Link your Azure subscription, click on – Subscription Name – and choose for – Link an Azure subscription
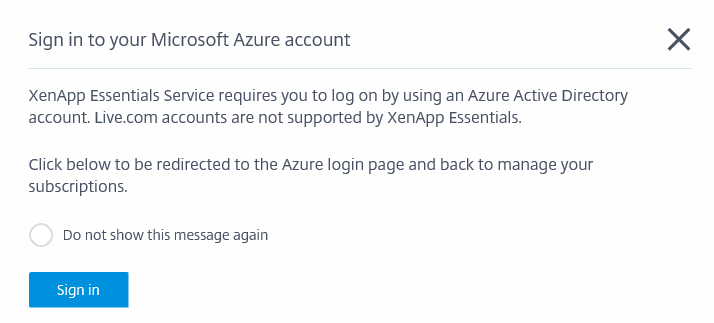
Click on Sign in
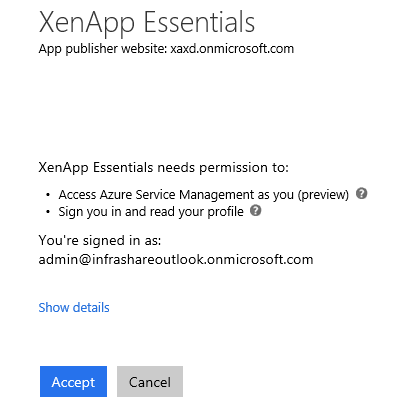
Enter in your Azure Global Administrator credentials

Accept the permission request
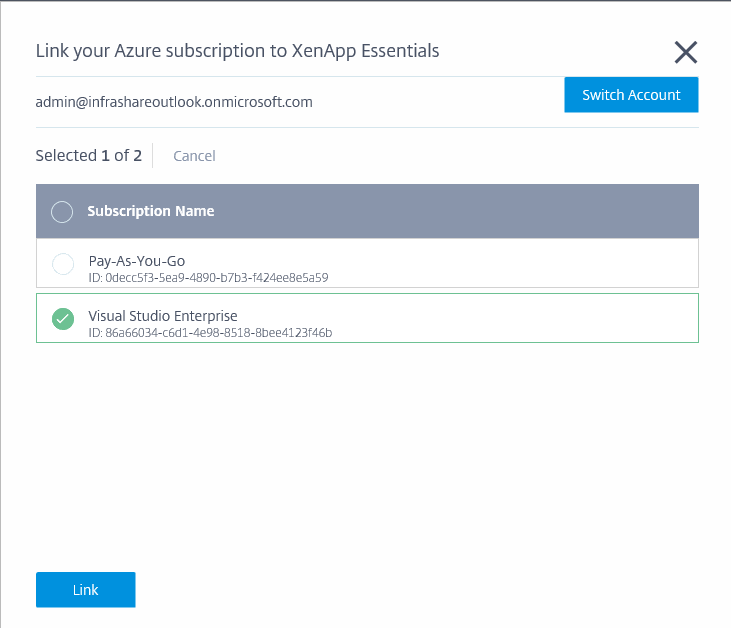
Step 22: Select your – subscription – click on – Link – to confirm
Step 23: Select the – Resource Group – the – Azure Virtual Network and – Subnet – Click on Save
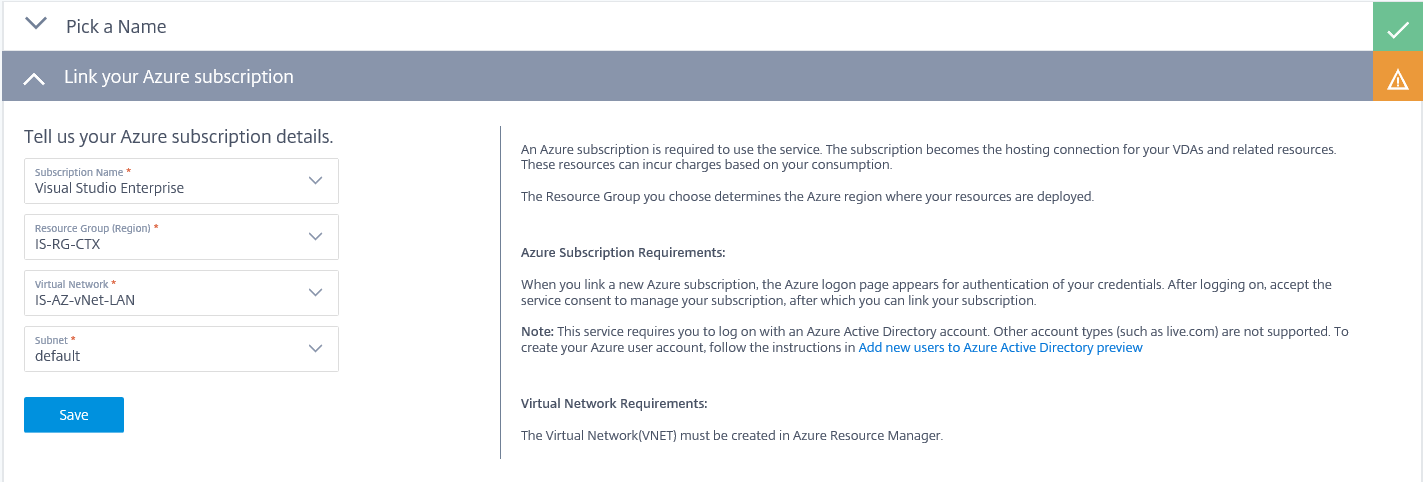
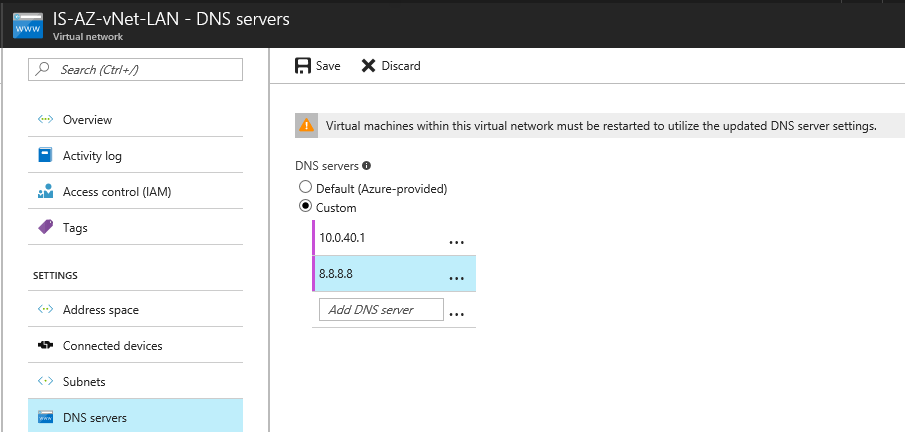
Note: Problems with the domain join? Please make sure that your domain server is available from the Azure vNet that you selected in the previous steps or check if your service account has enough rights to provide the domain join. If u use an ExpressRoute or IPsec VPN configuration – or a Domain controller placed in Azure – make sure that the primary DNS setting of the vNet is configured to your (on-premises) Domain Controller.
Step 24: Fill in the requested information and click on Save
Fully Qualified Domain Name: infrashare.net
Organizational Unit: OU=org,DC=infrashare,DC=net
Server Account Name: Service Account Name (in UPN format)

Step 25: Now we need to select the image that we just created in the earlier steps. Select the option – Import a new image– select the – resource group – storage account – VHD file – and give in a name for the base image. Click on Save
Options
Link an existing image: When u enrolled a XenApp Essentials image earlier, all the previous images will then be available here.
Use a Citrix prepared image: This option is for testing or PoC purposes, just to get a look and feel of the Essentials service. Machine is based on Windows Server 2012 R2 with VDA 7.13.
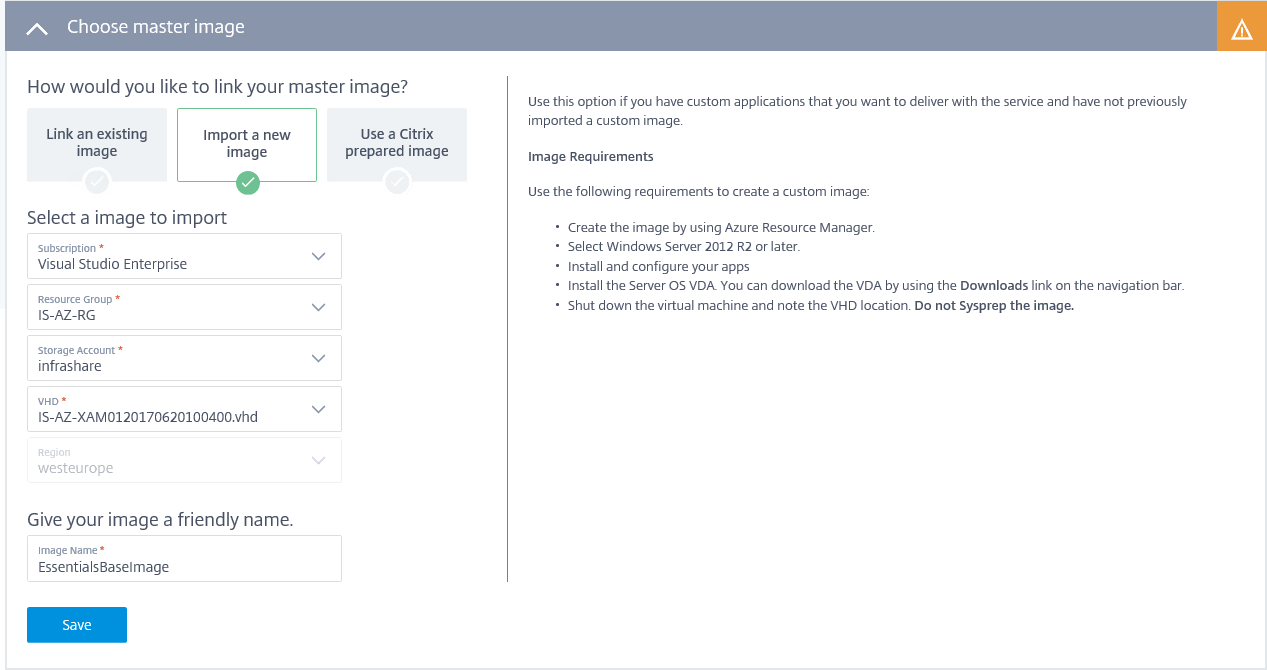
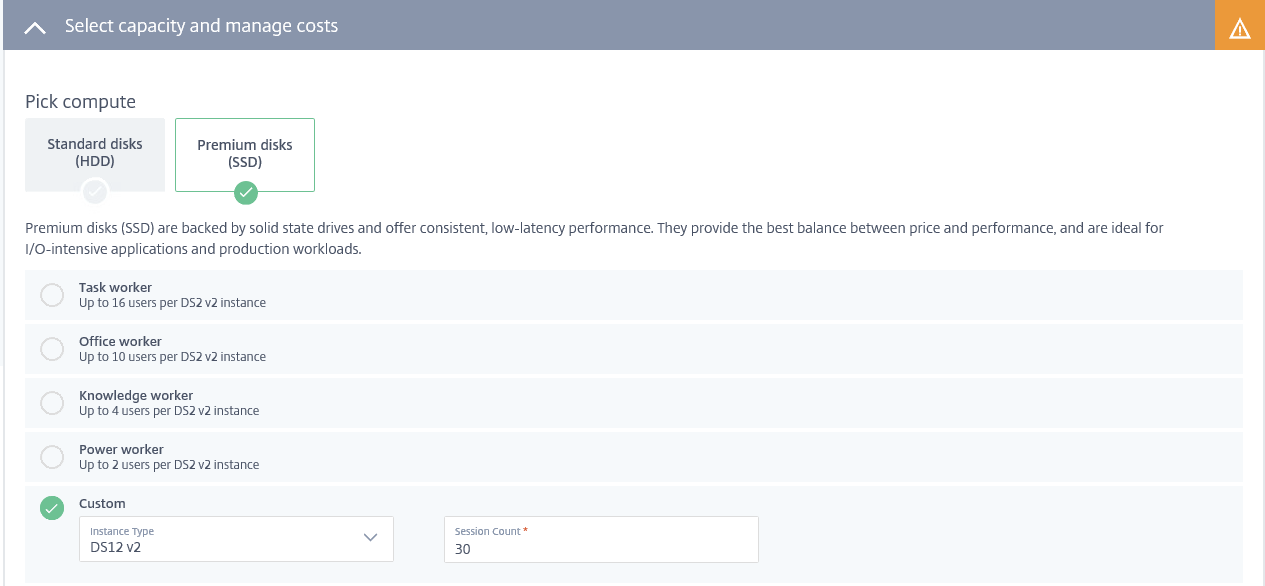
Step 26: Select the storage device, preferred to select – SSD – and the custom – DS12v2 – Virtual machine size.
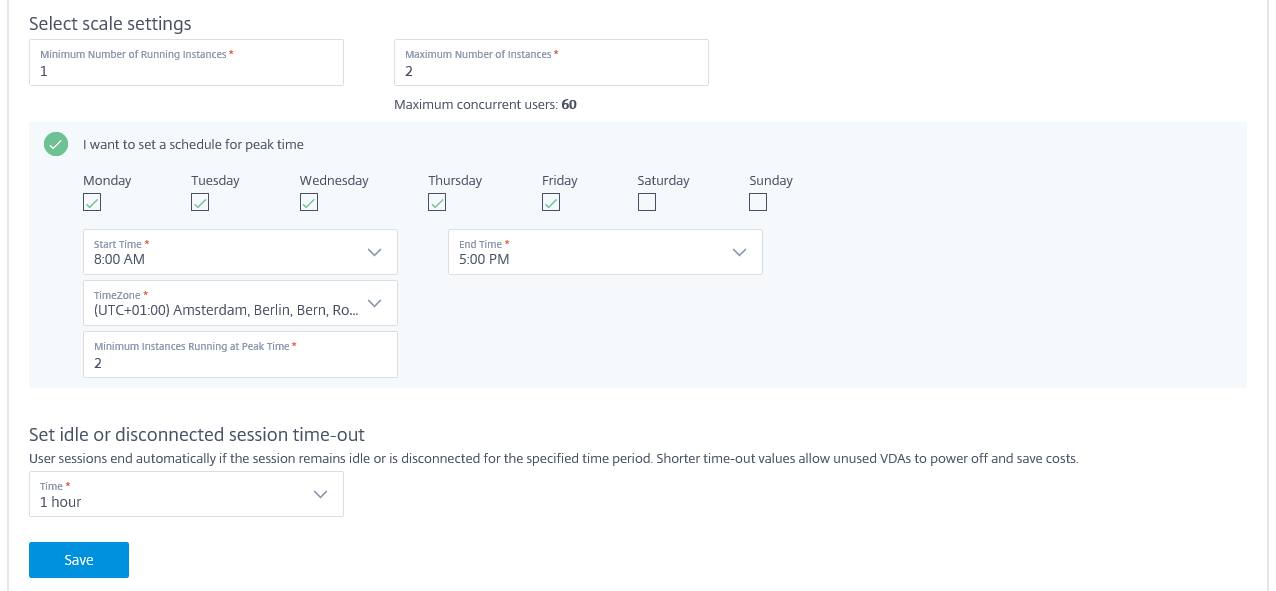
Scale your environment to save costs using Smart Scale
Step 27: This option is useful to save money – select a time schedule to scale up the environment – after the working hours – the environment will be scale down automatic to save resource costs.
Change the option – Set idle or disconnected session time-out – to one that fits your needs. Click on Save to confirm
Note: As mentioned in the beginning of this article – this is a pre-build Smart Tools: Smart Scale service, that is optimized for the Essentials service!
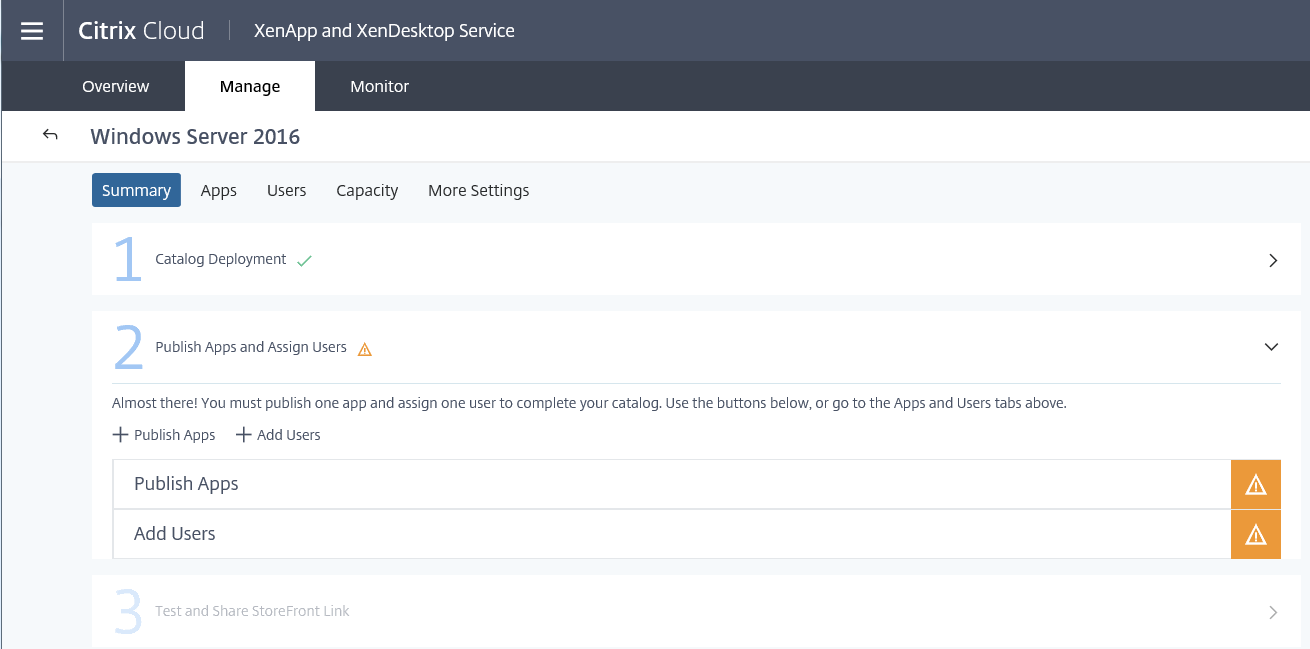
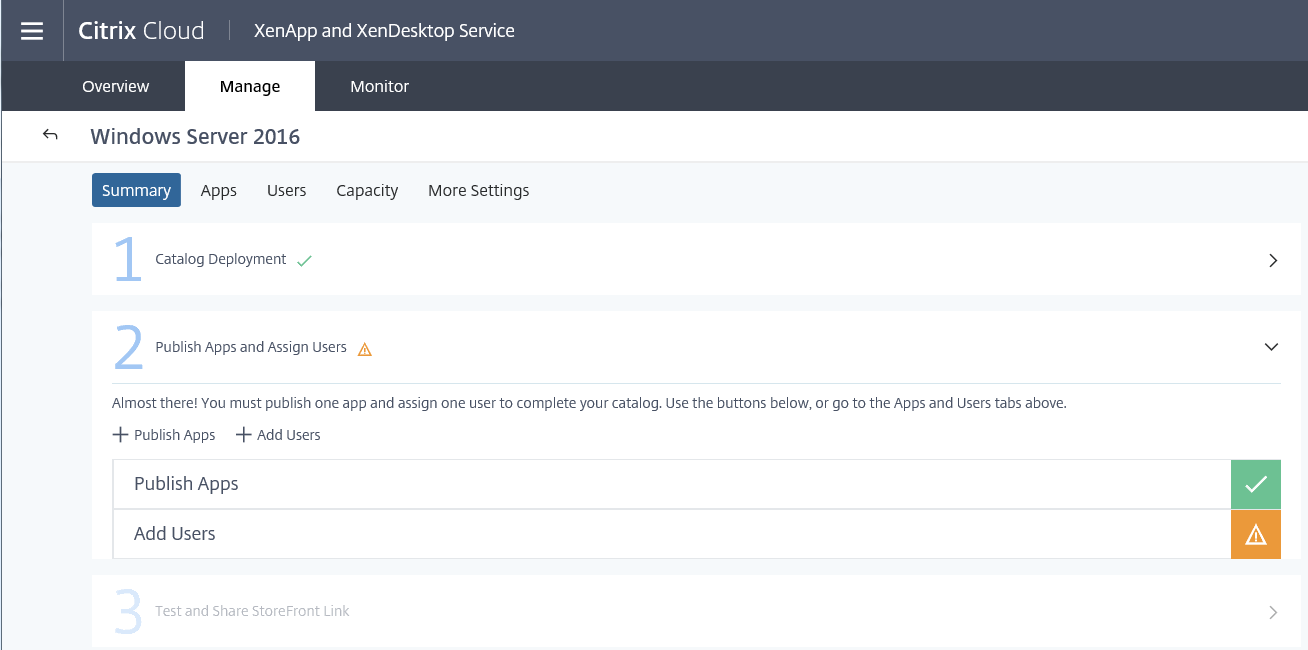
Confirm if all the steps are checked in green – Click on the – Start Deployment– button
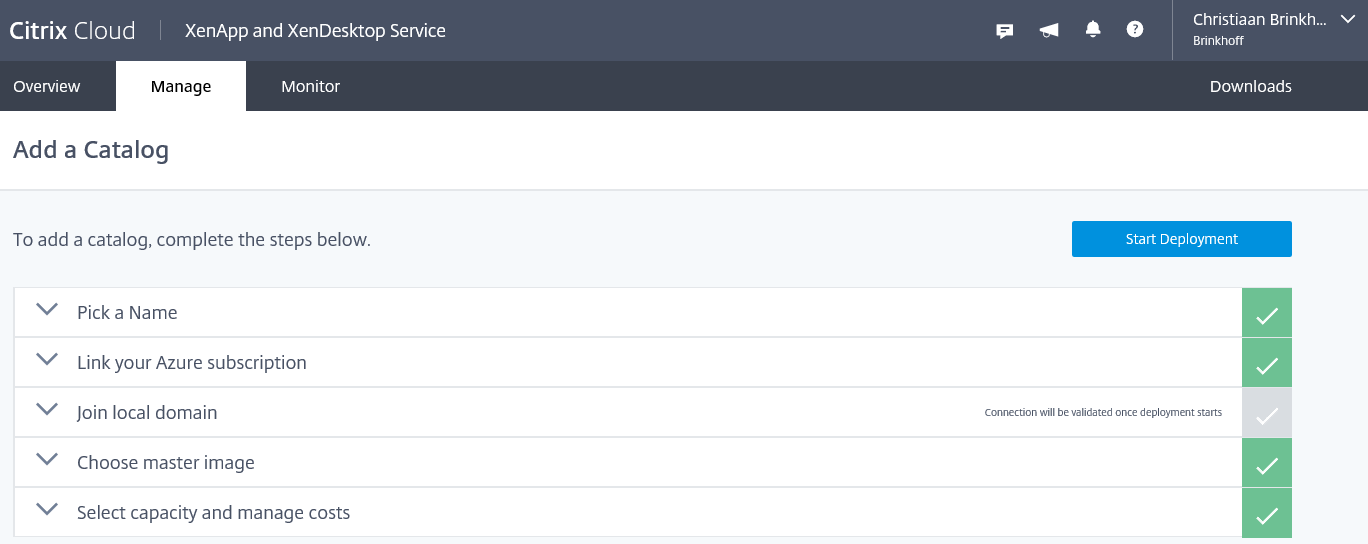
The deployment of the – Machine Catalog – is started
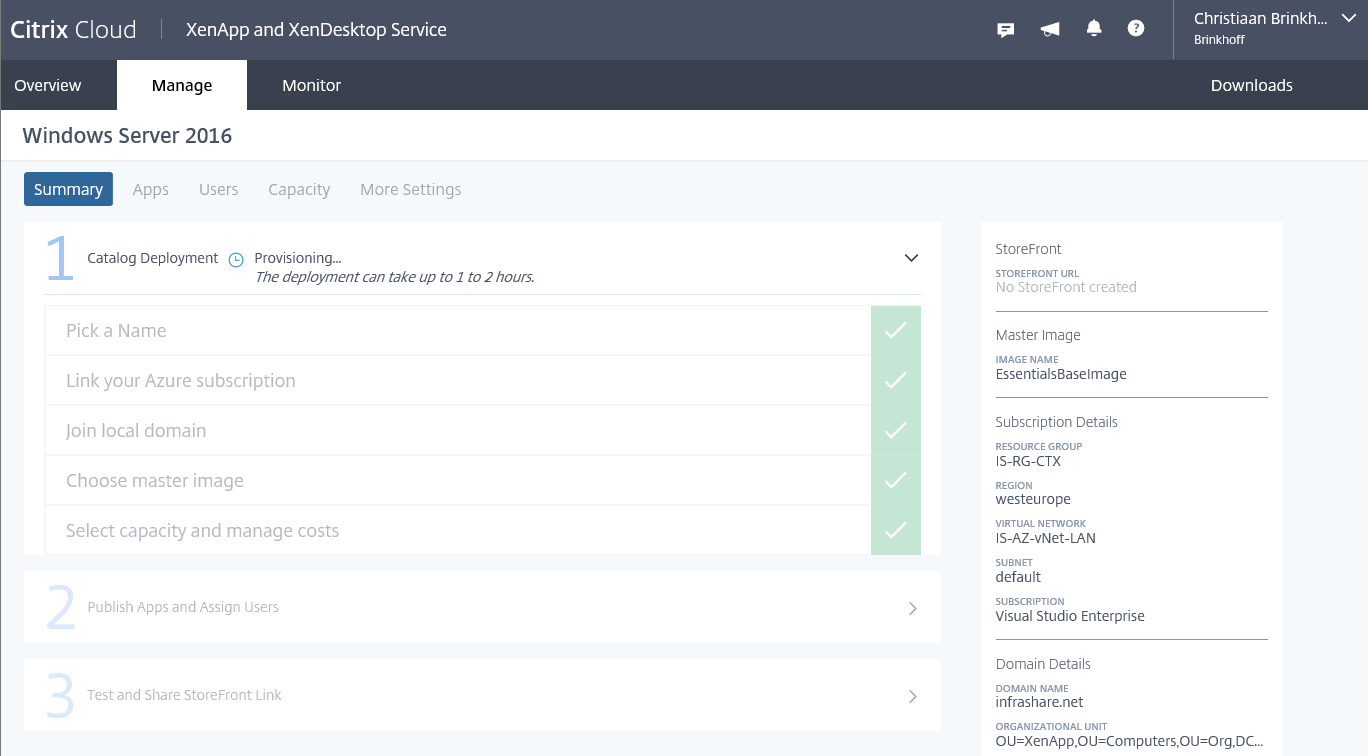
The process can take up to 2 hours, please wait and be patient

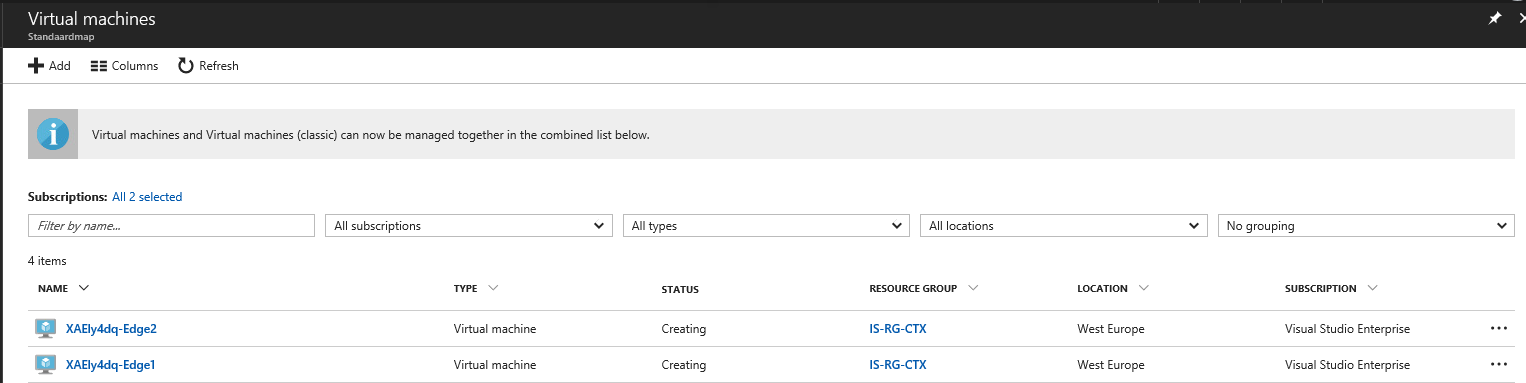
During the process, you can see the Machine Creation Services – process on the Virtual Machines option in the Azure portal
Step 28: Switch back to the Citrix Cloud and click on the + Publish Apps button
Step 29: Click on – Select App – and the discovery based on the Menu start shortcut will start

Step 30: Select all the Applications that you want to publish , they all have to be listed in the console with the status Published. Click on the cross to close the window
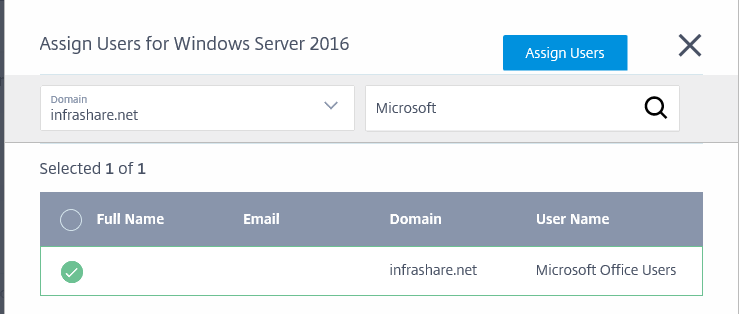
Step 31: A green checkmark must now be visible next to published apps. Now we need to filter the apps to users or groups, to providing this, click on the – + Add Users– button
Step 32: Select the correct domain – Enter in an Active Directory Group . I created the Microsoft Office Users group. Select the Group and click on – Assign Users
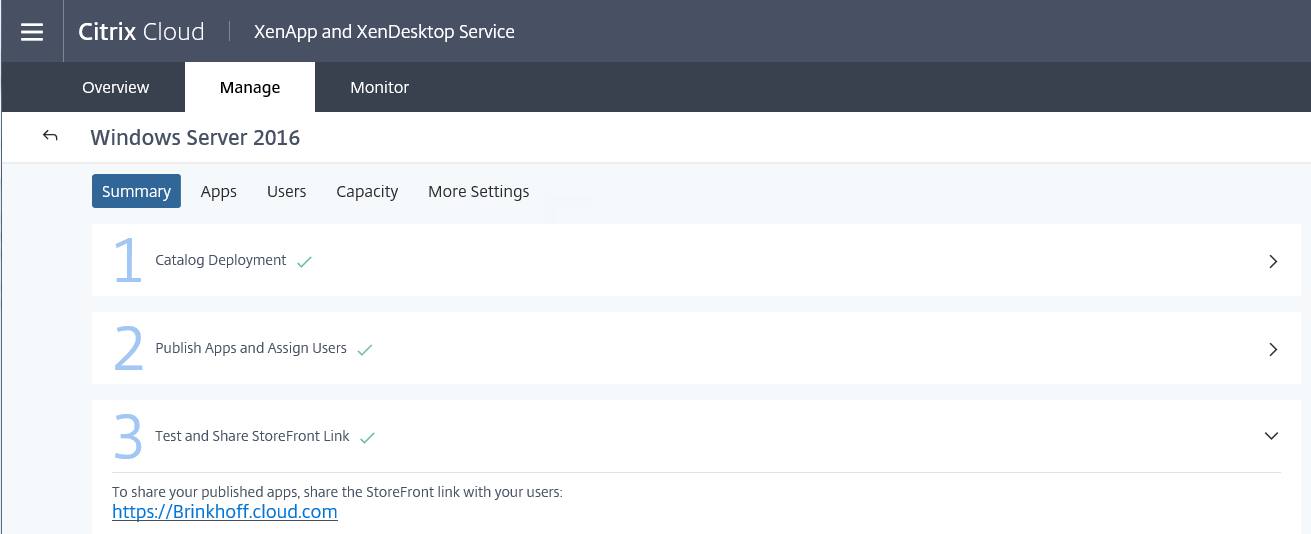
Step 33: The initial steps are finished, we can now start testing.
Setup Citrix Profile Management
Step 34: In Citrix Cloud, click the Manage tab

Click the – name – of the catalog

Click – More Settings
In – Set up Profile Management – in Azure subscription, enter the path to the profile share. For example, enter \\is-ad01\profiles$\#sAMAccountName# – Click Save
Go fully on Cloud? Then place the profiles on the – Microsoft Azure Storage Spaces Direct– service. A simple way to provide a redundant clustered fileserver environment for your Citrix profile in Azure.
I recommend the following article configuring this: http://www.diyar.online/2017/06/configure-citrix-cloud-user-profiles-on-microsoft-azure-s2d/

UPM will be activated on the background
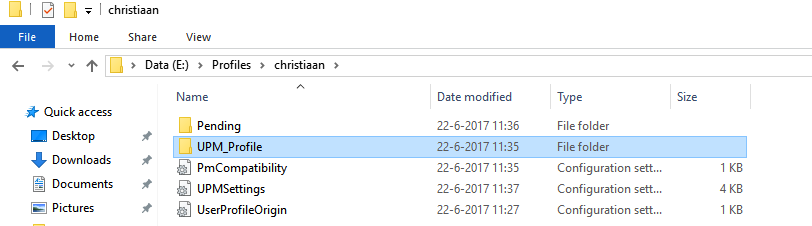
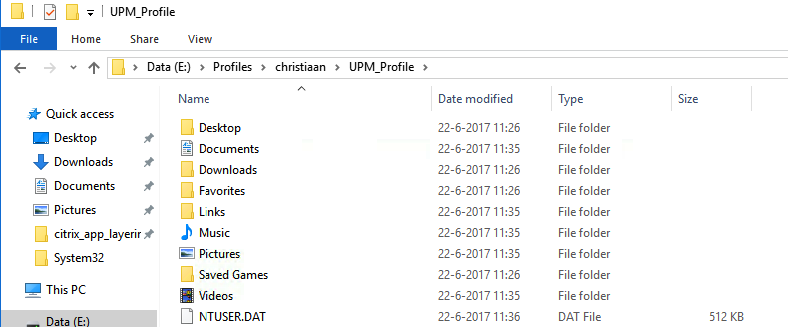
The following folders will be included in the profile.
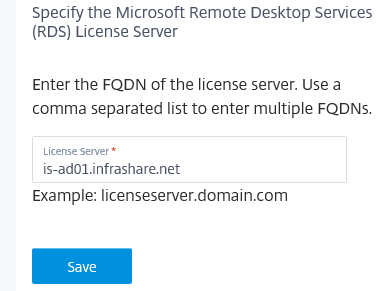
Configure the Microsoft RDS License Server
The Citrix XenApp Essentials offering accesses Windows Server remote session capabilities that would typically require a Remote Desktop Services client access license (RDS CAL). The Virtual Delivery Agent machines (app workload VMs) should be able to contact a Remote Desktop license server to request RDS CALs.
Note: You are required to install and activate the license server. For POC environments, you can leverage the grace period provided by Microsoft.
Step 35: In – Specify the Microsoft Remote Desktop Services (RDS) License Server – configure the FQDN of your RDS license server. Click on Save
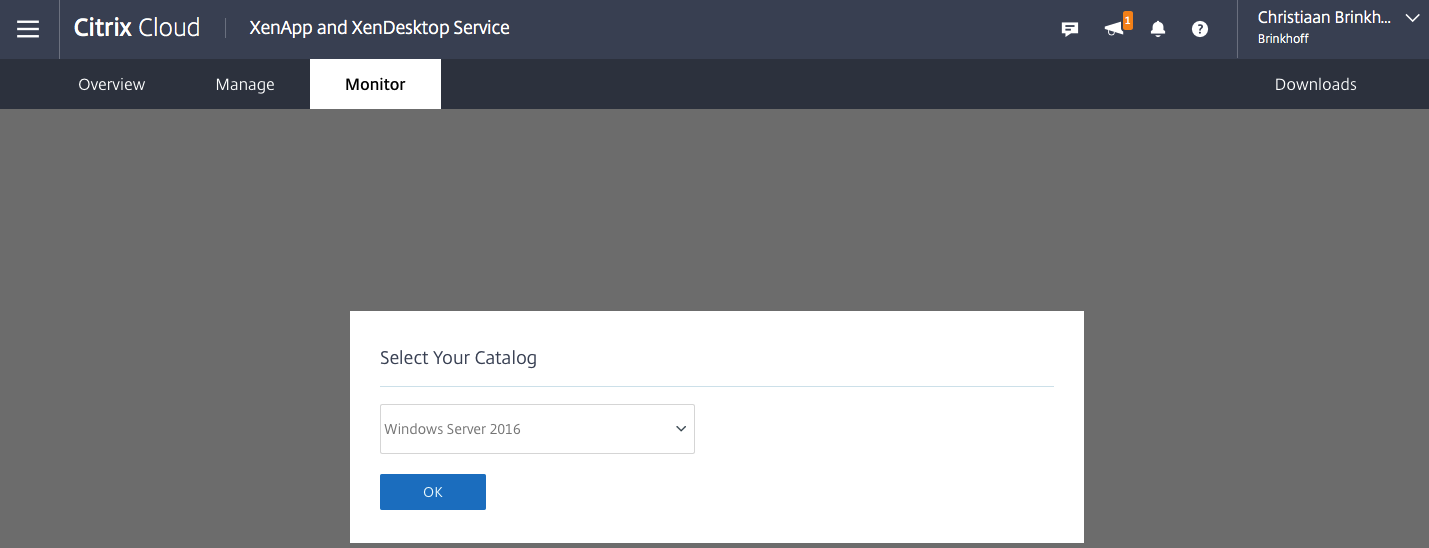
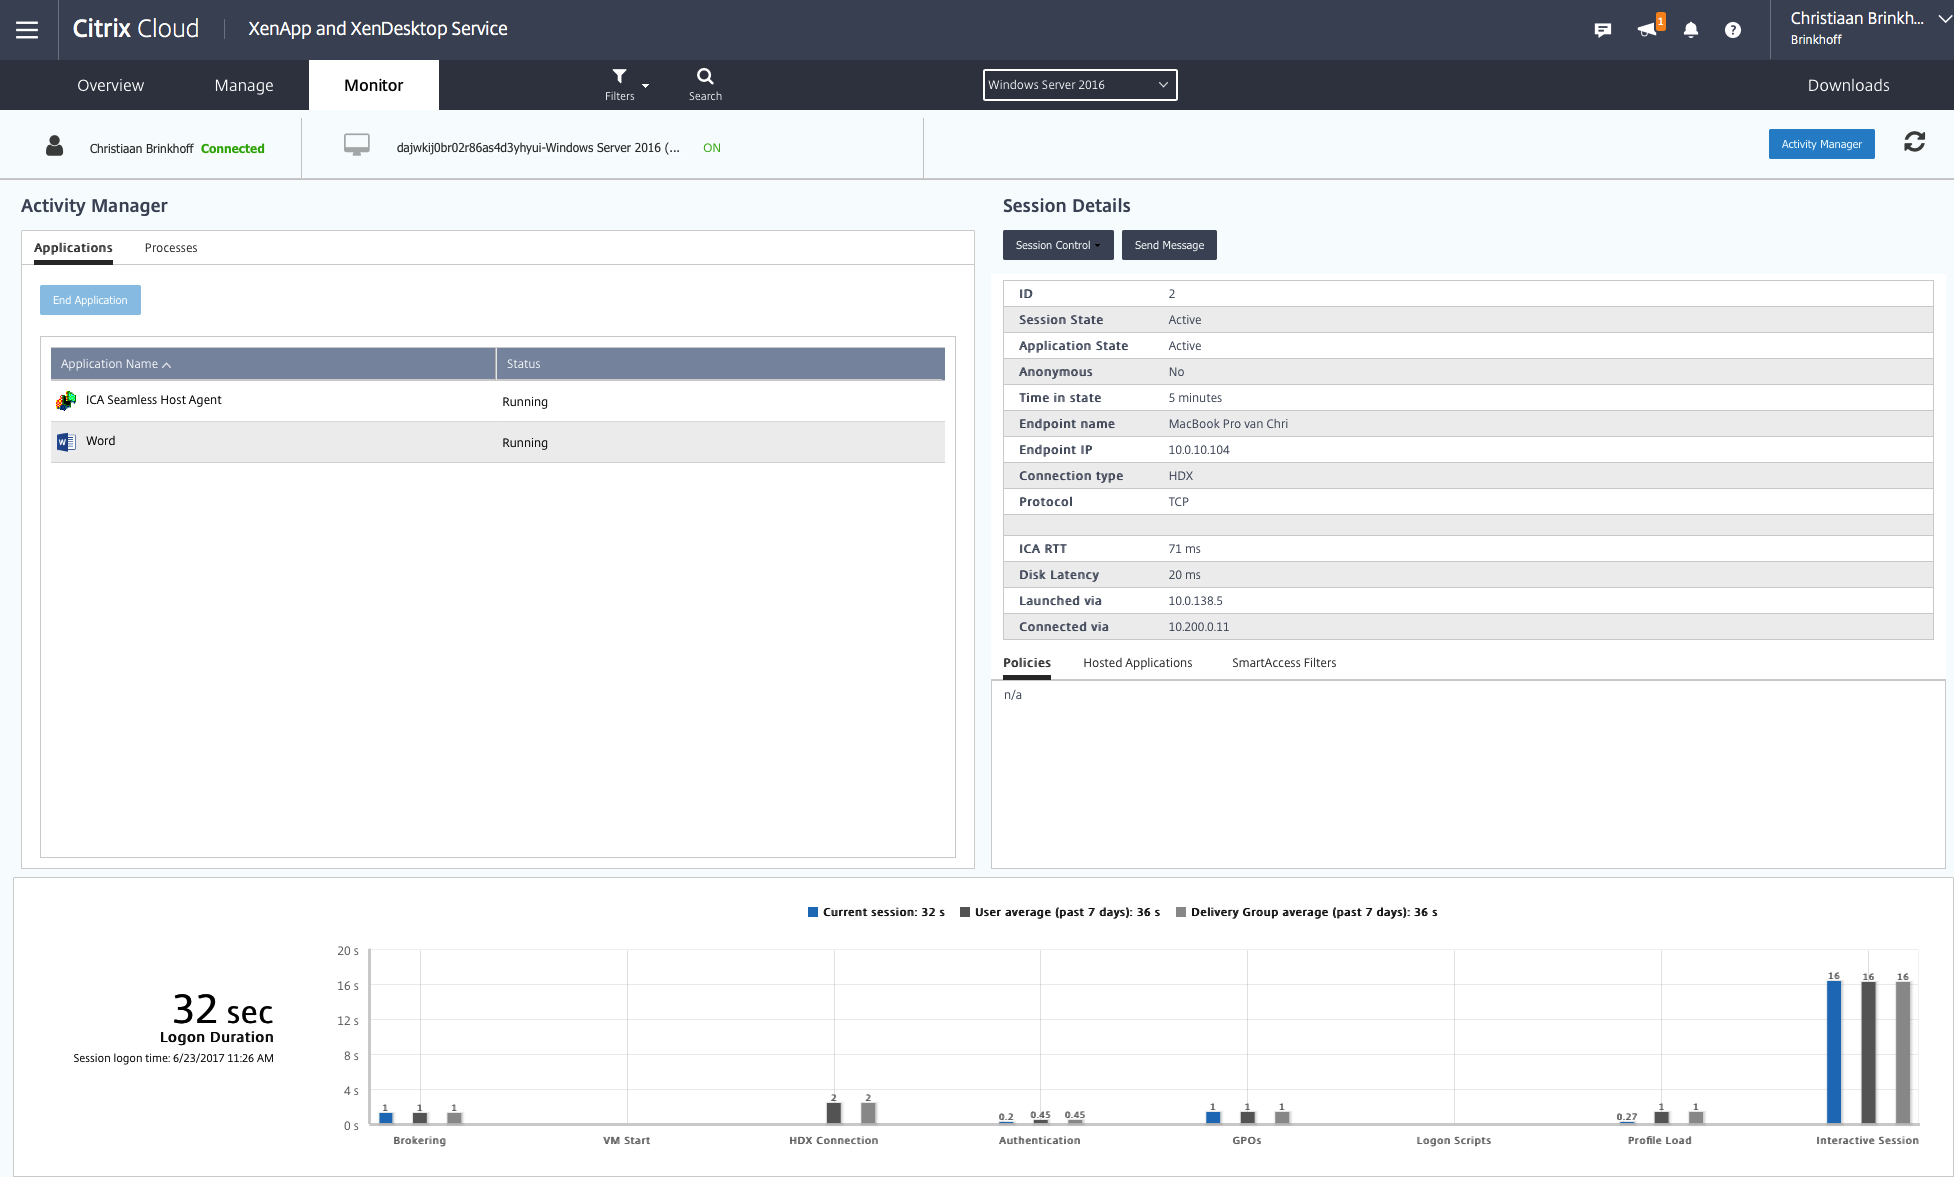
Monitor XenApp Essentials through the (online) Director
Step 36: Open the – Monitor – menu and Select your Catalog, click on Ok
Click on the user that you need to check/monitor
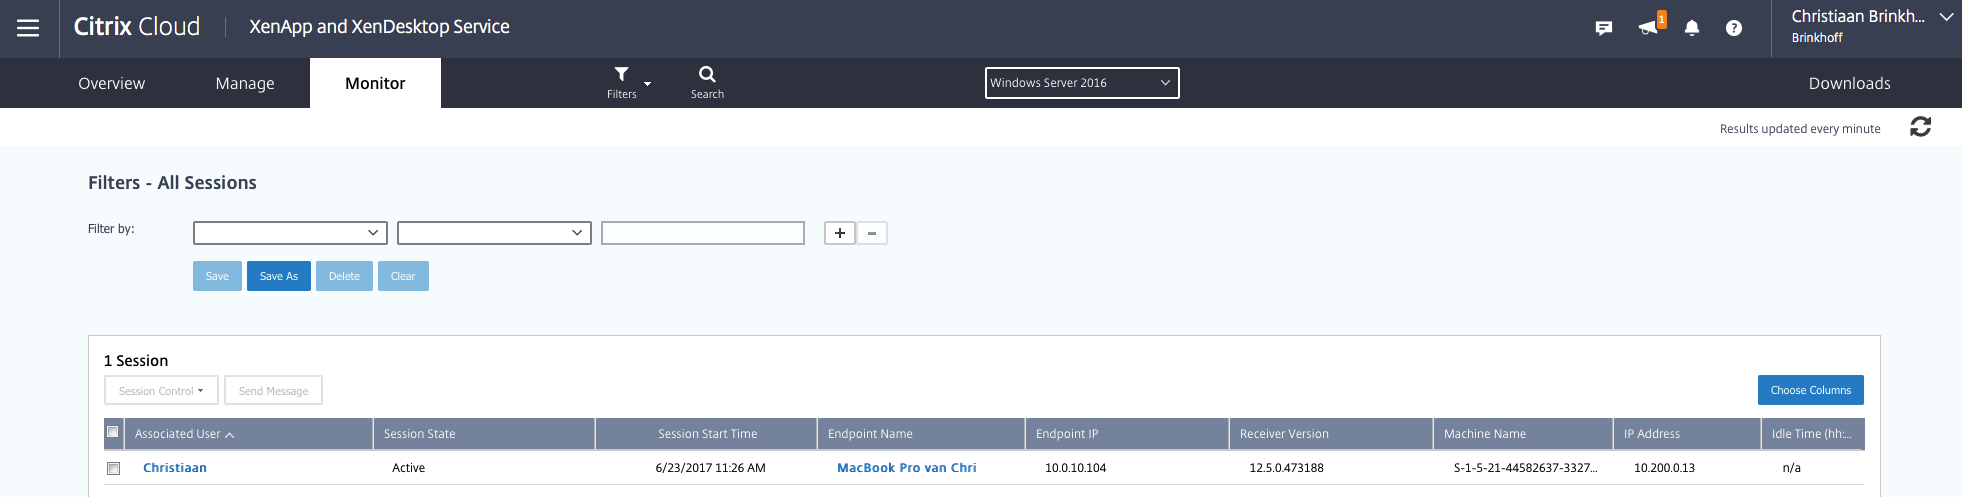
See all the information of the user session, almost just the same as the on-premises Director
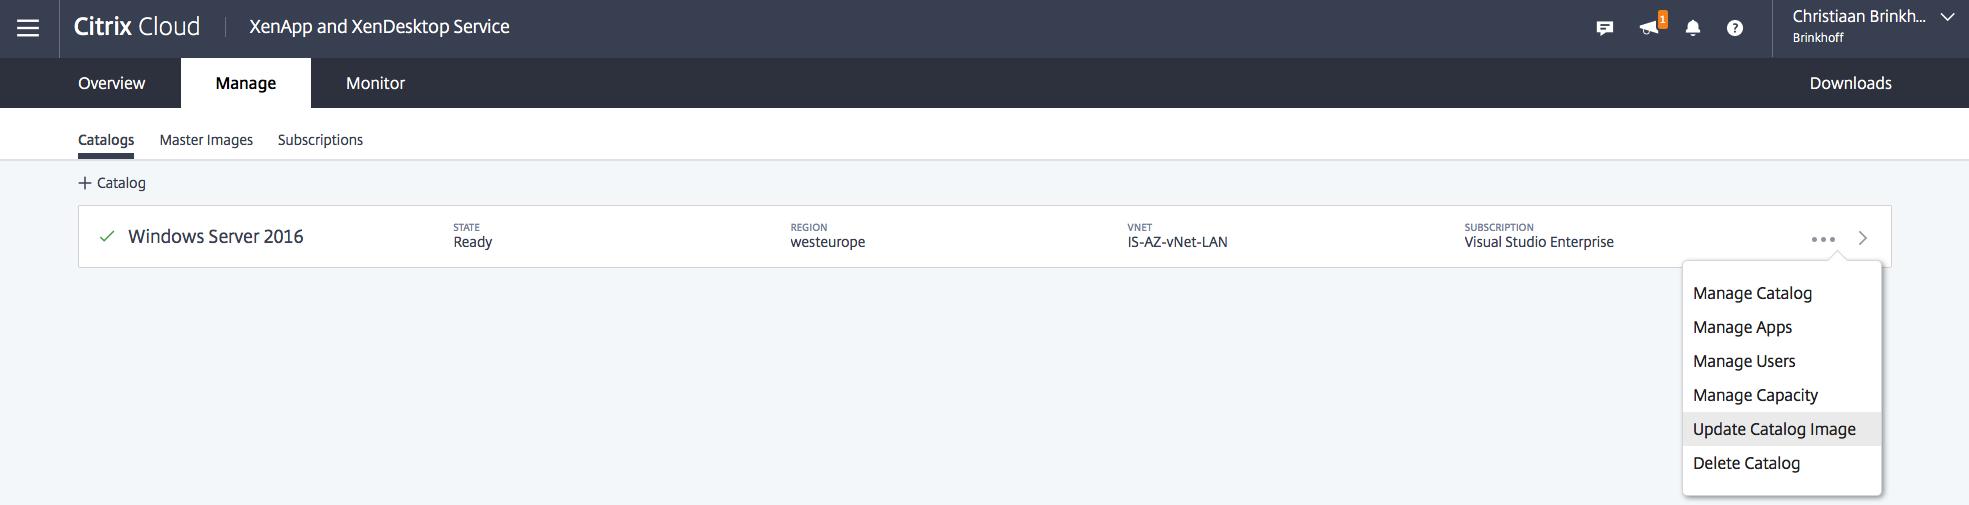
How to perform an image update
Step 37: Start the earlier created base image in Azure and perform all the update / installation actions that you need. Turn-off the Virtual Machine when finished and wait till the machine is on the status Stopped (deallocated).

Step 38: Open the – Manage – and – Catalogs – menu and click on the 3 points on the right, choose for Update Catalog Image
Step 39: Select the – Import a new image – option and select the same Azure information of the Virtual Machine in step 25
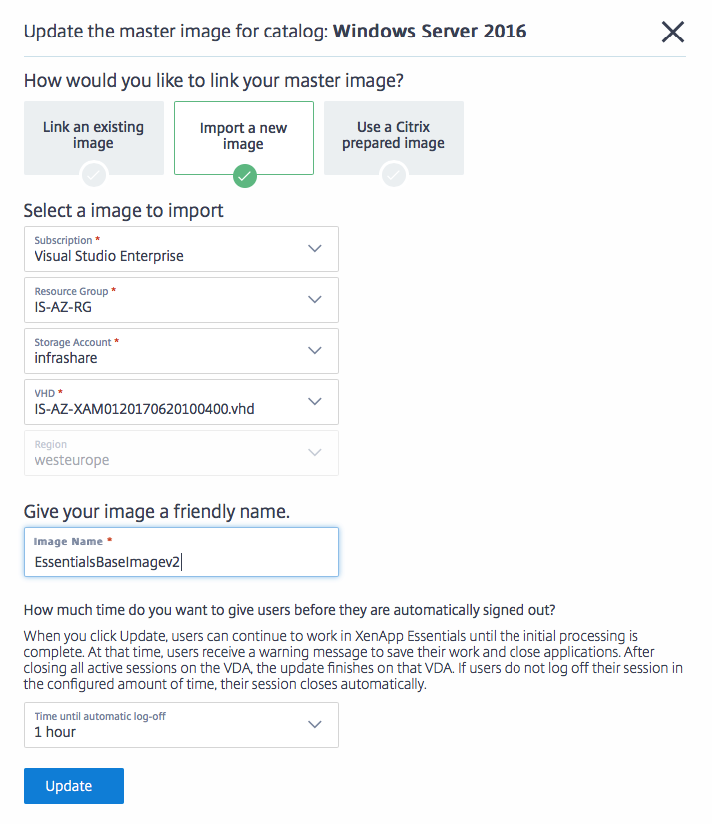
The new master image will now be created and applied in 1 hour, regarding the setting: Time until automatic log-off

Final step, image is being applied to VMs

Test the XenApp Essentials environment
Enter in your StoreFront link and check if it’s possible to logon
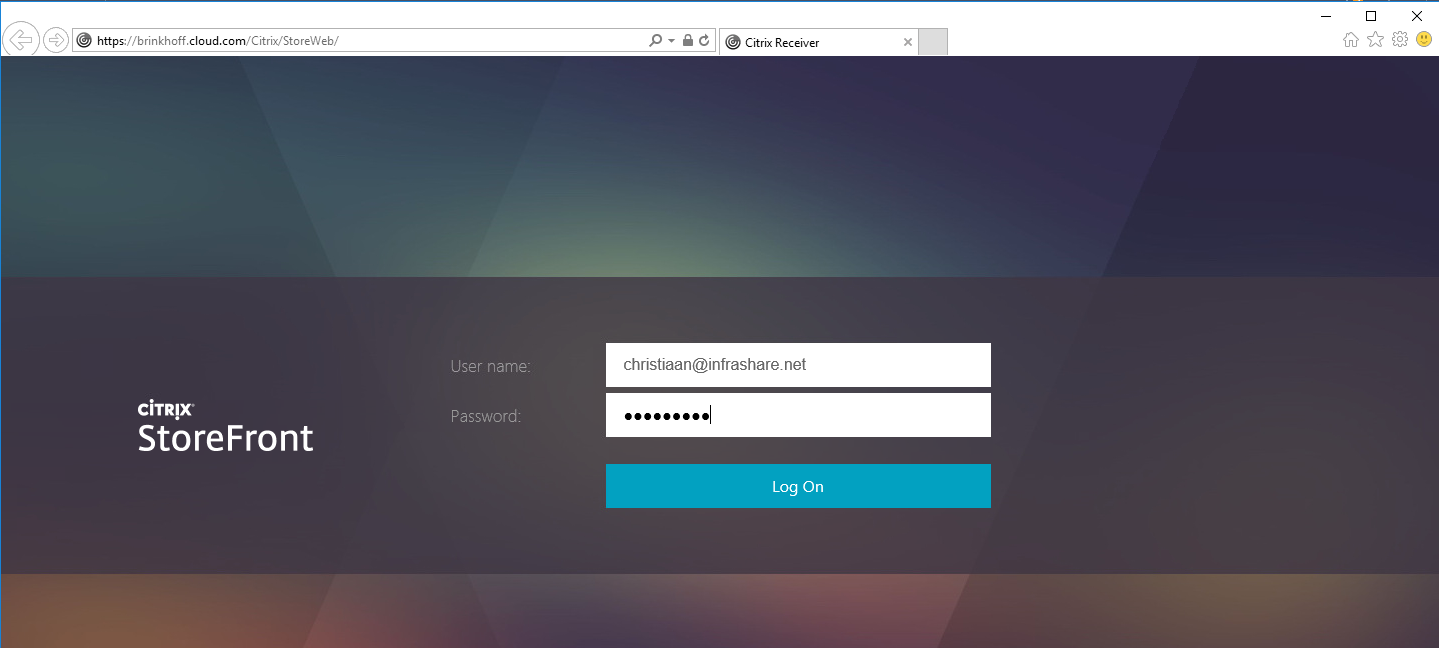
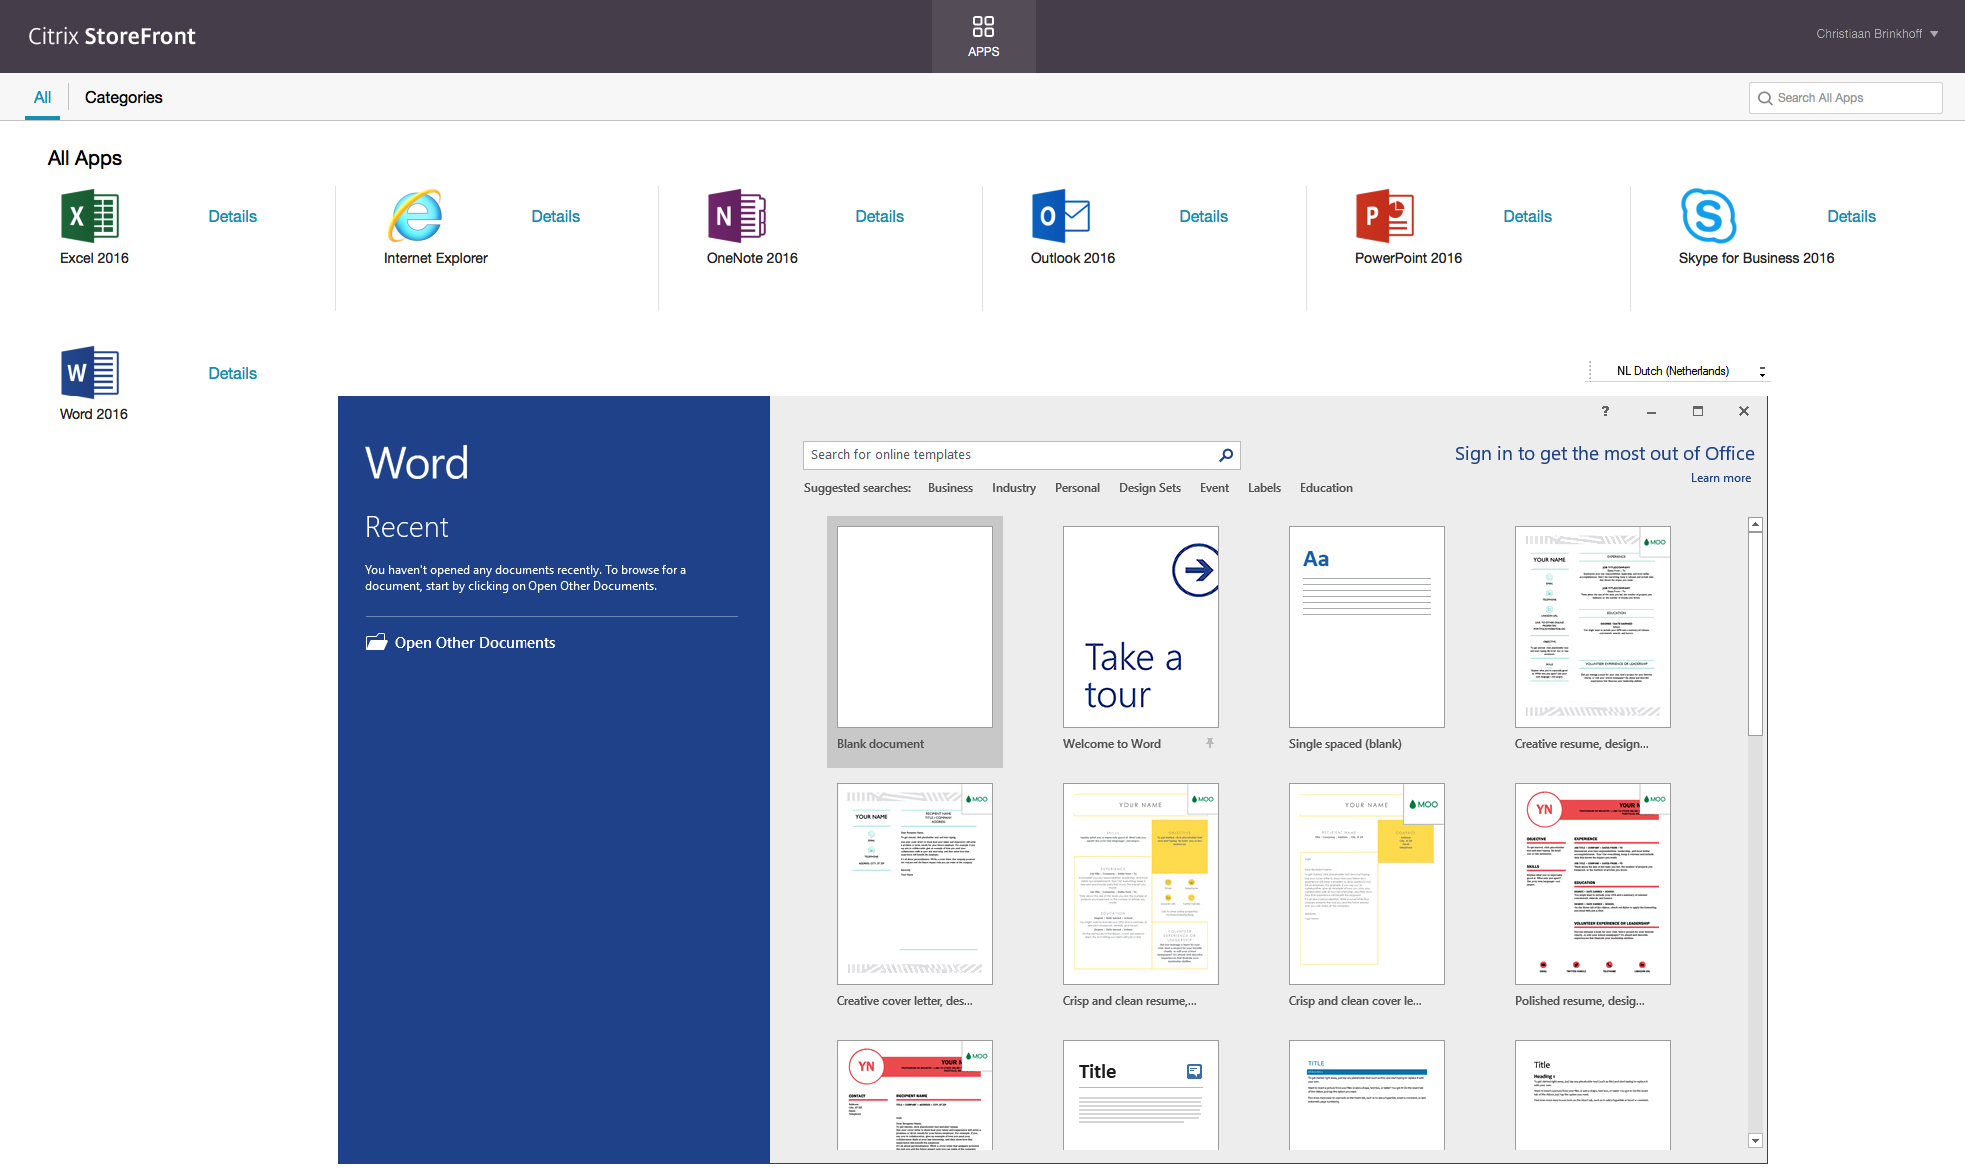
The logon process works properly, let’s start the Published Application: Microsoft Word

And the test is passed, Microsoft Word is started!
Note: It is a requirement that you have an Azure Active Directory environment pre-installed to perform the next steps.
Step 40: Open the – Identity and Access Management – option in the hamburger menu

Step 41: Click on the – Connect – button next to Azure Active Directory

Step 42: Enter in an Administrator Sign in URL, such as infrashareAAD. This can be a random name, and can be used later on to connect directly to the Citrix Cloud logon page. Click on Connect to continue 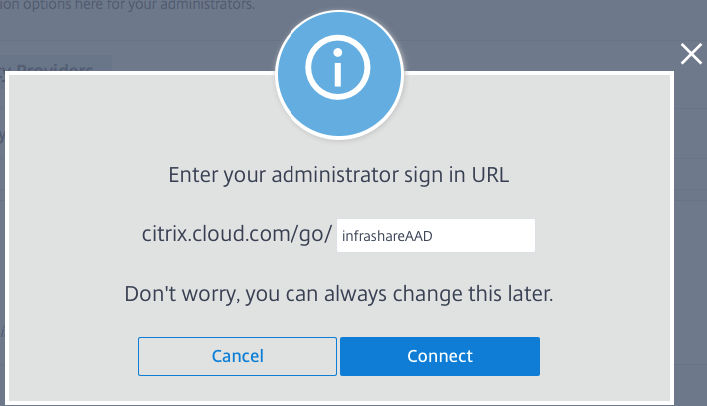
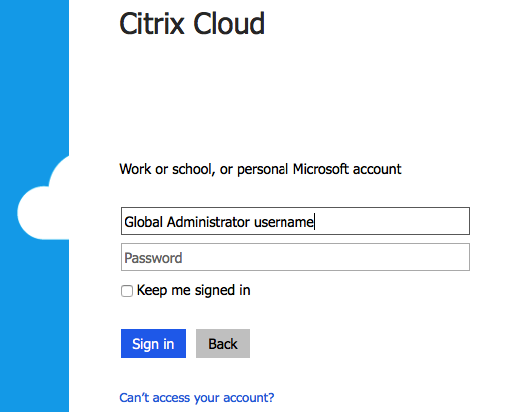
Step 43: Enter in the Global Administrator username and password of your Azure Active Directory environment. Click on Sign in
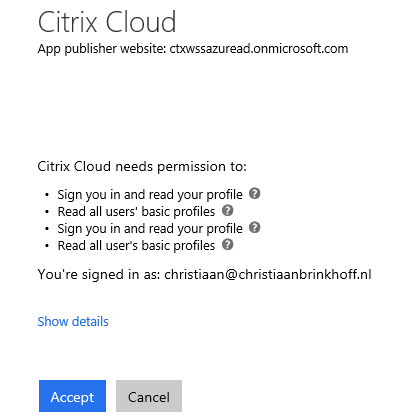
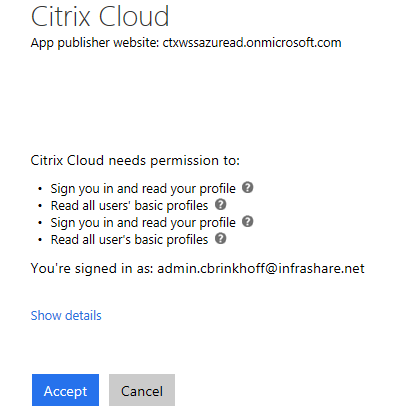
Accept the request for permissions.
Please verify if your Azure Active Directory name is now listed in the – My Company Identity Providers – list. If so, then the domain connection is finished correctly.
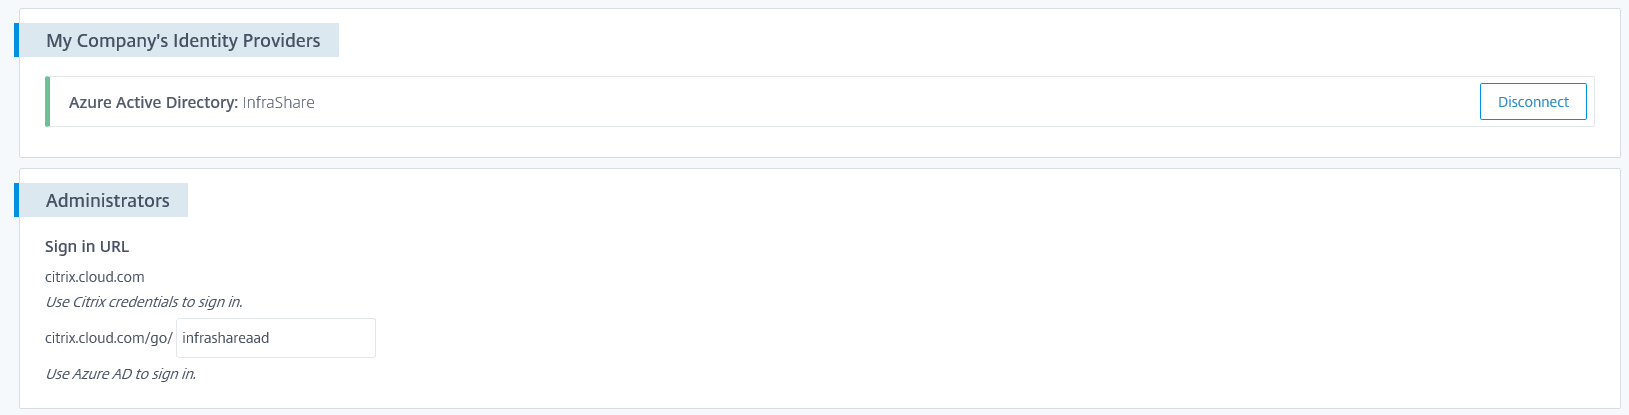
Step: In the menu, click on the – Administrators – option and select the Azure AD domain in the – Add administrators form – list.
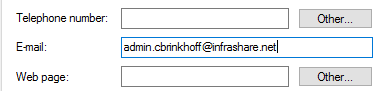
Note: Make sure that all your users in AzureAD have an emailaddress configured, this is a required AD field that needs to be filled. After adding a AzureAD user to the Citrix Cloud, a inventation email is sended based on this email, this is the reason why it’s required.

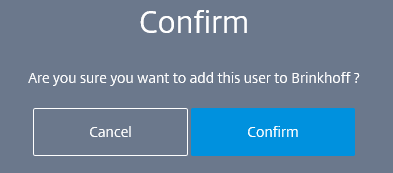
Step: Search for a Groups and/or user(s) that needs to get the privilege to logon to the Citrix Cloud and click on Invite

Confirm the invitation
An invitation will be send to the users email-address. Open the email and activate the account. The Azure Active Directory user is now able to logon to your Citrix Cloud environment.

The default rights are Full, what contains all rights in the environment.
You can change the rights to custom access, by clicking on the 3 point next to the just added username

The custom access provides 4 different – General Management – methods to apply to users

There are 2 methods to enter Citrix Cloud through your AzureAD credentials.
Method 1:
Enter in https://citrix.cloud.com and click on – Sign in with my company credentials

Enter the name you entered 5 steps earlier

Enter in the AzureAD logon credentials
Method 2:
Enter in the direct address in your internet browser
https://citrix.cloud.com/go/infrashareAAD
Enter in the AzureAD logon credentials

Make sure you accept the – App publisher website – request
You are now able to logon to the Citrix Cloud using your AzureAD Credentials!
NEWS! Azure Active Directory Support for XenApp Essentials
With this new solution, you can provide the following options to XenApp Essentials in Microsoft Azure. Just see it as “only” the authentication part of this article. With this article you cover both so you’d don’t need to configure this option in the Citrix Cloud.
- Setup the XenApp Essentials service to communicate with your Azure AD
- Configure your users’ XenApp Essentials workspace portal to enable users to authenticate against your Azure AD
Note: The virtual machines hosting your applications still need to be domain joined, either Active Directory or Azure Active Domain Services (AADDS), which I describe in this article.
Read the complete Citrix Blogs article about Azure AD Authentication here.
