
Configure the Enlightened Data Transport UDP Protocol (EDT) when using the Citrix Cloud Virtual Apps and Desktops – XenApp and XenDesktop Service with the VDA and NetScaler placed in the Microsoft Azure Cloud


Citrix did some great innovations on their product line throughout last the 2 years. One of them was the release of the Enlightened Data Transport Protocol. I’d always thought to write an article on this specific topic, but it actually never came to writing, that’s gonna change today…
“Citrix sessions over 200ms latency long-haul WAN connections? Citrix takes care of that…”
With Citrix solutions it was already possible to connect to your desktop from everywhere around the globe. Therefore, now with the EDT activated it even optimizes the connection for the short and longer distance datacenter connections. The future of work is not a place, but rather a thing you do. The Digital Workspace of the future will mostly be build-up in a Public Cloud, such as Microsoft Azure. So, the distance between an Azure datacenter location and the end-user is something you need to take care of – proactively – when you design a new Citrix (hybrid) Cloud environment.
There is a gap in documentation on this product that I’d like to fill in with this blog article. I’ll hope you’ll understand the EDT protocol more and will be using it as default for your XenApp and XenDesktop – whether its a Cloud or on-premise – implementation in the near future! I’m excited about the technology, so I’ll hope I transferred a bit of my enthusiasm to you…
See the following architecture drawing – How it technically works from the end-user to Azure:

In this article, I’ll walk you through the required steps for configuring EDT for your Citrix XenApp and XenDesktop Cloud Service environment in Microsoft Azure.
Note: The EDT protocol is currently only available when u use a Bring-Your-Own NetScaler in combination with XenApp and XenDesktop Service in Citrix Cloud or On-premise versions. EDT support for the Citrix Workspace in Citrix Cloud is following soon, very soon…
Enjoy reading!
Table of contents
Click on the title to get forwarded in the article.
- Deploy the Cloud Connector(s) inside Microsoft Azure
- NetScaler – Azure NSG Network Requirements
- Deploy the Citrix NetScaler from the Azure marketplace
- Perform a Citrix UDP – EDT ICA session
- EDT Demo – see it yourself
- Troubleshooting
More on Digital Workspaces in Azure?
This blog is part of a Citrix Cloud blog series about the different Citrix Cloud Digital Workspaces possibilities. Previous articles that I wrote around the Citrix Cloud, that you might find interesting to read:
- How to configure Citrix Cloud – App Layering 4.8 to deliver virtualized apps and Office 365 caching – User Layers for XenApp and XenDesktop Service Cloud Workspaces in Microsoft Azure
- How to configure the Citrix Cloud XenApp and XenDesktop Service using Azure Managed Disks and Citrix Optimizer
- How to configure Citrix XenApp Essentials in Microsoft Azure, including Azure Active Directory authentication to Citrix Cloud
- How to use Citrix Smart Tools – Smart Scale to reduce your XenApp and XenDesktop on Azure Cloud resource costs
- How to configure a Bring-your-Own NetScaler VPX in Azure for XenDesktop Essentials and XenApp and XenDesktop Service from the Citrix Cloud
- How to configure Azure Active Directory Domain Services for Citrix Cloud Workspaces with the lowest Total-Cost-of-Ownership in Azure Infrastructure-as-a-Service
Did you know these facts?
-
- That the internal traffic also performs over the UDP protocol and not only for external sessions?
- Up to 2.5x Interactivity depending on nature of the load and network conditions; Up to 10x faster file transfer.
- The Citrix Workspace and NetScaler-As-a-Service remote access possibility in Citrix Cloud doesn’t support EDT yet, you’ll need to setup an own NetScaler in Azure IaaS to use this feature, when using the Citrix Cloud XenApp and XenDesktop Service.
- Local Host Cache also works when using Citrix Cloud – XenApp and XenDesktop Service?
- Fast connect time: no timeouts when UDP is unavailable before falling back to TCP
- Always use UDP whenever it becomes available: any time in the lifetime of an HDX session. For example, when switching from data plan to WiFi, or between network subnets with different access policies, etc.
- EDT is not designed to necessarily save bandwidth, it’s to optimize the end-user experience for long-distance (Public Cloud) Datacenter connections
- It is not a compression protocol nor a more efficient encoder.
- It just gets the data where it needs to go faster (it’s a transport protocol).
- Might actually use more bandwidth if it is available (but this is good for interactivity and bulk data transfer speed).
- That the internal traffic also performs over the UDP protocol and not only for external sessions?
Differents between UDP and TCP
As you may know, the ICA Protocol is currently (without EDT activated) working on the TCP protocol. Both perform the same job but the way is different. TCP stands for “Transmission Control Protocol”. UDP stands for “User Datagram Protocol.” The main difference between them is that the TCP is connection oriented while UDP is connection-less. In TCP after the connection is setup, bidirectional sending of data is possible but in UDP, packets are sent in v. TCP is more reliable than UDP, but UDP is faster than TCP.
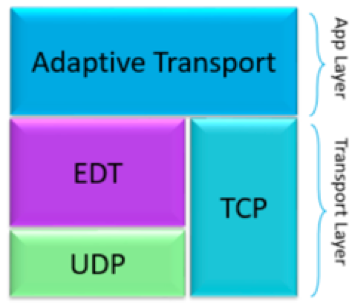
So, what is Enlightened Data Transport Protocol?
Adaptive transport is a new data transport technology for Remote Access to XenApp and XenDesktop environments. It is faster, more scalable, improves application interactivity, and is more interactive on challenging long-haul WAN and internet connections. Adaptive transport maintains high server scalability and efficient use of bandwidth. By using adaptive transport, ICA virtual channels automatically respond to changing network conditions. They intelligently switch the underlying protocol between the new Citrix protocol called Enlightened Data Transport (EDT) and TCP to deliver the best performance. It improves data throughput for all ICA virtual channels including Thinwire display remoting, file transfer (Client Drive Mapping), printing, and multimedia redirection. The same setting is applicable for both LAN and WAN conditions.
When set to Preferred, data transport over EDT is used as primary, with fallback to TCP. By default, adaptive transport is disabled (Off) and TCP is always used. For testing purposes, you can set Diagnostic mode, in which case only EDT is used, and fallback to TCP is disabled.
Note: Using EDT in the Citrix Cloud, or use XenApp or XenDesktop on-premises? The policy will now be set to preferred as default setting. So there is no need to configure this setting manually!
More in-depth info? Please check the following source: https://www.citrix.com/blogs/2017/11/20/hdx-adaptive-transport-and-edt-icas-new-default-transport-protocol-part-ii/

Requirements for EDT
- Citrix Cloud XenApp and XenDesktop Service
- VDA for Desktop OS 7.13 or higher
- VDA for Server OS 7.13 or higher
- StoreFront 3.9 (in Azure) or higher
- Citrix Receiver for Windows 4.7 or higher
- Citrix Receiver for Mac 12.5 or higher
- Citrix Receiver for iOS 7.2 or higher
- IPv4 VDAs only. IPv6 and mixed IPv6 and IPv4 configurations are not supported.
- NetScaler 12 build 55.x is the minimum supported (stable) version in Azure.
Note: Citrix just announced New EDT behavior in XenApp/XenDesktop 7.16 and Q4 Receivers. Please check the following Citrix support article for more information.
Citrix Cloud Connector
I already mentioned it in one of my previous articles, therefore now as extra reminder – keep in mind that you’ll need to configure the NetScaler STA (Secure Ticket Authority) to the Citrix Cloud Connectors FQDN address over port 80.

Citrix Cloud Connector – Local Host Cache
Some of the great advancements of the Cloud, where most of the people are not aware of when thinking about the Cloud – which are already part of the local advantages – such as Local Host Cache. Are also available when using Citrix Cloud – XenApp and XenDesktop Service. The technology works the same as the on-premise FMA 7.x version of XenApp and XenDesktop, so you’ll find the same Config Sync and High Availability service from the Desktop Broker on the Citrix Cloud Connector services console.
Always install 2 or more Citrix Cloud Connectors in Microsoft Azure and place them in the same Availability Set, including 2 fault and 2 update domains! Citrix just made a comprehensive whitepaper article free available on Citrix Cloud Connector sizing and best practices. Please check it out here, when you need more information about this.
Note: It is required to have a StoreFront and NetScaler installed in Microsoft Azure Infrastructure-As-a-Service. When the connection breaks to Citrix Cloud, the Citrix Workspace/Hosted StoreFront will (obviously) not respond.
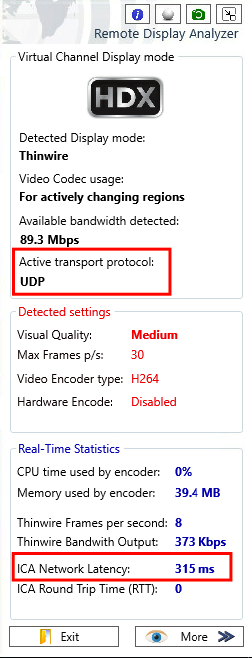
Analysing Desktop Protocols
When you work with Virtual Desktop environments, such as Citrix XenApp and XenDesktop or VMware Horizon, and always want the best user experience for the end-user. You definitely (if you haven’t got this tool in your IT Professional toolbox already) need to check out the Remote Display Analyzer tool. Bram Wolfs (Citrix CTA) and Barry Schiffer (Citrix CTP) are the great creators of this tool, and what is more awesome, it’s free available for the community!
It also supports active transport protocol detection, which is very useful for this article. The tool pops up in the Virtual Desktop environment during a session, see the picture below as example. Another awesome new feature since release 2.0 is the support for basic GPU information with extended functionality for Nvidia vGPU cards.
Interested in the software or want to know more? Please check it over here.
Networking requirements in Azure
The following network ports needs to be opened on the internal Azure Virtual Network and on the external Network Security Group, which’ll need to be attached to the NetScaler(s) in Microsoft Azure. Those rules need to be attached to the XenApp and XenDesktop servers, StoreFront server(s) and NetScaler(s) to communicate to the back-end.
TCP and UDP SSL port 443 is only required for the outside to the NetScaler VIPs. The UDP magic all happens inside the virtual network.
Inbound rules

outbound rules

inbound rules NetScaler

Extra: Add HTTP port 80 if you want to provide http -> https redirection for your end users.
![]()
Deploy the Cloud Connector(s) inside Microsoft Azure
Before we start with the installation of the Citrix Cloud Connectors, we need to deploy 1 or 2 (recommended) basic VM’s in Microsoft Azure.
Note: I assume that u already have an Azure account and have a Virtual Network, storage account and (optional) a resource group. This is required for all the upcoming steps in Microsoft Azure!
Just logon into your Azure account and deploy a Windows Server 2016 machine from the marketplace. Follow the next steps…
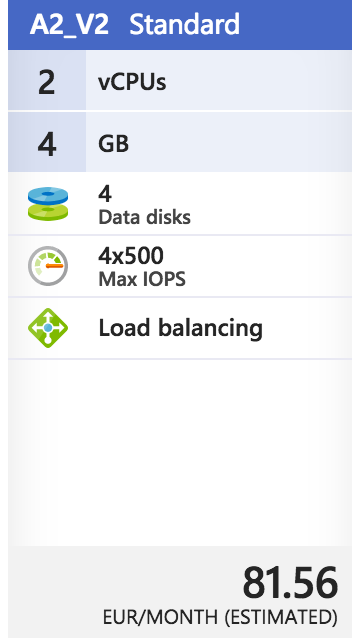
Note: There is no need for SSD premium storage for this type of machine. Just to save out costs, make use of a Basic Resource size, such as A2_v2.
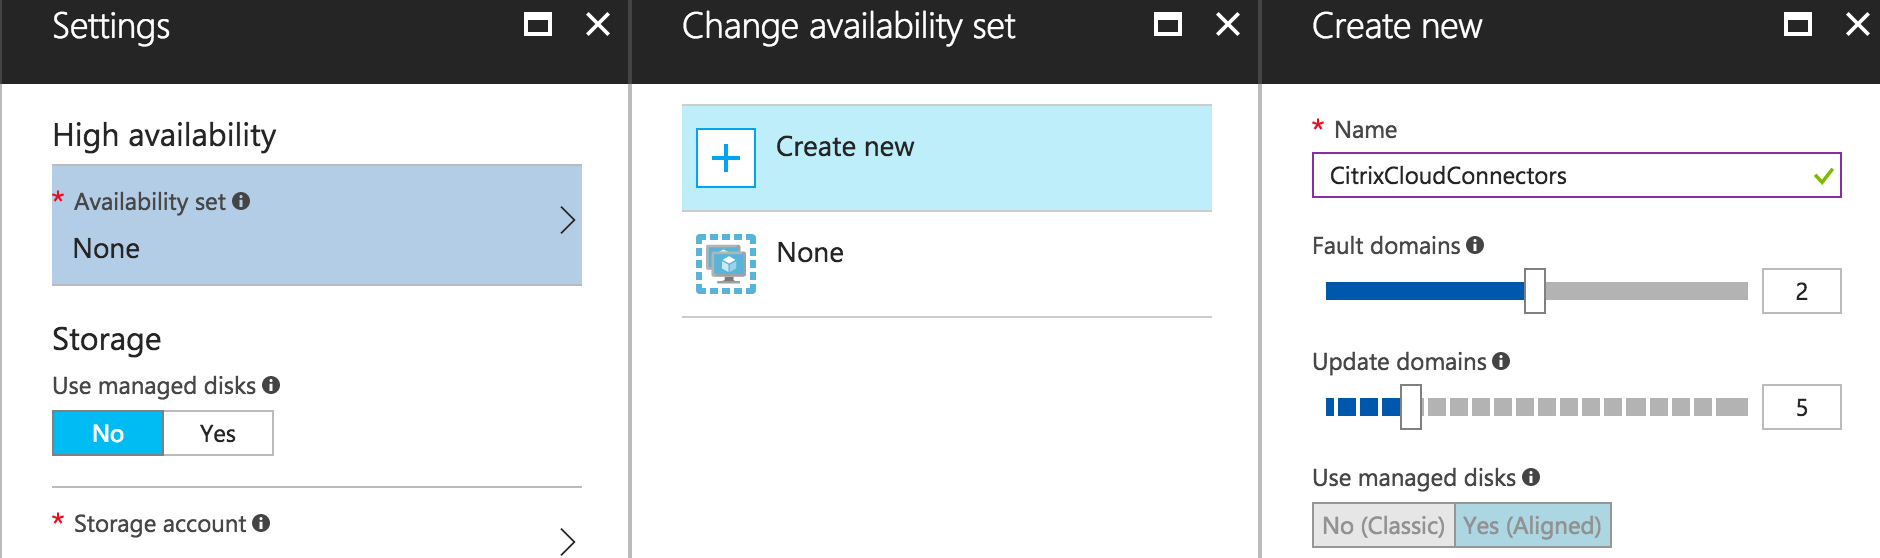
Note: Make sure to place (when u install 2) the Citrix Cloud servers in the same Availability Set. Finish the deployment in Azure, join the Citrix Cloud Servers to the domain and go to the next step
Note: Make sure to disable IE Enhanced Security Configuration before you start the cwconnector.exe installation

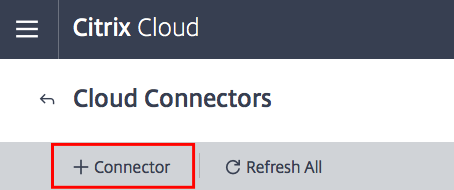
Switch back to the Citrix Cloud and click on + Connector to download the Citrix Cloud Connector(s).
Click on download and save the file (cwcconnector.exe) somewhere on the Citrix Cloud servers in Azure, the installation needs (of course) to be run from inside that machine.

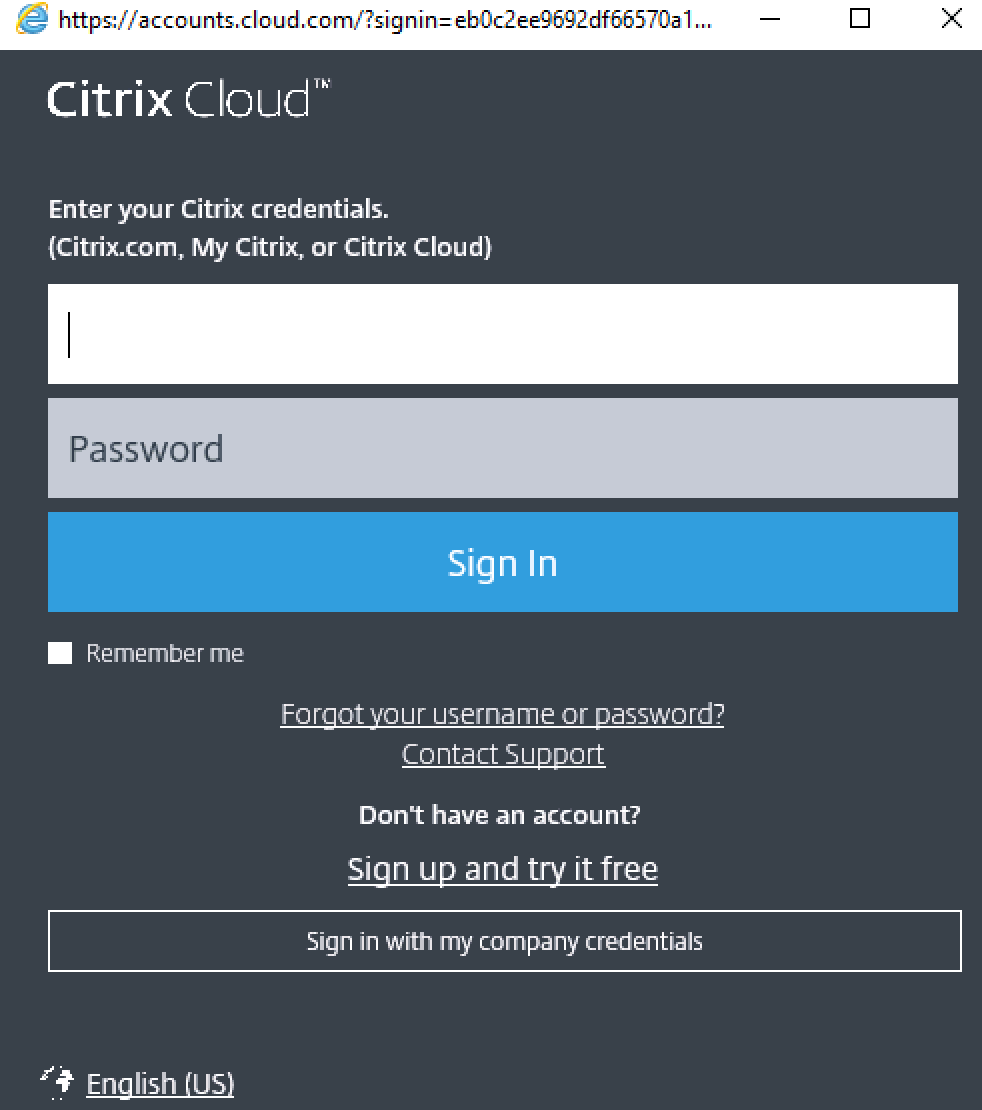
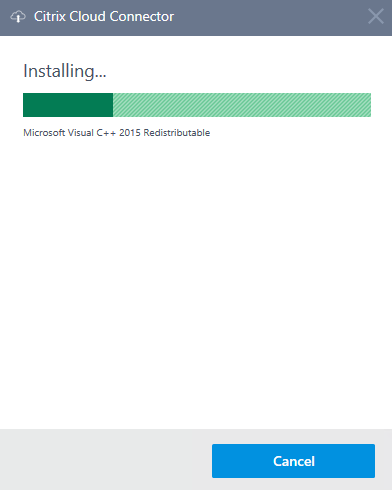
Install the Citrix Cloud Connector software on the Servers in Azure, first sign in with your Citrix Cloud Account.
The installation process will start directly afterwards…
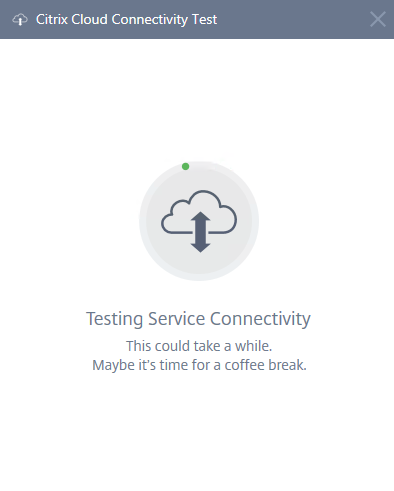
Testing the Connection…
Note: Troubles with the connection? Please check out this troubleshoot article.
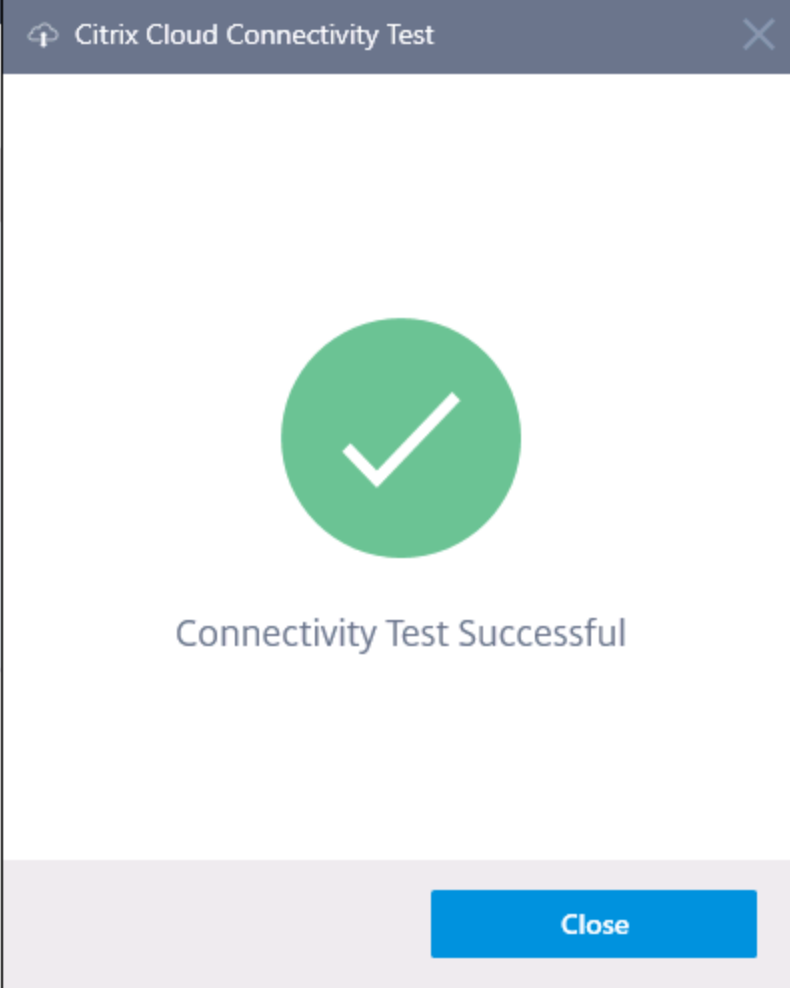
Connection successfully verified, click on Close
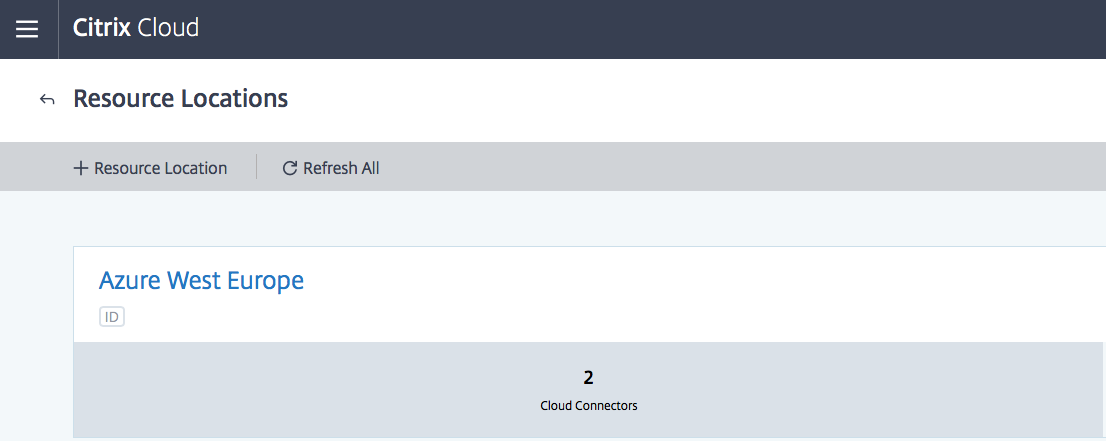
Click on refresh All

The new resource location must now be added to the list. Perform the same steps for the other Cloud Connectors.

Note: The yellow / orange mark is active because there is only one Citrix Cloud Connector active. When you install another Citrix Cloud server in Azure, the warning will disappear. And remember: place them in the same Availability Set!
After the second; the warning is gone.

Now open the Hamburger menu – click on Resource Locations

Rename the resource location to Azure – DC location.

Save the new Resource Location name and check if it’s changed in the menu.
Deploy the Citrix NetScaler from the Azure marketplace
I’m assuming that you already have a XenApp and XenDesktop Service environment (or trial) activated. If not, please check one of my previous articles before continuing to the next step.
The next step is to prepare the NetScaler in Azure. I’d already covered all the initial configuration steps of NetScaler in Microsoft Azure Infrastructure-As-a-Service in the article below.
Extra: I’m also advice to add Azure Multi-Factor Authentication to the NetScaler configuration. Check another article of my blog for providing the configuration steps.
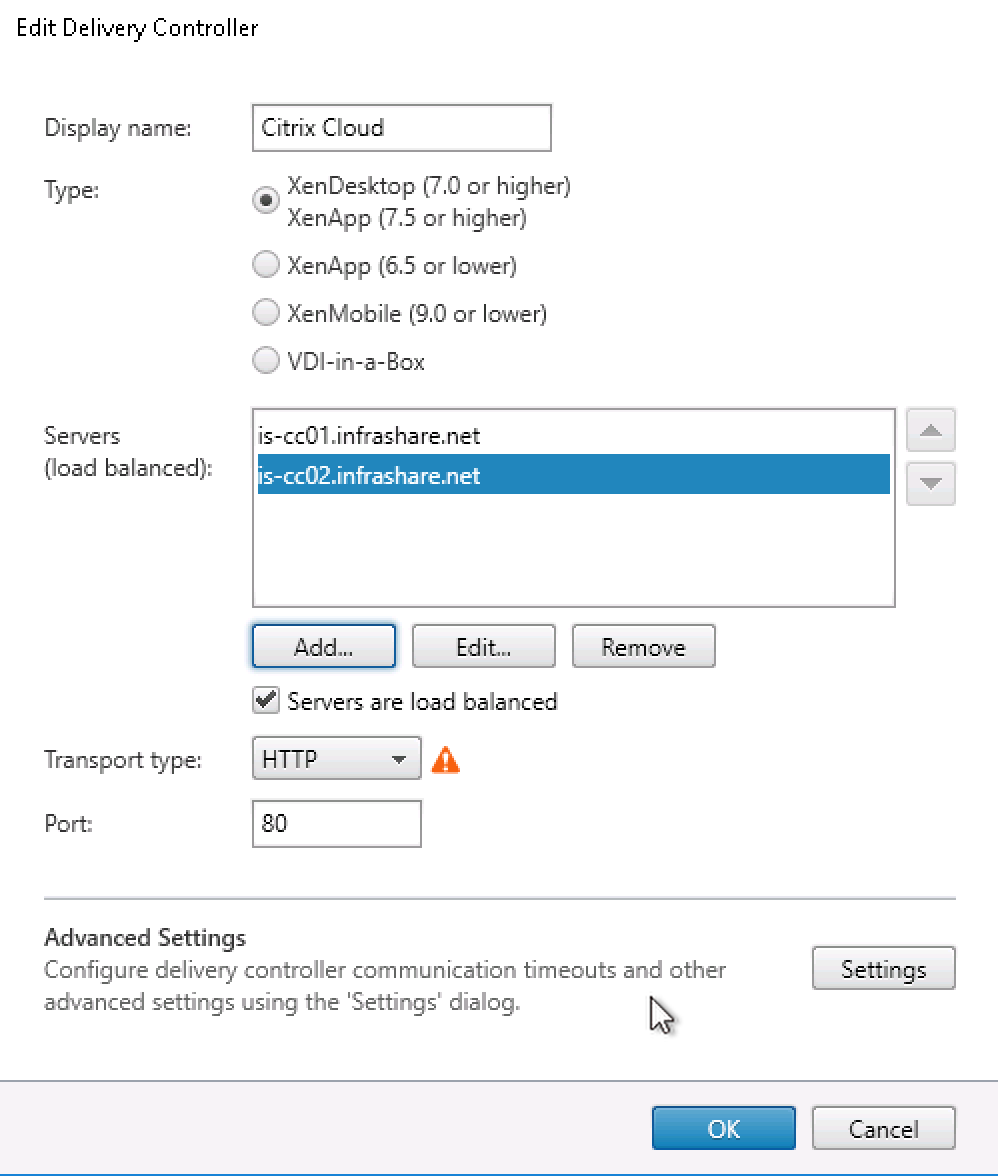
Remember to point the Delivery Controller StoreFront site configuration to the Citrix Cloud connectors!
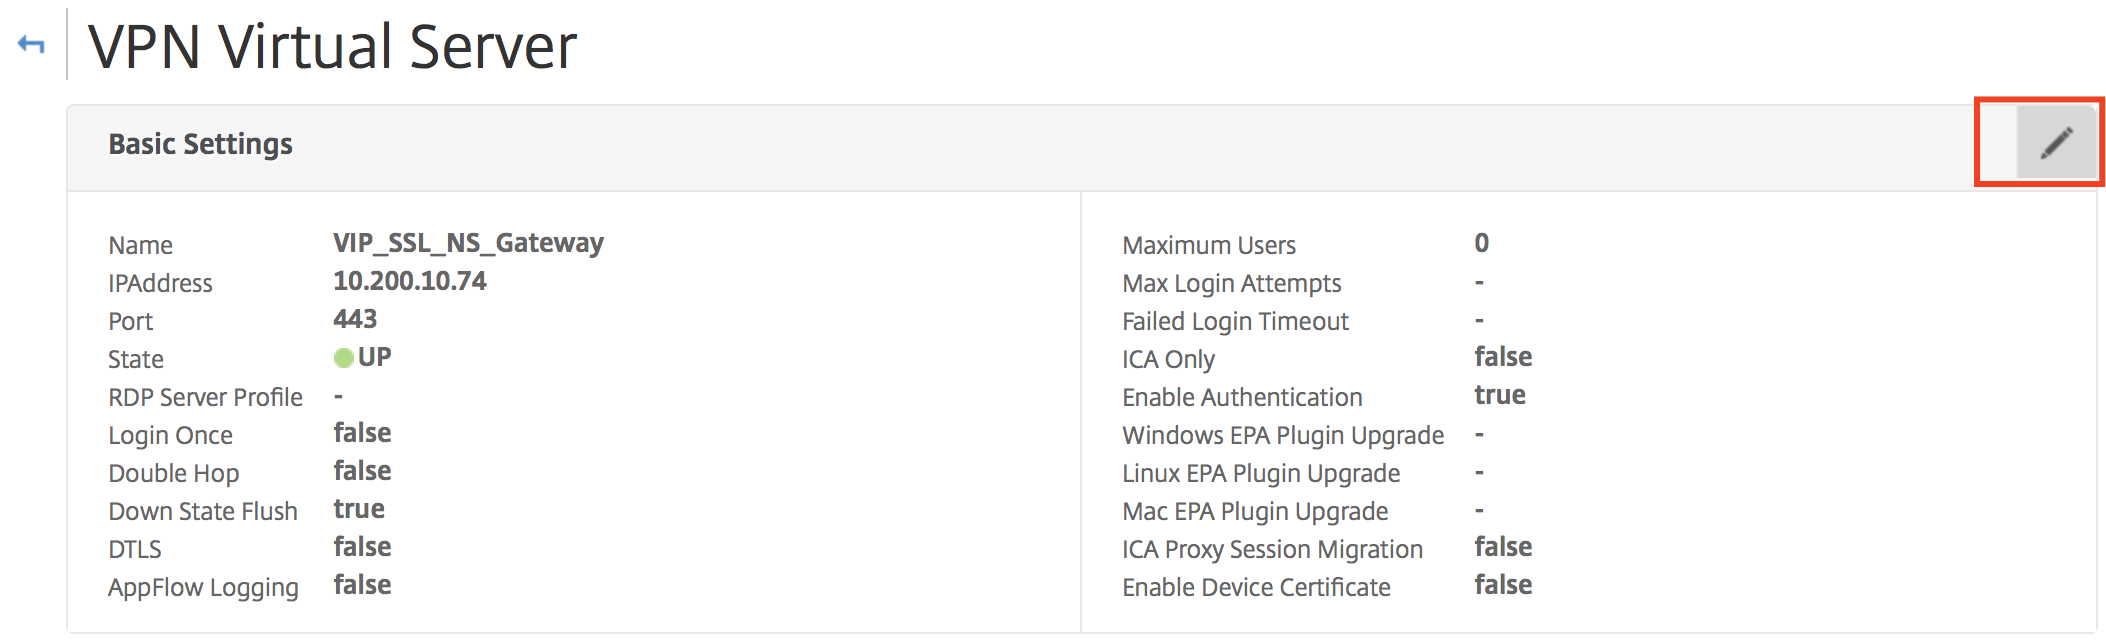
Activate DTLS on the NetScaler virtual server
To activate the EDT functionality on the NetScaler, you’ll need to activate the DTLS Basic settings on the VPN Virtual Server.
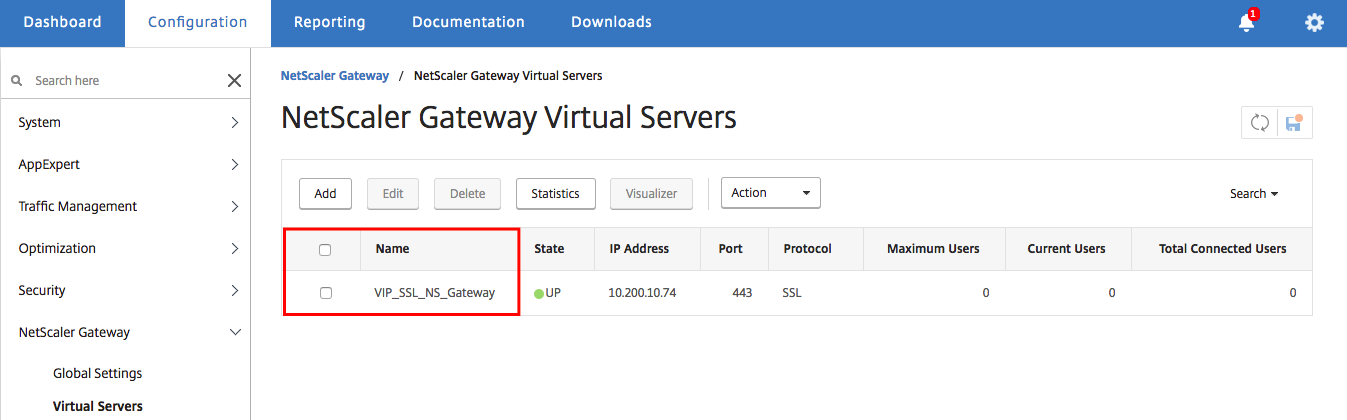
Open the VPN Gateway Virtual Server
Activate the DTLS setting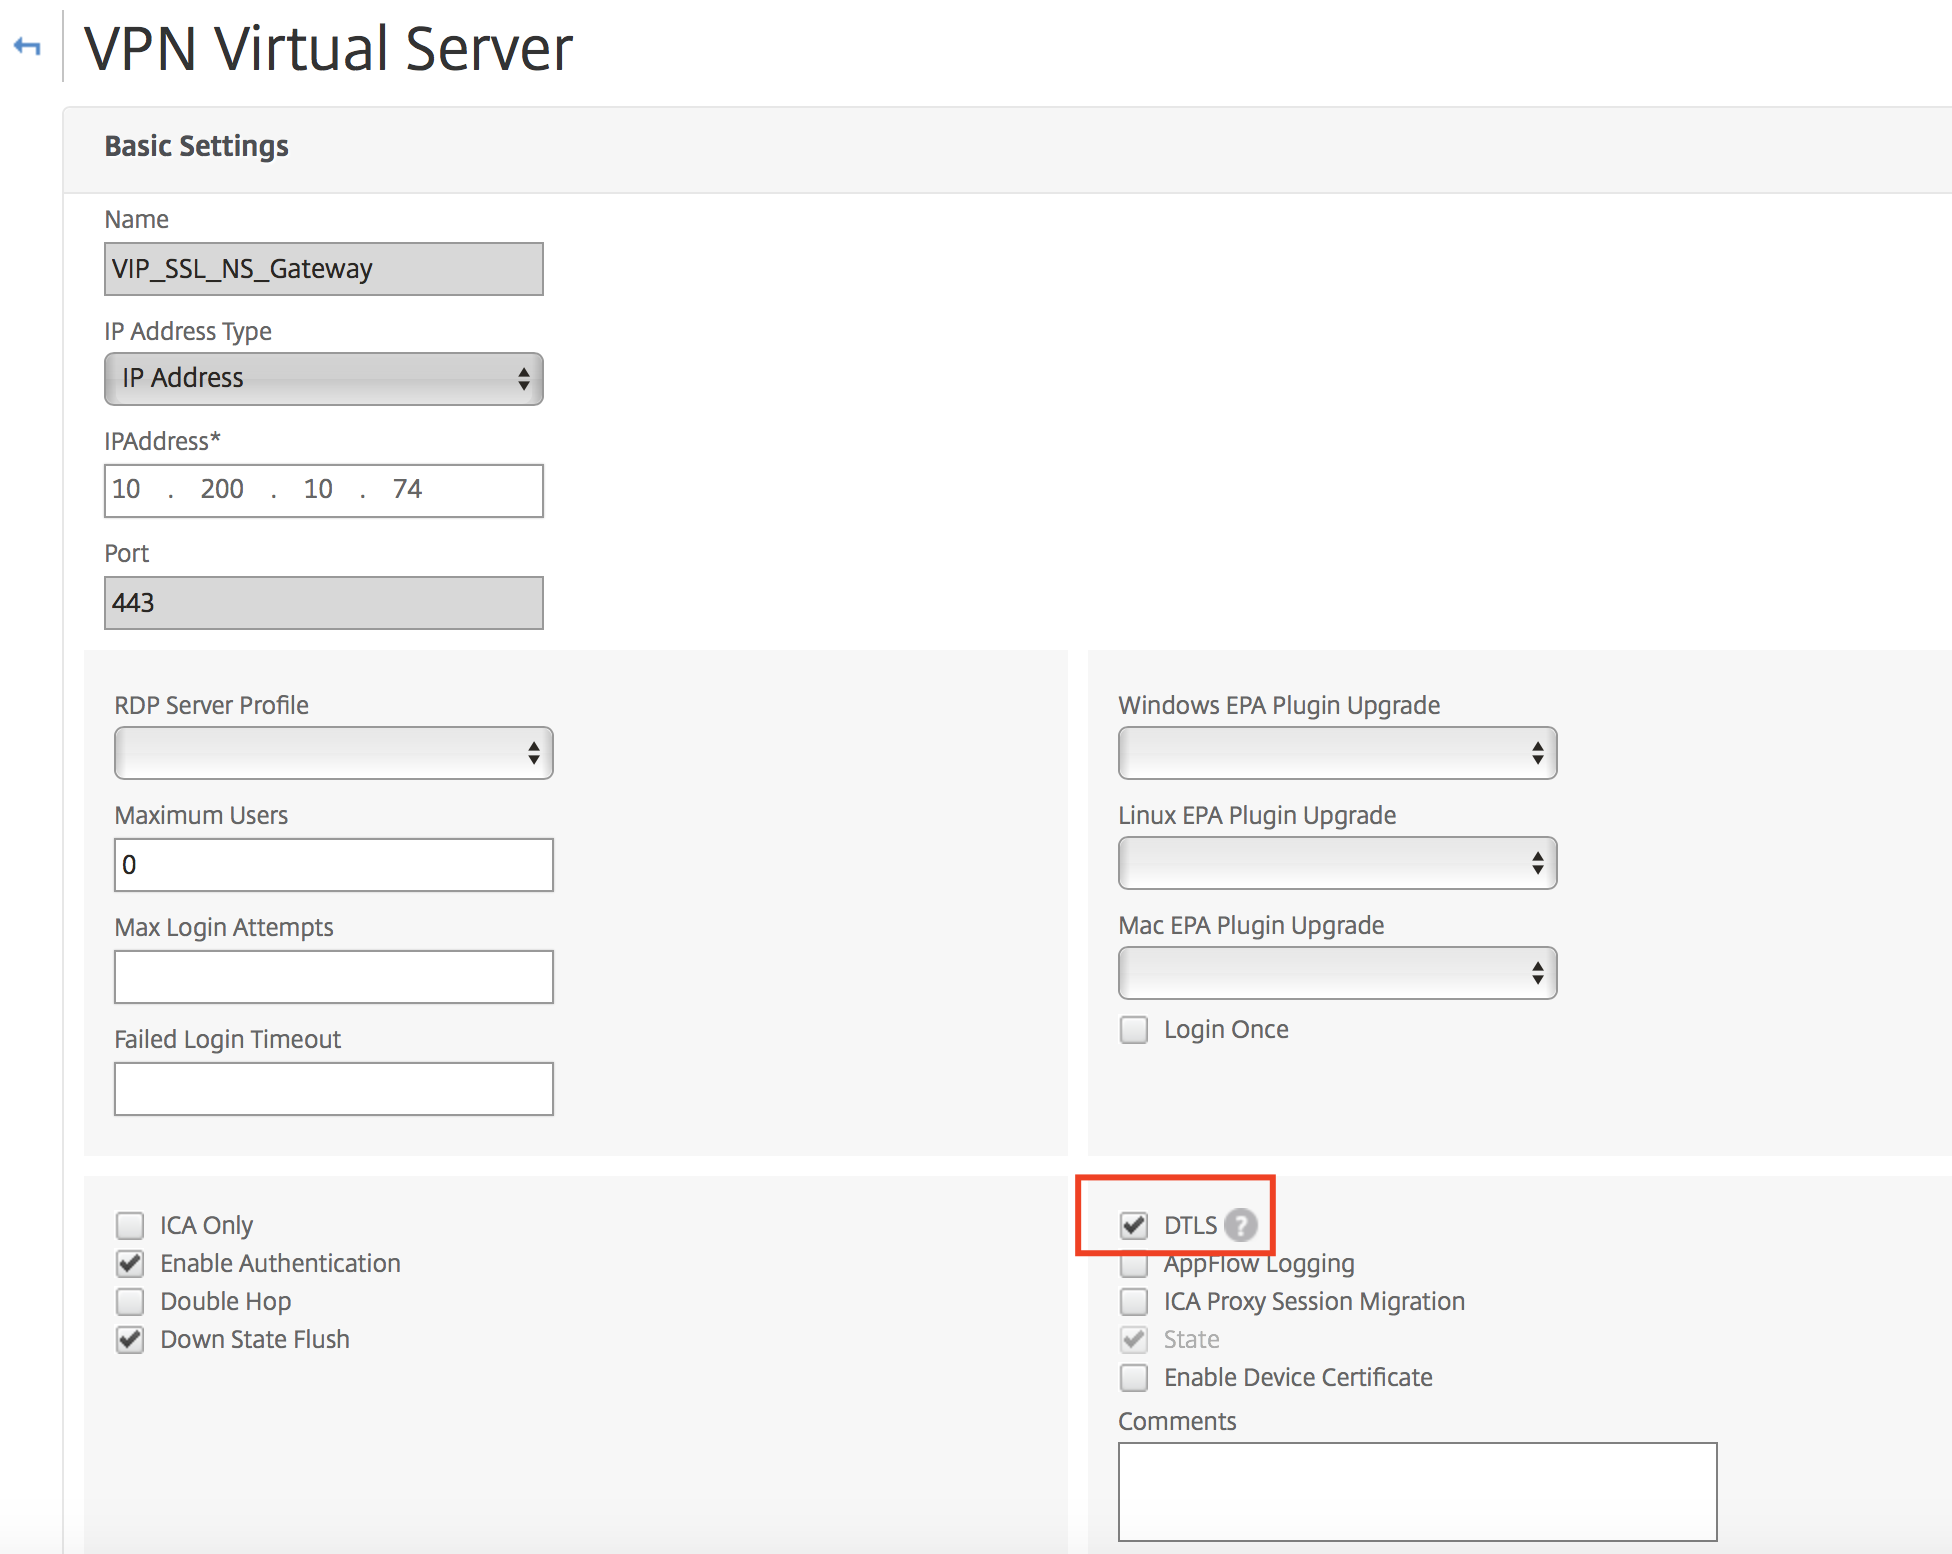
Activate the EDT Citrix Policy
Note: Using EDT in the Citrix Cloud, or use XenApp or XenDesktop on-premises? The policy will now be set to preferred as default setting. So there is no need to configure this setting manually!
Go to citrix.cloud.com
Open the Citrix Policy management console in Citrix Cloud – Studio
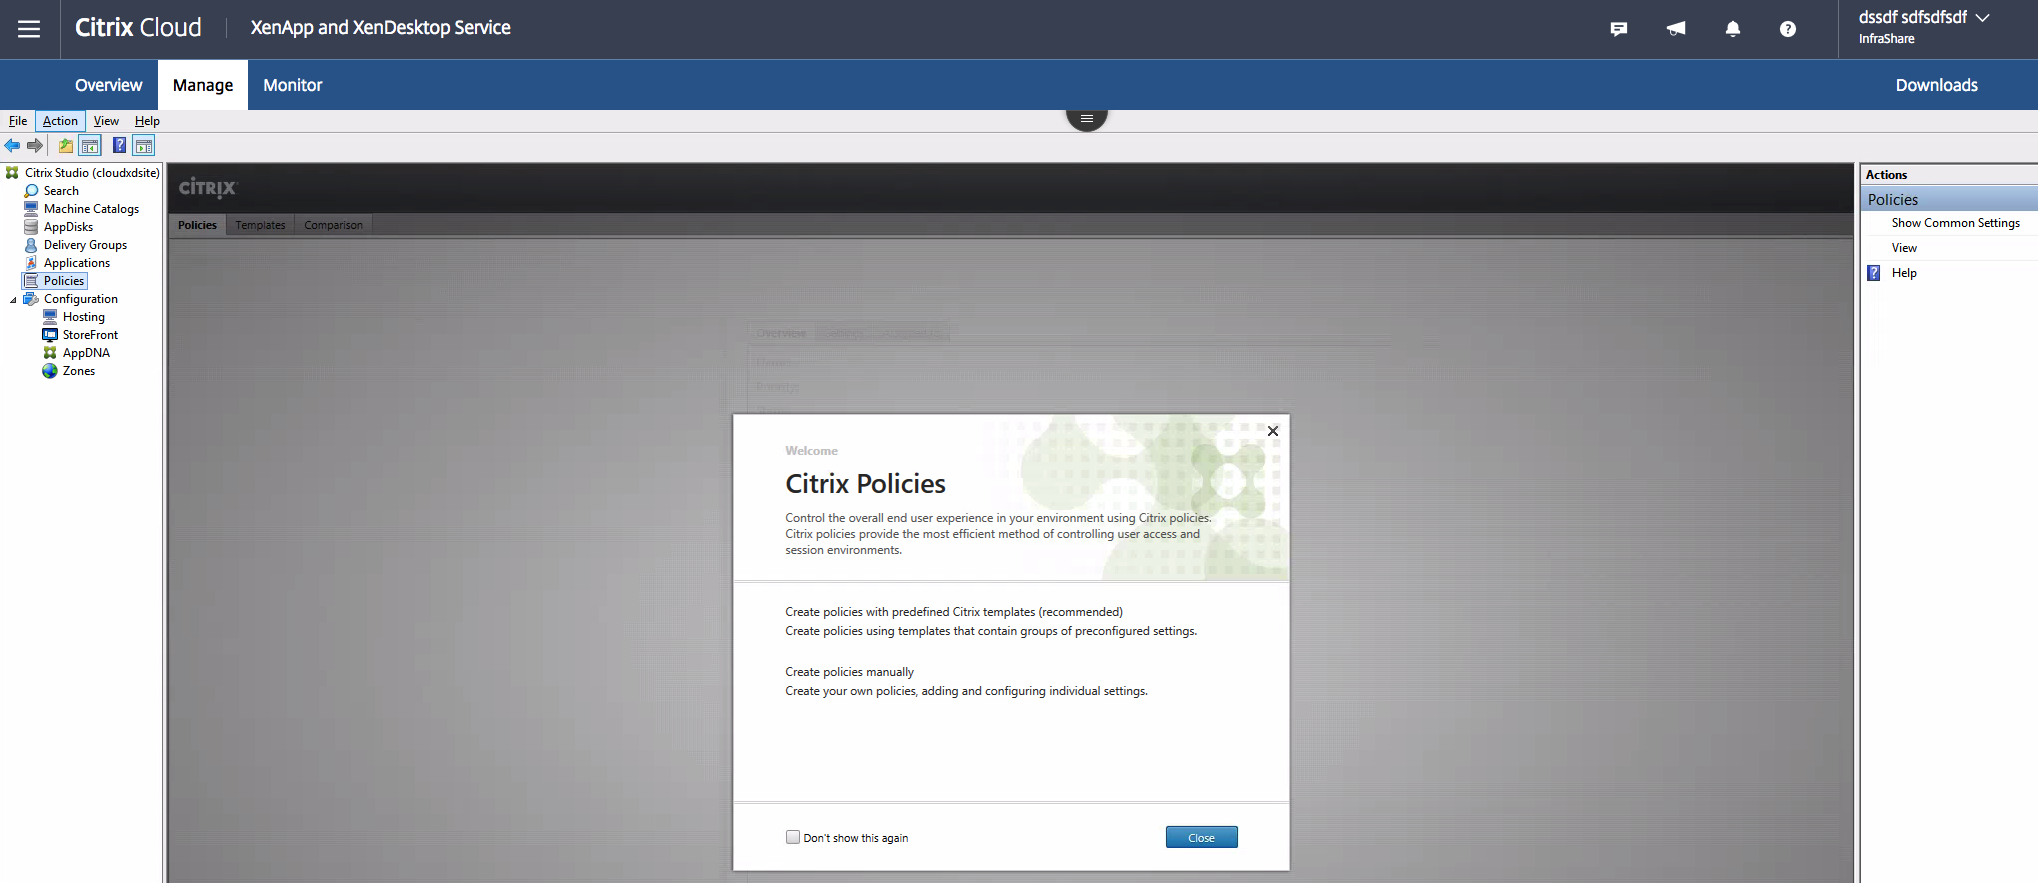
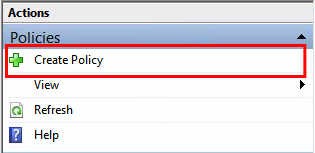
Create a new Policy
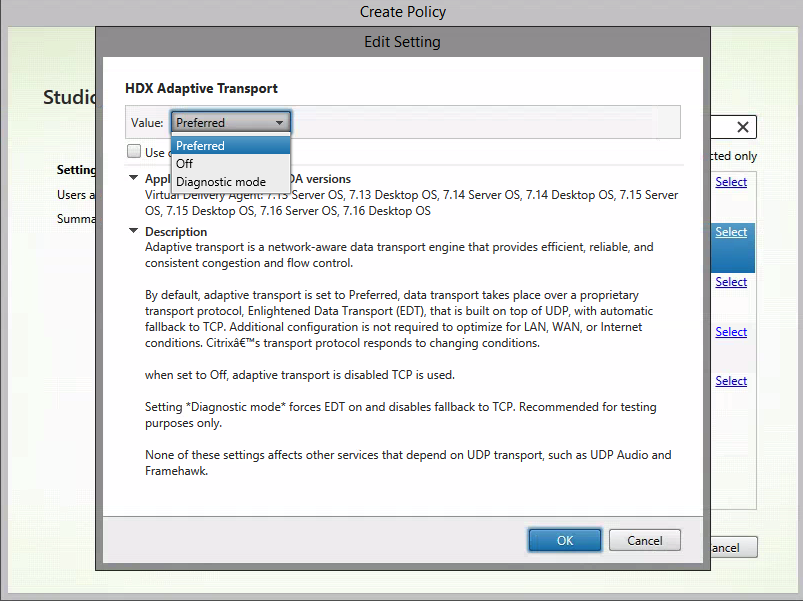
Search for HDX Adaptive Transport

Activate the Policy – value on Preferred.
Note: By activating the Preferred option, you’ll have the possibility to switch back to the normal Session Reliability 2498 TCP port when the EDT UDP port in not reachable. When you activate the Diagnostic mode – the policy will force you to use EDT.
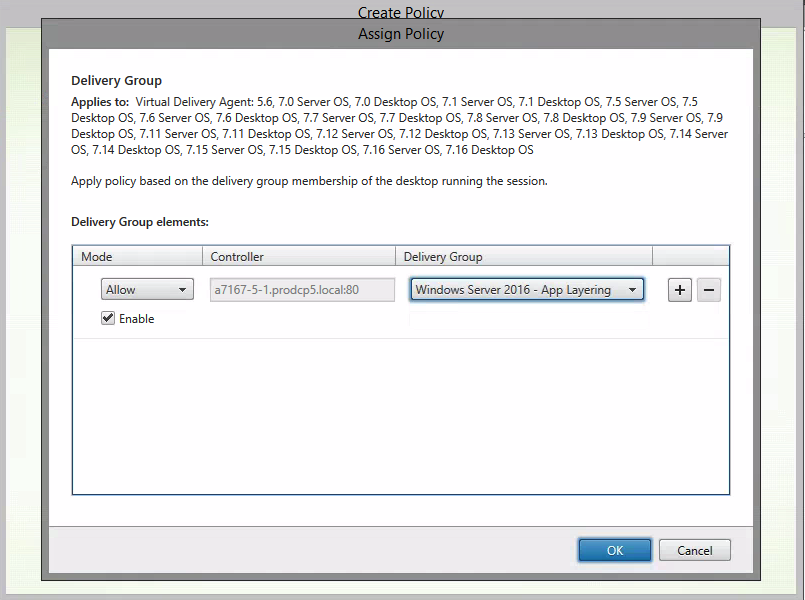
Click on Assign – next to Delivery Group

Assign the policy to the Delivery Group
Give in a name for the Citrix policy, click on Finish
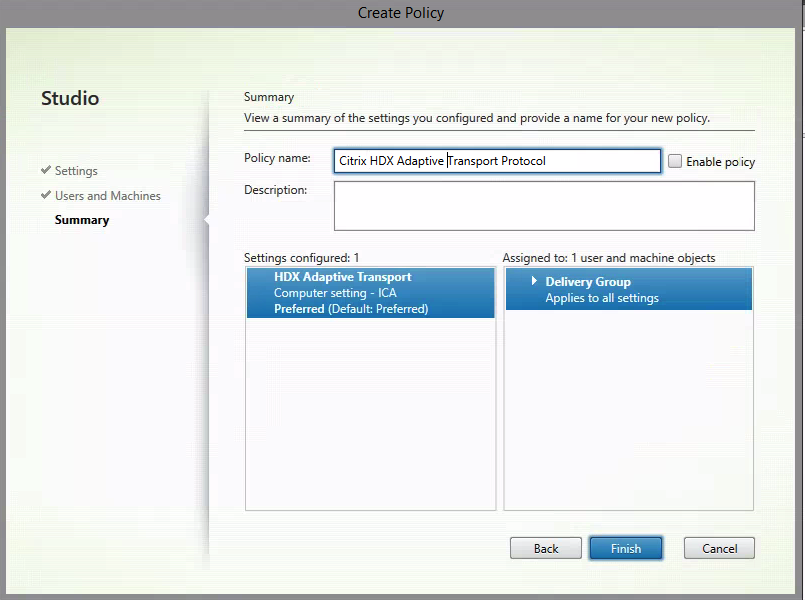
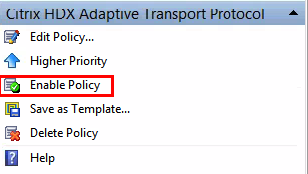
Enable the policy
Perform a Citrix UDP – EDT ICA session
Click on Monitor – in the Citrix Cloud Console

Search for a user that is logged on to the Desktop environment in Azure

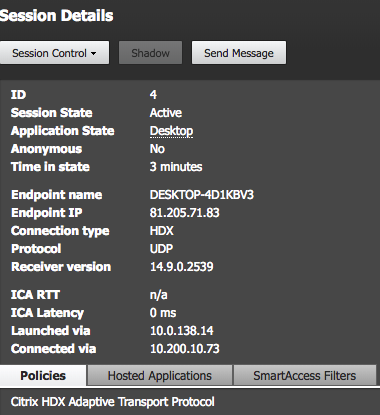
Open the Session Details menu
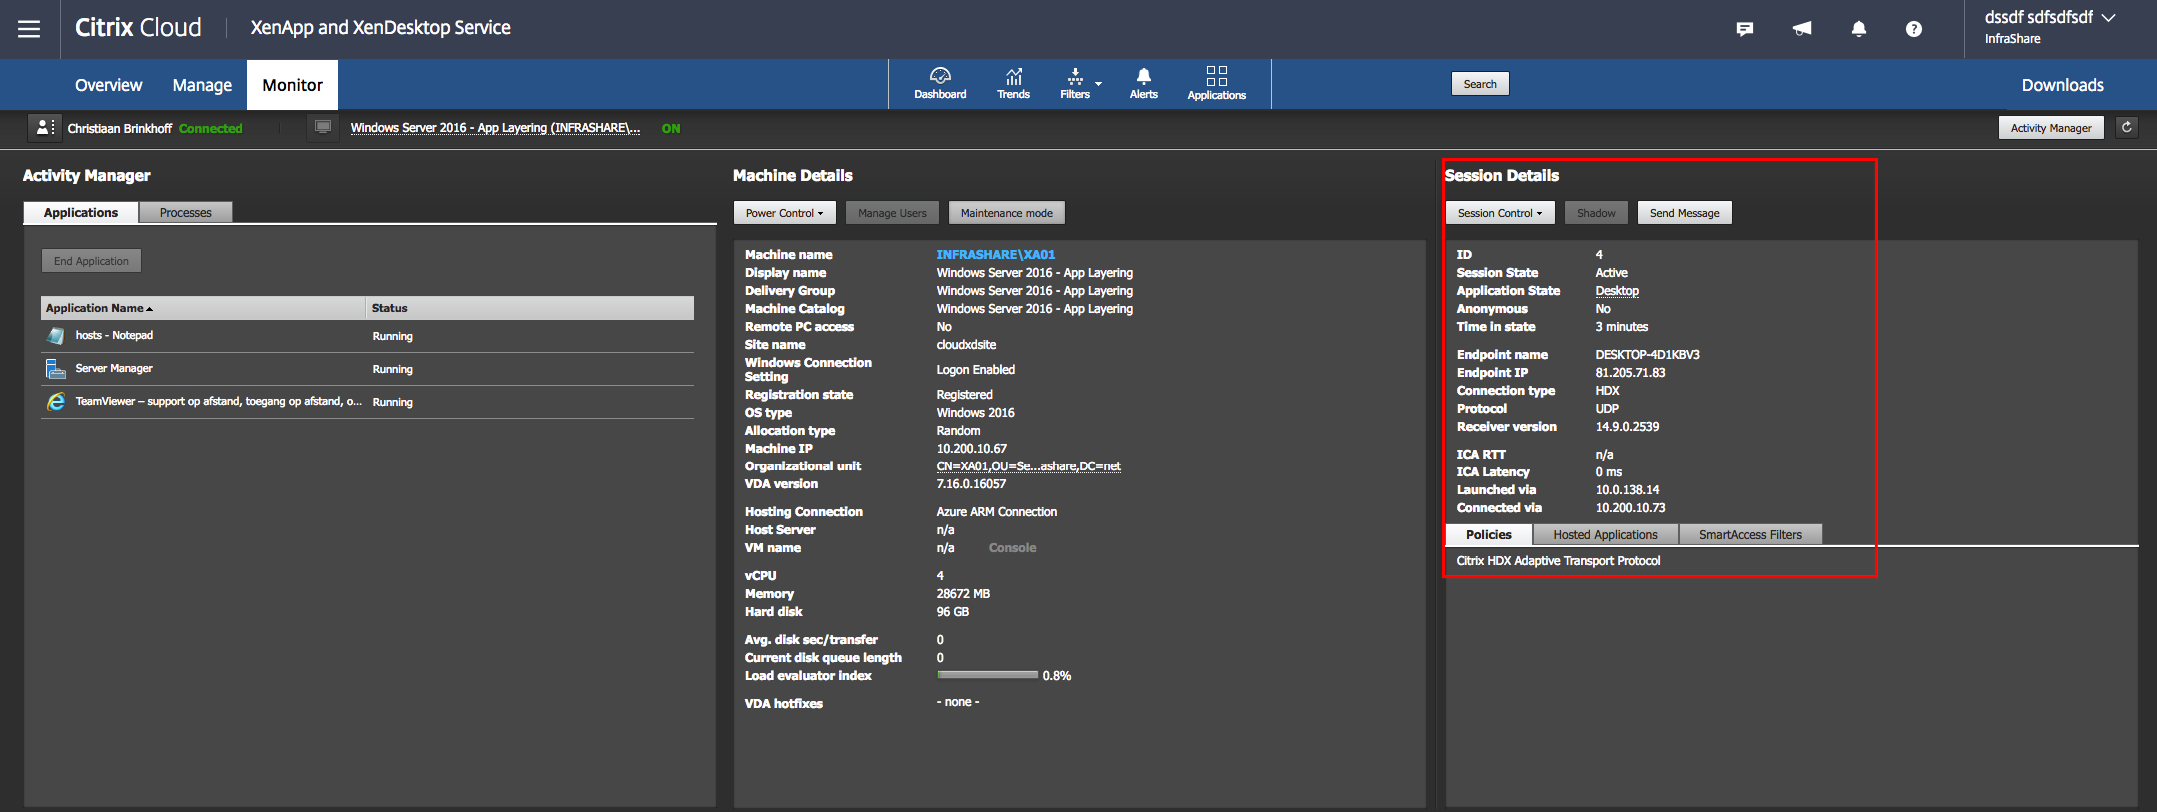
Check if the Connection Type is on HDX – with protocol UDP
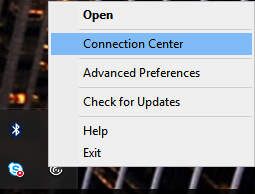
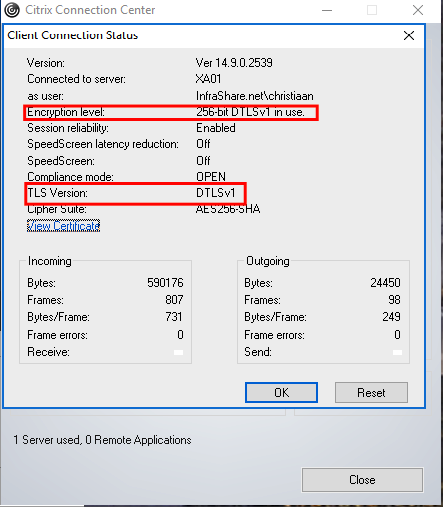
You can also open the Client Connection Status of the local Receiver to check if the EDT DTLS protocol is activated.
Open the Properties screen

If EDT is running, you’ll see the DTLSv1 encryption level and DTLSv1 TLS version.
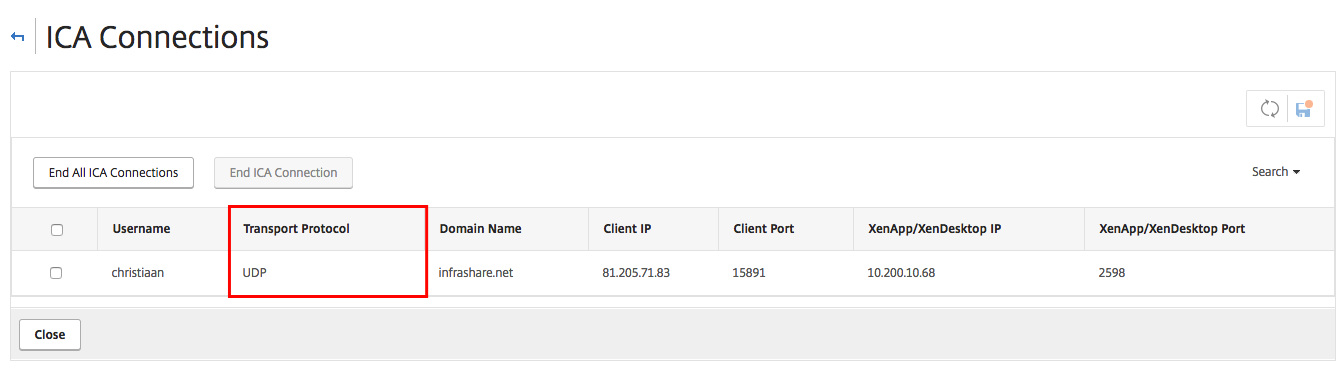
Check if UDP is active –NetScaler Gateway
Open the NetScaler Web Console
Go to Configuration > NetScaler Gateway
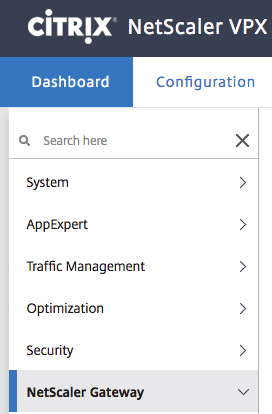
Click on ICA Connections

On this screen, you’ll see all the active ICA sessions that are currently active through the NetScaler Gateway.
Check if UDP is active – Windows Commands
Another method to check if UDP is active is through the following commands:
Open a command prompt on the VDA
Run the command netstat –a –p UDP

Check if the UDP ports 1494 and 2598 are listening

EDT Demo – see it yourself
I’ll show how the ICA sessions performs over a 200ms latency connection. Just to give you a small impression how good it works!
Troubleshooting
If the VDA sometimes freezes up every 5-15 minutes requiring a session reconnect to resolve the issue. Microsoft’s Azure Support confirmed that Azure Gateway limits the packet size to 1420. Packets greater than 1420 may be dropped, and definitely truncated.
By default, the Azure Gateway is set to TCP MSS=1350, and MTU=1400. So we need to reduce EDT MSS to 1400 or lower.
Note: Please check the following Citrix Support article for more information on troubleshooting EDT for NetScaler: https://support.citrix.com/article/CTX231821
EDT DTLS falls back to TCP – and UDP won’t activate? Please check the following options below.
- NetScaler Gateway is configured to access the applications hosted on the Storefront.
- DTLS is enabled on the VPN virtual server.
- ICA connection logs on the firewall between the SNIP and the VDI client it will be using TCP port instead of UDP sometimes.
Note: Please check the following Citrix Support article for more information on troubleshooting EDT for NetScaler: https://support.citrix.com/article/CTX232419
That’s it for now. I’ll hope to see you back soon.
Cheers,
Christiaan Brinkhoff