
Configure Azure Quick Deploy and Workspace Site Aggregation for Citrix Cloud XenApp and XenDesktop Service – Virtual Apps and Desktops deployments in Microsoft Azure and On-Premises Resource Locations


I’m currently still buzzing after last week Citrix Synergy, which was by far the most impressive Synergy in my opinion. Gave a well appreciated Break-Out session together with George Kuruvilla on Citrix Cloud Best practices on different Clouds, and we had a completely packed room! Next, to that, I’ve seen many significant improvements and new product releases as new inspiration to blog – beginning with this article.
“focus and simplicity. Simple can be harder than complex; you have to work hard to get your thinking clean to make it simple.”— Steve Jobs
The latest improvement on the XenApp and XenDesktop Service (or now also called Citrix Virtual Apps and Desktops) is Azure Quick Deploy. This new option provides a more straightforward interface that offers faster deployment of Virtual Desktops and Apps in Azure Infrastructure-As-a-Service. This deployment method offers basic configuration, without advanced features. Therefore, you still need to use the Citrix Studio / Full Configuration console.
The process of deploying resources in Azure was only possible through a Published Studio console in the Citrix Cloud. This improvement aligns with the setup procedure of XenApp Essentials, which is also available for Azure deployments only, but then directly from the Azure Marketplace.
Furthermore, Citrix also released Citrix Workspace Aggregation, the feature which connects the Citrix Workspace to on-premises resource locations, such as XenApp 6.5 and 7.x – all through the same pane of glass – whether your desktops and apps exists in the Cloud or on-premises! More on this specific topic later on in this article.
See the Cloud Workspace architecture with the Workspace Aggregation feature activated, including XenApp 6.5 to leverage the same user experience!

In this article, I’ll show you how easy you can deploy Citrix XenApp and XenDesktop – Virtual Apps and Desktops within Microsoft Azure by using the new Azure Quick Deploy feature and an extra I’ve also included the new Workspace Aggregation feature! As extra, I’ve included a Demo video at the end of this blog, where you can see how Workspace Aggregation works!
Enjoy reading!
Table of Contents
Click on the title to forwarded in the article:
- Deploy the Master Image Virtual Machine in Azure
- Login to the Citrix Cloud
- Start Azure Quick Deploy
- Create a Catalog
- Link your Azure subscription
- Join the local domain
- Connect to a resource location
- Choose the master image
- Configure Smart Scale – Capacity
- Publish Virtual Apps
- Publish Virtual Desktops
- Assign Apps and Desktops to Groups and Users
- Set up profile management in Azure subscription
- Specify the Microsoft Remote Desktop Services (RDS) License Server
- Citrix Workspace Aggregation configuration
- Test the Citrix Workspace Aggregation – see it yourself demo
More on Digital Workspaces in Azure?
This blog is part of a Citrix Cloud blog series about the different Citrix Cloud Digital Workspaces possibilities. Previous articles that I wrote about the Citrix Cloud, that you might find interesting to read as well:
- How to configure Virtual Windows 10 (VDI) Desktops with XenDesktop Essentials in Microsoft Azure
- How to activate Azure AD Bring-Your-Own-Identity authentication for the Citrix Workspace Experience unified portal, including Conditional Access configuration
- How to configure Citrix Cloud – App Layering 4.8 to deliver virtualized apps and Office 365 caching – User Layers for XenApp and XenDesktop Service Cloud Workspaces in Microsoft Azure
- How to configure the Citrix Cloud XenApp and XenDesktop Service using Azure Managed Disks and Citrix Optimizer
- How to configure Citrix XenApp Essentials in Microsoft Azure, including Azure Active Directory authentication to Citrix Cloud
- How to use Citrix Smart Tools – Smart Scale to reduce your XenApp and XenDesktop on Azure Cloud resource costs
- How to configure a Bring-your-Own NetScaler VPX in Azure for XenDesktop Essentials and XenApp and XenDesktop Service from the Citrix Cloud
- How to configure Azure Active Directory Domain Services for Citrix Cloud Workspaces with the lowest Total-Cost-of-Ownership in Azure Infrastructure-as-a-Service
Did you know?
- You cannot use Azure Quick Deploy to deploy desktop OS machines.
- It’s only available when using Azure Resource Manager as your host. It is not available with any other host types.
- If you have separate user and resources forests in Active Directory, you must have Cloud Connectors installed in each forest before you add your on-premises Site.
- Azure Quick Deploy is available only in the XenApp and XenDesktop Service and the XenApp Service. It is not offered in the XenDesktop Service and XenDesktop Essentials.
- It uses different terminology compare to Studio: you create a catalog. In Full Configuration (Studio), you create a machine catalog.
- During the process of adding your Site to Workspace, you can specify if you want to provide internal or external access to the resources you make available to users through Workspace.
- After the Azure Quick Deploy automated procedure – a Delivery Group named – AzureQuickDeploy will be created in the Citrix Cloud Studio, with the status – Managed by Citrix Cloud
- Ensure that port 2513 on the XenApp server is accessible from the Cloud Connector machines in your environment. During the discovery process, the Cloud Connectors contact the Citrix XenApp Remoting Service on the XenApp server you specify. This service listens on port 2513. If this port is blocked, Citrix Cloud can’t discover your deployment.
- It automatically creates server VMs and installs two Cloud Connectors in your resource location. In the Studio / Full Configuration, these are separate steps you must complete before creating a catalog.
- It does not use Delivery Groups. In Azure Quick Deploy, you configure all the deployment items in the catalog: the catalog, machines, applications, desktops, and subscribers. (A Delivery Group is automatically created for each Azure Quick Deploy catalog (using the same name as the catalog), but that action occurs behind the scenes. There is no required customer administrator action.)
- The Azure Quick Deploy interface has a different layout and style. There is more on-screen guidance.
- You must be a full administrator to see both deployment options. If you are not a full admin, you won’t see the Azure Quick Deploy option, and will automatically use Full Configuration.
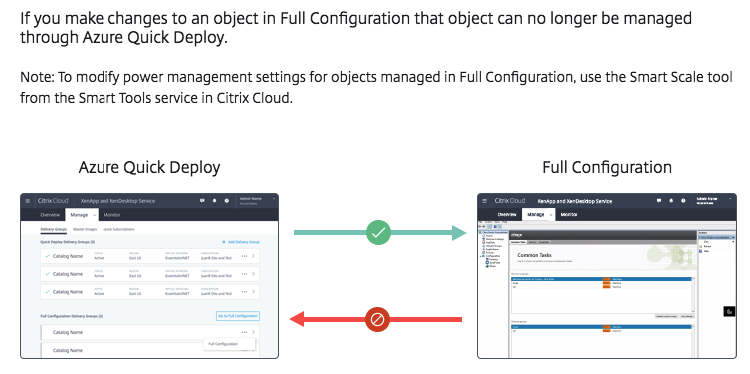
Important note: You can also use Studio to edit a catalog deployed with Azure Quick Deploy. However, if you use Studio to change that catalog or its corresponding Delivery Group, you will no longer be able to edit that catalog from the Azure Quick Deploy interface (Manage > Catalogs).
VDILIKEAPRO Survey on Cloud Workspaces
I see Azure as the way to go for future Citrix Virtual Apps and Desktop deployments. Our Community friends from VDILIKEAPRO, Mark Plettenberg and Ruben Spruijt did another excellent community survey, which is quite interesting. You see a small difference between the Netherlands and USA results as well, let’s see if we – Dutch fellows – can change this number next year!
All the other survey results will be posted online very soon, so keep tracking the VDILIKEAPRO website and socials. 
Feature Comparison sheet
The following sheet shows which features are available through the new simplified Azure Quick deploy service and which aren’t. Do it yourself Studio(Full Configuration) means that you’ll need to use the old fashion Studio for that, which means no automation – all by yourself!

Azure Quick Deploy process diagram
The following menu shows all the automation steps, which are part of the Azure Quick Deploy Process. The deployment of the Desktop Machines will take place through Machine Creation Services in Azure. Before this process, 2 Citrix Cloud Connectors will be deployed in one Availability Group to provide an HA connection from the Citrix Cloud to Azure.
Citrix Workspace Aggregation for on-premises Virtual Apps and Desktops, including XenApp 6.5 and Citrix 7.x support
Citrix Workspace now includes probably the most requested feature, support for on-premises XenApp 6.5 and XenApp and XenDesktop 7.x or higher. The unified – single pane of glass – portal, which can be used to access all your desktops – apps, and SaaS apps, whether they’re active in the Cloud or on-premises – will support older XenApp environments to leverage the transformation to the Cloud. Published apps and desktops all started from the same portal, and users would love this new approach instead of switching between all the different websites and consoles with a Single-Sign-On (SSO) experience. From a Cloud transformation/migration perspective, this makes it a lot easier for the users to adopt a new workplace in the Cloud!
Note: The Aggregation feature requires a Citrix Cloud Connector on-premises in the same network location as the Data collectors. It typically works the same as placing a Citrix Cloud connector in a resource location of Azure for example. The feature is currently only available in Tech Preview and currently does not support Azure Active Directory.
I’ll recommend you to watch the following – SYN240: XenApp and XenDesktop Service: how to migrate– Synergy Breakout session to know all ins and outs on an architectural perspective.
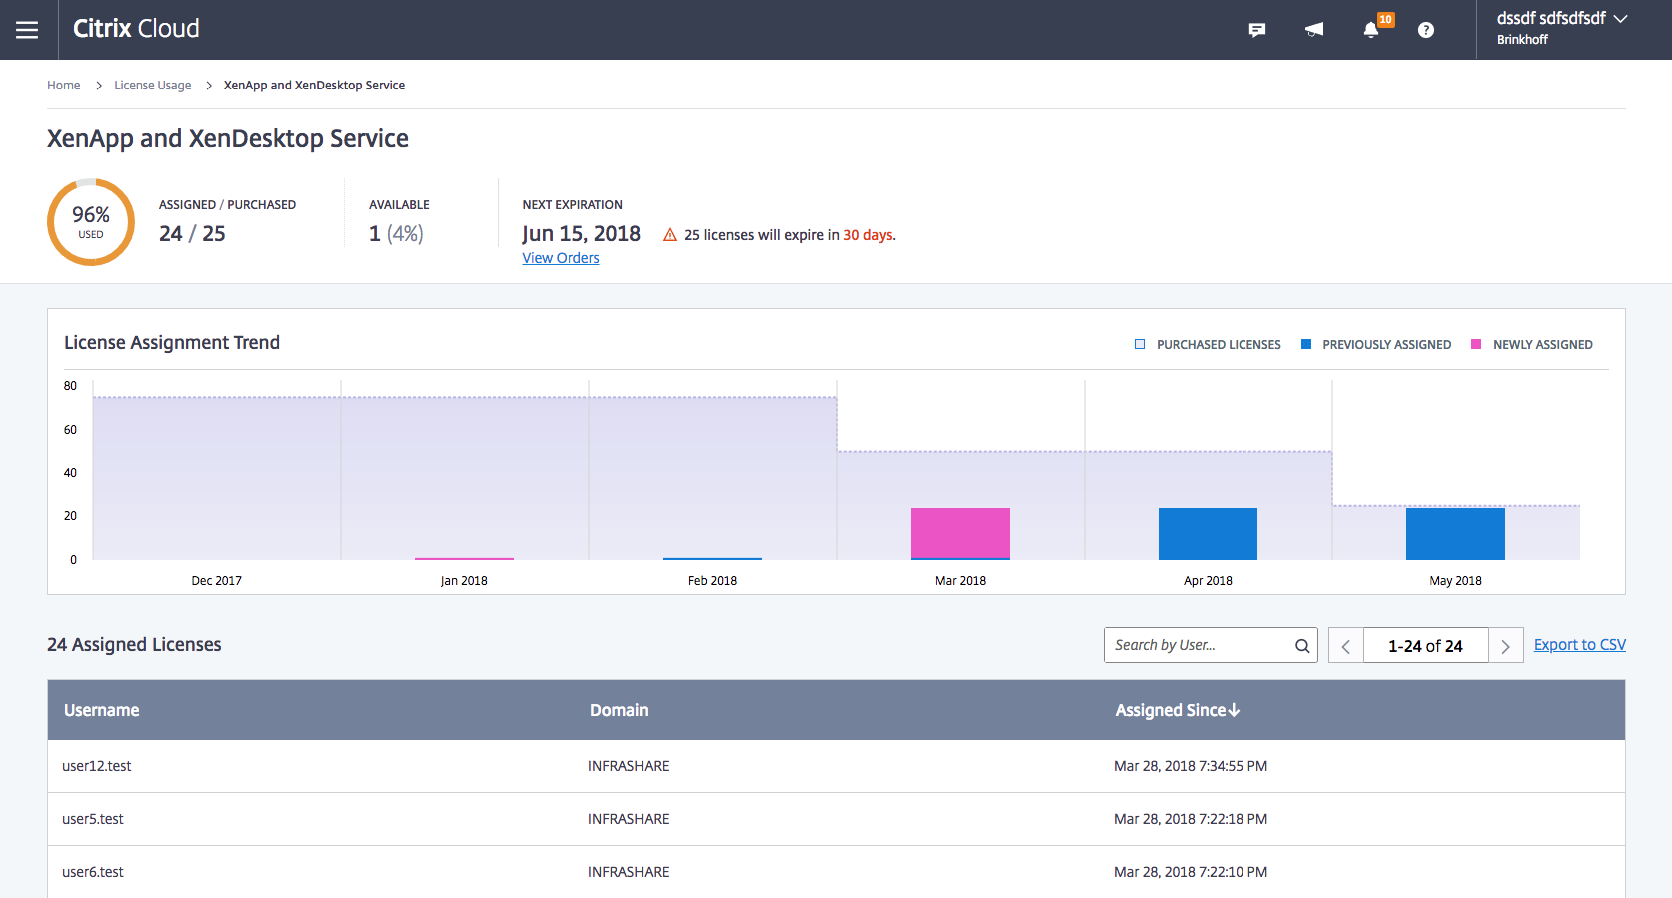
License usage in Citrix Cloud
Another excellent feature improvement is the new license usage menu, which you’ll find in the hamburger menu of Citrix Cloud. Before this, there was no possibility to manage Citrix Cloud user licenses from the Studio.
Deploy the Master Image Virtual Machine in Azure
Before we start, please keep in mind that you cannot switch back to Azure Quick Deploy when you open the configuration items, catalogs and delivery groups in the Citrix Studio – Full Configuration. You’ll get a warning before, so make your decision wisely!
Note: The Citrix Cloud connectors will automatically be deployed during the Azure Quick Deploy automation process.
The first step will be the deployment of the master VM in Azure.
Choose for a Windows Server 2016 Operating System in the Azure Marketplace. I don’t go (again) through all these steps, if you are not familiar with the process, please check one of my previous blog articles, such as this article one around deploying Windows 10 in Azure. These are the same steps as for Server 2016, just choose for Server 2016 from the Azure Marketplace.
Go to https://xenapp.cloud.com/
Log in with your Citrix Cloud credentials

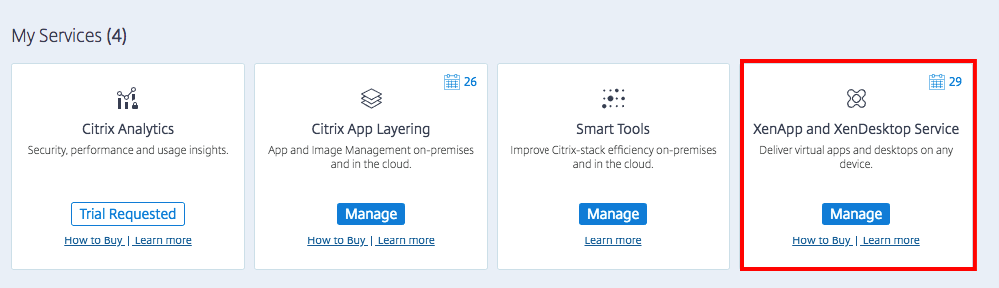
Click on XenApp and XenDesktop Service – Manage
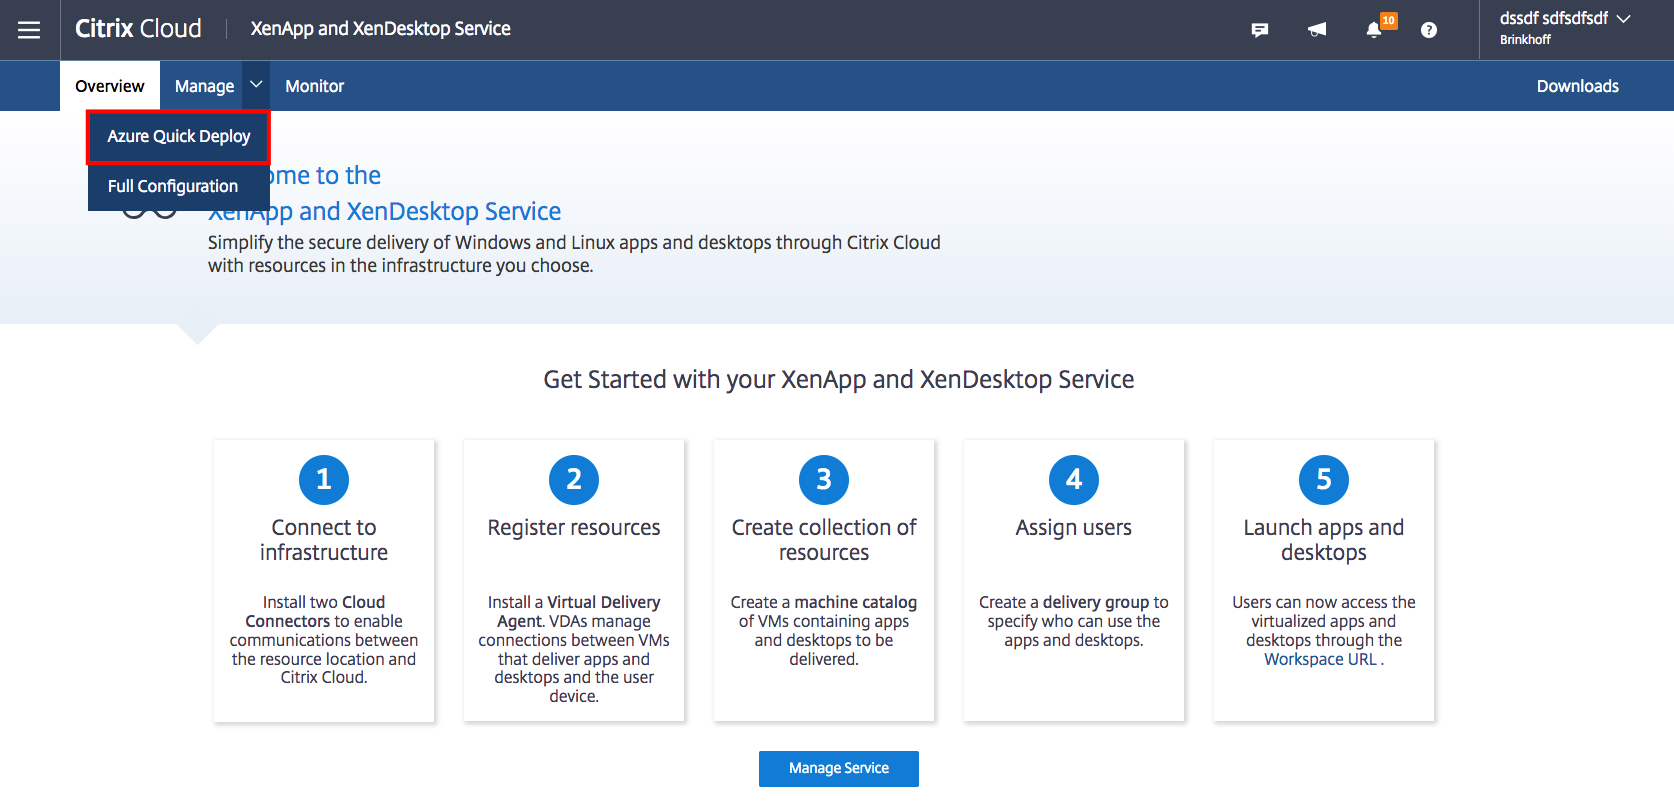
Click on Manage – Azure Quick Deploy
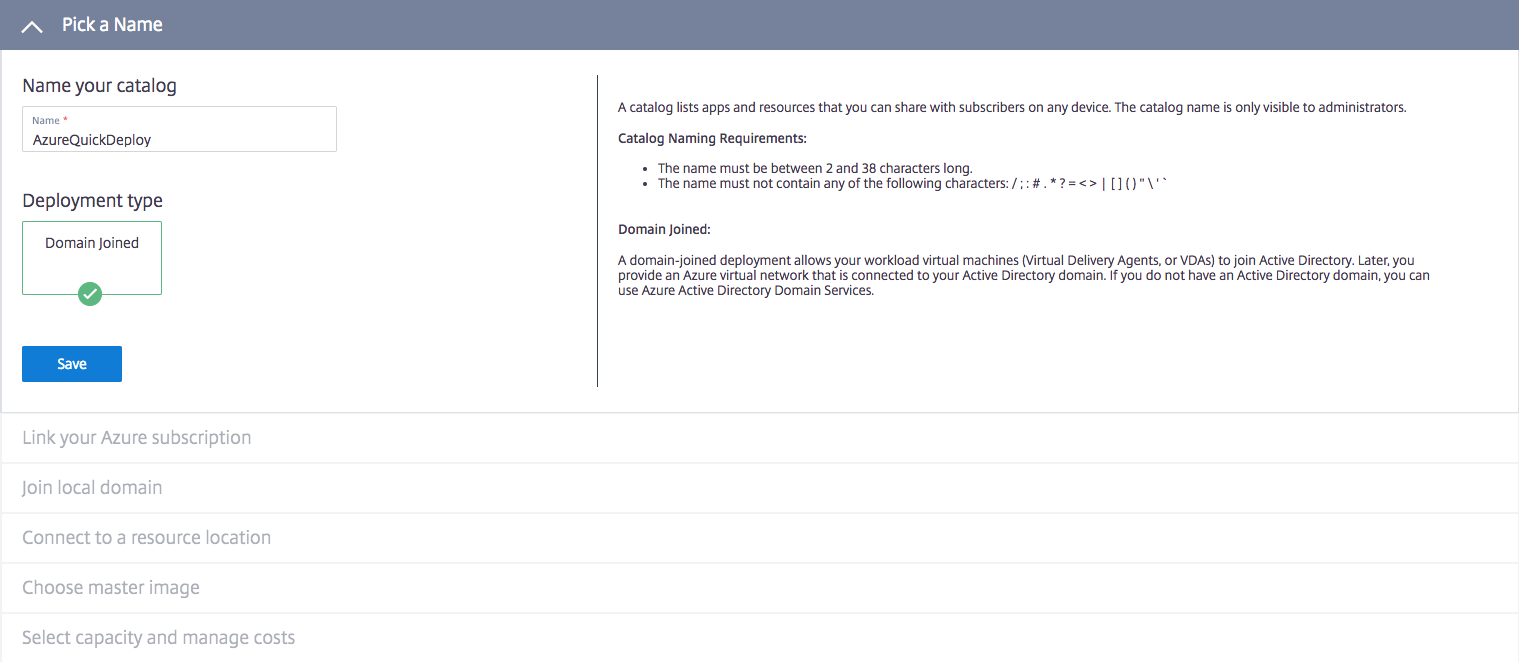
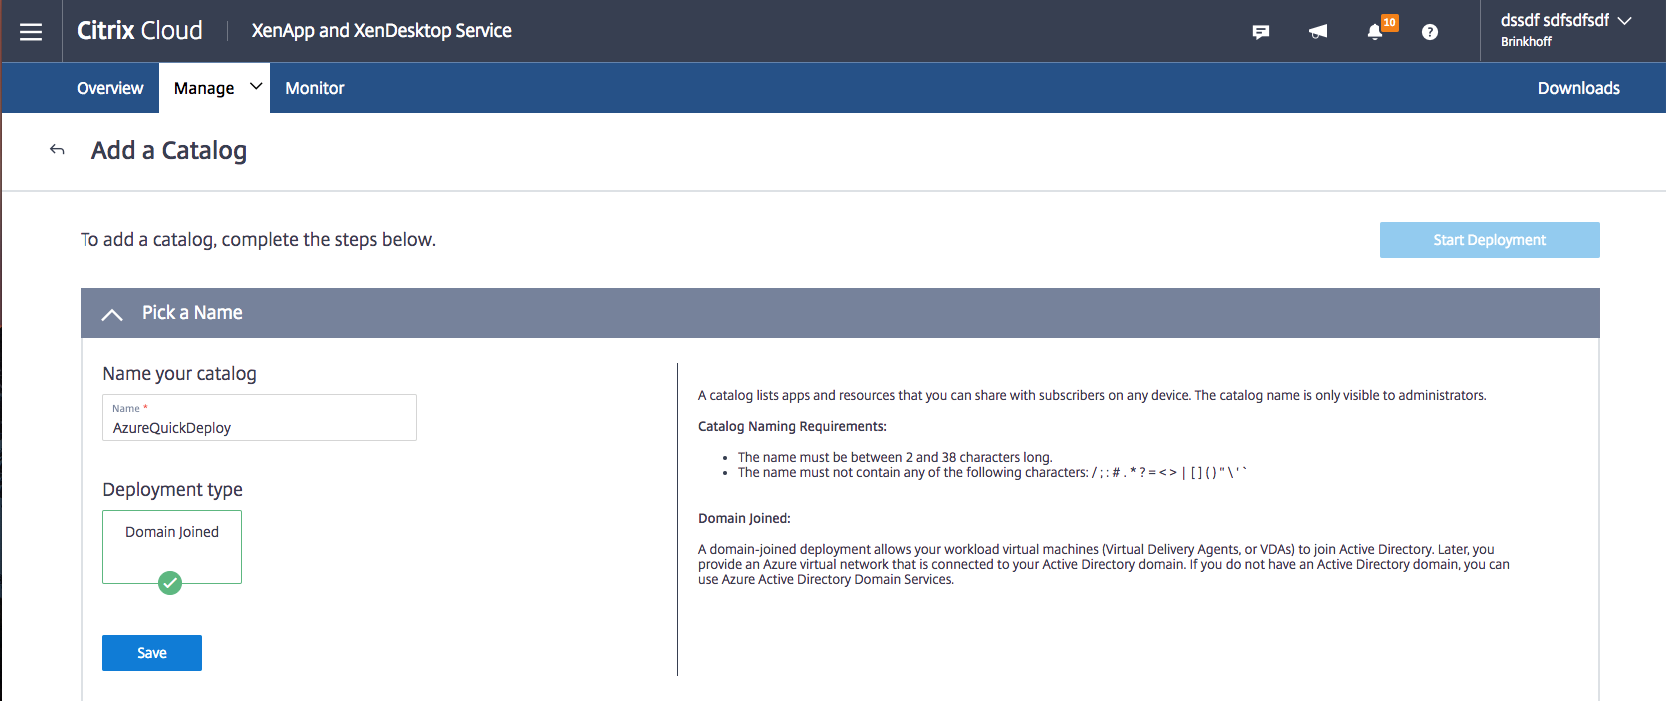
Click on Create a Catalog
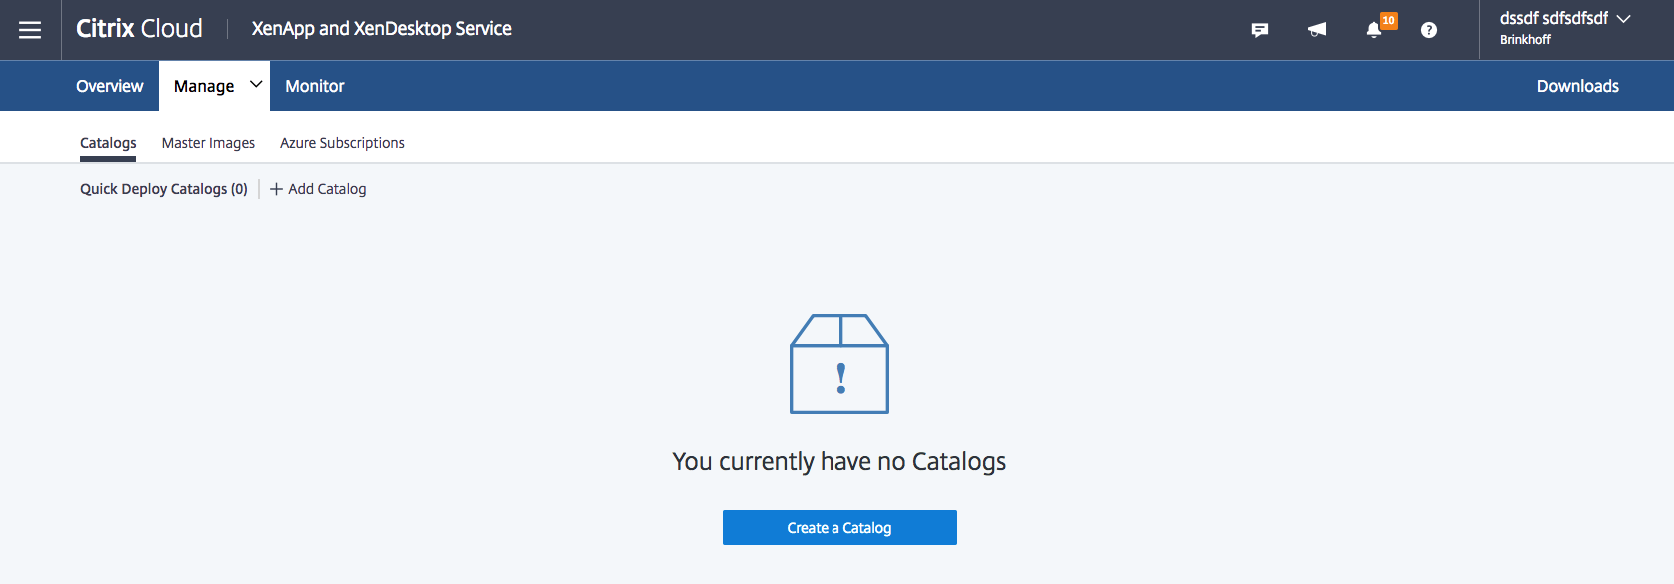
Note: If you already have instances running through XenApp and XenDesktop Service – through Studio / Full Configuration, then they’re listed in the same Catalogs screen below.

Enter a name for your Catalog, Click on Save
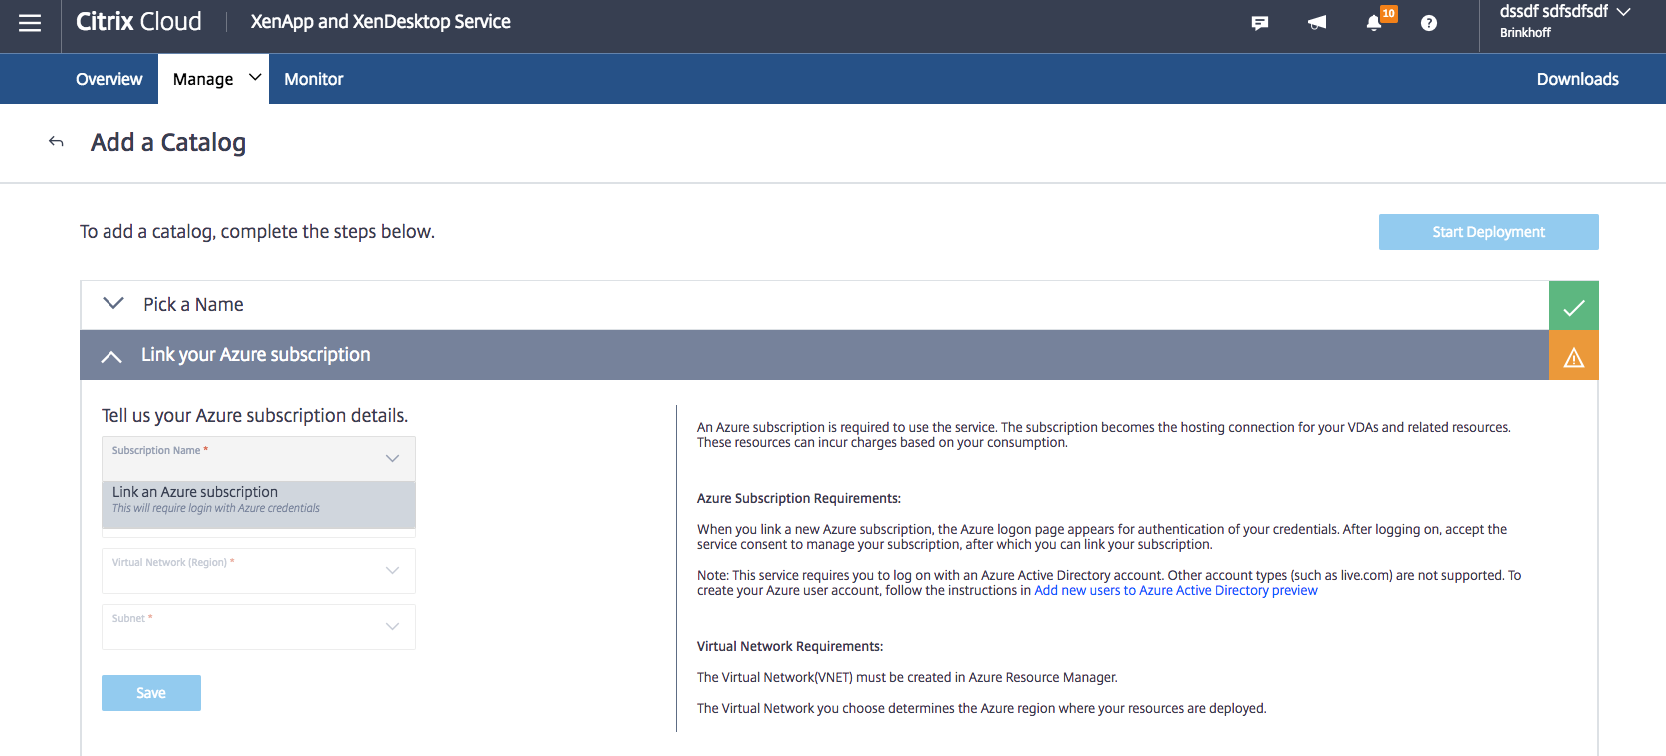
Click on Link an Azure Subscription
Enter the Administrator credentials
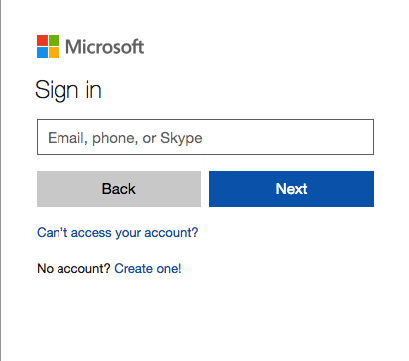
And password as well
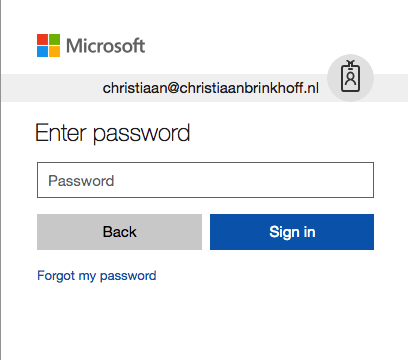
Approve the request
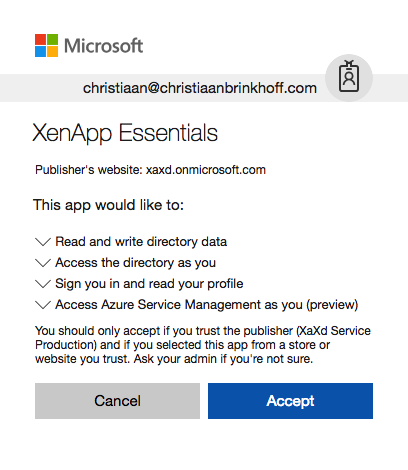
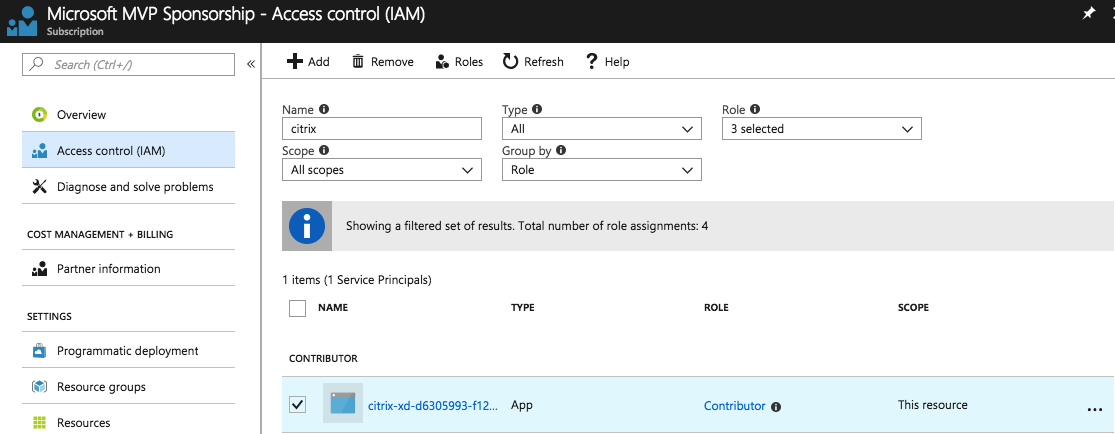
Background insights: The following user will be created on the Azure subscription to provide the deployment of the machines and to perform the Power Management of the Virtual Machines.
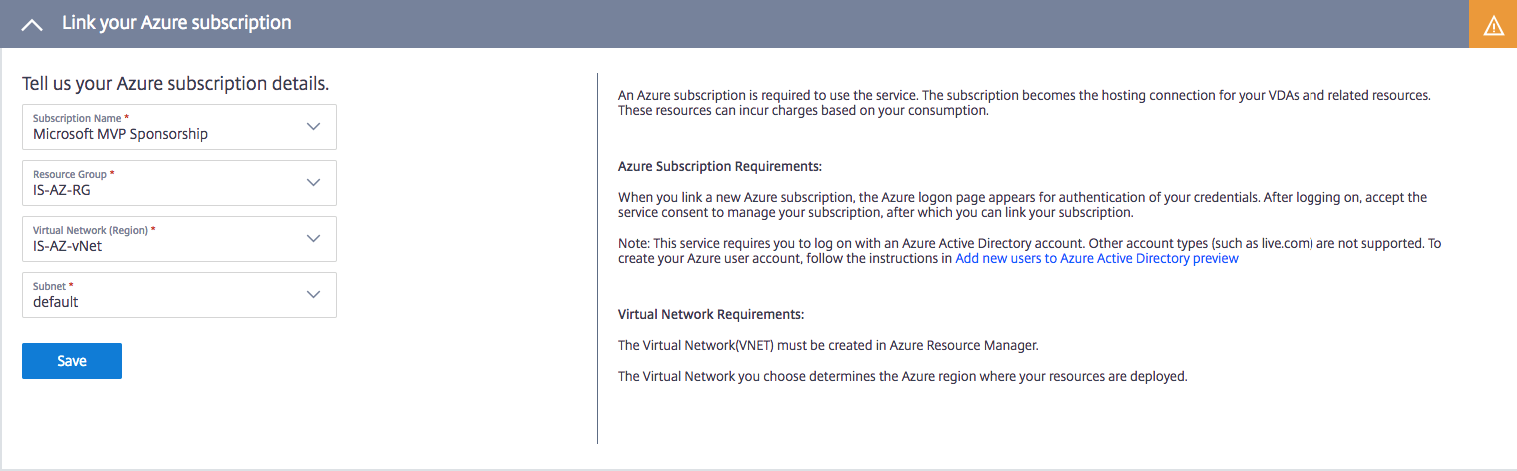
Select the correct subscription

Select the subscription, choose your Resource Group, Virtual Network and subnet – to place your Workers in.
Click Save
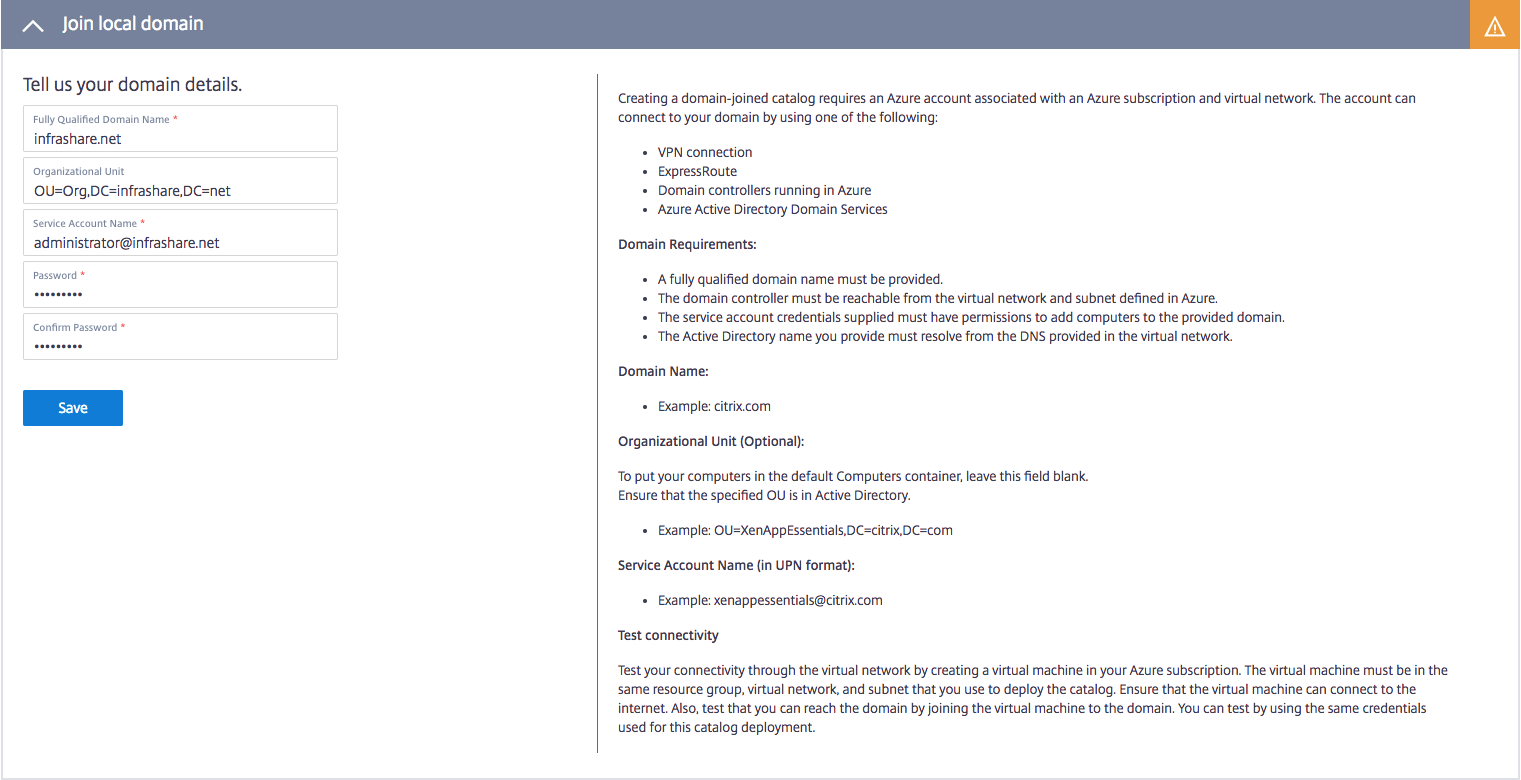
Enter the Active Directory information.
Note: Make sure to enter a service account with proper rights to provide the domain join within Active Directory!
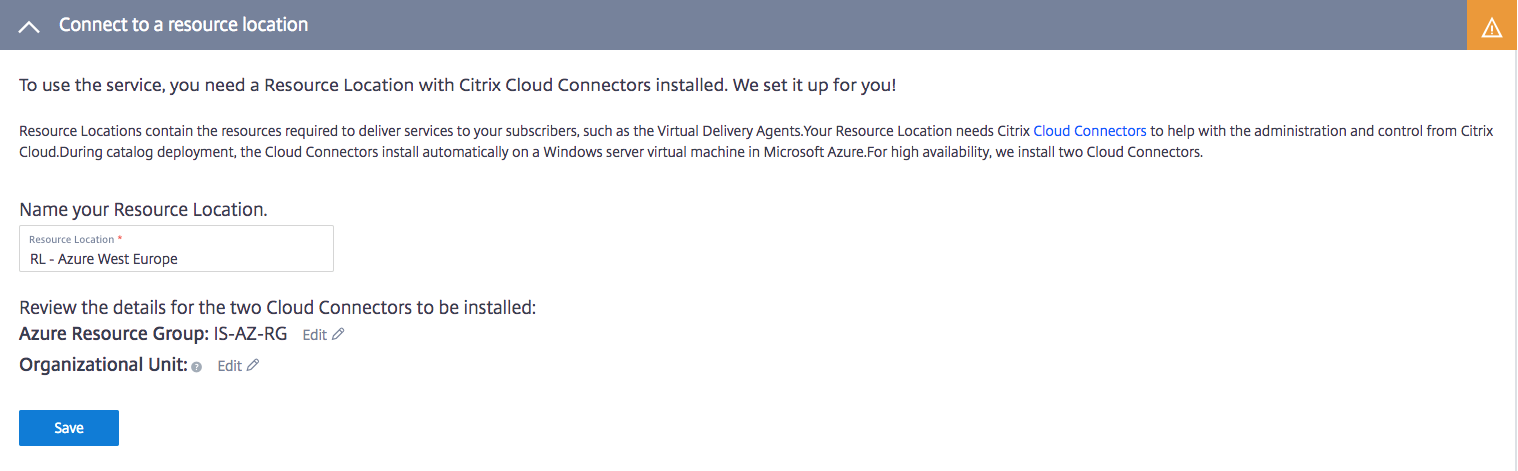
Connect to a resource location
The Connection to the resource location, which takes places through the Citrix Cloud connectors is now

If there are no Citrix Cloud connectors, you’ll get prompted for a new Resource Location name. When you start the deployment, two Citrix Cloud connectors will automatically be placed in Azure.
Click on Save
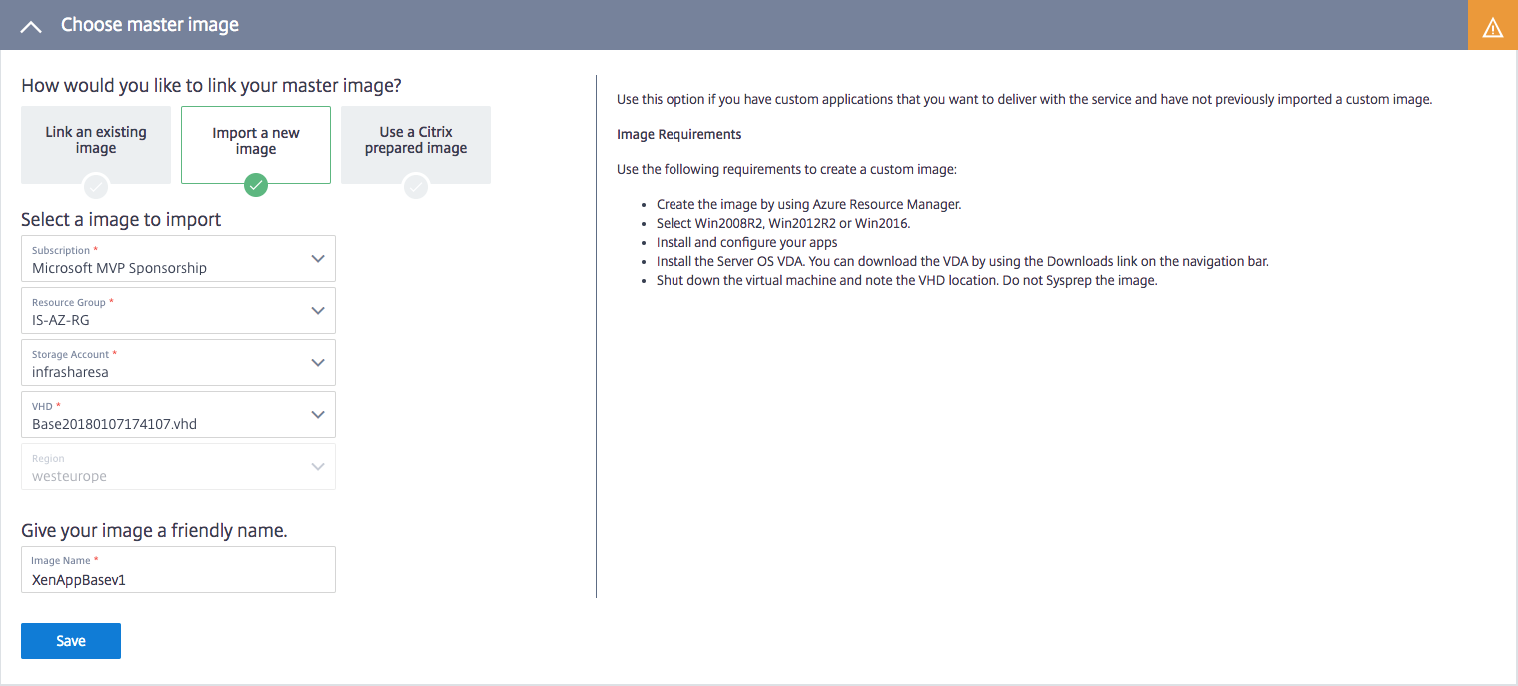
Choose for the option – import a new image.
Note: If you already performed these actions, you can also choose to link an existing image.

Open the Disk / click on the Disk
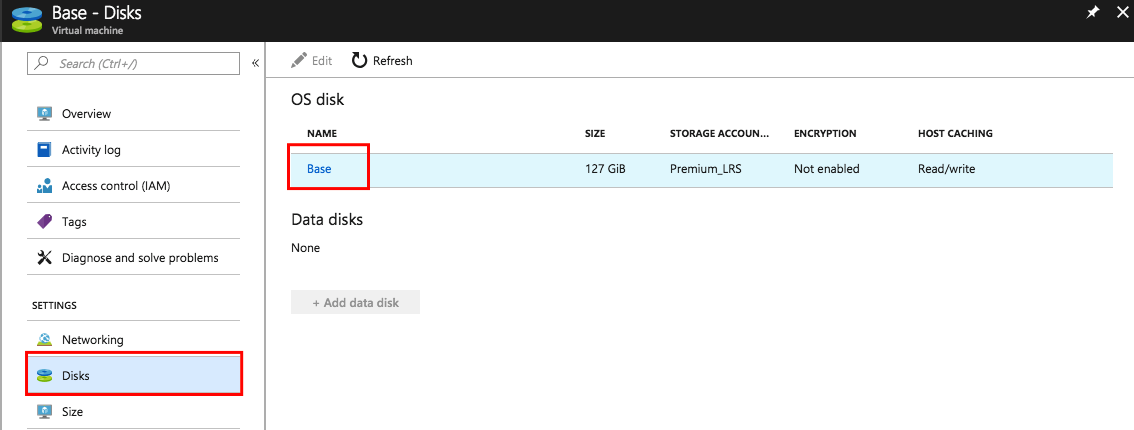
Remember the VHD URI location for the next steps
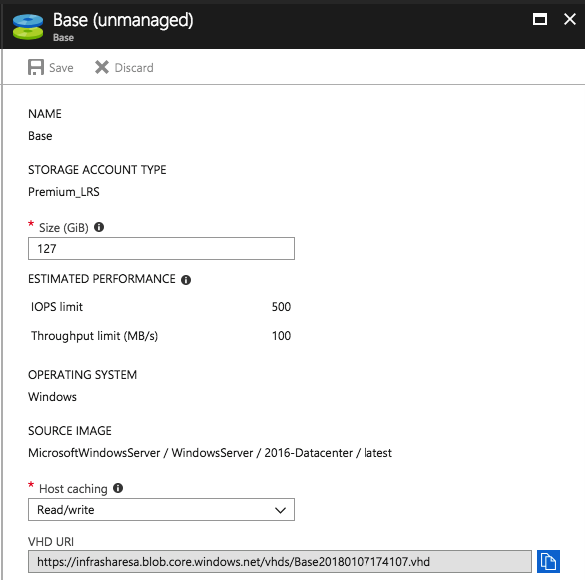
Select the location of the Base image and give in a name. Click on Save
Note: Make sure to unselect this checkbox, Azure Managed Disks are a Hugh performance improvement to the performance and maintenance process.
You have much lower limitations active and also optimizations on performance for your environment. See them all below.
- Faster provisioning time
- Scalable elastic storage / dynamically expandable storage
- No IOPS limitations anymore

Note: N-Series are also supported! Which are Nvidia graphical vGPU Virtual Machines in Azure for High User Experience / Performance. Check out this blog article for more information.

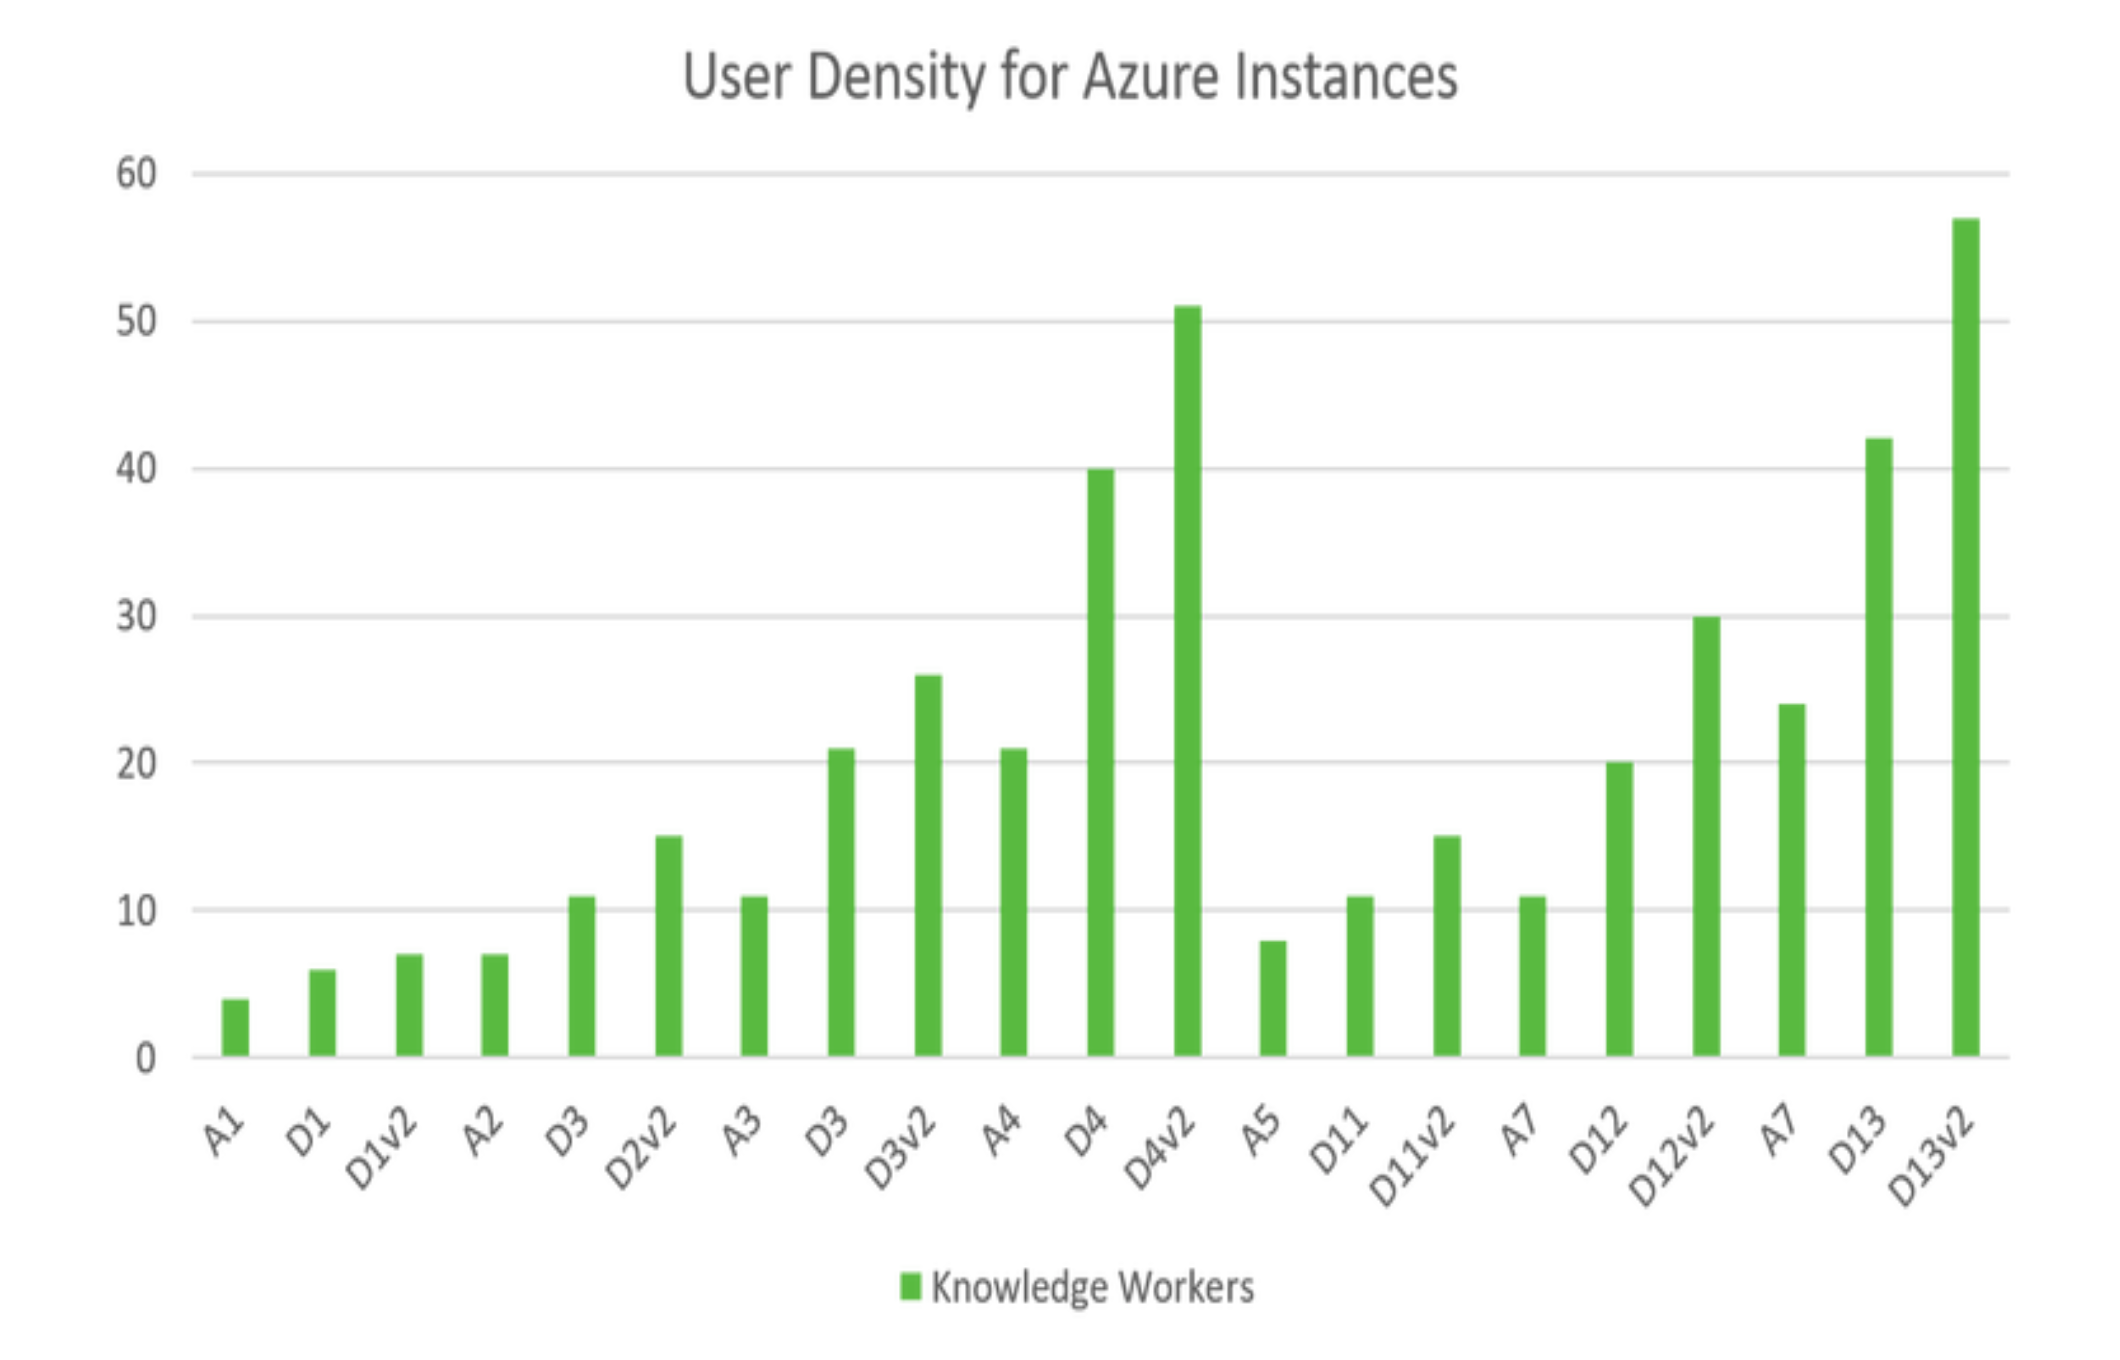
If you choose custom sizings, choose them wisely. See the graphics below to make this decision a bit easier. These are LoginVSI measurement results of Citrix from one year ago.
Configure Smart Scale – Capacity
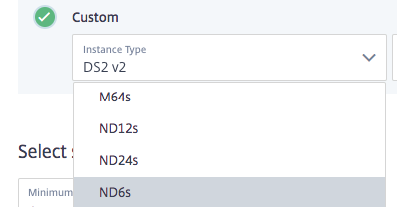
Choose your sizing’s
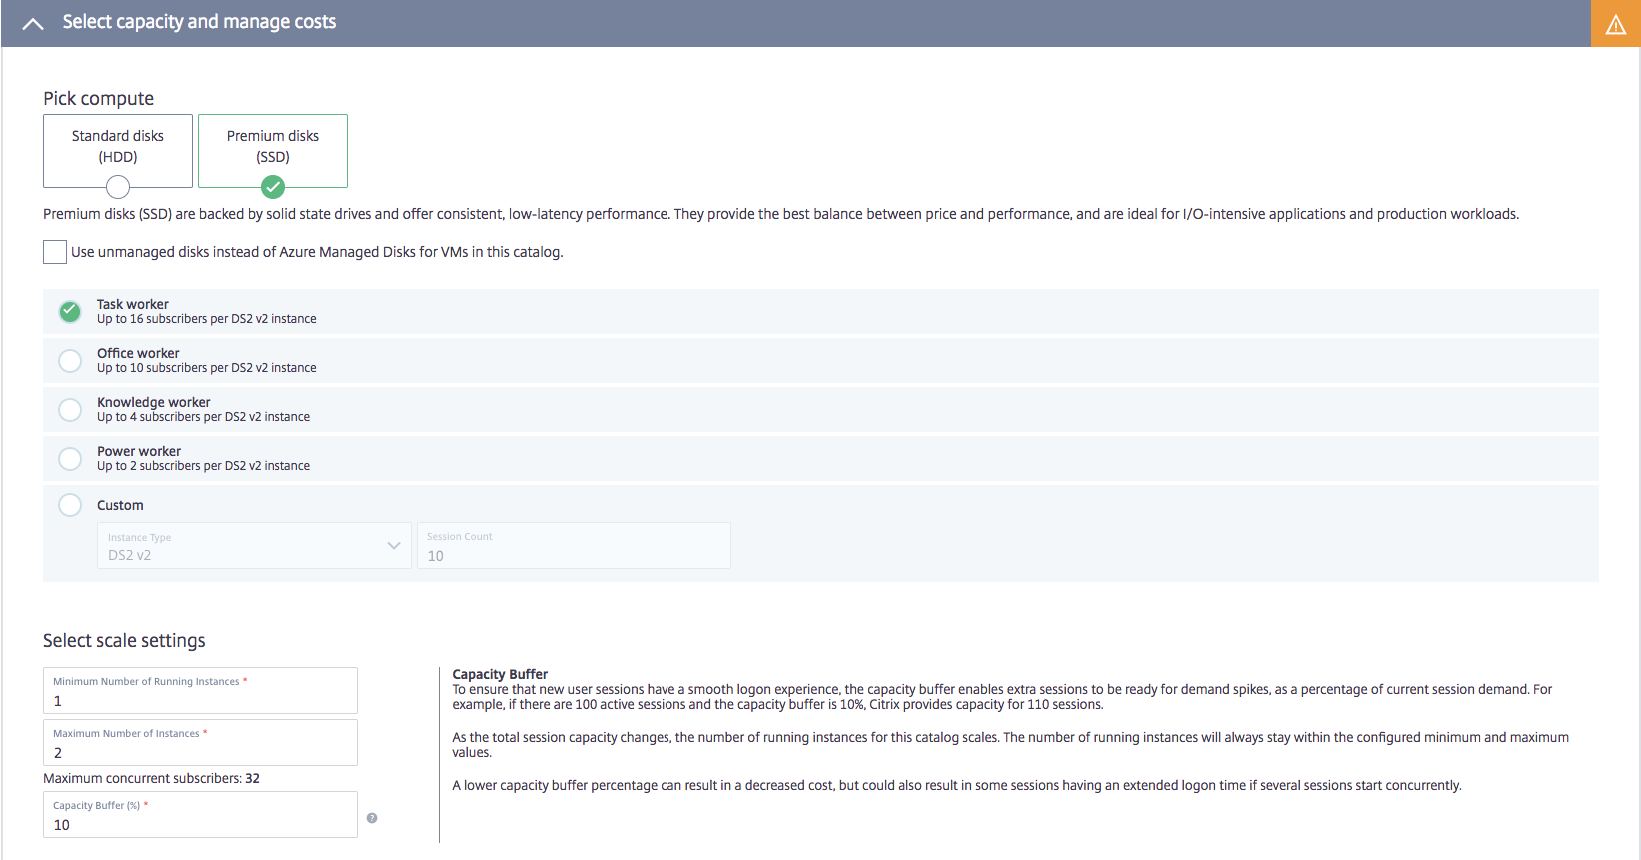
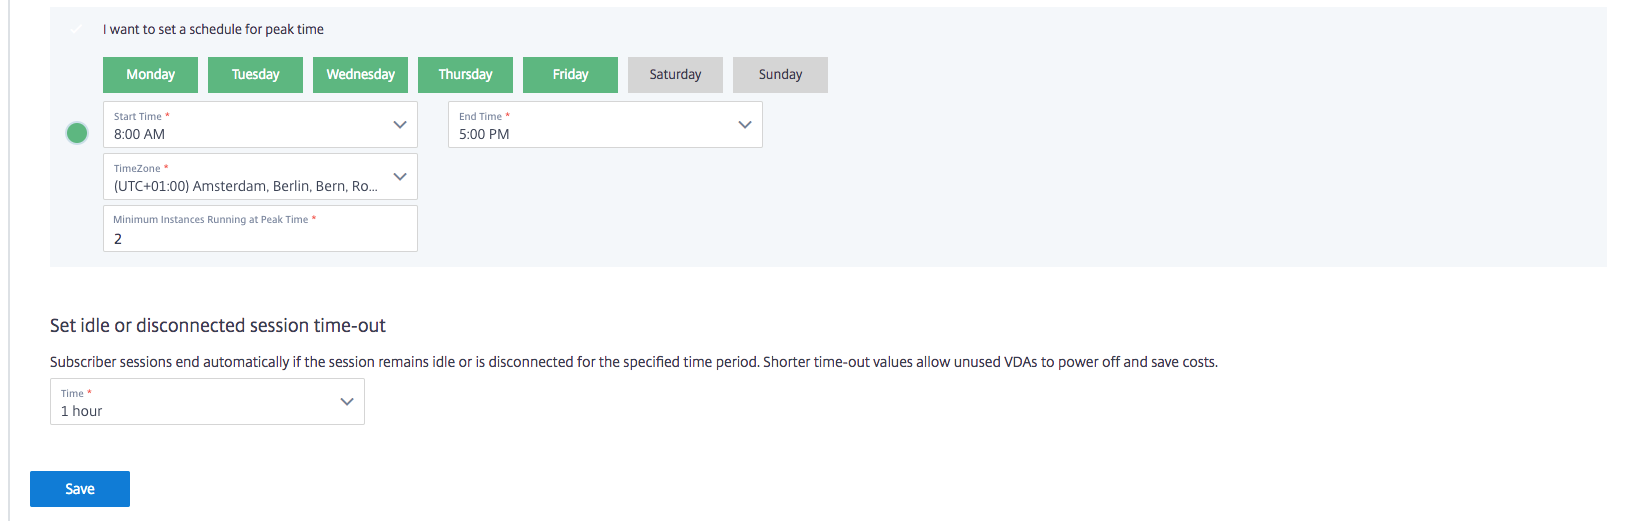
Activate Smart Scale if you want to save money on Virtual Machine resource costs. Within this option, you can downscale the Virtual Desktop and Apps environment after working hours, which saves resources costs.
Click on Save
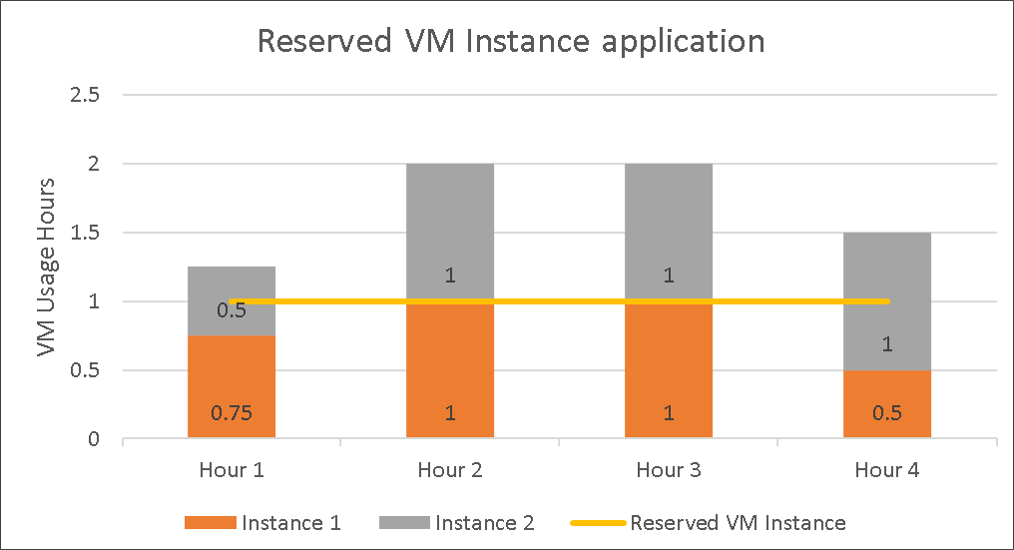
Note: If you want to save more money for Azure, I advise you to take a look at Reserved Instances. With this typically new service, you can reserve resource for 1 or 3 years, which can save up to 50% on resource costs! See this Microsoft Docs page for more info!
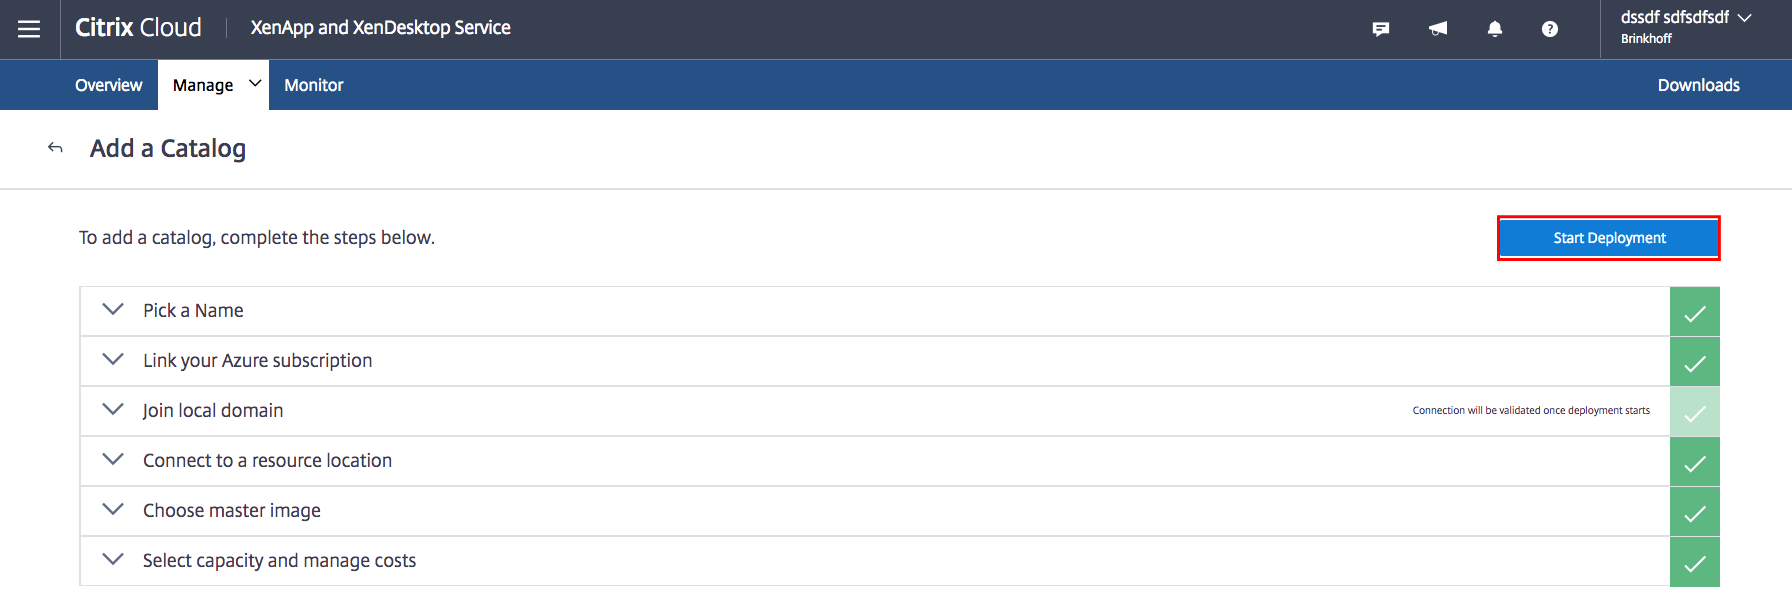
Click on – Start Deployment – to start the Automated enrolment process!
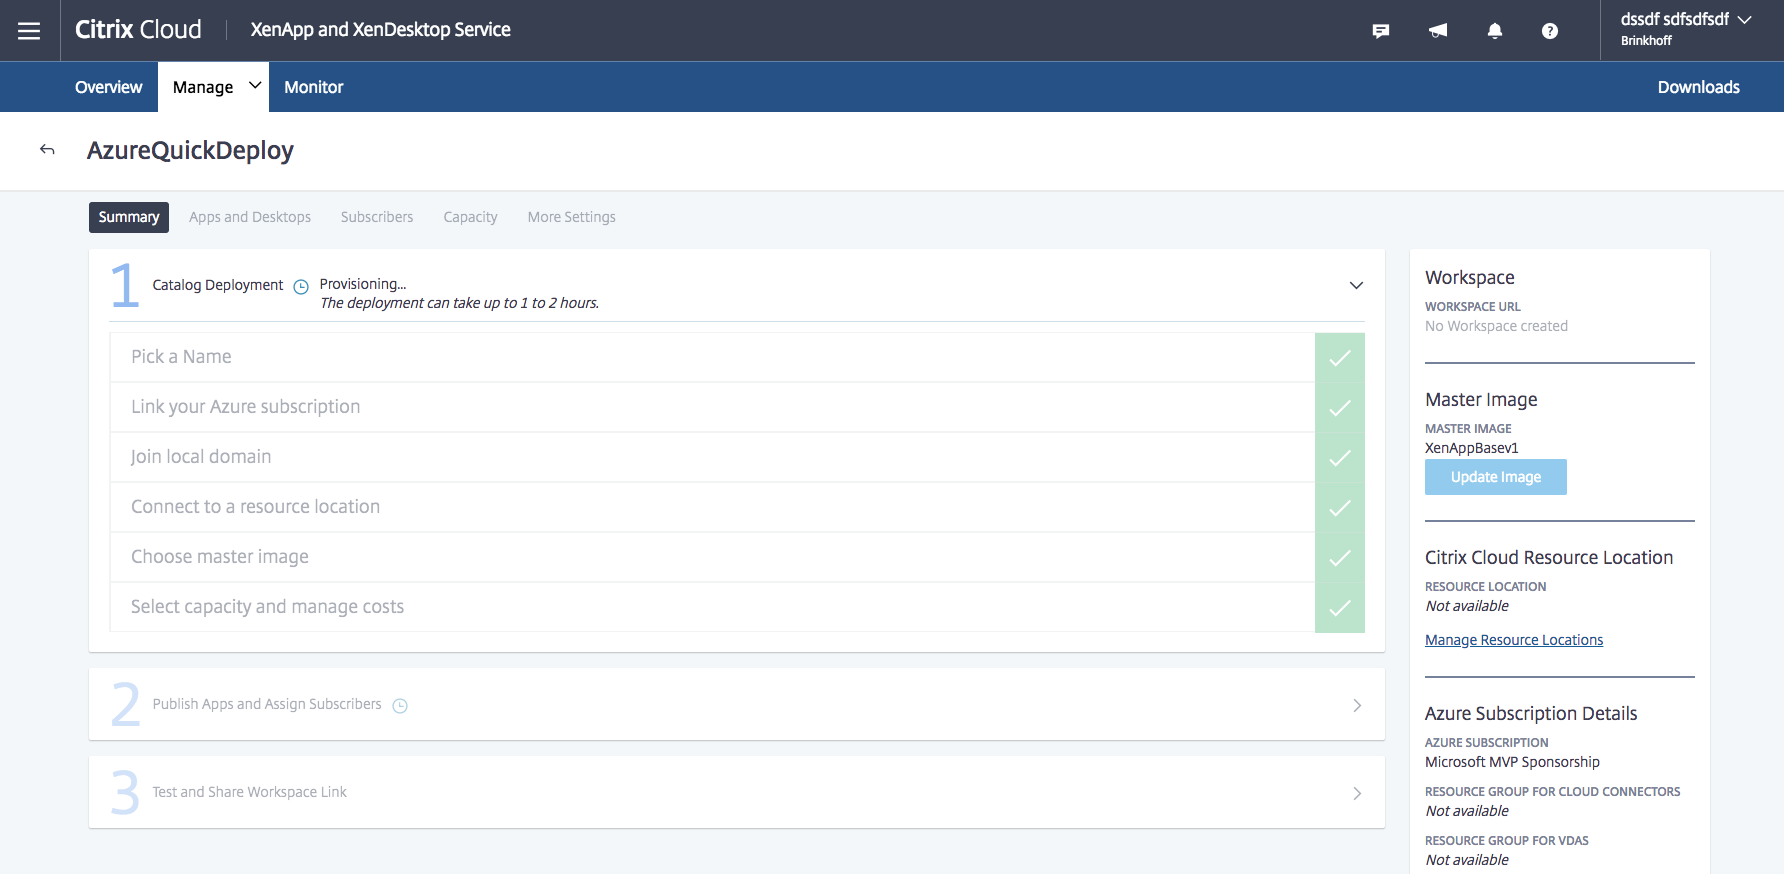
The deployment is started…

Background insights: The Citrix Cloud connectors are currently deployed in Azure under the machine name Edge1 and Edge2. Within the same Availability Set – including 1 fault and update domain!

Process status…


Master image is being created…

When the process is finished, you’ll see the following machines running

The deployment process is finished
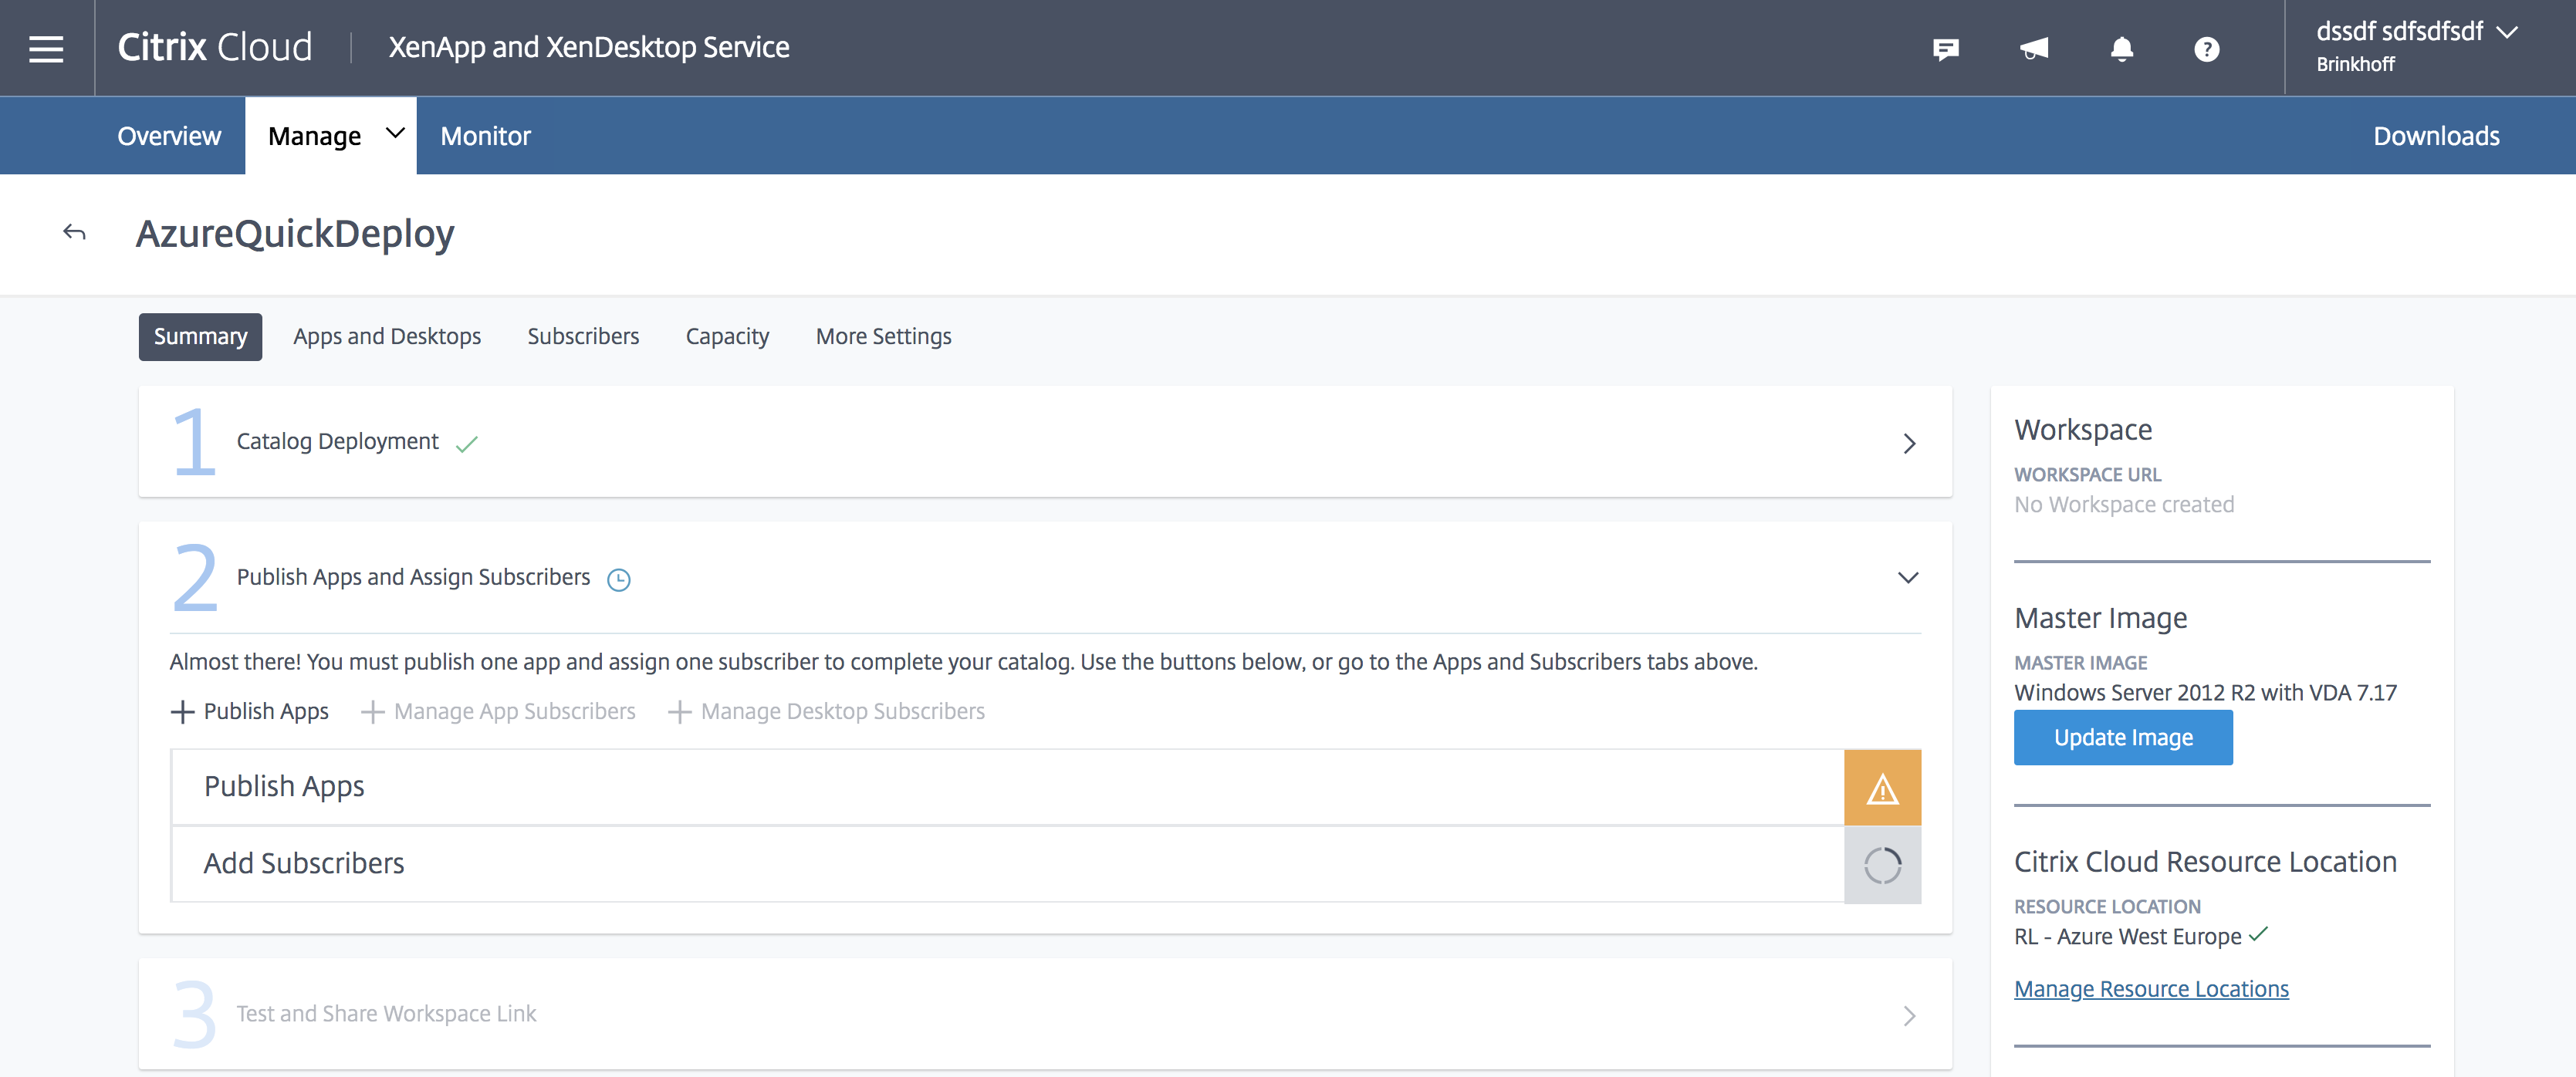
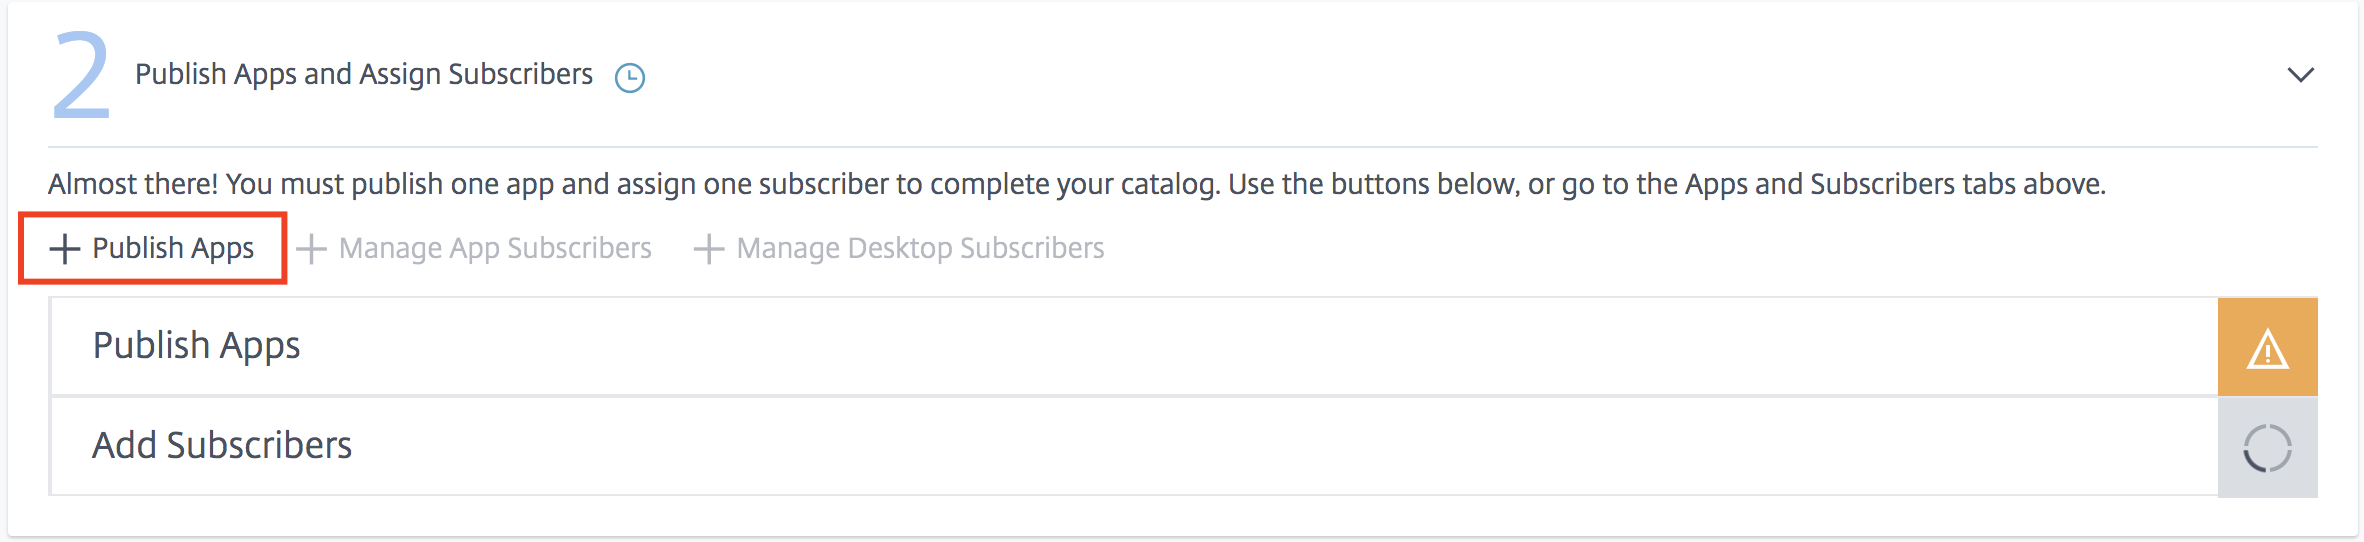
Click on Publish Apps
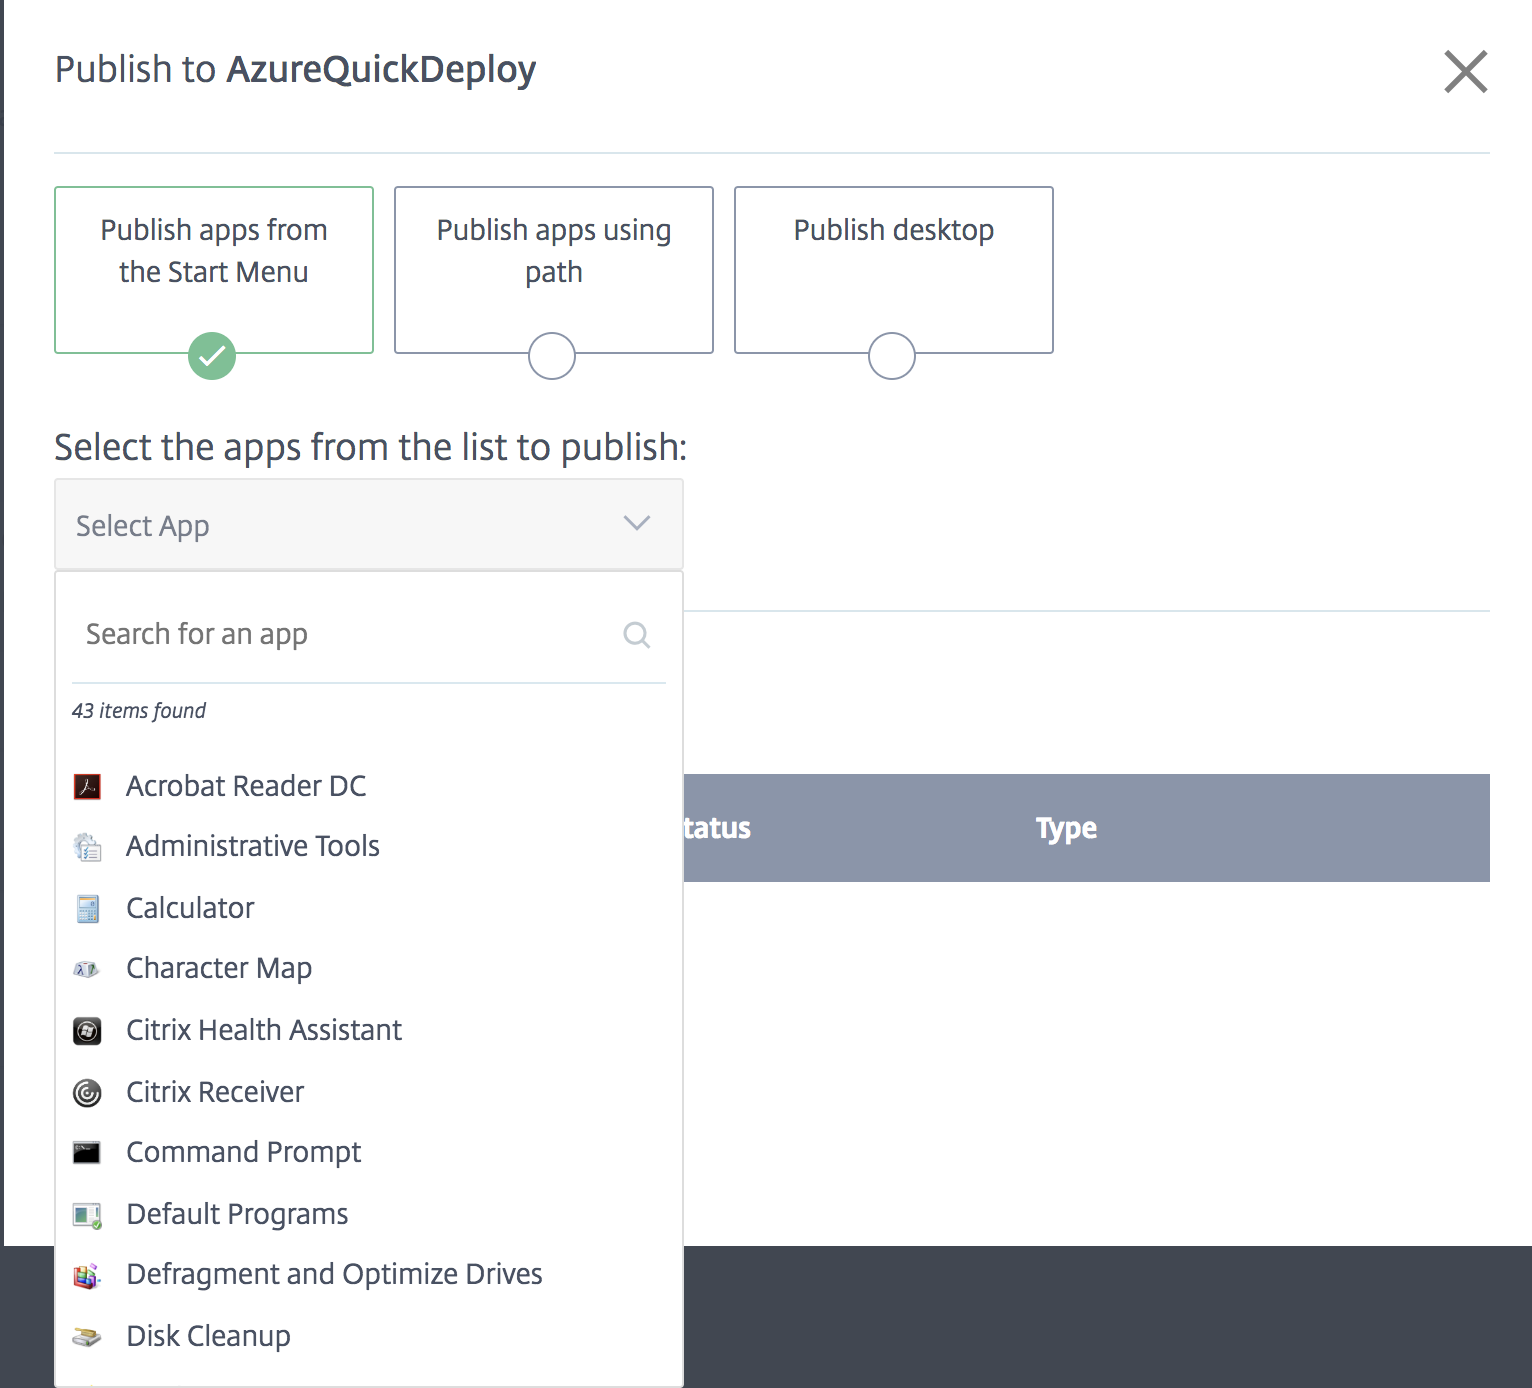
Select the Apps that you want to Publish to the Citrix Workspace
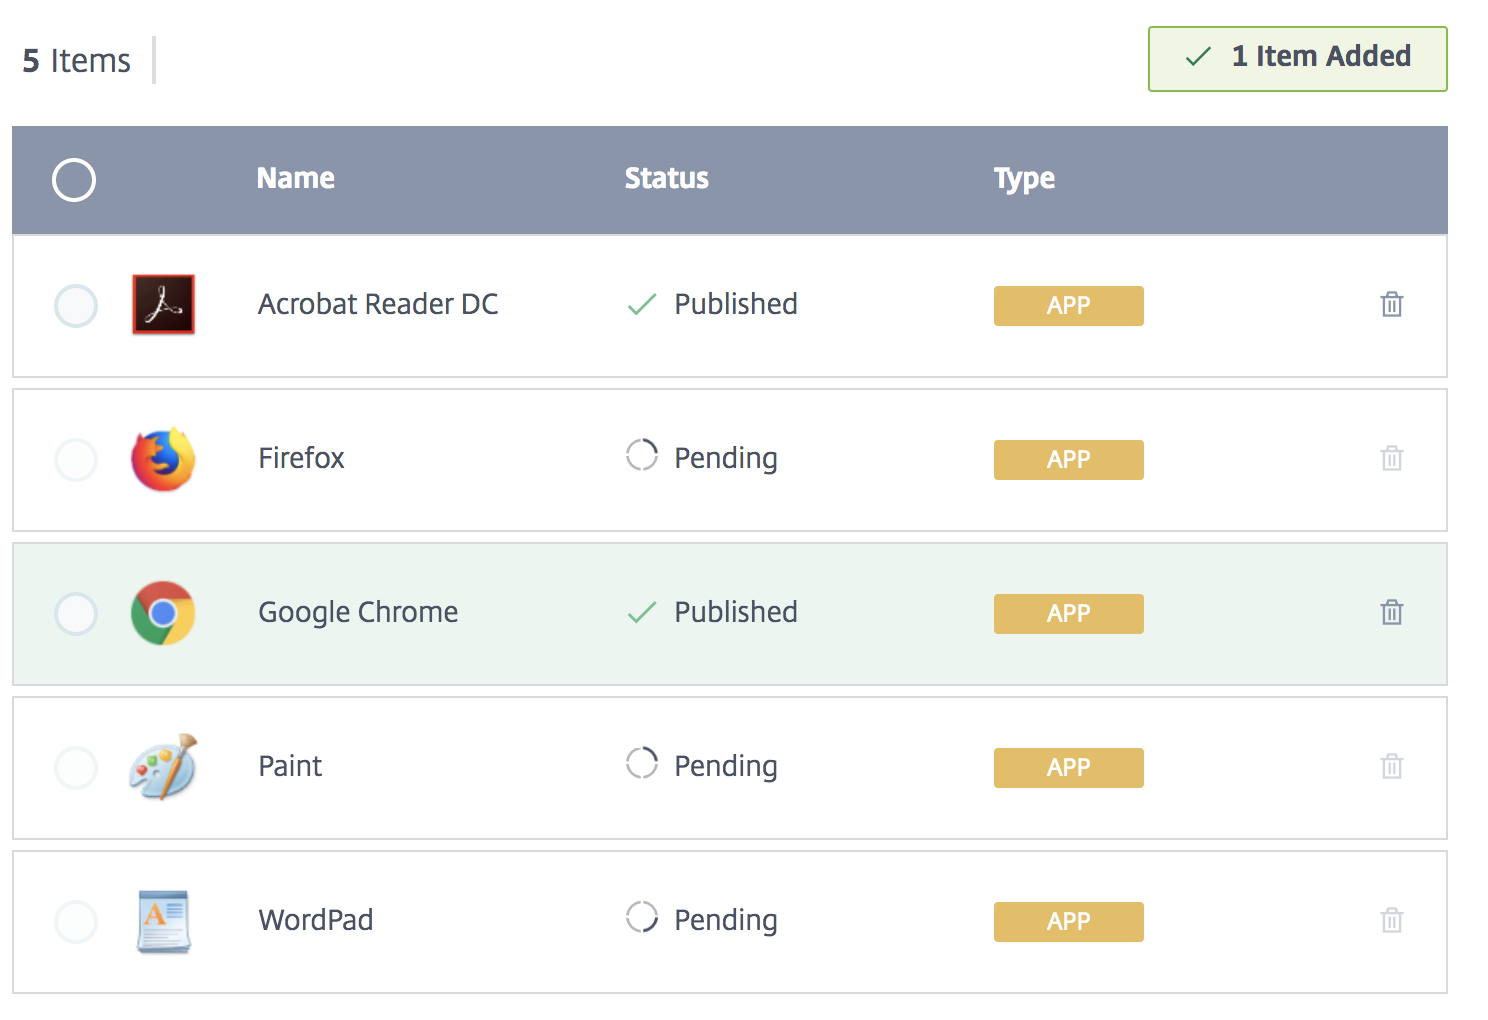
Check if all the Apps are listed
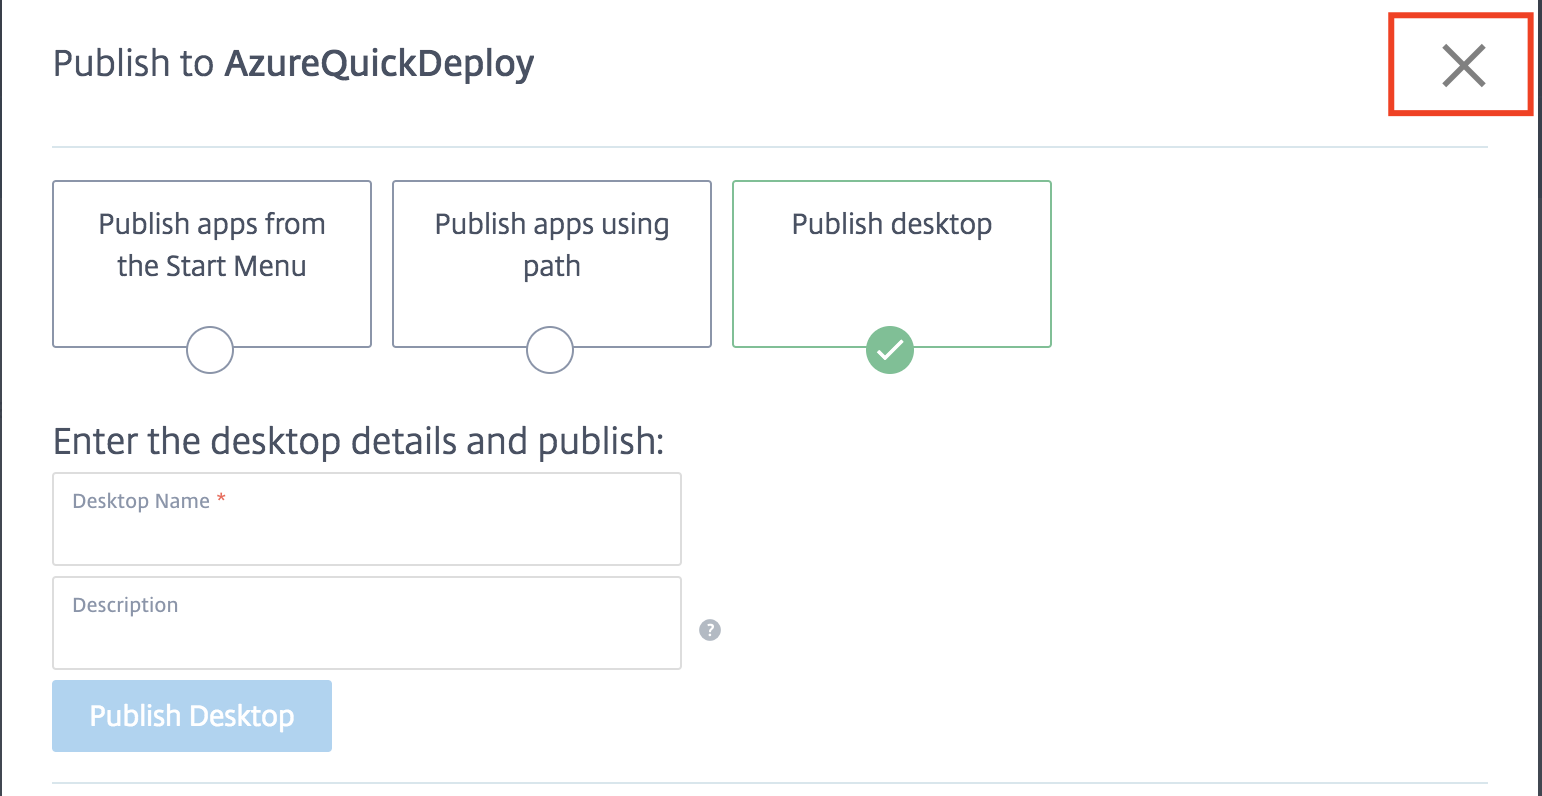
Click on PublishDesktop – give in a Desktop Name
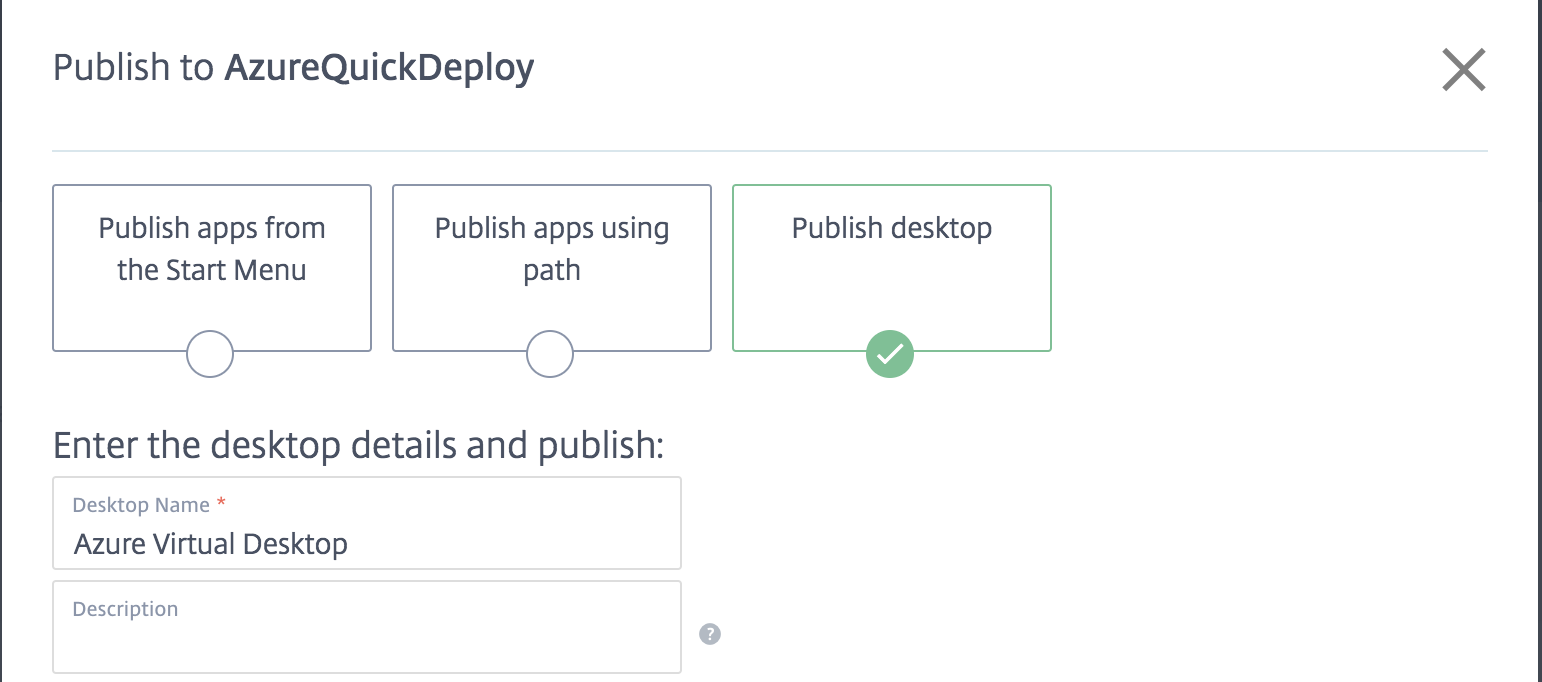
Click on PublishDesktop
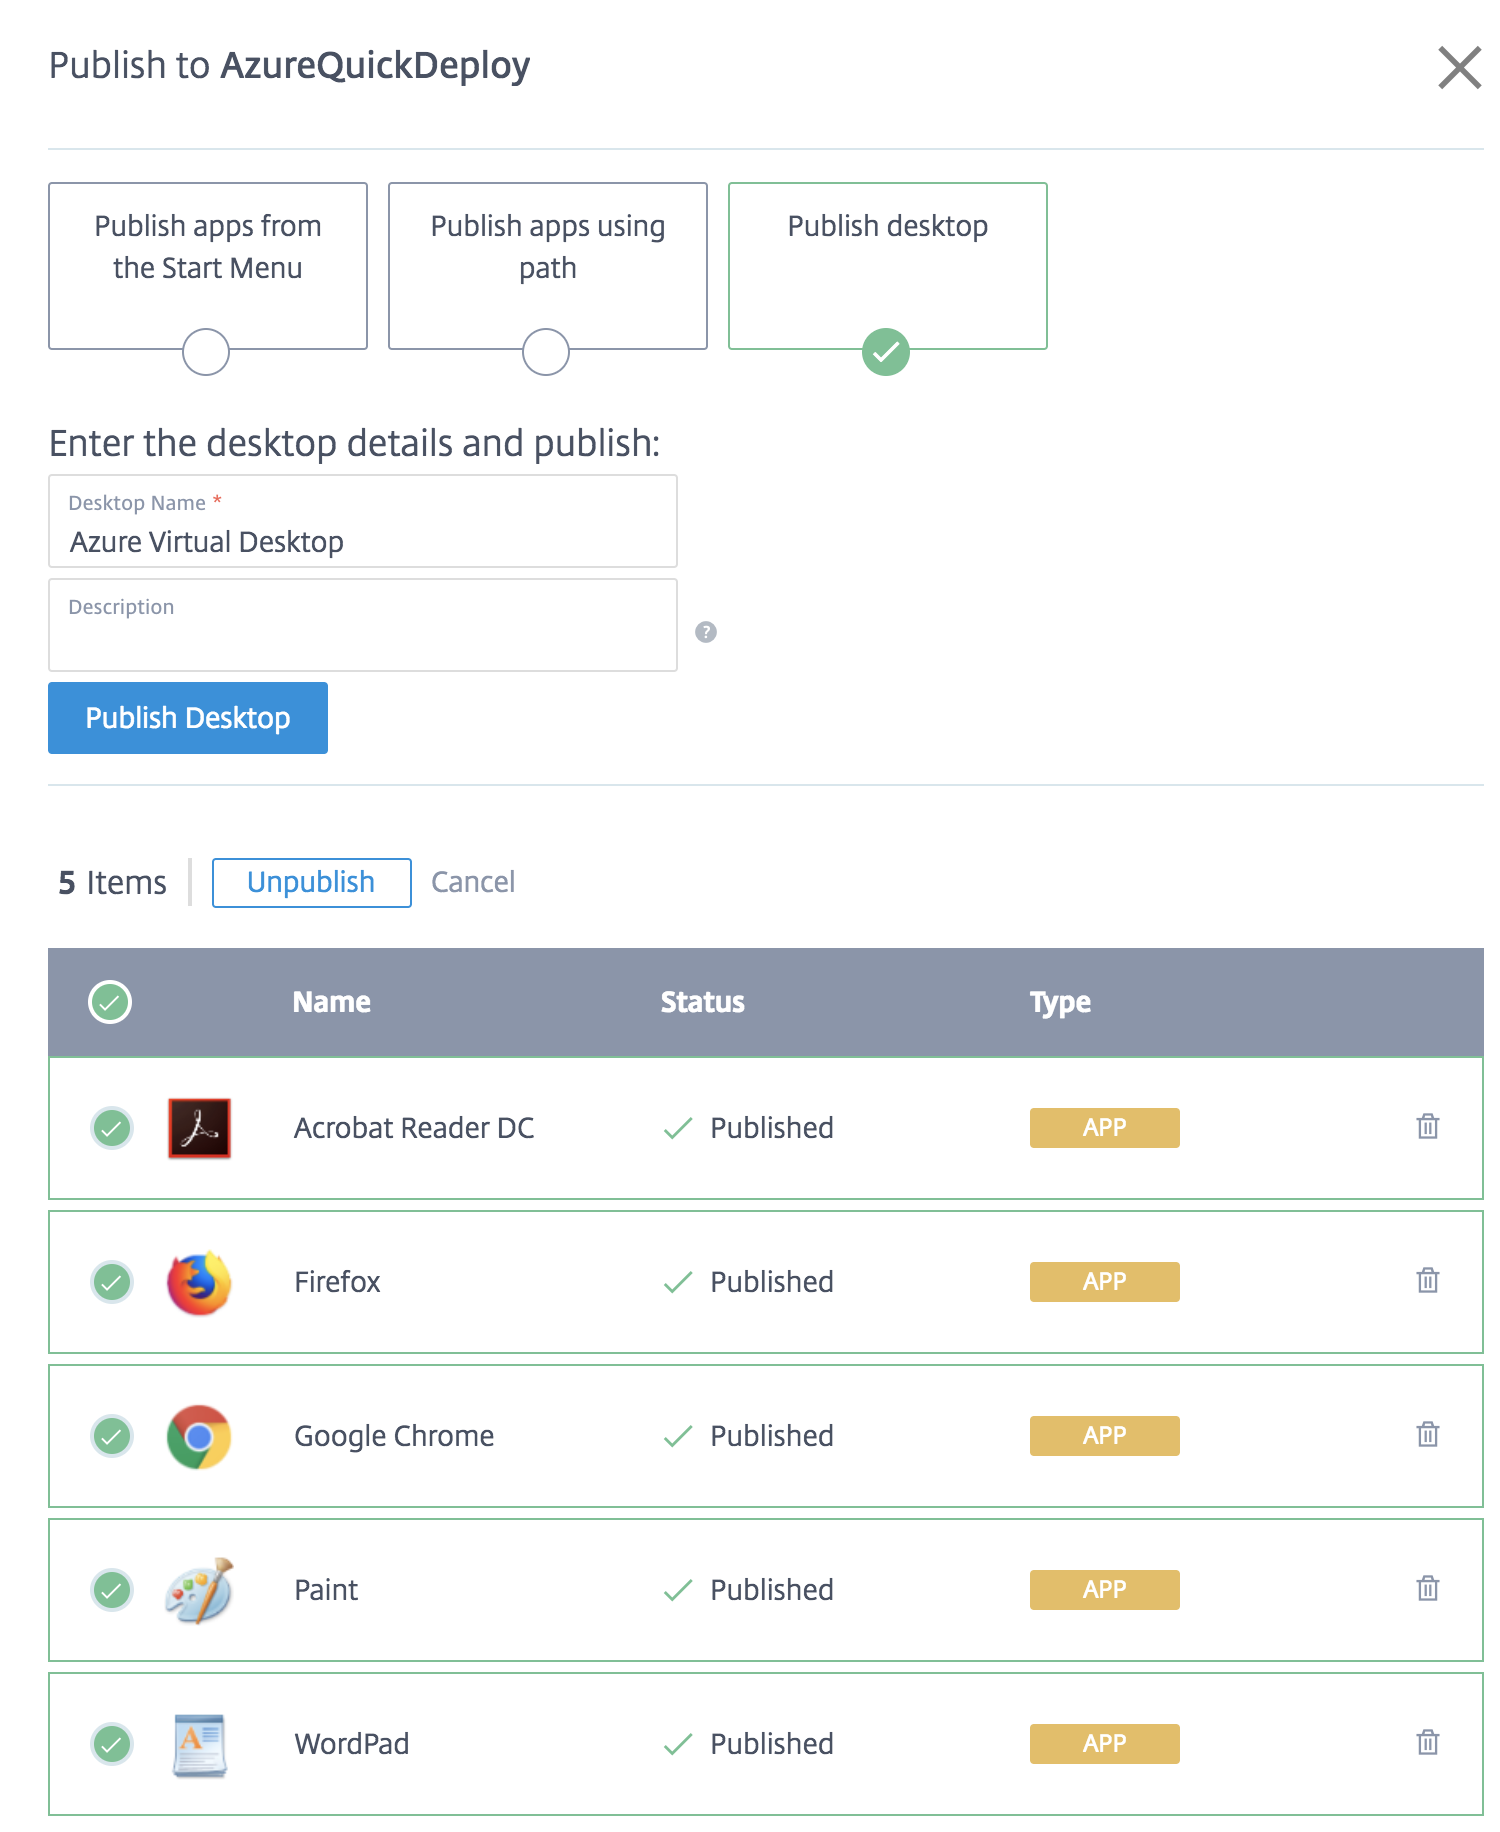
Wait some seconds… The Desktop will be added to the list…
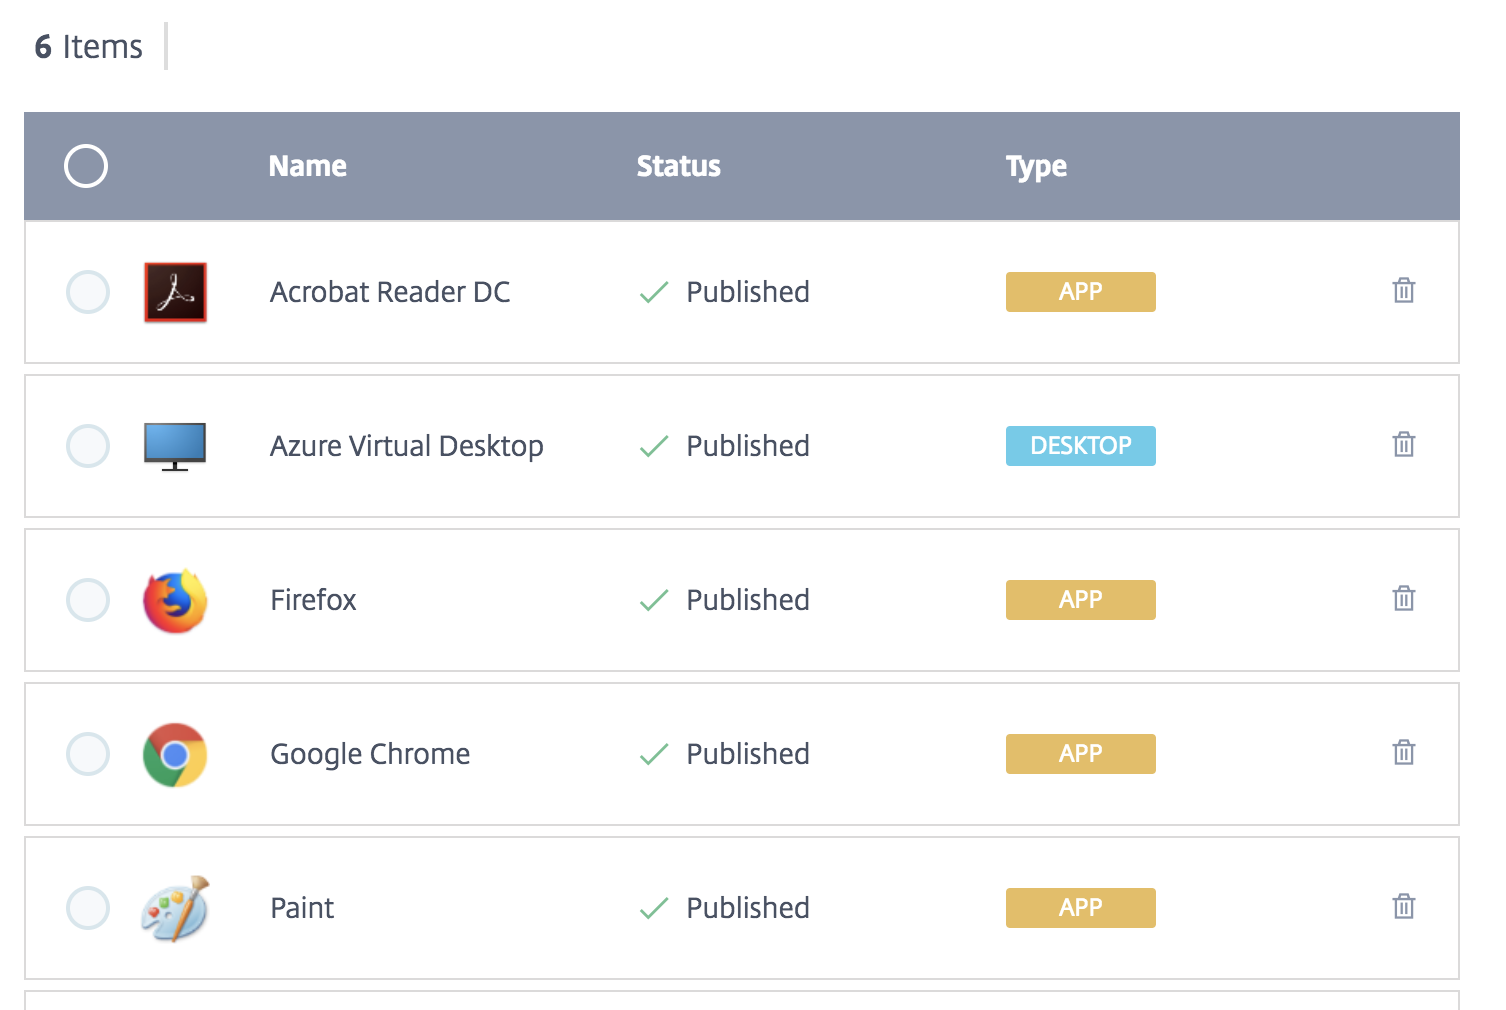
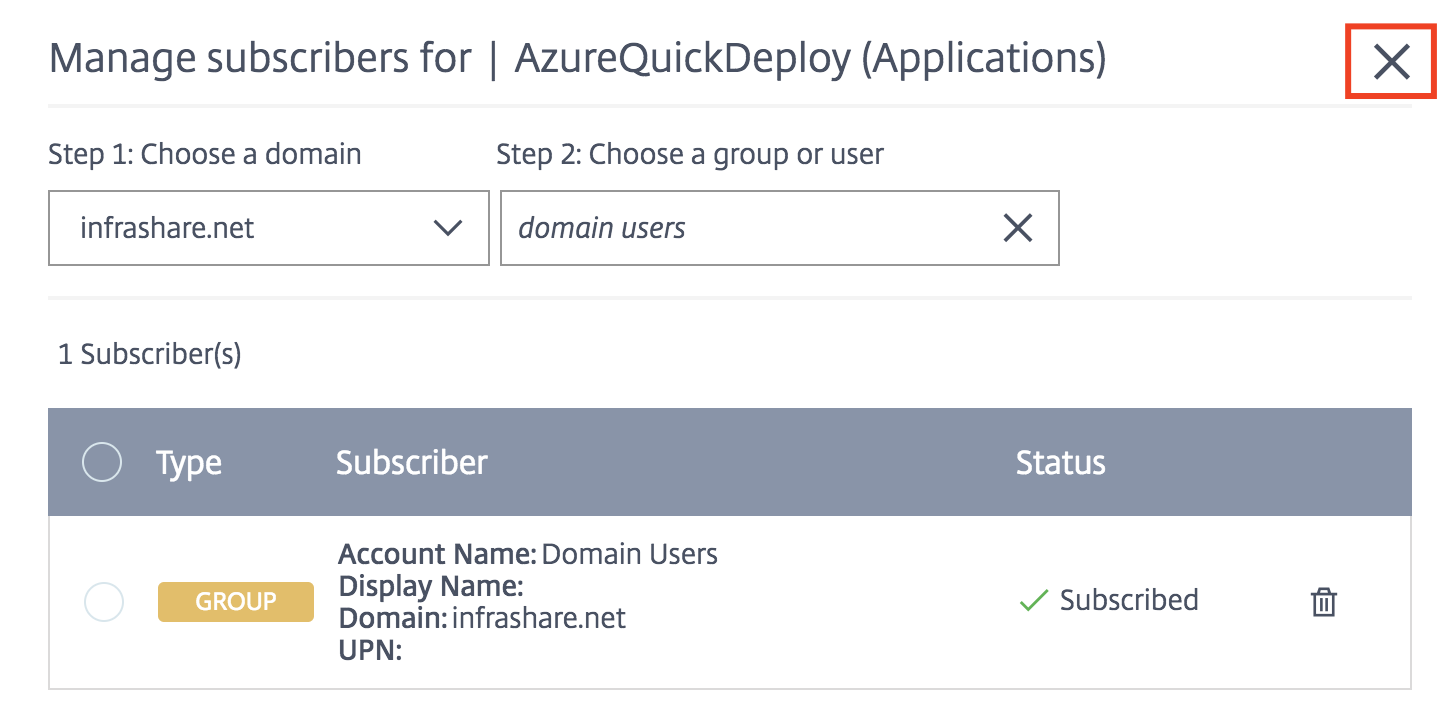
Click on the cross to close the screen
Assign Apps and Desktops to Groups and Users
Click on the previous screen on + Manage App Subscribers
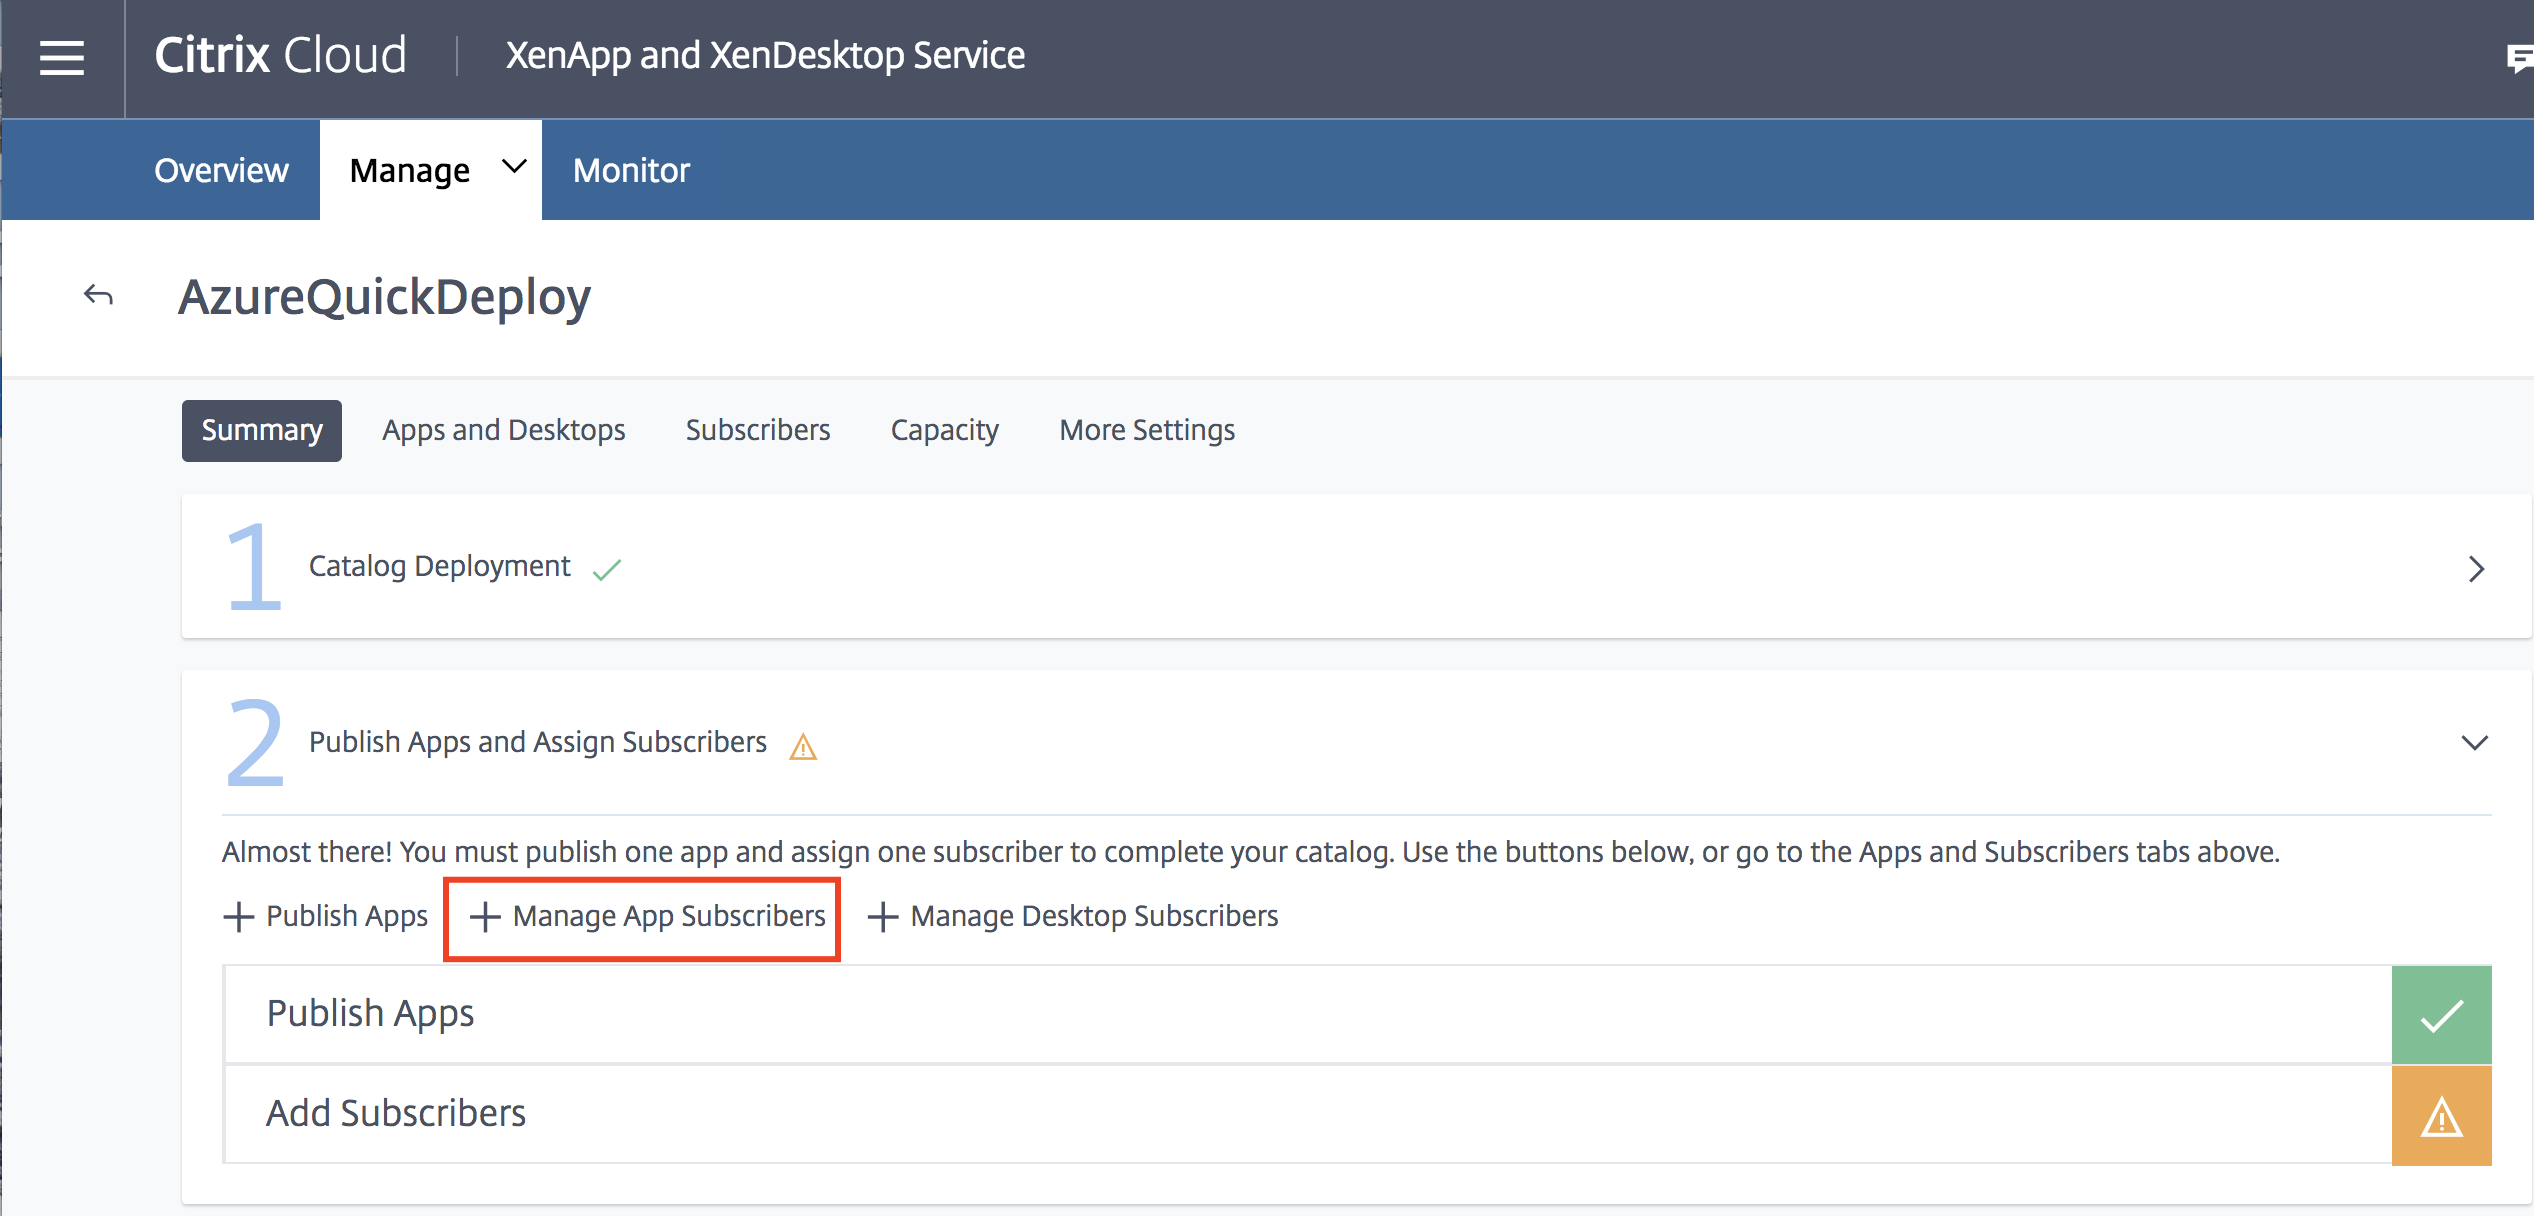
Select the Groups
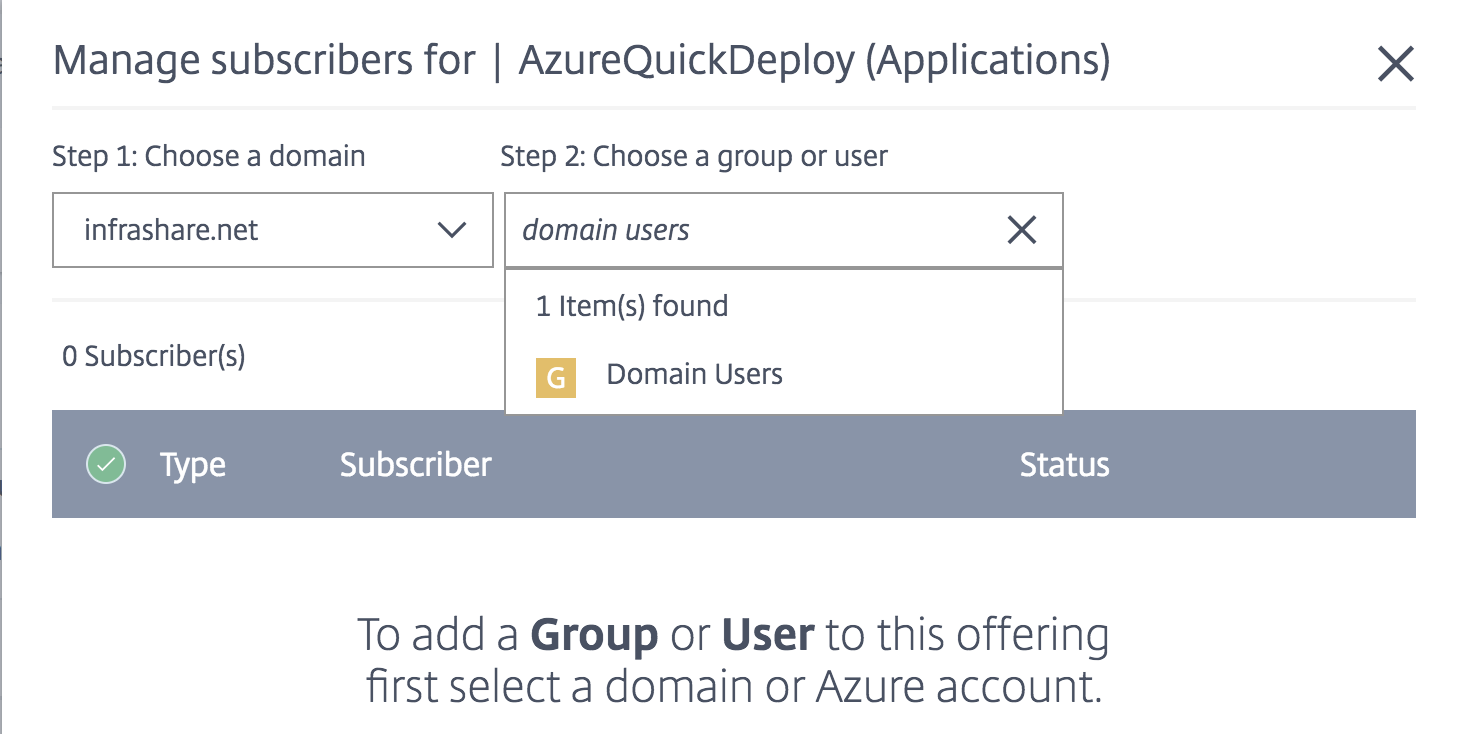
Close the screen
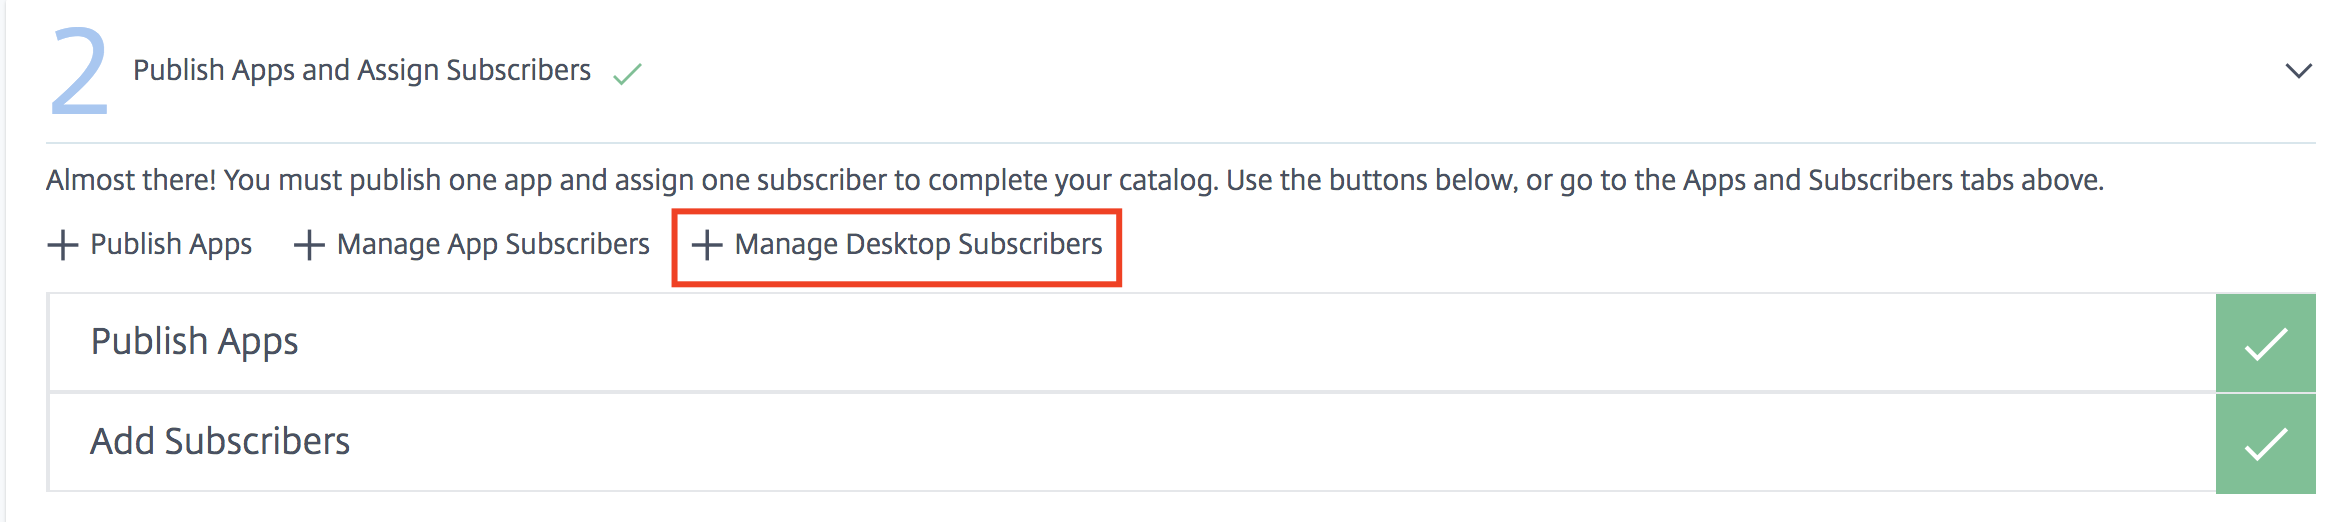
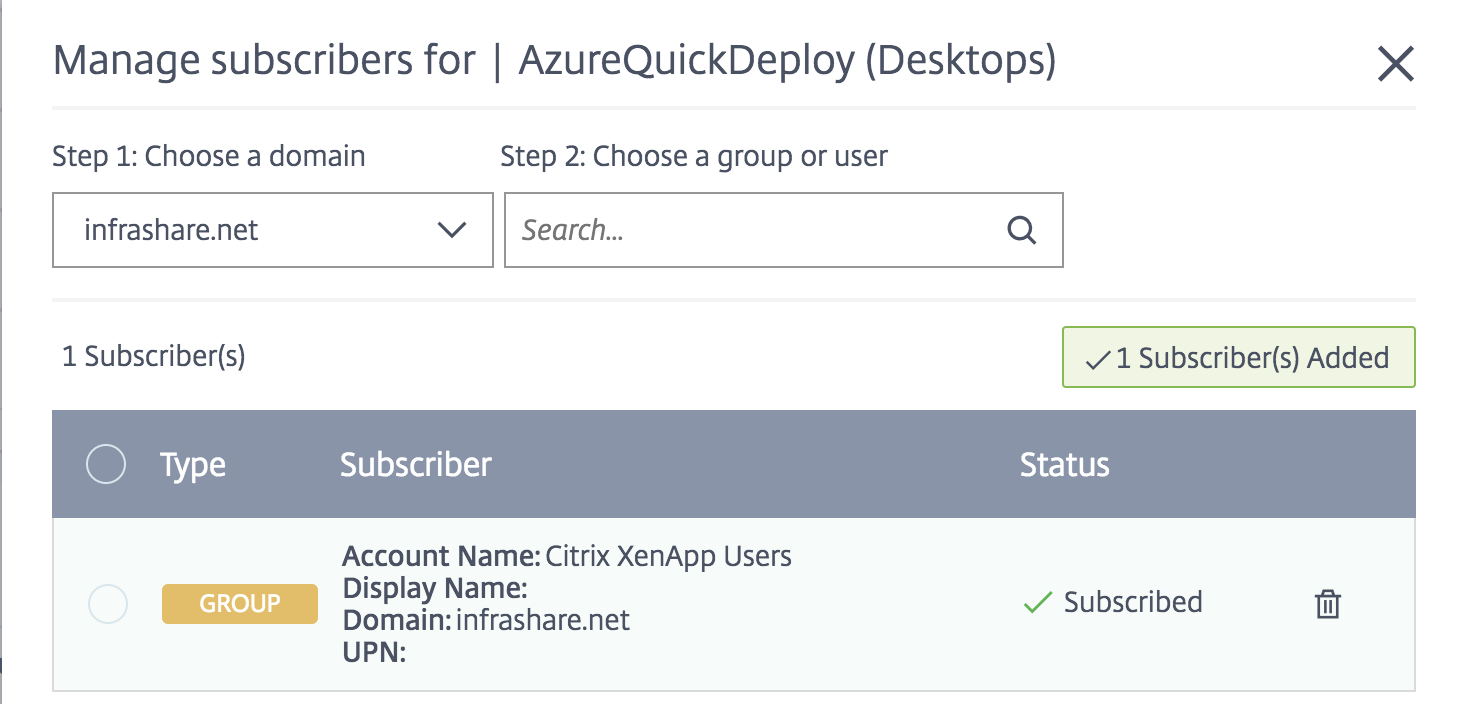
Click on +Manage Desktop Subscribers to assign groups/users to the Publish Desktop
Search for a Group and/or Users
Close the screen afterwards
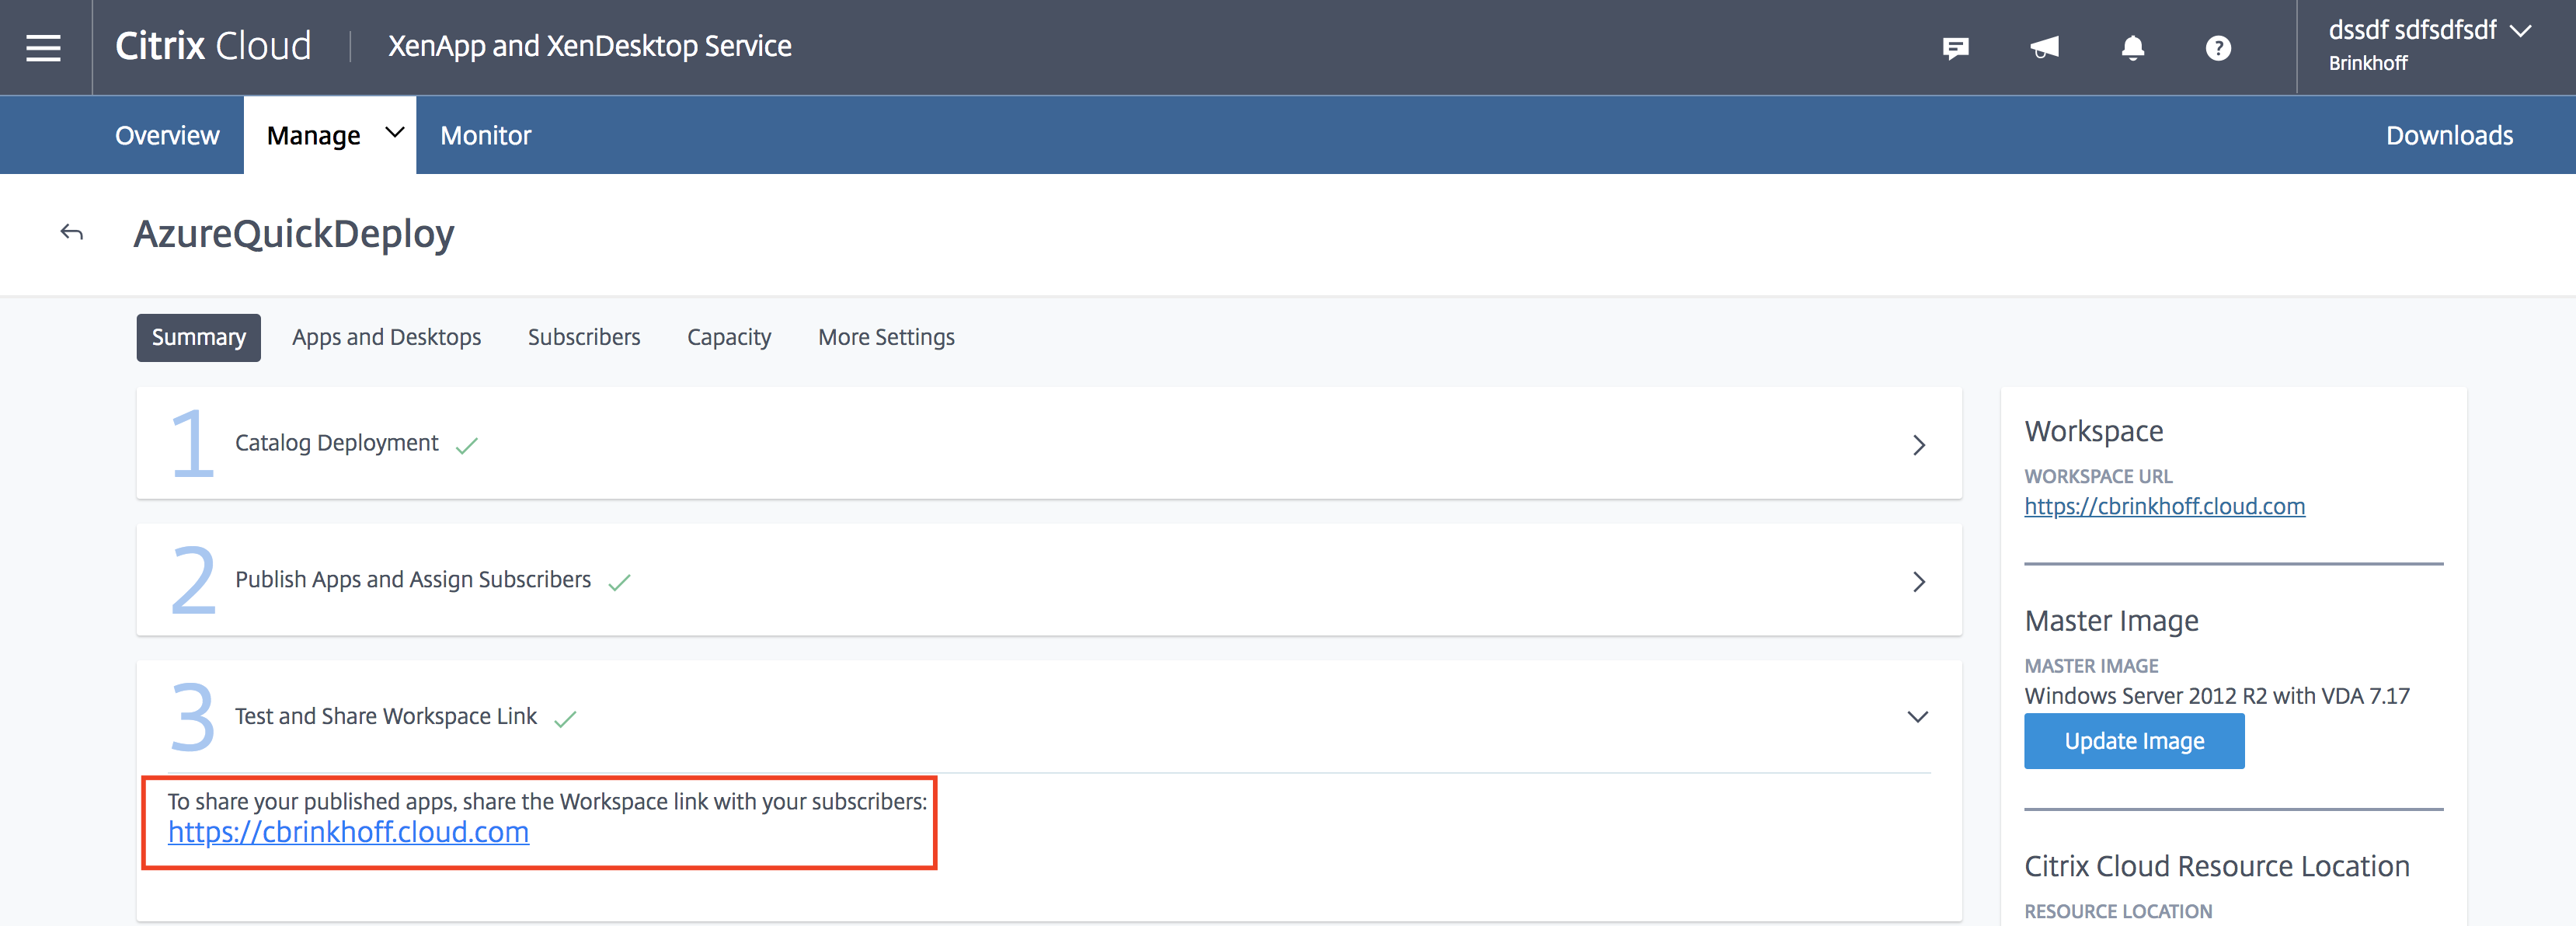
Copy / remember the Workspace URL to test the Virtual Apps and Desktops later on
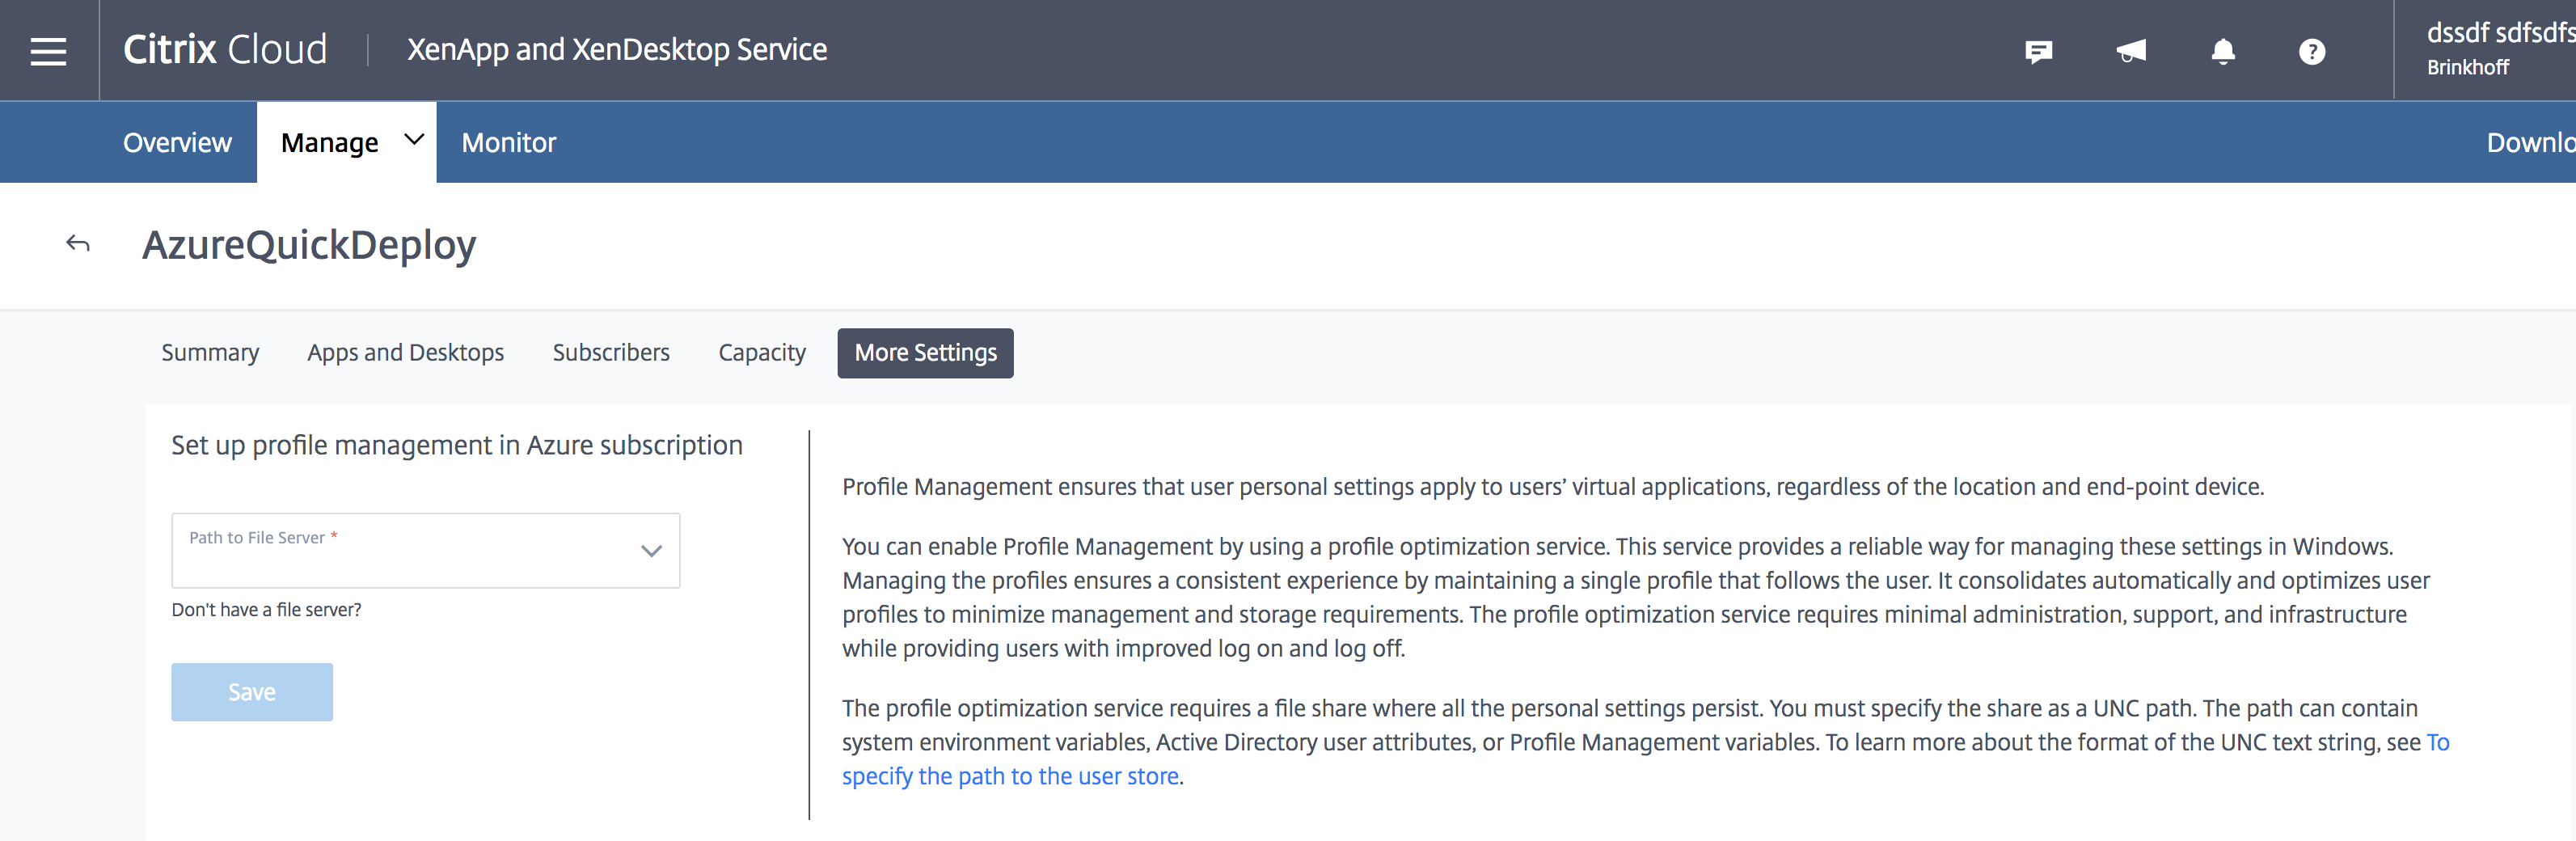
Set up profile management in Azure subscription
Click on More Settings

Provide a UNC network file share path to save the Citrix UPM Profiles – the configuration is all set during the creation of the machines and can’t be changed.
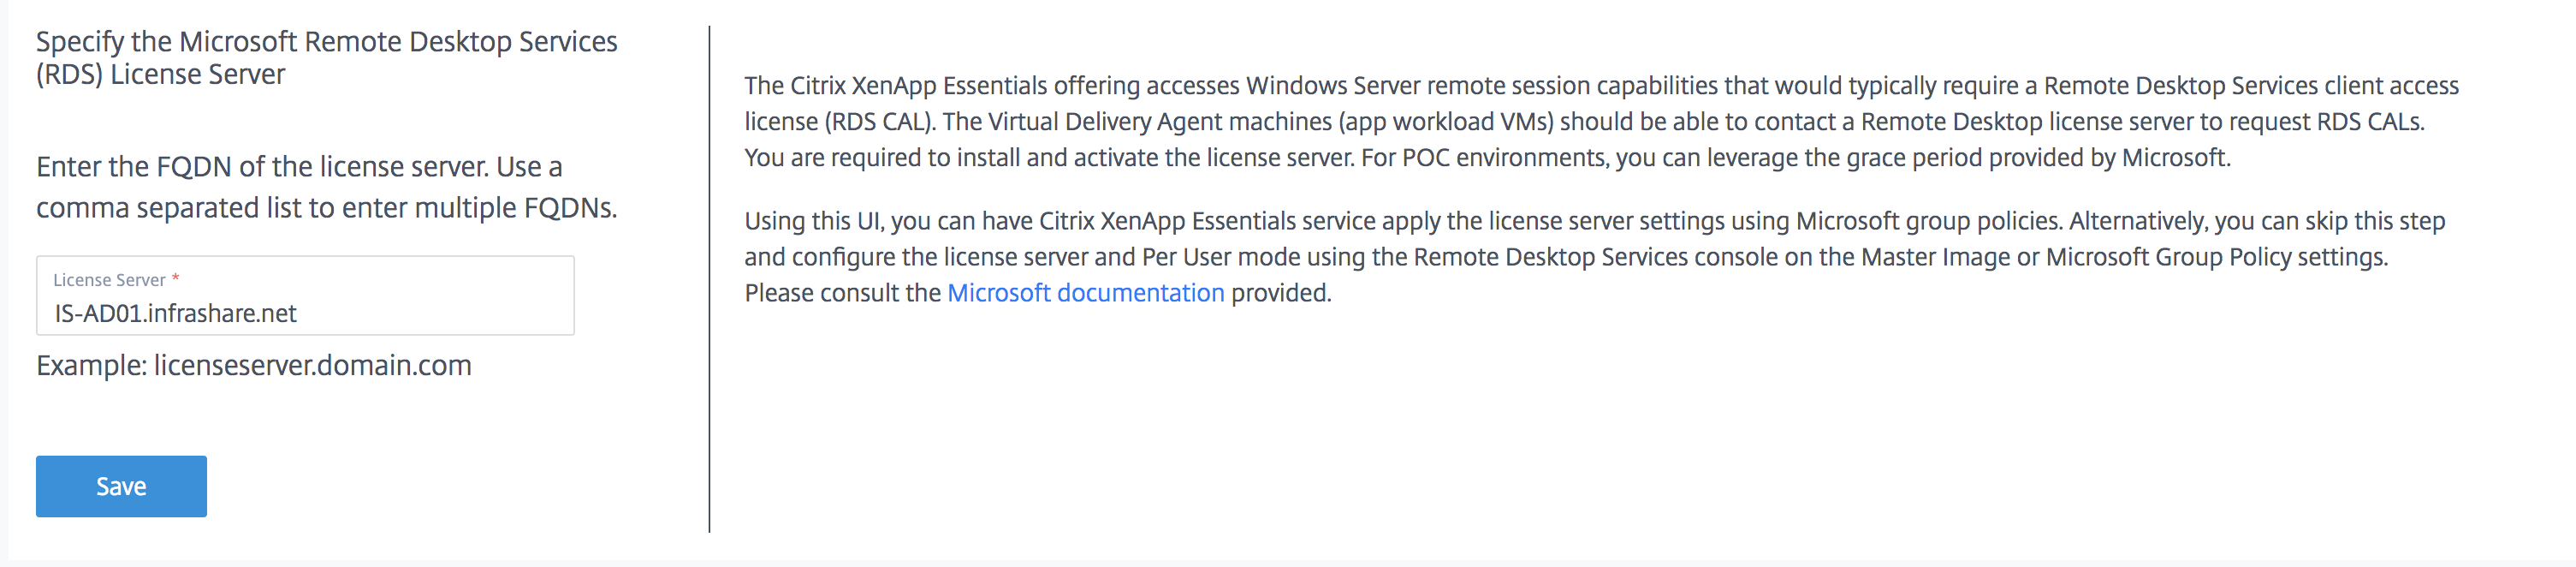
Specify the Microsoft Remote Desktop Services (RDS) License Server
Give in the RDS Licensing FQDN of the server to use your own server RDS CAL’s
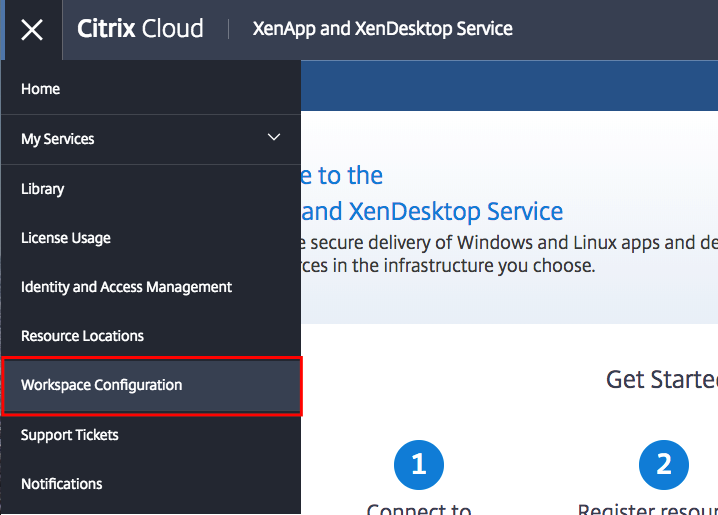
Citrix Workspace Aggregation configuration
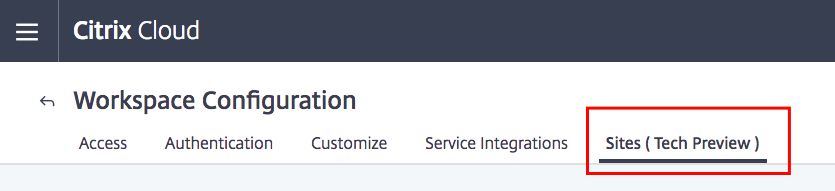
Switch to the Workspace Configuration menu
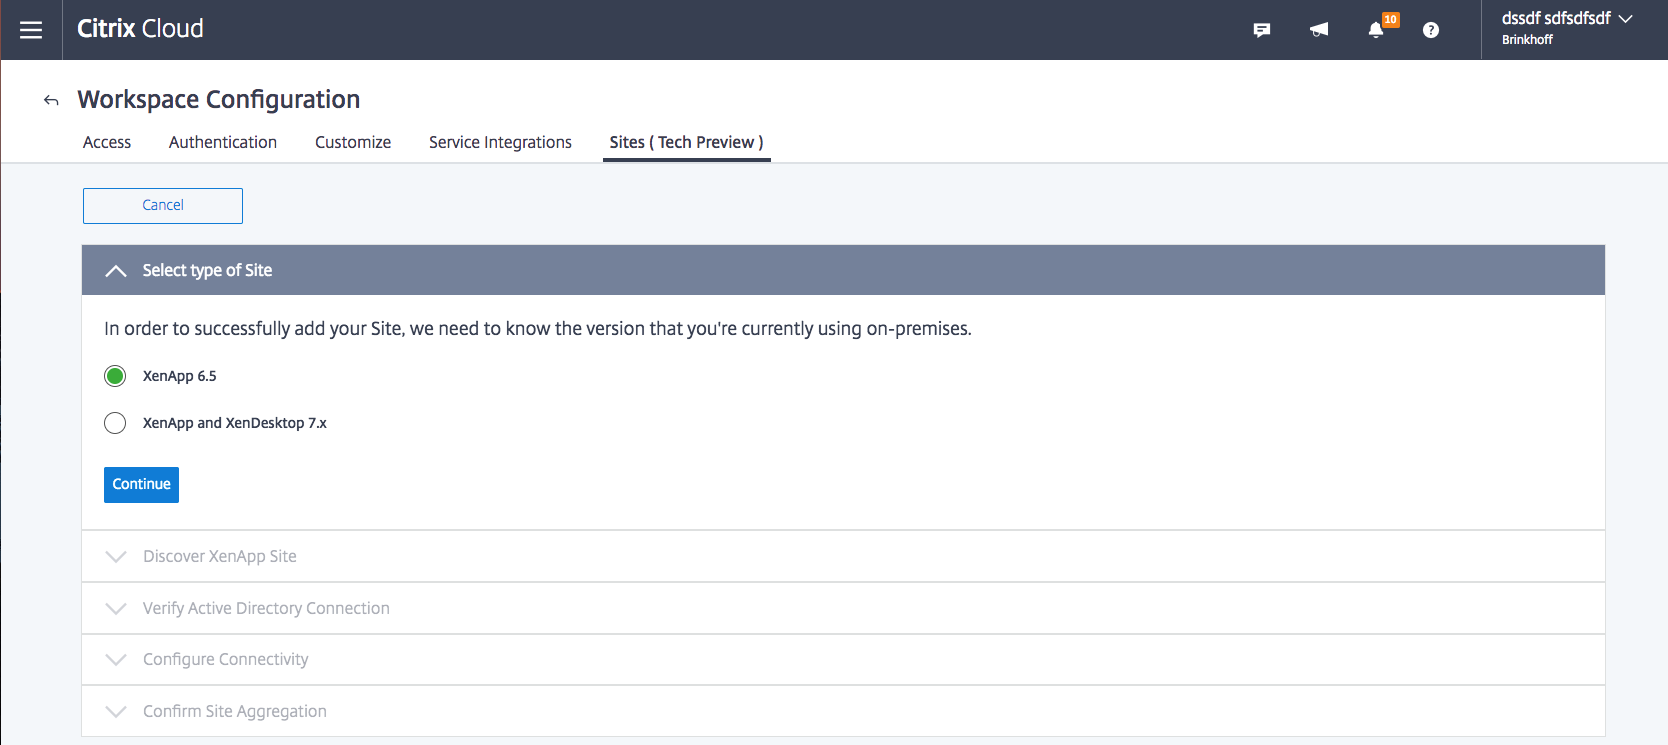
Click on Sites (Tech Preview)
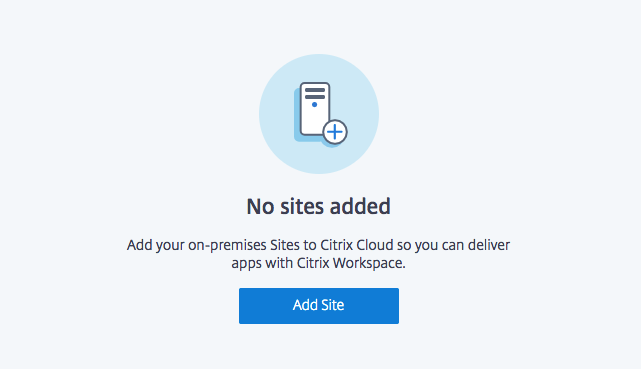
Click on Add Site
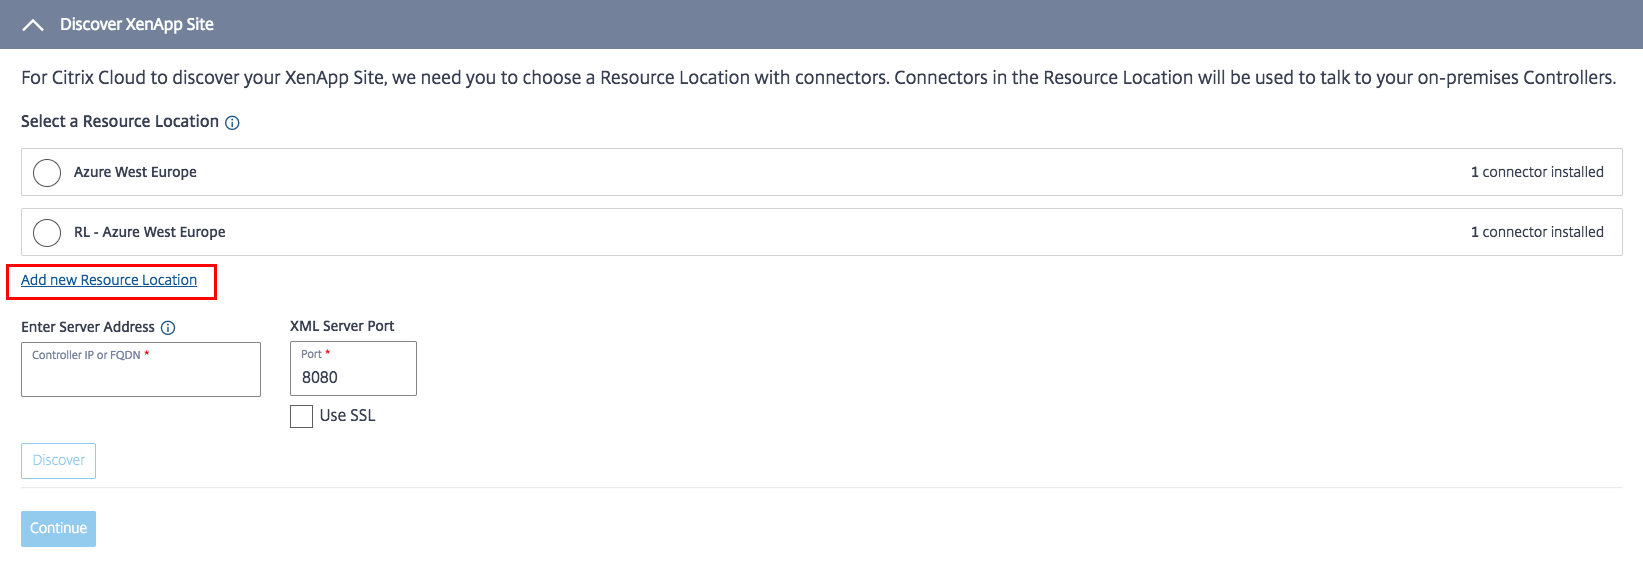
Select the on-premises XenApp 6.5 version

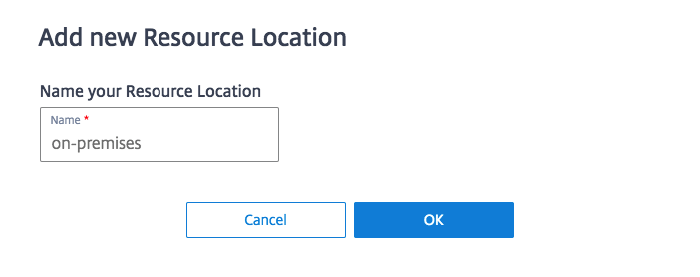
Click on – Add new Resource Location – to add the on-premises site
Give in a random name, such as on-premises
Download the Citrix Cloud Connector software and install it on a server in your on-premises network. This can also be on the Data Collector for example.

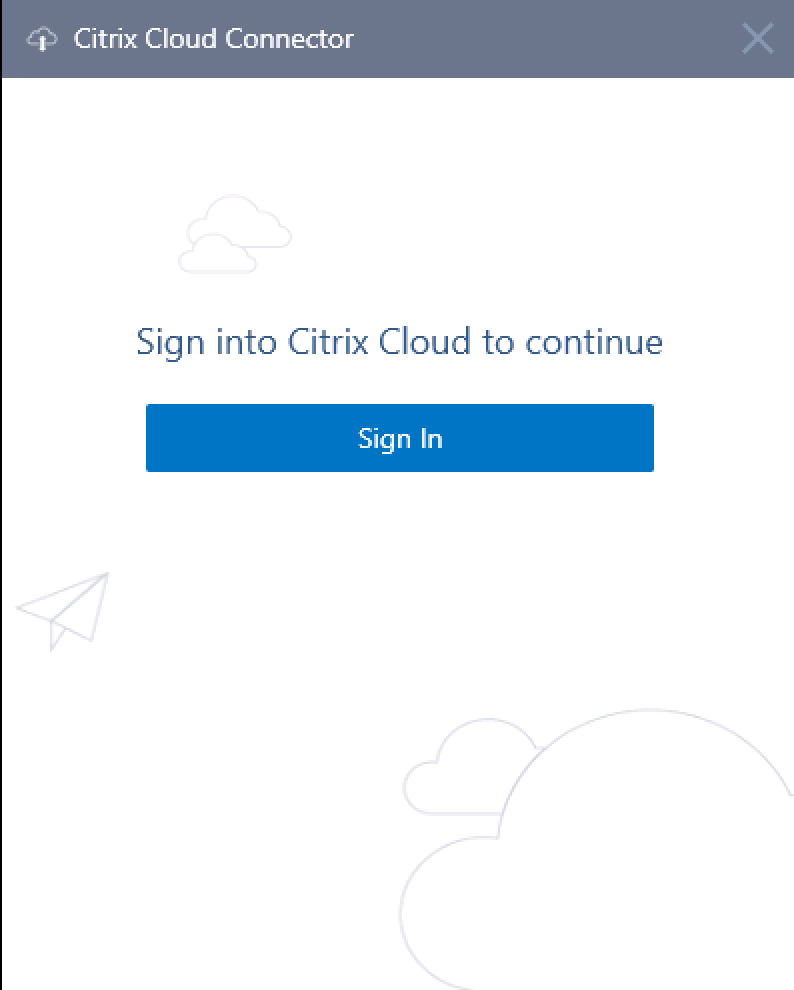
Click on Download Connector

Run the cwcconnector.exe on the server

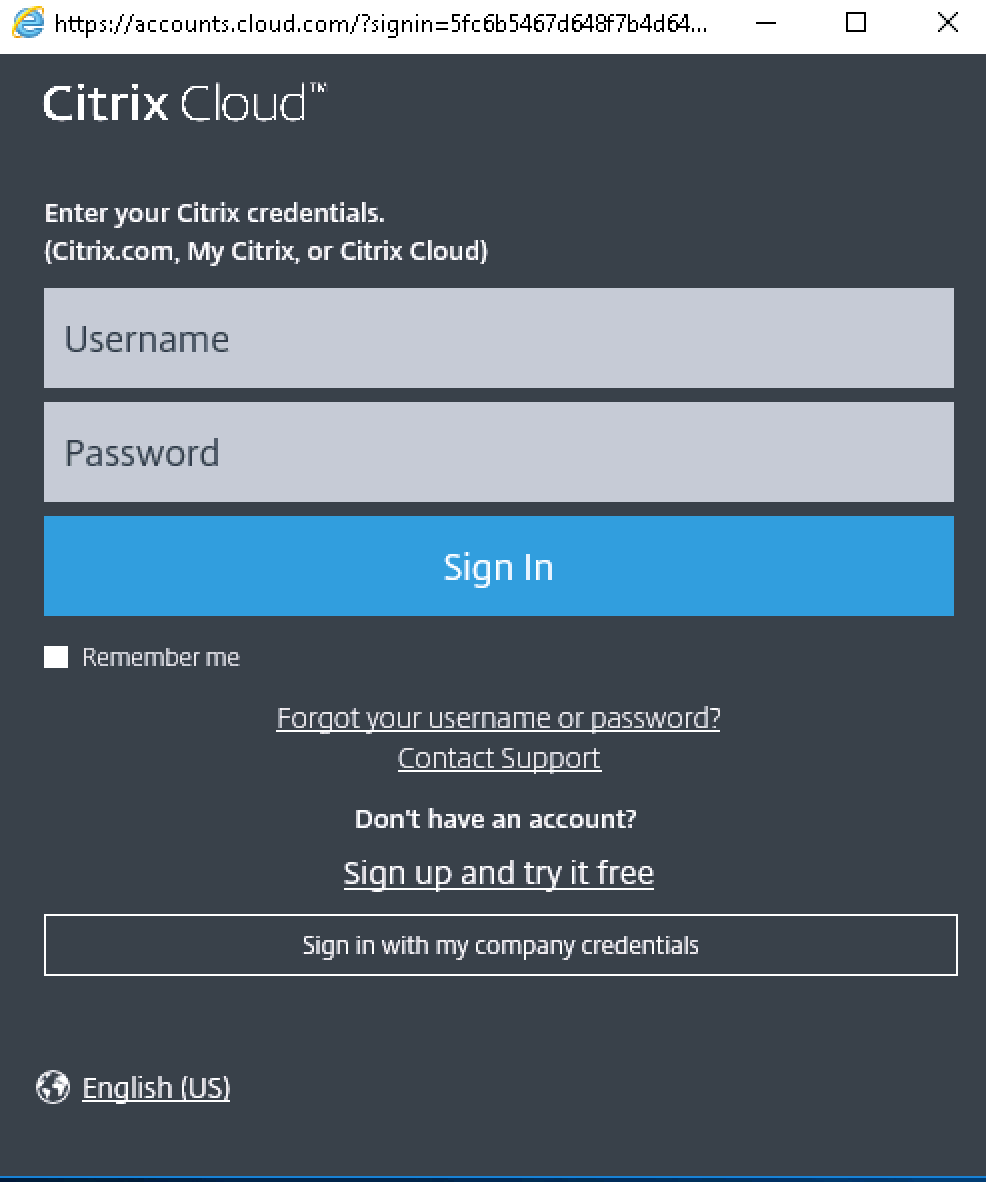
Click on Sign In
Enter in your Citrix Cloud credentials, click on Sign In
Select the on-premises Resource
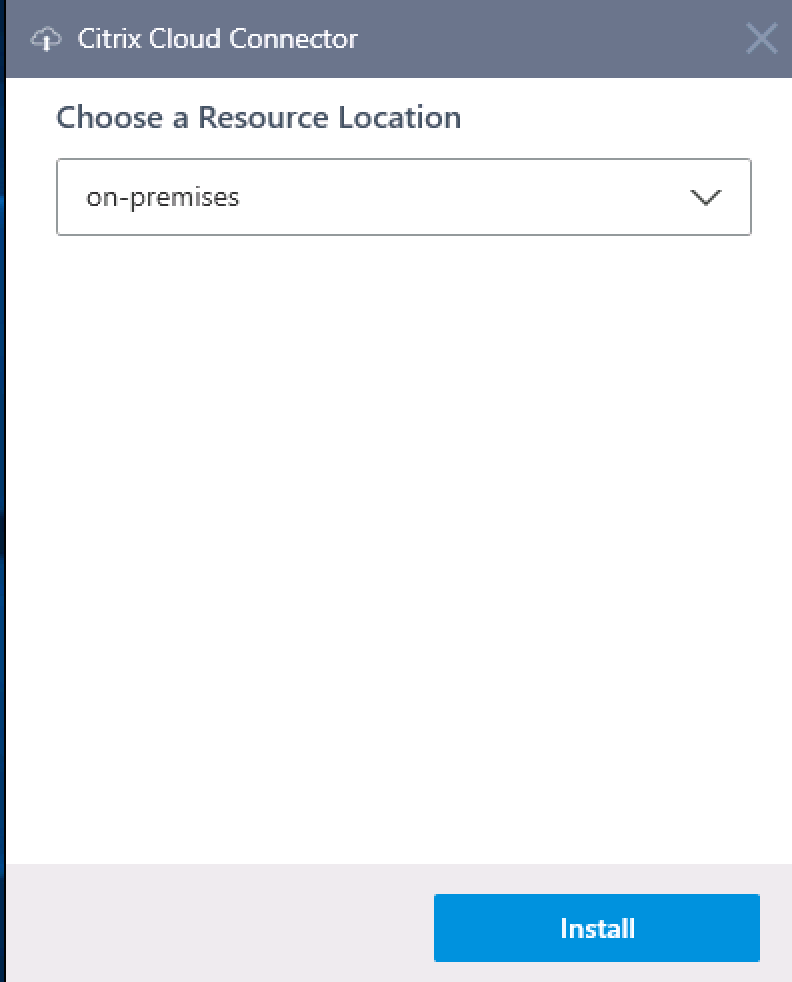
The installation process will start directly
Note: Troubles with the connection? Please check out this troubleshoot article.
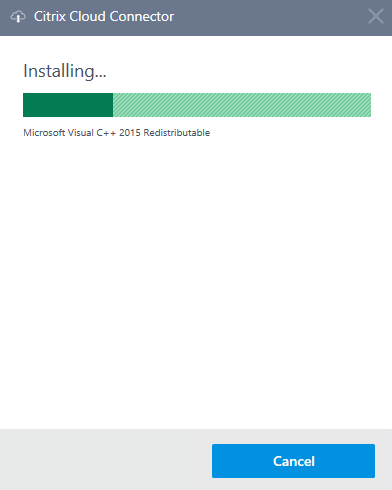
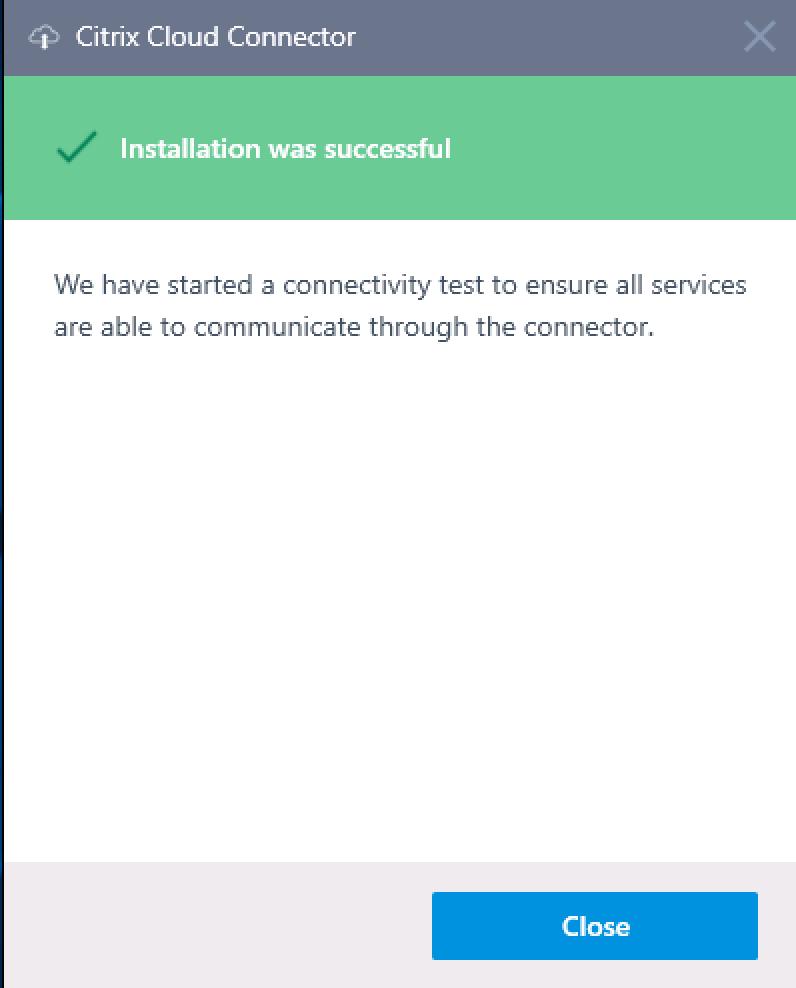
The installation is successfully finished
Switchback to the Workspace Configuration Menu in Citrix Cloud
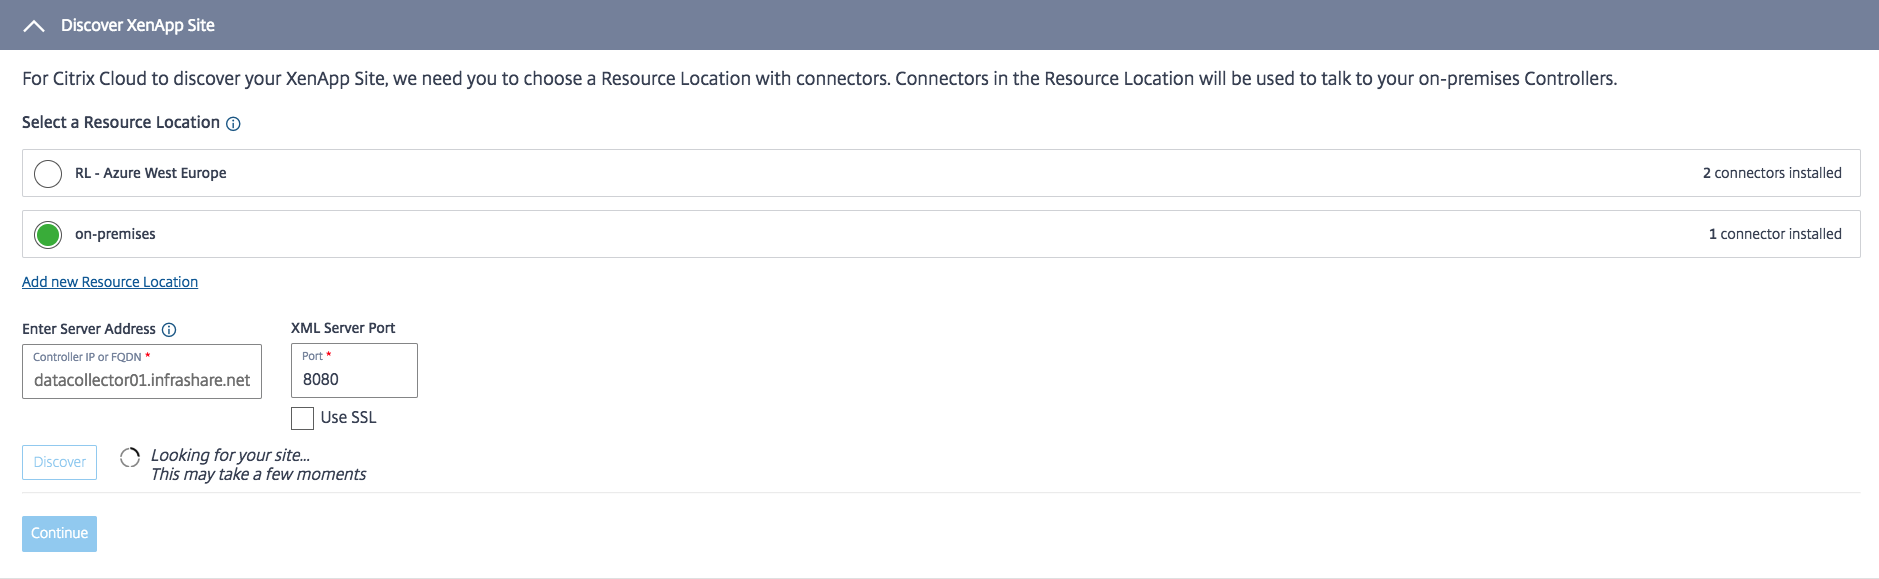
Select the on-premises Resource Location – which now has 1 connector installed

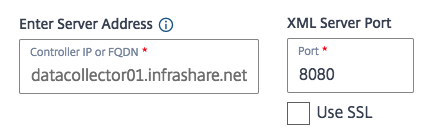
Enter in the FQDN and port of the XenApp 6.5 Datacollector or Desktop Delivery Controller if you have an on-premises 7.x version.
Click on Discover to test the connection
Note: For XenApp and XenDesktop 7.x Sites, Citrix Cloud automatically discovers the XML server port.
Enter the Administrator credentials of the Citrix site / farm

Note: Discovery might take a few minutes to complete, depending on the type and size of the Site
And yes! The XenApp 6.5 has been found! Click on Continue

Click on Continue
Note: This is only a check if you only use one Active Directory domain – or multiple – no further action are needed.

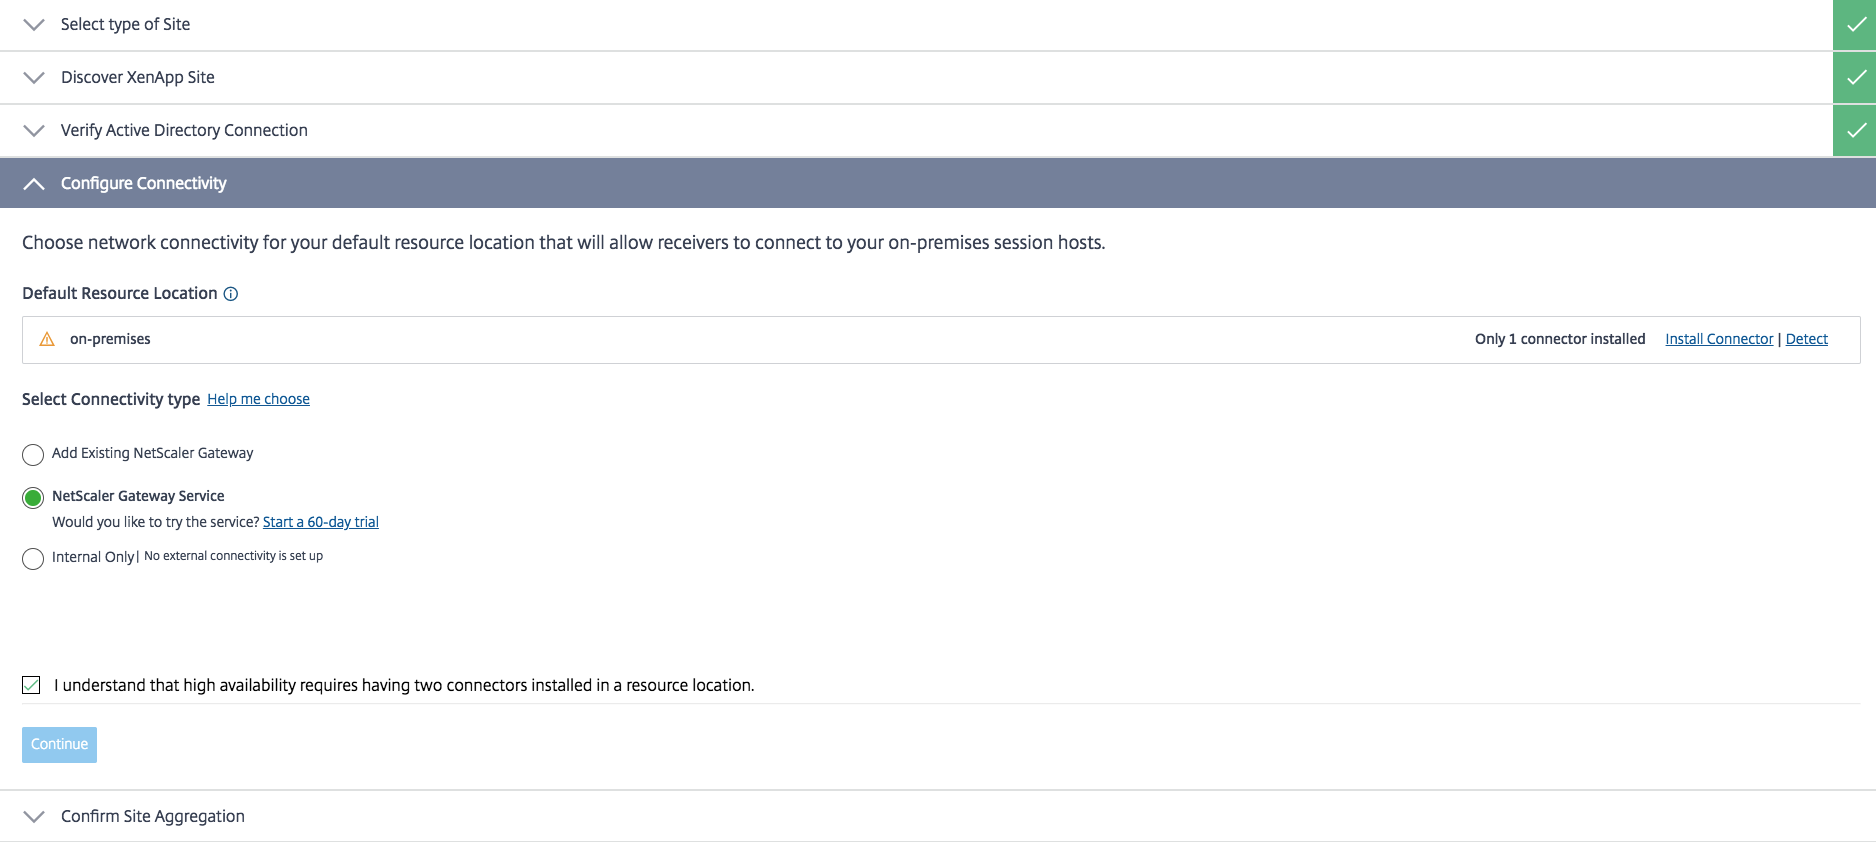
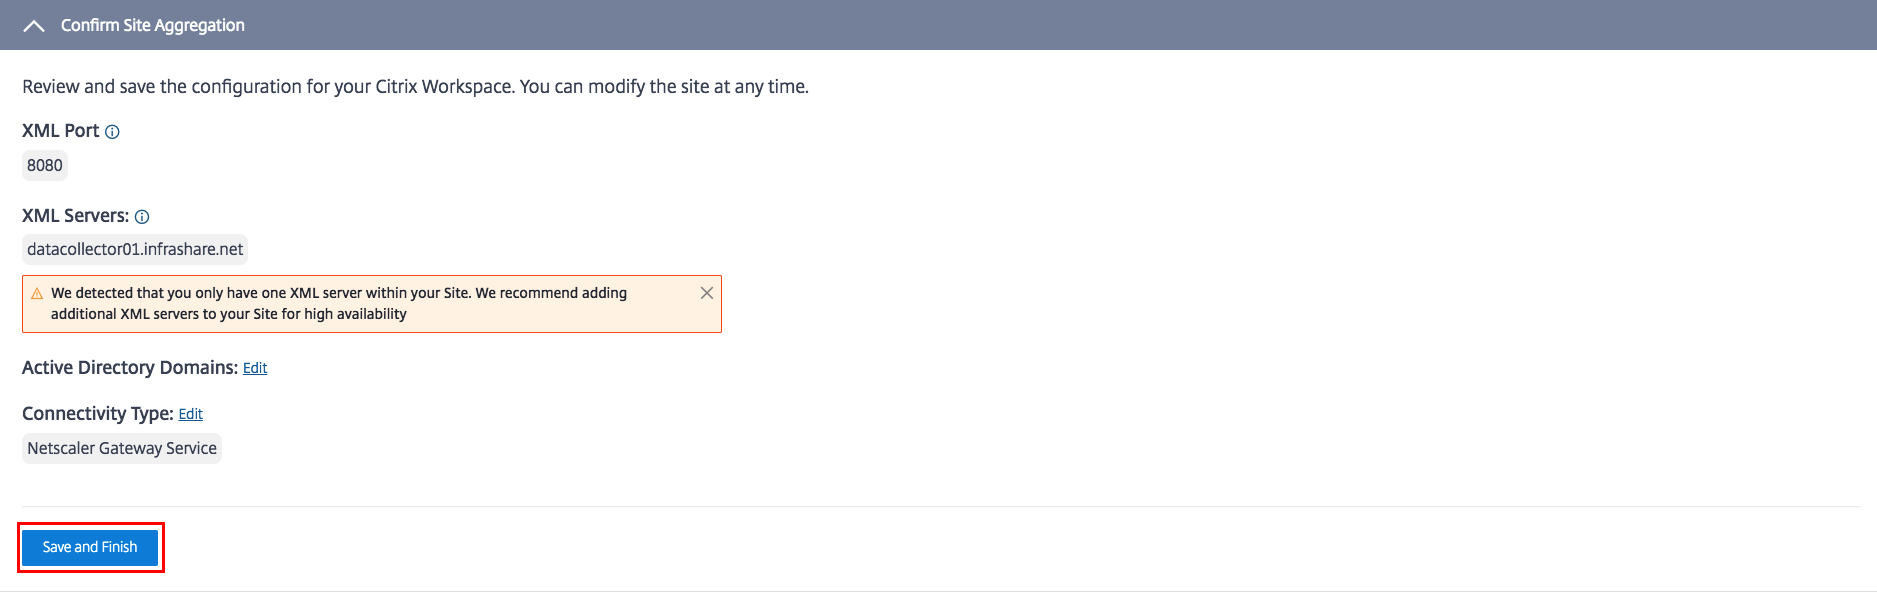
Choose your external Connectivity – I’m using the NetScaler Gateway Service for that, therefore an Existing NetScaler in Azure Infrastructure-As-a-Service is also possible.
Accept the terms and click on Continue
We’re done with the Site Aggregation setup – Click on Save and Finish
Test the Citrix Workspace Site Aggregation – see it yourself demo
See how Citrix Cloud XenApp and XenDesktop Service and an on-premises XenApp 6.5 environment all come together in the Citrix Workspace!
And as always, I hope this helps.
Cheers,
Christiaan Brinkhoff