
Using Citrix Cloud Virtual Apps and Desktops with Nutanix InstantOn for Acropolis Hypervisor to deploy Windows 10 VDIs – the easy hybrid Cloud way!


One of the most important alliances partners of Citrix is definitely Nutanix. Nutanix released their new Citrix Cloud support end of last year as – Citrix Ready partner program and included Nutanix AHV (Acropolis Hypervisor) support – through the new CWA-plugin for Citrix Cloud. Which makes Nutanix one of the most critical players in the field for Private Cloud and Hybrid Cloud configurations for enterprise businesses that not suiting in a Public Cloud Infrastructure-As-a-Service (IaaS) service model, but want to take full advantage of the simplicity of the Citrix Cloud – Virtual Apps and Desktops Service (or better say,XenApp and XenDesktop). Unfortunately, there isn’t much documentation on the internet on this solution, so I’m happy to (again) fill another gap for the community!
“Try to be a rainbow in someone’s (hybrid) Cloud” – Maya Angelou
Nutanix makes it possible to quickly expand Cloud workloads for enterprises and smaller businesses as well and with InstantOn – the new method to extend the Citrix Cloud with Nutanix Acropolis – you’ll save time by migrating the Citrix Desktop Delivery Controllers, Director, Site DB, StoreFront and NetScalers (or Citrix ADC’s of course…) to the Citrix Cloud. A good match if you ask me, and as IT Pro you’ll save more time to do other stuff around innovation!
The procedure is pretty straightforward… You’ll need to install at least one Citrix Cloud Connector (or 2 to provide a higher level of business continuity) in your Nutanix Cluster network environment, on top of that an AHV Host Connection will be required for the connection to AHV. The Citrix Cloud Connector performs a secure channel for communication between the Citrix Cloud control plane and Nutanix AHV. Think about traffic, such as the Machine Creations Services process, AD Computer Account creation, and other authentication jobs.
In the end – users directly connect to the Citrix Workspace (former Hosted StoreFront) in the Citrix Cloud, which allocates the Nutanix Virtual Desktop VM, and send the user through the Citrix Cloud Connectors – directly to that VDI desktop. Please scroll to the end of this blog to see an experienced video!
See below how it simply works in a more architectural way…

In this article, I’ll show you how you can extend your Citrix Cloud Control Plane with Nutanix Acropolis Hypervisor (AHV), which can be active in your local or providers datacenter. Next, to that, I included some other interesting updates on Nutanix and Citrix as well.
Enjoy reading!
Free Webinar: Nutanix is giving a Public Webinar next week on topic – Simplify Hybrid Cloud VDI with Nutanix Enterprise Cloud Platform & Citrix Cloud. I recommend this presentation as a follow-up to this blog! See the complete agenda here.
Table of Contents
Click on the title to forward in the article:
- VDILIKEAPRO independent survey results
- Prepare the Citrix Cloud Connector(s) image
- Enroll the Master – VDI Base image
- Create the Nutanix Acropolis Host Connection
- Configure the MCS AHV Windows 10 VDI Machine Catalog
- Create the Delivery Group
- Test Nutanix Virtual Desktops through the Citrix Workspace
- Experience it yourself – Demo video
Did you know?
- Nutanix AHV (Acropolis) usually is not available at the Host Connections selection within the Citrix Cloud? You’ll need to install the Citrix Cloud CWA Plugin on every Citrix Cloud Connector to make the option visible in the list.
- The Plugin needs to be installed elevated as a local server Administrator (can be a domain user w/rights). I don’t believe the behavior exists with UAC disabled, but haven’t tested).
- It has to be installed on ALL cloud connectors in a given tenant. If you’ve got any other Resource Locations, those Citrix Cloud Connectors need the plugin as well. This is due to the way that dropdown list in Cloud Studio is populated – not public information but for your info!
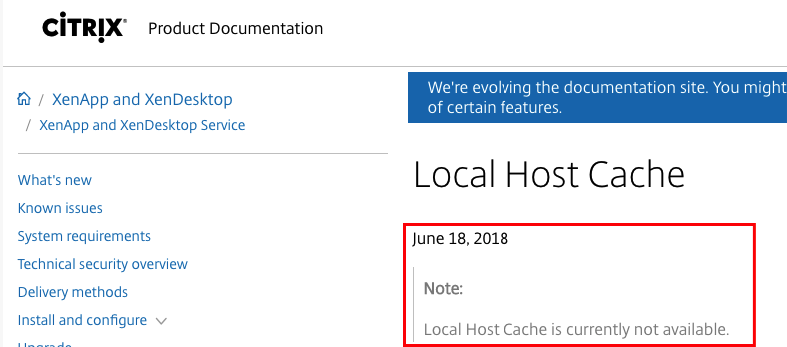
- Local Host Cache is currently not supported for Citrix Cloud. There is a significant bug detected, and I think that Citrix will fix that soon and the support will come back.
- Citrix Cloud is now available in USA, Europe, and APJ as well, so the Citrix Cloud control plane is always nearby!
- When u want to use LHC you’ll need an own StoreFront within your AHV environment to ensure the internal connection. You can extend this as well for Remote Access by placing an NetScaler (Citrix ADC) VPX or MPX in the same network.
- Ensure that you have created a Sysprep (System Preparation) VM with Windows 2012 R2 server as the base image for the Citrix Cloud Connectors and the VM should be available on the Nutanix cluster. Note: I’ve received confirmation from Nutanix that Server 2016 is as well supported.
- Nutanix has a free Community Edition, which is now as well available as ISO installation, which makes it very easy to implement for home lab/testing purposes.
- The Community edition supports the Citrix Cloud integration as well.
- The machine where you are installing the Cloud Connector must be in sync with UTC.
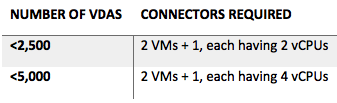
- The use of 2-vCPU connectors is recommended for sites that host 2,500 VDAs. More than 2,500 VDAs require Cloud Connectors equipped with 4 vCPUs.
- The Citrix Cloud Connectors are needed to interact with the VDAs on the network access level, so be sure that they can communicate.
- Turn off Internet Explorer Enhanced Security Configuration (IE ESC). If this is turned on, the Cloud Connector might not be able to establish connectivity with Citrix Cloud.
- Connecting to the Internet from your data centers requires opening port 443 to outbound connections.
- Do not upgrade a previously-installed Cloud Connector with a newer version. Instead, uninstall the old Cloud Connector and then install the new one.
- Do not install the Cloud Connector on an Active Directory domain controller or any other machine critical to your resource location infrastructure.
- Regular maintenance on the Cloud Connector will perform machine operations that will cause an outage to these additional resources.
VDILIKEAPRO independent results on Hypervisor usage
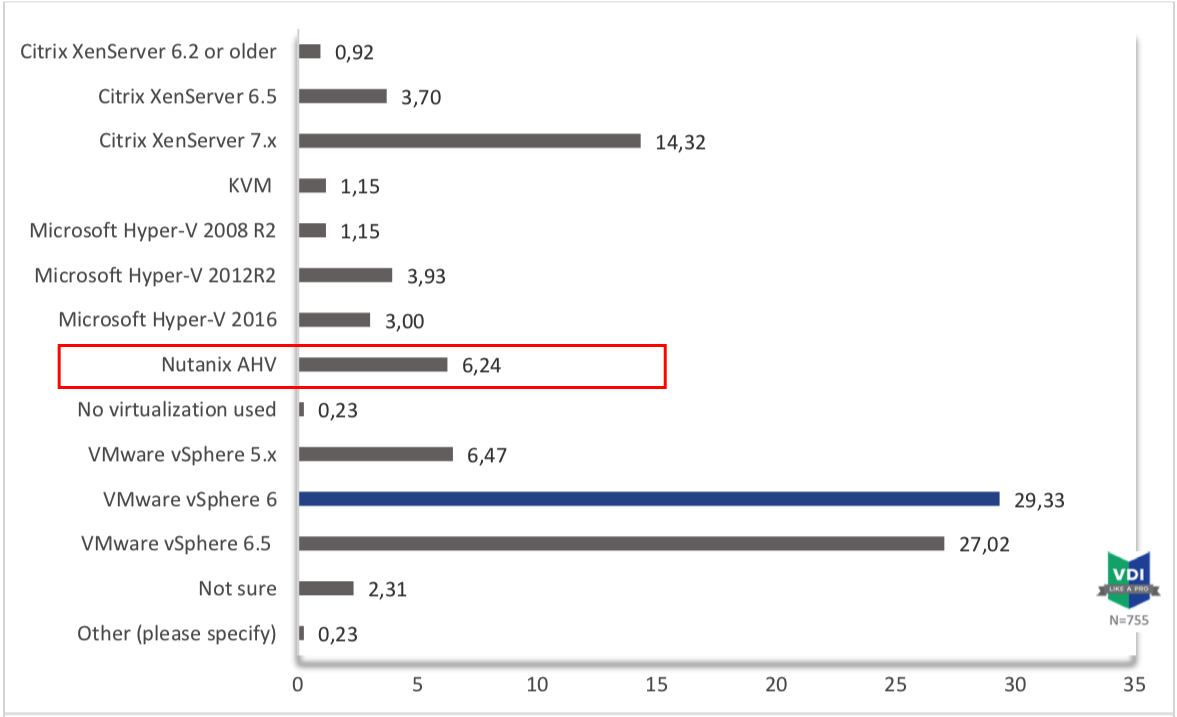
Which hypervisor is currently deployed on-premises for VDI workloads?
“VMware remains by far the largest vendor delivering virtual infrastructure for VDI, though the usage is slowly decreasing from 68.22% in 2017 to 63.17% in 2018. In 2017 15.31% were using VMware vSphere version 6.5 while 6.5 is now used by 27.02% in 2018. Citrix XenServer adoption has increased from 16.67% in 2017 to 18.88% in 2018. Microsoft Hyper-V usage is stable from 8.33% in 2017 to 8.16% in 2018. Adoption of KVM/Nutanix is up more than 3x and growing fast, 2.13% in 2017 to 6.99% in 2018. It’s also good to mention that multiple hypervisors could be selected in this year’s survey. Selecting your hypervisor is a long-term commitment, organizations are updating their solutions but migration to another platform isn’t occurring much.”
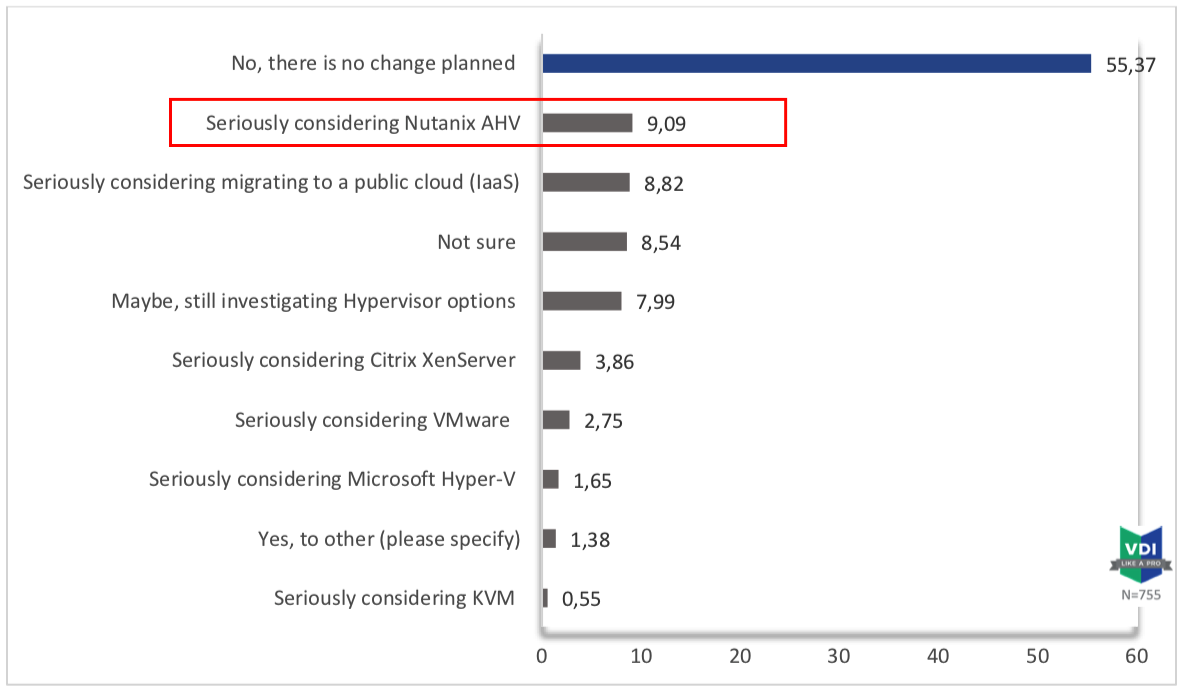
Will you introduce or change to a different hypervisor for you SBC workload?
“This year 55.3% of participants stated they didn’t have any plans to change their hypervisor. Nearly 8% of the participants are interested in changing the hypervisor or at least interested in investigating their options. Respondents seriously considering public cloud (IaaS) totaled 8.8%. Nutanix is being seriously considered as a new or additional hypervisor by 9.09%. Nutanix and Public cloud IaaS are both areas of growth for SBC and remote application as a service scenario.”
Nutanix is doing a great job, as you can see is Nutanix the number one Hypervisor for IT Professionals that are considering changing their Hypervisor. The number is even higher than migrating to a Public Cloud – Infrastructure-As-a-Service model. Some business will probably never be ready for a Public Cloud scenario. Nutanix will be a great fit to fill in that gap!
Recommended: Download the complete EUC – VDILIKEAPRO survey here.
Citrix Cloud connectors – automated enrollment
The Citrix Cloud Connectors are needed to interact with the Citrix Control Plane. They’re also called the Proxy or Edge servers from your resource location to the Citrix Cloud. Nutanix included a very simplified method in their AHV Prism console to deploy the Citrix Connectors very quickly in a High Available approuch.
Ensure that you have a Sysprep (System Preparation) VM with Windows 2012 R2 or 2016 server as the base image for the Citrix Cloud Connectors deployment and the VM should be available on the Nutanix cluster in a snap.
Host connection Nutanix CWA Plug-In for Citrix Cloud
If you want to use Nutanix Acropolis to host Citrix Cloud provisioned VMs, you’ll need to install the Nutanix plugin on all the Citrix Cloud Connectors to enable configuration of Nutanix connections in the Host Configuration option of the Citrix Studio. The Plugin needs to be installed elevated as a local server Administrator (can be a domain user w/rights). I don’t believe the behavior exists with UAC disabled, but haven’t tested).

Note: Keep in mind – when you don’t install the AHV Plugin on all the Citrix Cloud Connectors, then the Nutanix Acropolis Connection won’t show up in the Host Connection screen within the Citrix Cloud – Citrix Studio. So it has to be installed on ALL cloud connectors in a given tenant. If you’ve got any other Resource Locations, those Citrix Cloud Connectors need the plugin as well. This is due to the way that dropdown list in Cloud Studio is populated – not public information but for your info!
Prepare the Citrix Cloud Connector(s) image
First, we need to prepare a Windows Server 2012 R2 server for the Citrix Cloud Connectors enrollment.
Note: I’ve received confirmation from Nutanix that Server 2016 is as well supported! Just follow the same steps for this OS and you’re good to go!

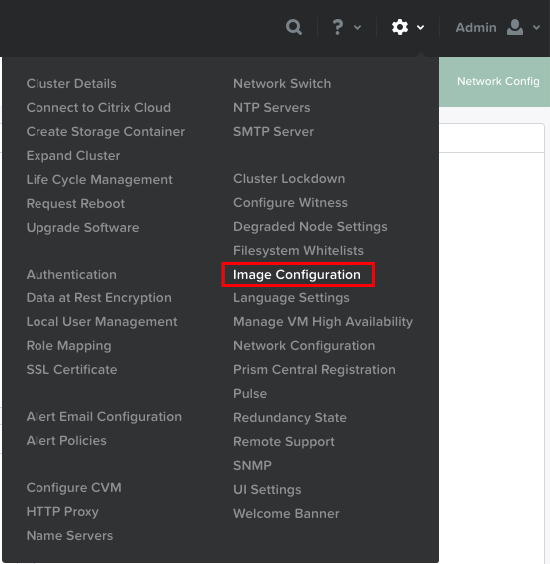
Upload the ISO of Windows Server 2012 R2 through the Image Configuration option
Click on Upload image
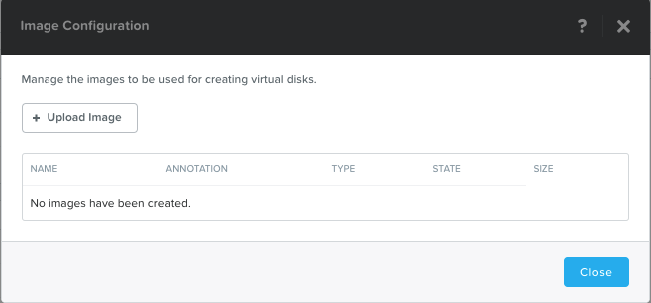
Give in a name and choose/select the ISO
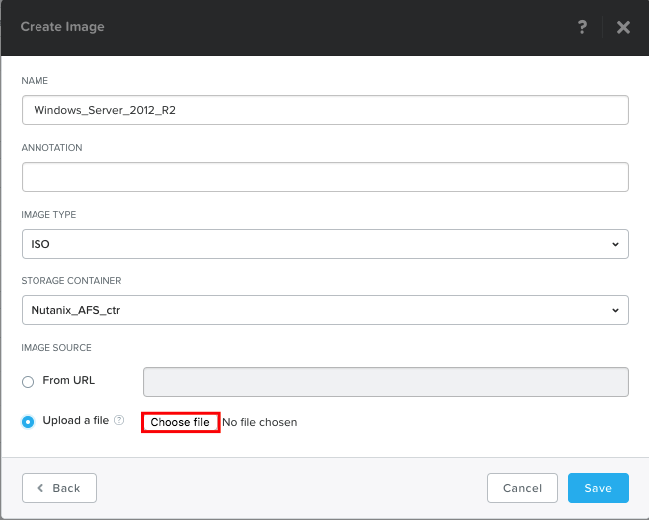
Click on Save

The ISO is now uploading…

When the message below returns, you’re good to go to the next steps
Deploy the Citrix Cloud Connector(s)
Secondly, we need to configure the Citrix Cloud Connectors default template, which Prism will use to deploy the Cloud Connectors in an automated way. More on this later on in the article…
Login to Prism
Open the VM menu
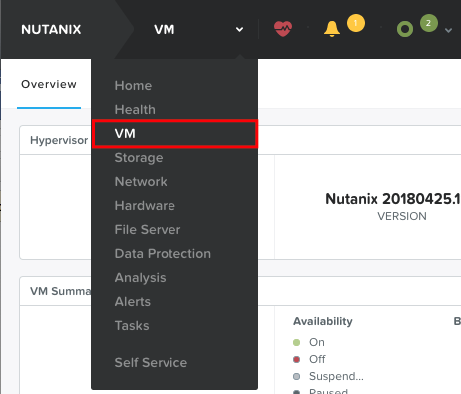
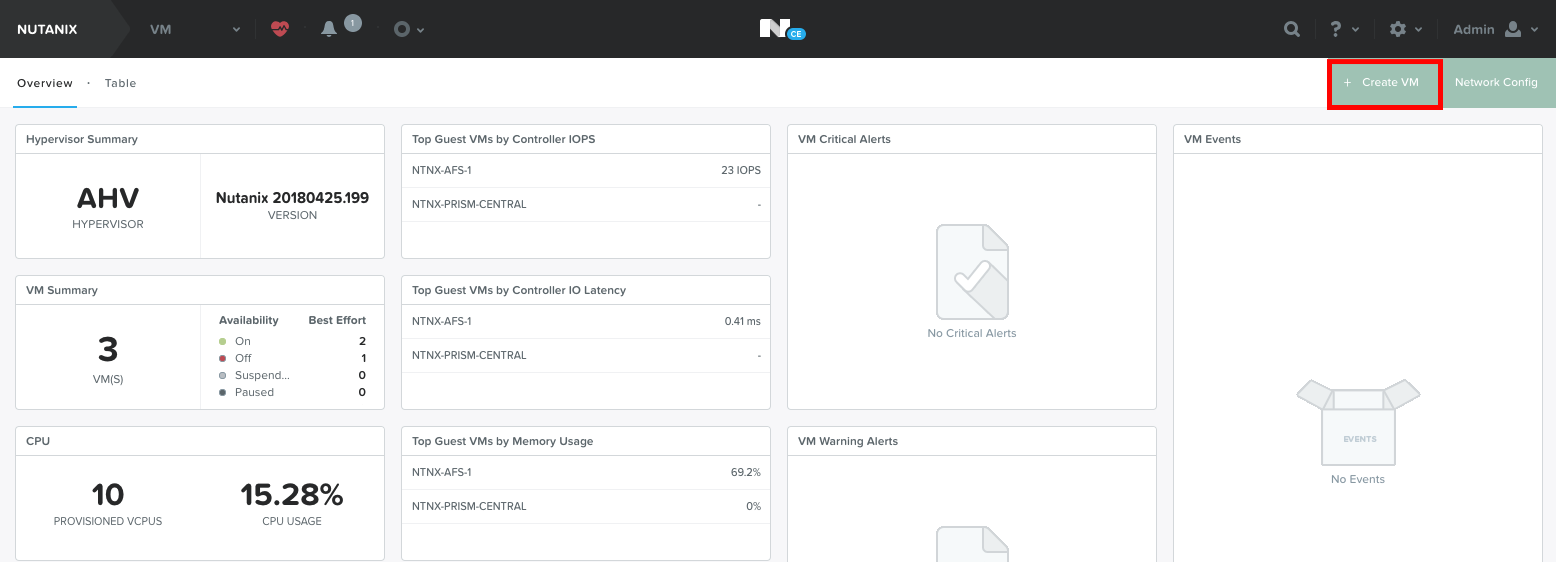
Click on Create VM
Citrix Cloud Connector sizing’s
The use of 2-vCPU connectors is recommended for sites that host 2,500 VDAs. Cloud Connectors equipped with four vCPUs proved to be more stable during testing. 2 GB of RAM is the minimum. Therefore, 4GB is preferred.
For this demo, I’ll use the lowest level of requirements, but be aware of your numbers and sizing’s before you start implementing Citrix Cloud with Nutanix!
Note: As mentioned at the beginning of this article, Citrix currently removed the Local Host Cache functionality support for Citrix Cloud. I expect that it will return shortly, and keep in mind when it’s back, the sizing’s needs to higher, as LHC needs at least 1 GB preserved RAM on the Citrix Cloud Connector for caching purposes.
Give in a name for the sysprep Citrix Cloud Connector Virtual Machine – the sizing and number of vCPUs and RAM and scroll down…

Click on Add New Disk
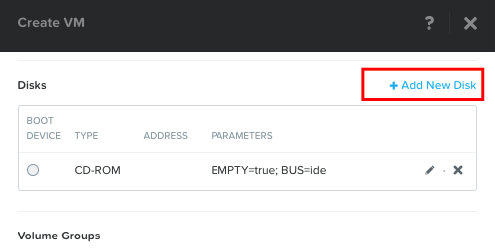
Select type CD-ROM – and the Image which we created earlier click on Add
And add a C:\ – OS disk to the Virtual Machine, Click on Save
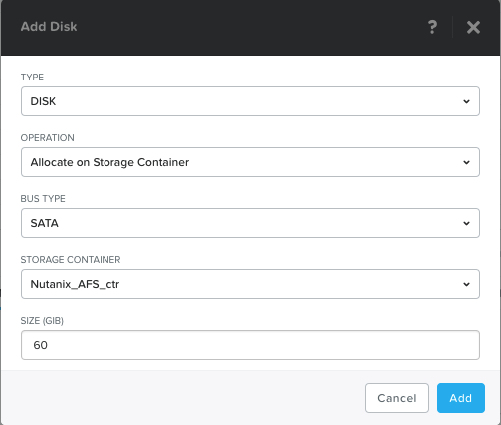
Note: In the end, we must have 2 disks attached

Add a NIC – VLAN to the VM

And click on Save to start the deployment
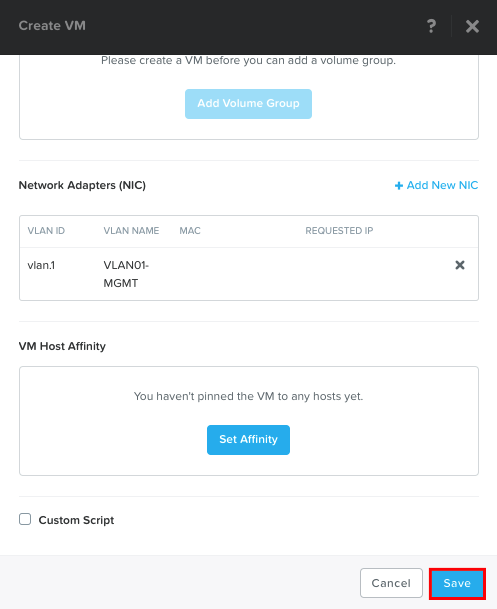
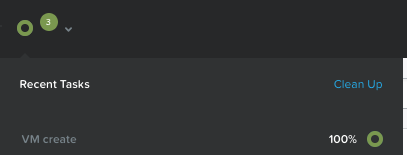
And the machine is successfully created!
Start the VM
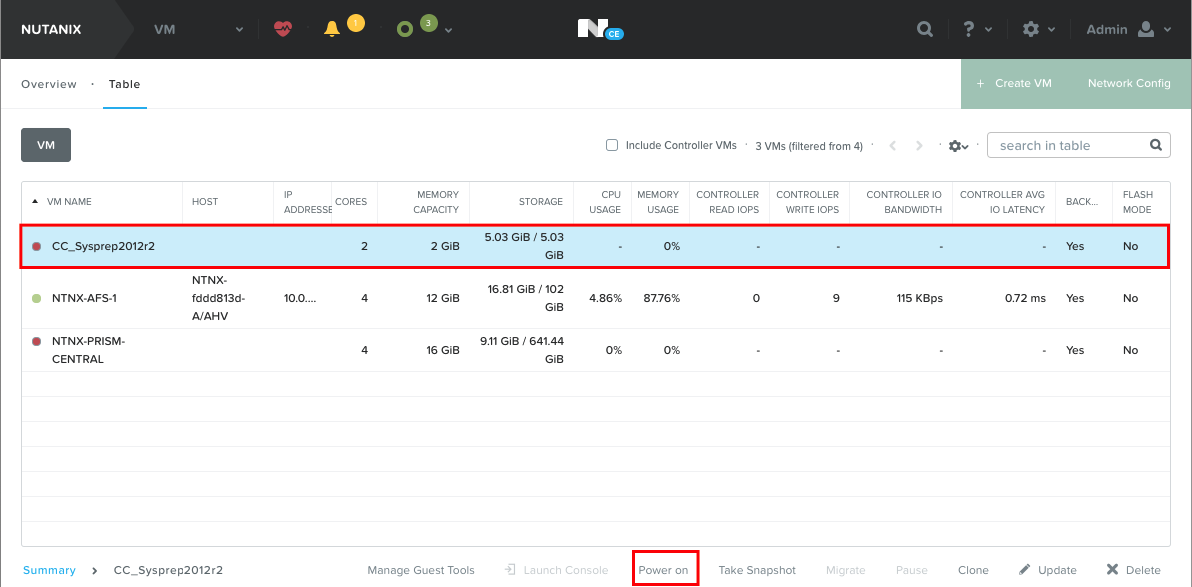
Open the Console
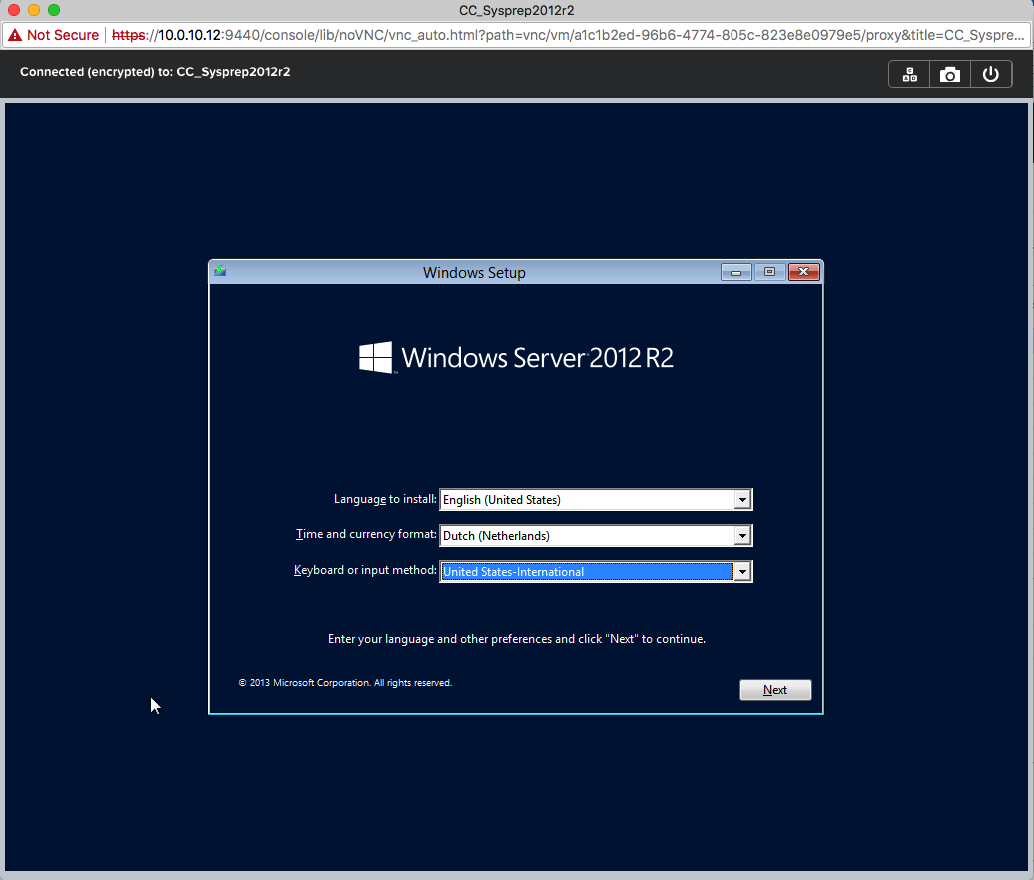
I don’t go through all the initial Windows Server enrollment steps and I’m expecting that you’ve got the knowledge for that in place! J
Note: Choose for the one with the GUI!

Quite fun to share, my percentage on the Getting files ready went faster than 1 second per percentage! (It’s running on 2x 500GB Samsung m2 EVO 970 flash disks) J

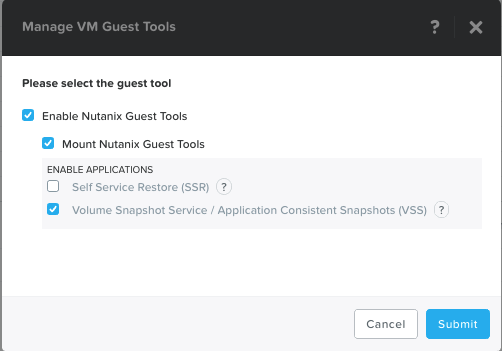
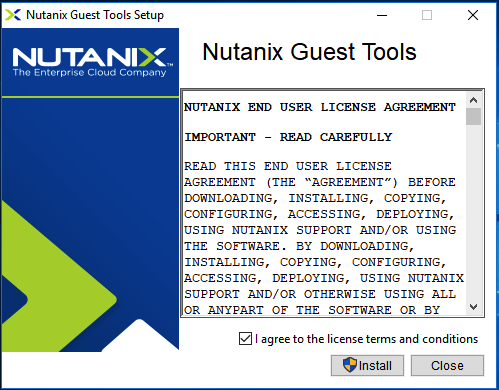
Install the Nutanix Guest Tools
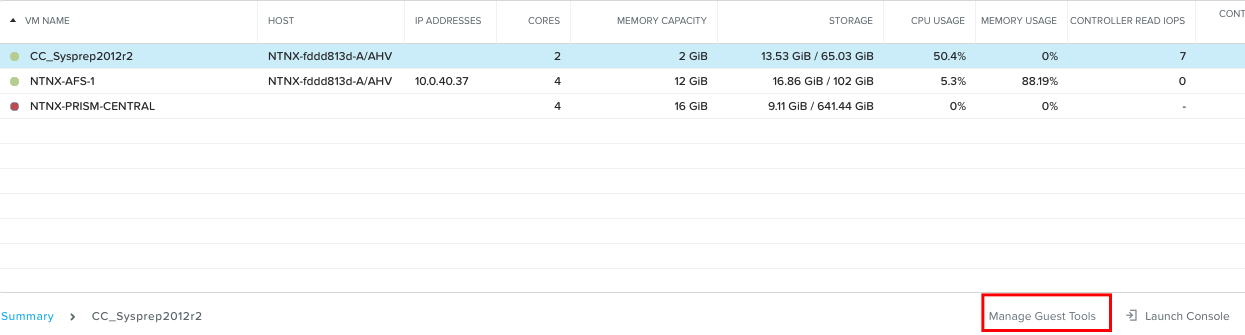
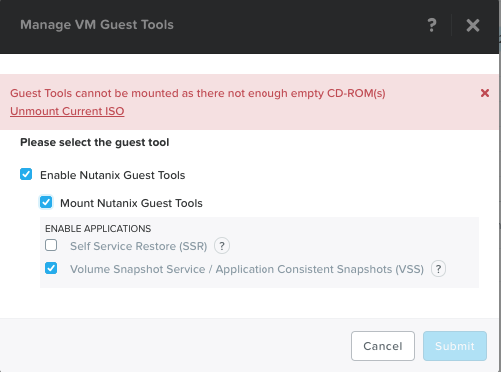
Unmount the Windows Server 2012 ISO – CD-ROM first, and select the Enable Nutanix Guest Tools options. Click on Submit
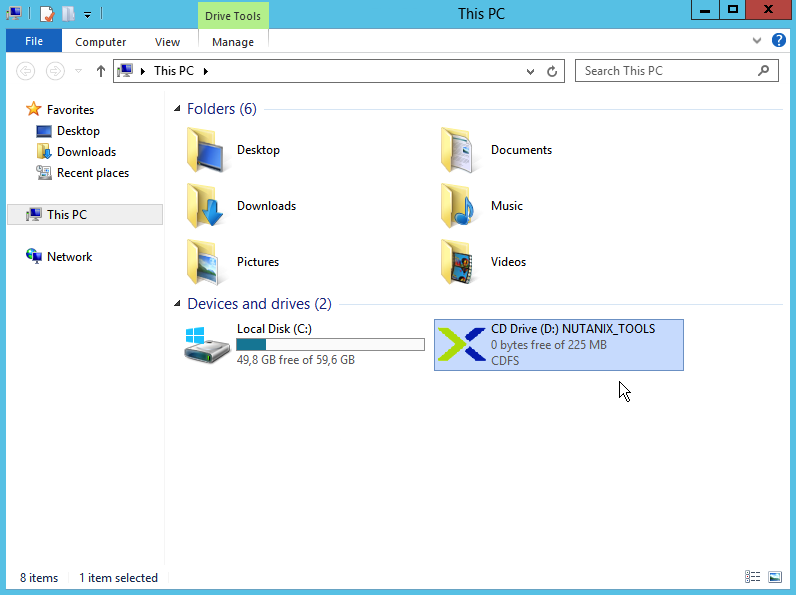
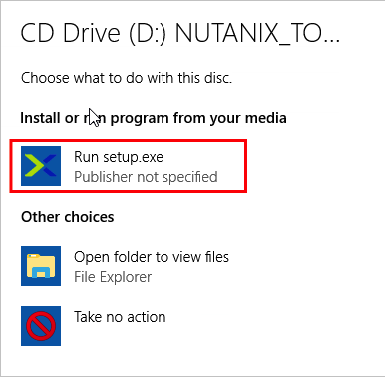
Switch back to the console and open This Computer
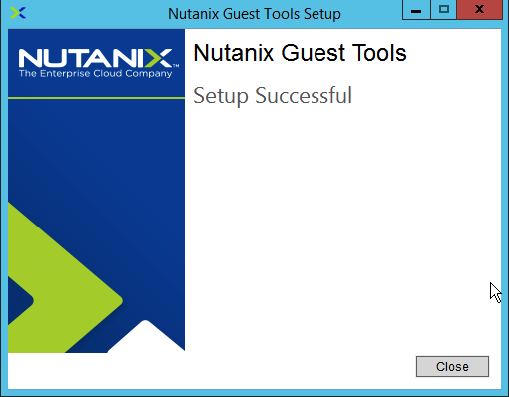
Walk through the setup – it’s very straightforward

Almost done…
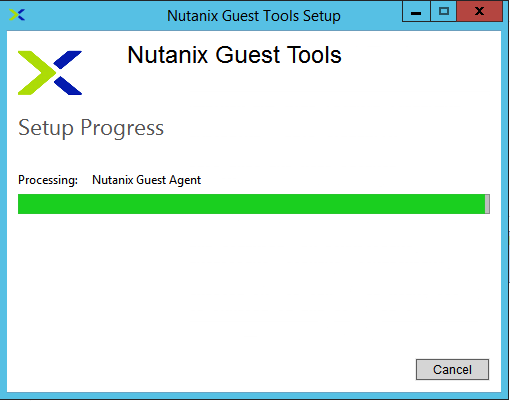
Click on Close
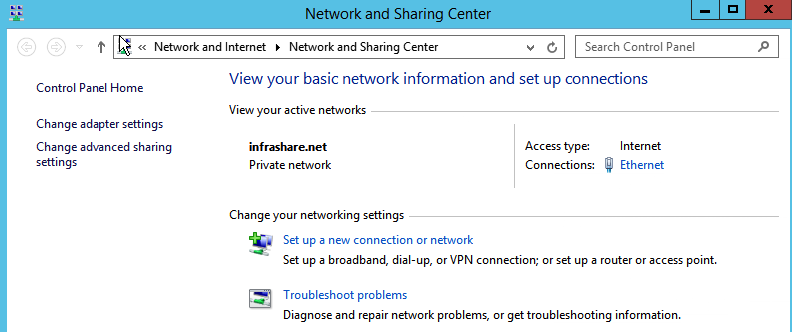
Make sure that the network connection works and that the machine gets an IP through the DHCP. This is easier for the Citrix Cloud enrollment.
Make sure that the setting – Mount Nutanix Guest Tools is unselected after this installation.

Enable Remote Desktop Connection– to enable RDP for both the Connectors

Sysprep the Cloud Connector VM
Open a Run prompt and open the sysprep folder

Take over the setting from the picture below.
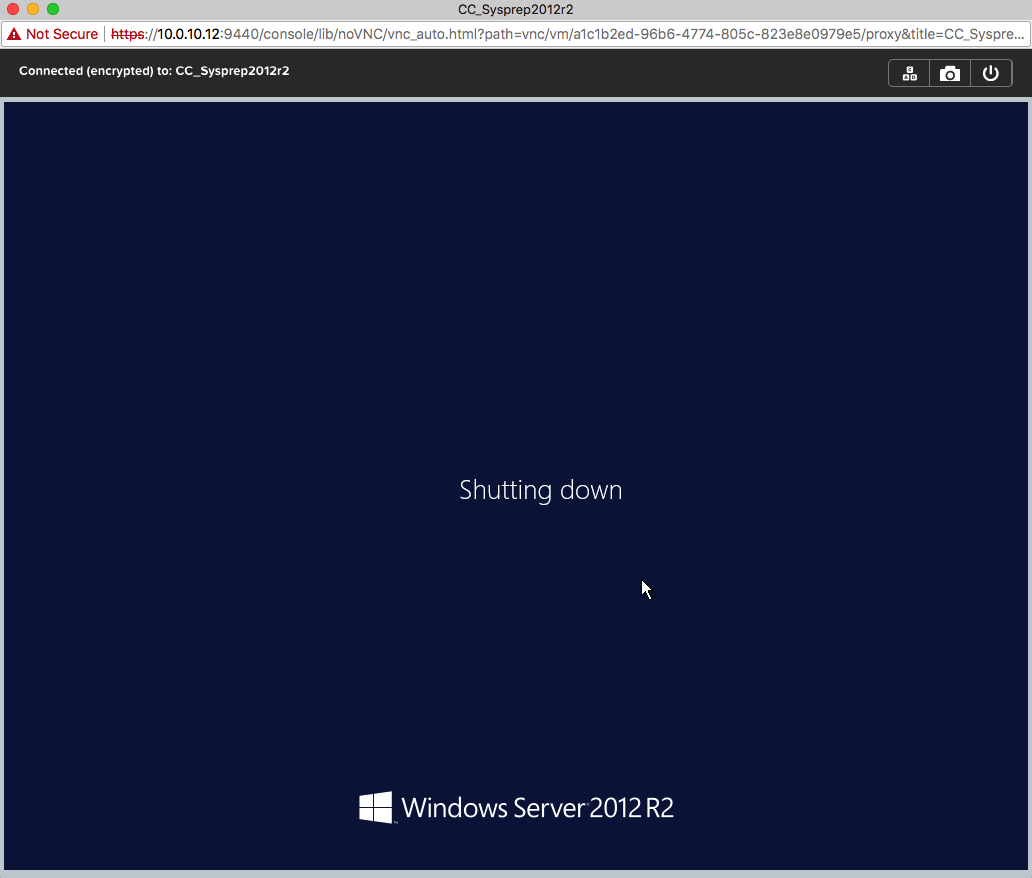
Make sure to select Generalize and Shutdown. Click on Ok
Note: The Sysprep VM must be in the powered-off state. If you power on the VM, you will lose the Sysprep state and the configuration will fail.

This can take up to 5 – 10 min…
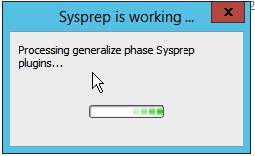
The Sysprep procedure is finished
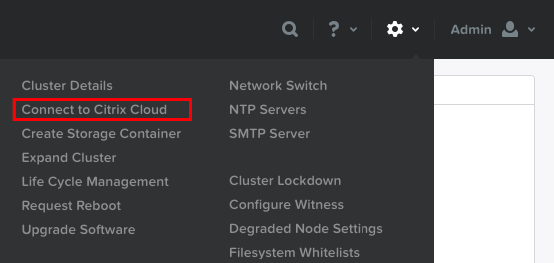
How to connect your Nutanix Cluster to Citrix Cloud
Click on the Settings menu
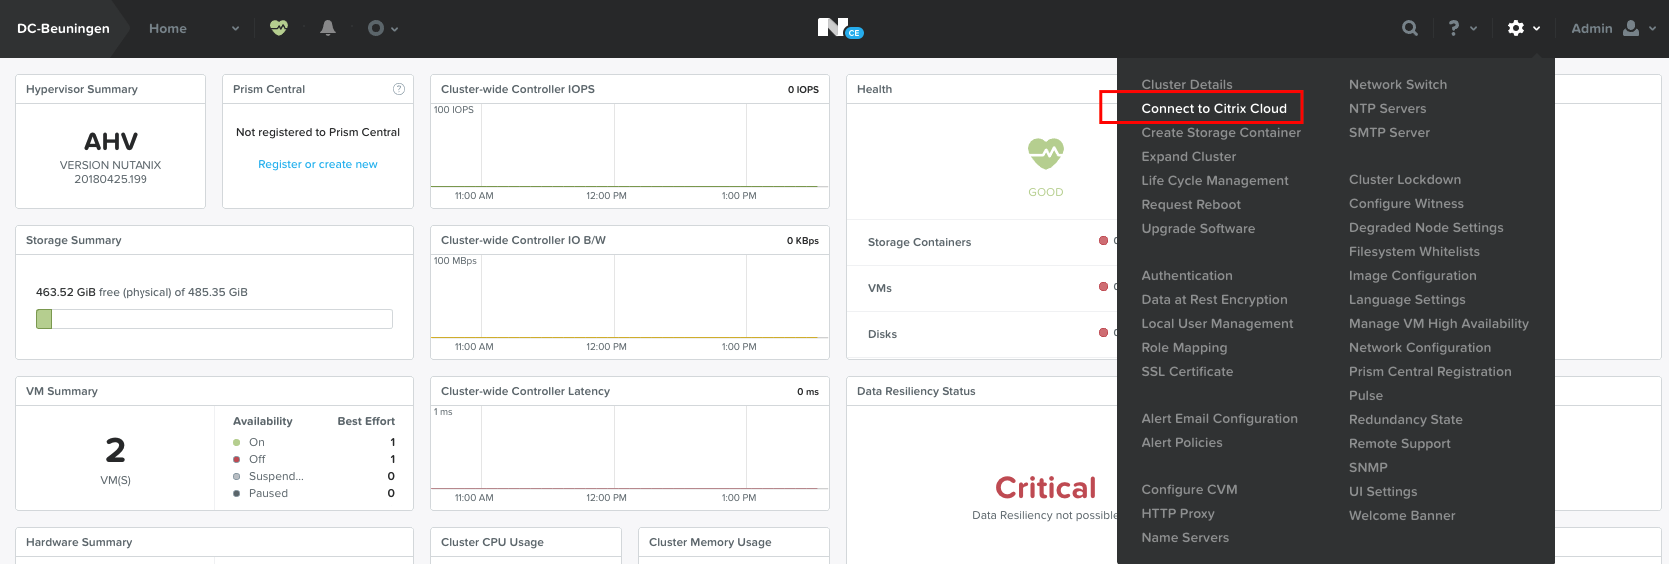
Now we need to collect the following information. Proceed to the next steps…
Create a Citrix Cloud API for Nutanix
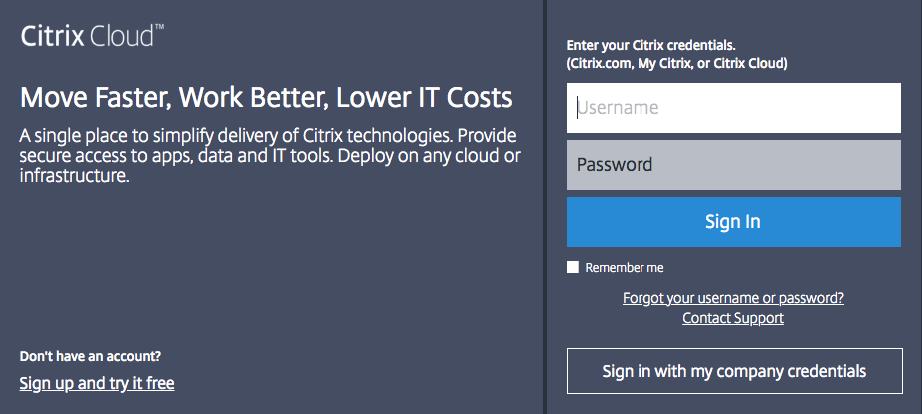
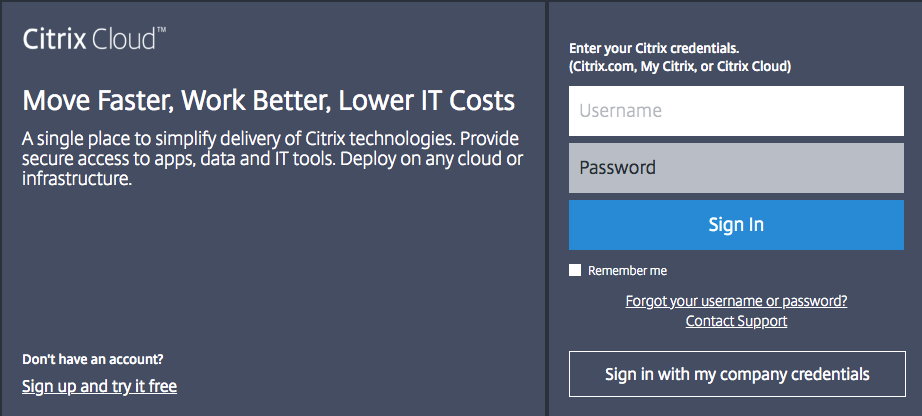
Switch to the Citrix Cloud
Go to citrix.cloud com
Open the menu in the upper left corner and go to Identity and Access Management

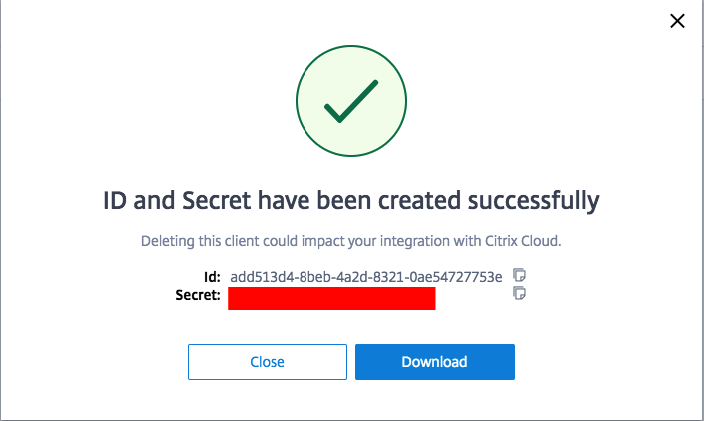
Create a Secure Client key – give in a name, click on Create Key
Note: The value behind Customer ID is needed for the Customer ID section in the Prism – Citrix Cloud settings

Copy the following ID and Secret – or click on Download to download the key file which holds the same 2 values
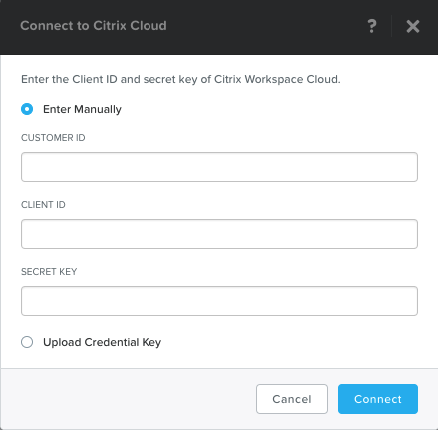
Switch back to Nutanix Prism
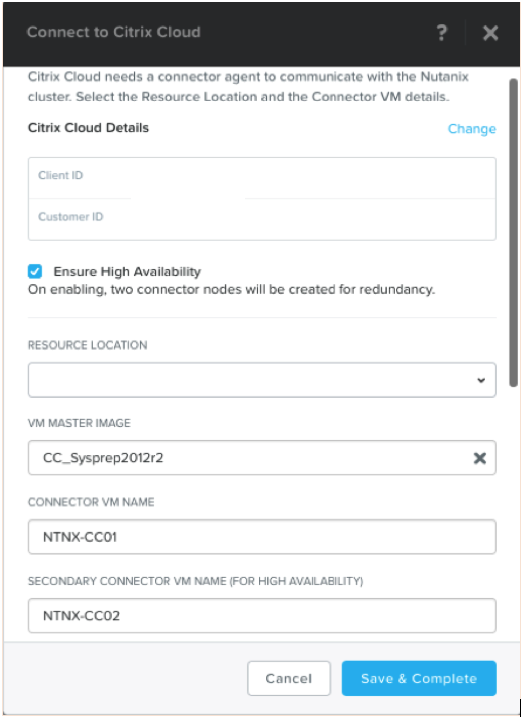
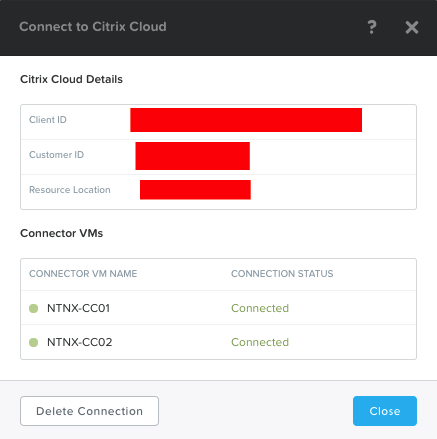
Give in the Customer ID from 2 steps back and upload the key file

The connection is in progress…

If the connection succeeds the following screen will return within Prism. Select the Syprep machine and the Citrix Cloud Connector(s) VM Name.
I suggest deploying two Cloud Connectors to provide High Availability!

Enter the local administrator account of the Sysprep VM and the domain credentials to provide the Domain Join to your Active Directory domain.
Click on Save & Complete to start the enrollment

The VM enrollment process is started…

Two Citrix Cloud Connectors are added to the AHV Cluster
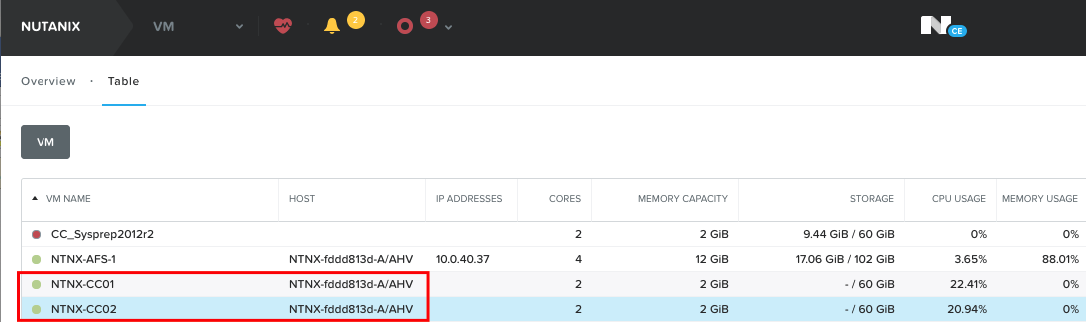
The rest of the process will be done completely automated.
The machine will be joined to the domain and the Citrix Cloud Connector client will be installed.
As you can see – the domain join ran successfully!
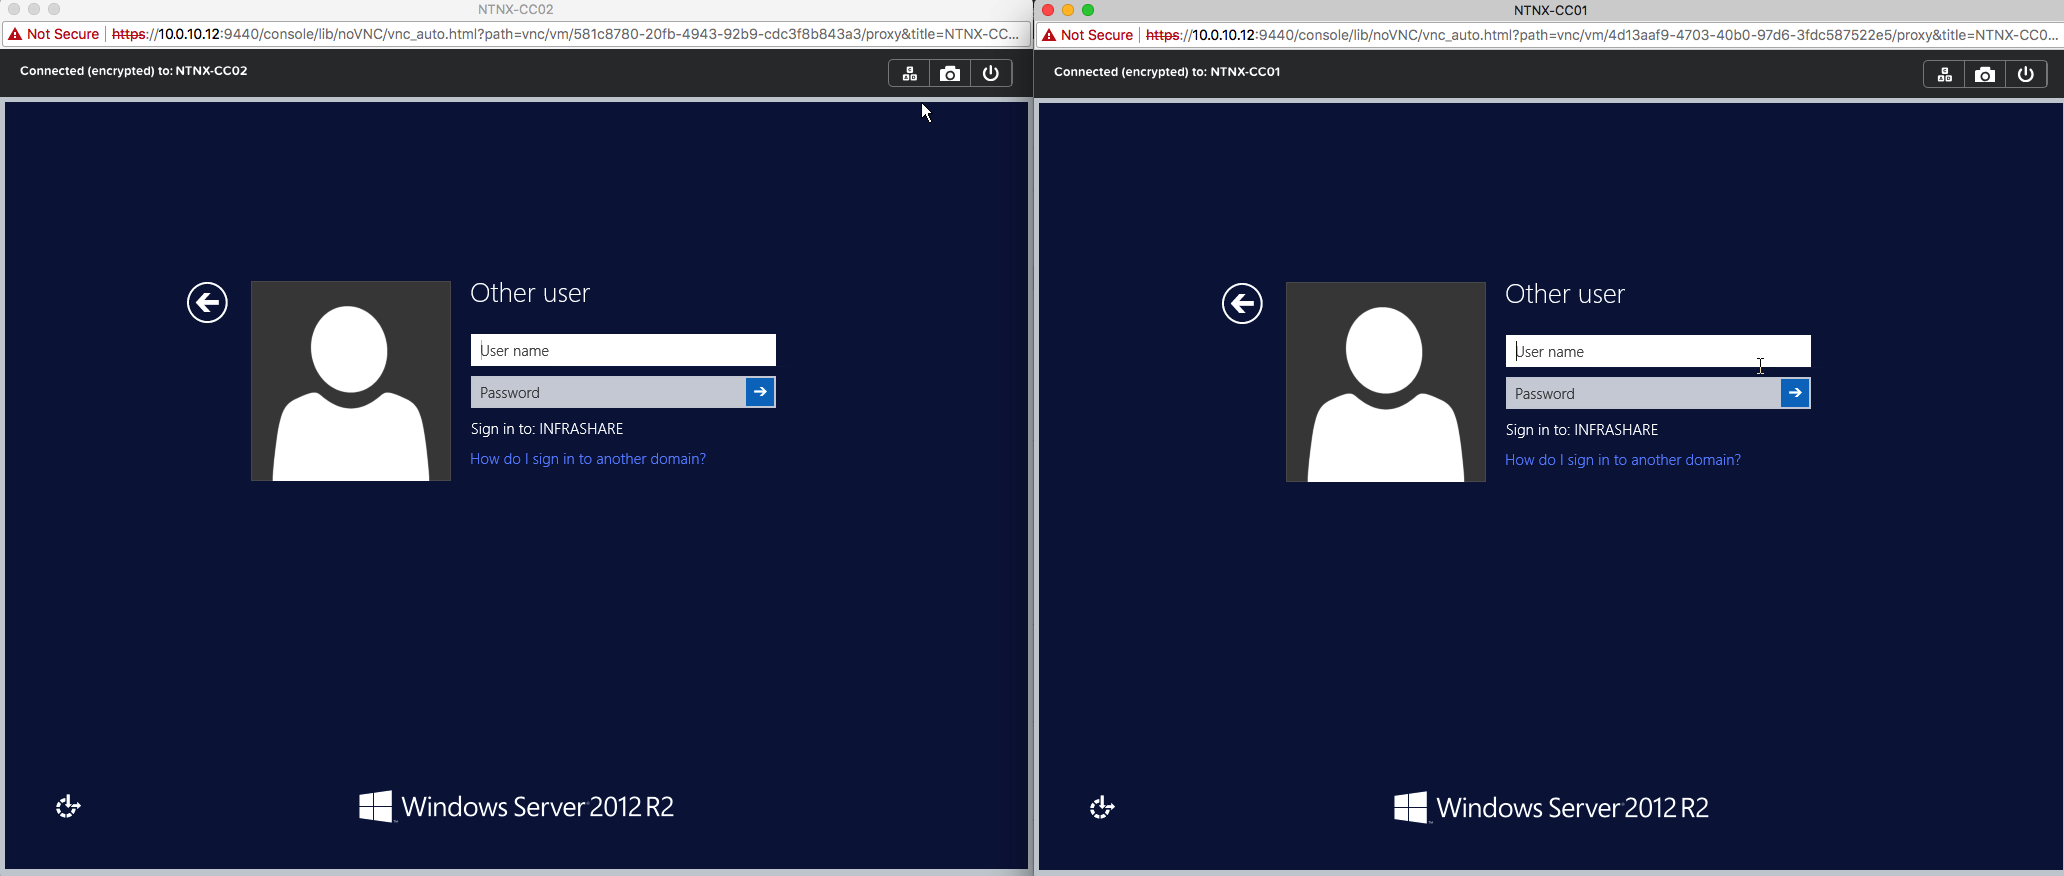
And the Cloud Connector as well!

And the Citrix Cloud Connectivity test runs great as well!

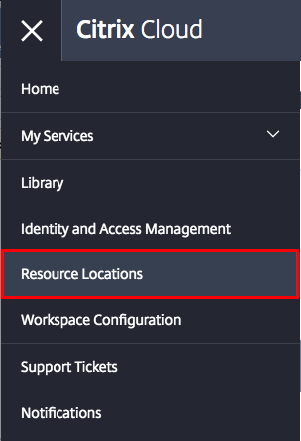
Switch back to the Citrix Cloud portal. We now should see two Cloud Connectors added into a Resource Location.
And yes, the automation process did his work pretty good…
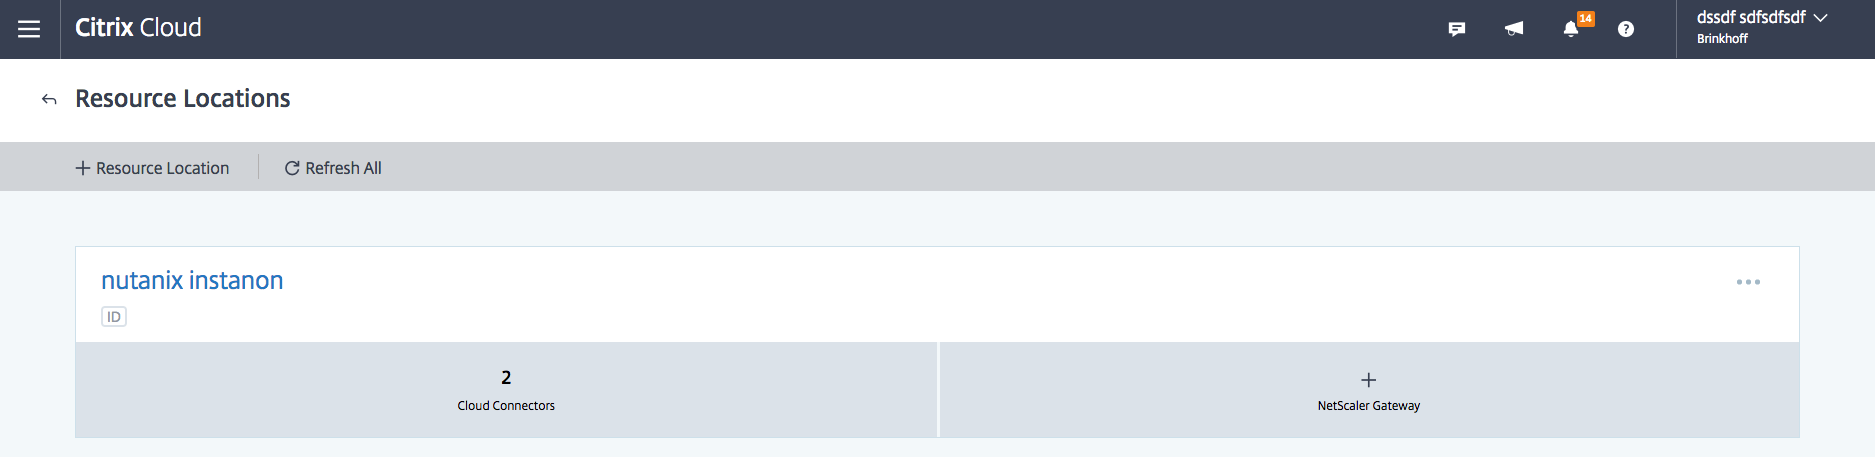
You now see both Citrix Cloud Connectors Online, and they’re ready to rock!

And when you now open the Citrix Cloud menu
You’ll see both Connectors online!
Install the Nutanix CWA Plug-In for Citrix Cloud Connectors
Now we need to login to both Citrix Cloud Connectors and install the Nutanix CWA Plug-In. The software is needed for the Host Connection – Resource Connection setup within the Citrix Cloud. You can download the plugin from your Nutanix Portal.
The Nutanix CWA Plug-In is designed to create and manage VDIs in a Nutanix Acropolis infrastructure environment for the Citrix Cloud.
By installing the software on both Citrix Cloud Connectors, the Nutanix Acropolis feature will pop-up in the Host Connection setup within the Citrix Cloud.
Open a remote or Console session to both Connectors
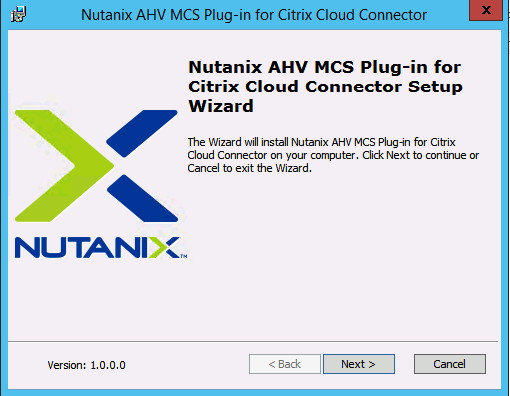
Download the software from the Nutanix Download Portal and run the MSI

Click on Next
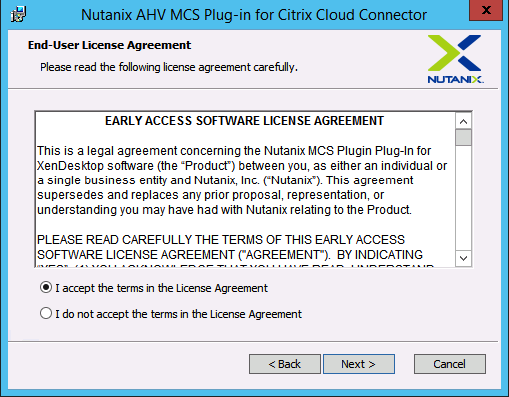
Accept the terms – Click on Next
Click on Next
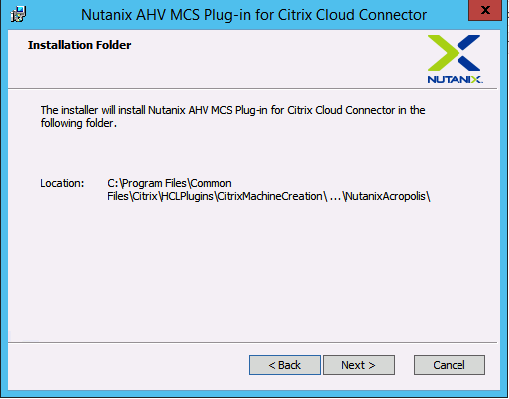
Click on Install

The installation takes only 30 – 60 seconds…
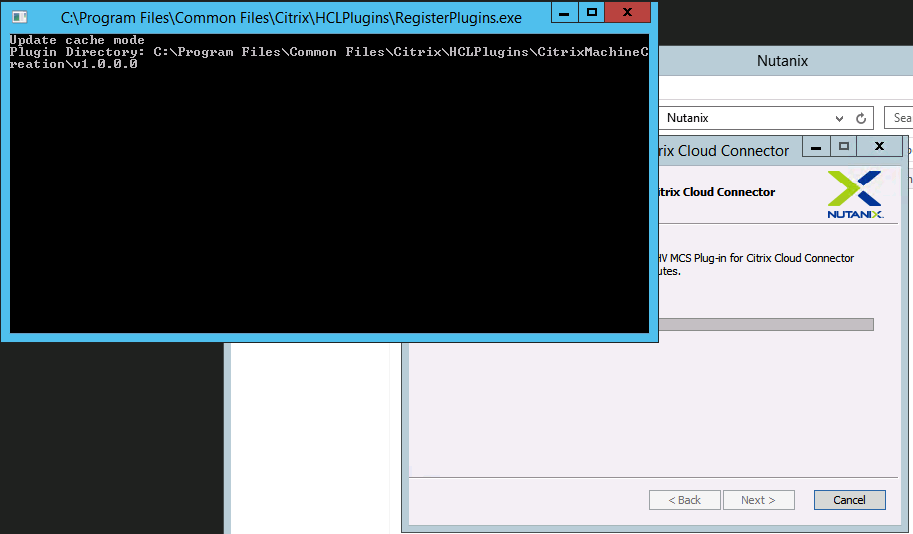
The installation is finished!

Perform the same steps for the other Citrix Cloud Connector(s) in your environment!
Enroll the Master – VDI Base image
Upload the ISO of Windows 10 – 1803 through the (same) Image Configuration option as we did for the Cloud Connector VM

Click on Upload image

Give in a name, select a Storage Container and choose/select the ISO
Click on Save

Enroll the Virtual Machine
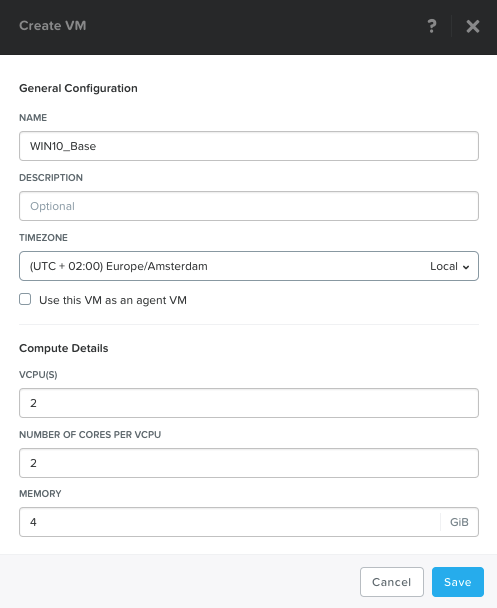
Add the C:\ OS Disk
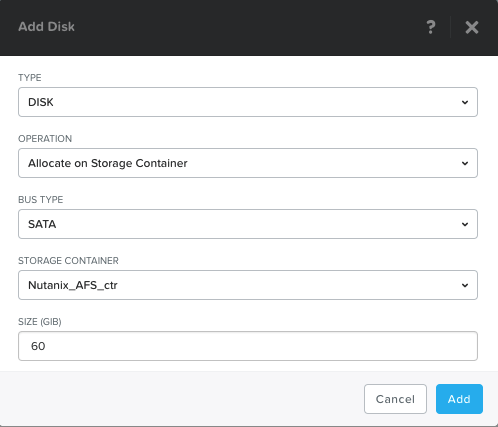
And open the default CD-ROM and change it to the Windows 10 ISO
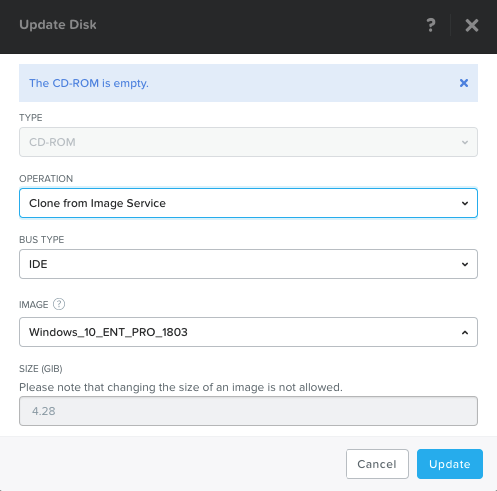
Ensure that at least the following 2 disks are applied
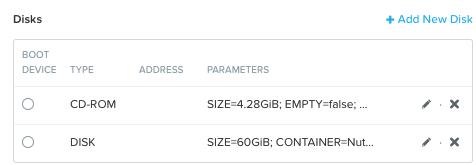
Create a network Card – NIC – assign a VLAN
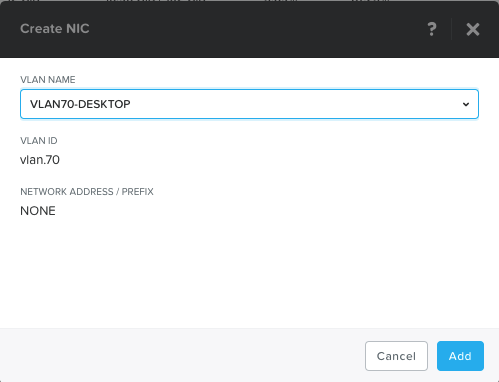
Click on Save

Start the Virtual Machine and open the Console

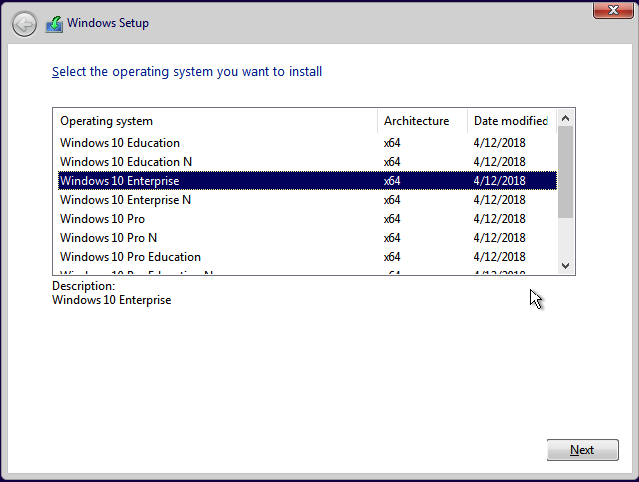
Go through the Initial setup of Windows 10
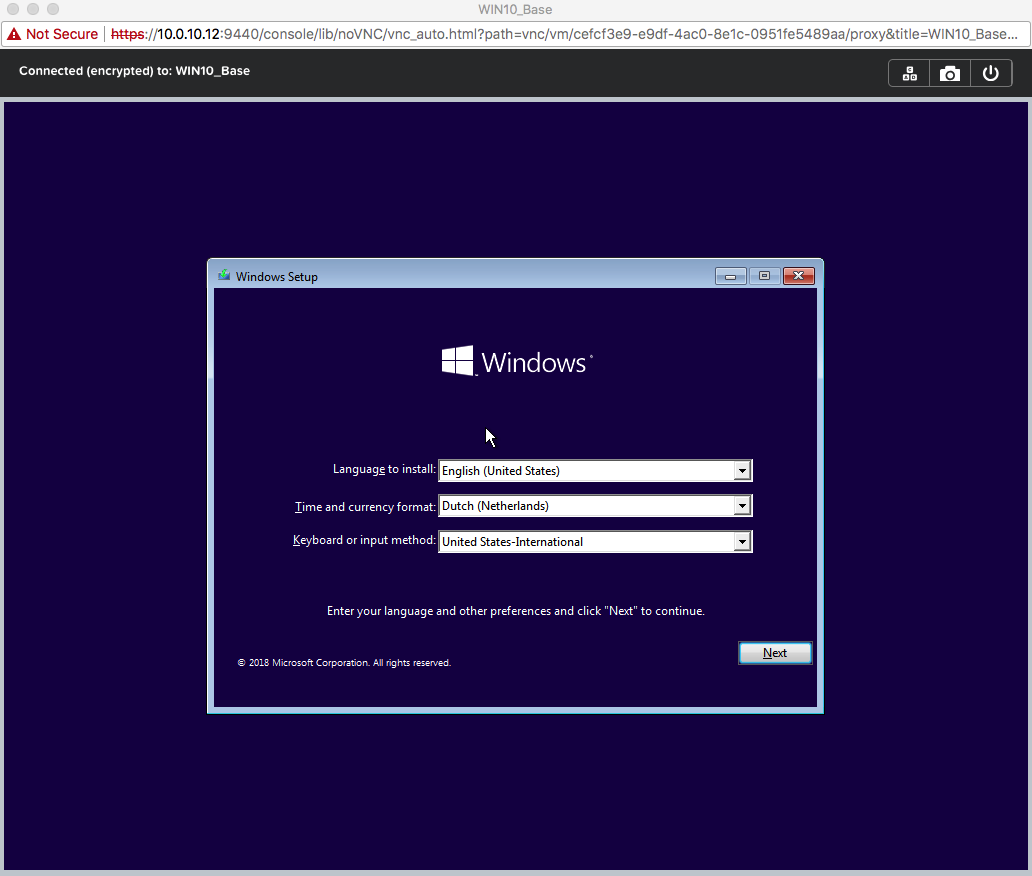
I’m using Windows 10 Enterprise, but of course, you’re free to decide your version (Pro or Enterpise)
Partition the disk

Wait for the Windows 10 – Welcome screen
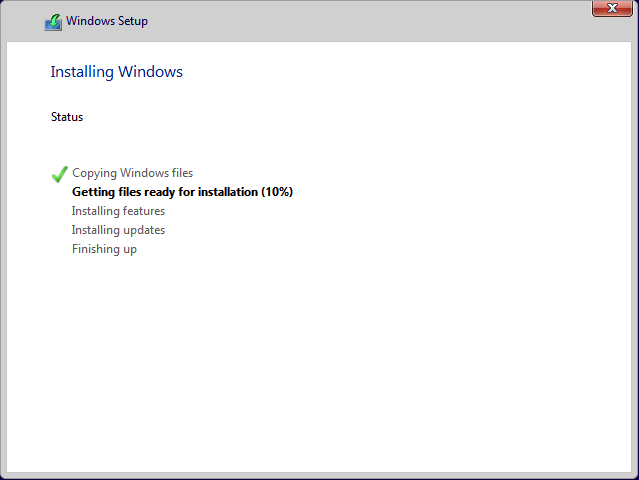
Go through the initial Windows 10 setup

Install the Nutanix Guest Tools
Note: Make sure to unmount the Windows 10 ISO
Run the setup.exe
Click on Install
And the setup finished successfully

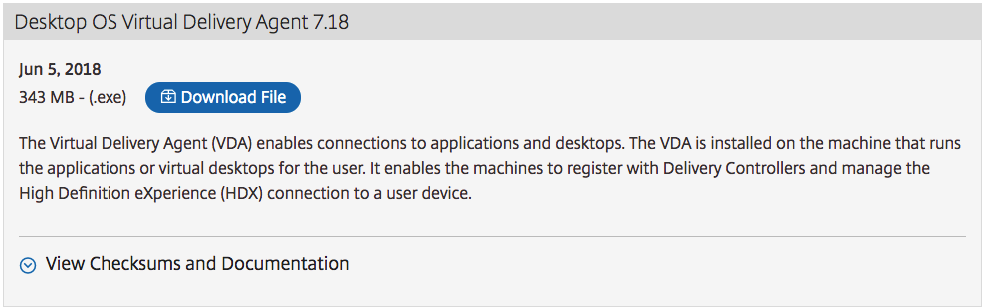
Install the Citrix VDA Desktop Software
Download the latest Citrix XenApp and XenDesktop VDA software through the URL below.
https://www.citrix.nl/downloads/citrix-cloud/product-software/xenapp-and-xendesktop-service.html
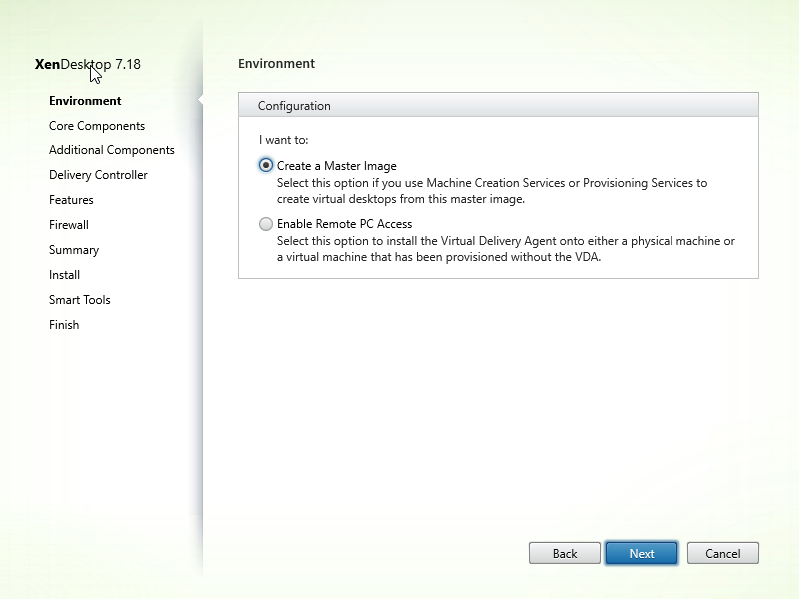
Make sure the Master Image option is selected – Click on Next
Click on Next

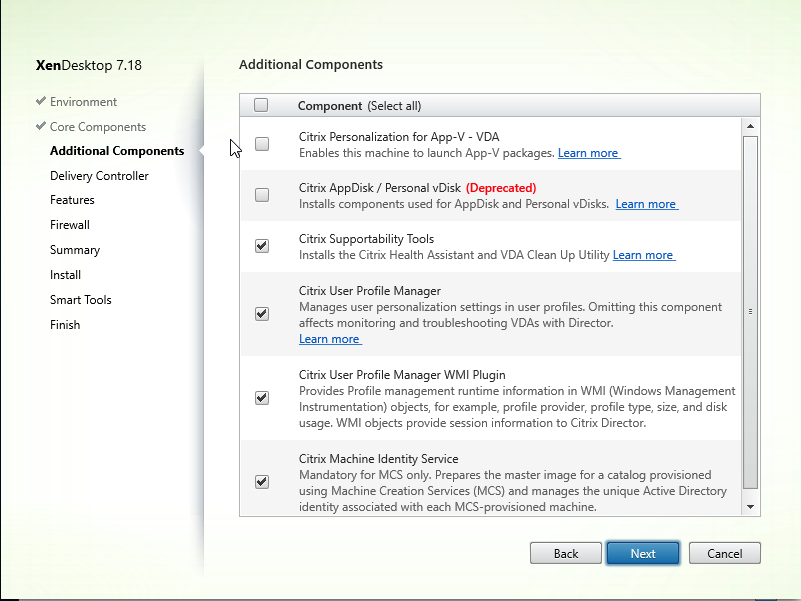
Deselect the ones that you do not use – Click on Next
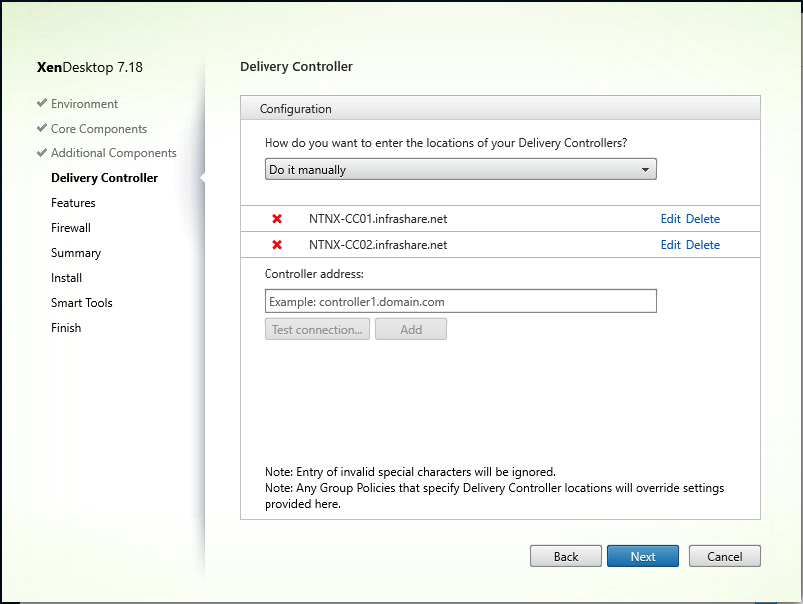
Enter the 2 (or 1) Cloud Connectors FQDN names, which you created earlier in the Citrix Cloud setup within Nutanix Prism. Click on Next
Select the Features
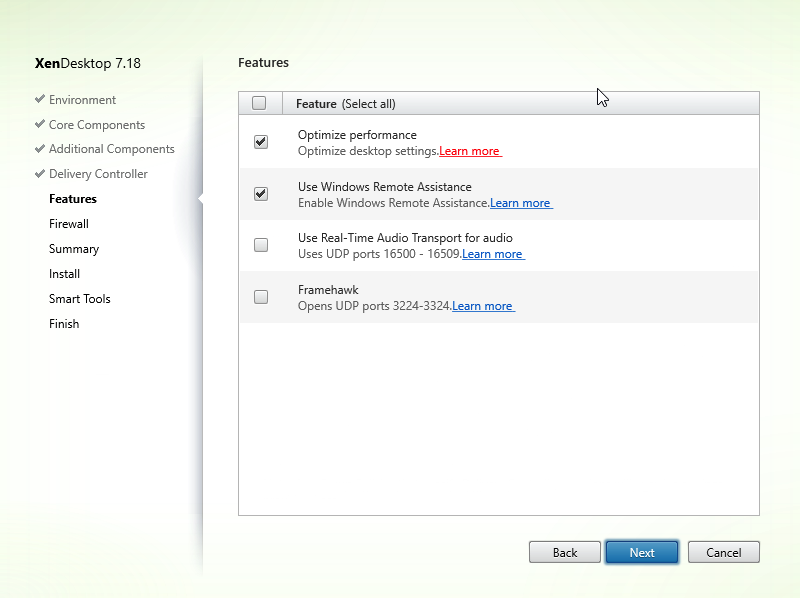
Click on Next

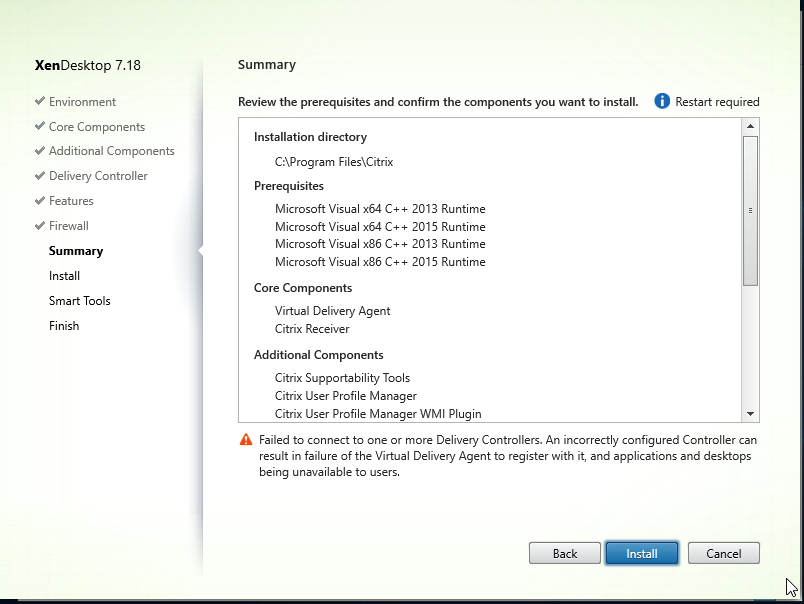
Click on Install
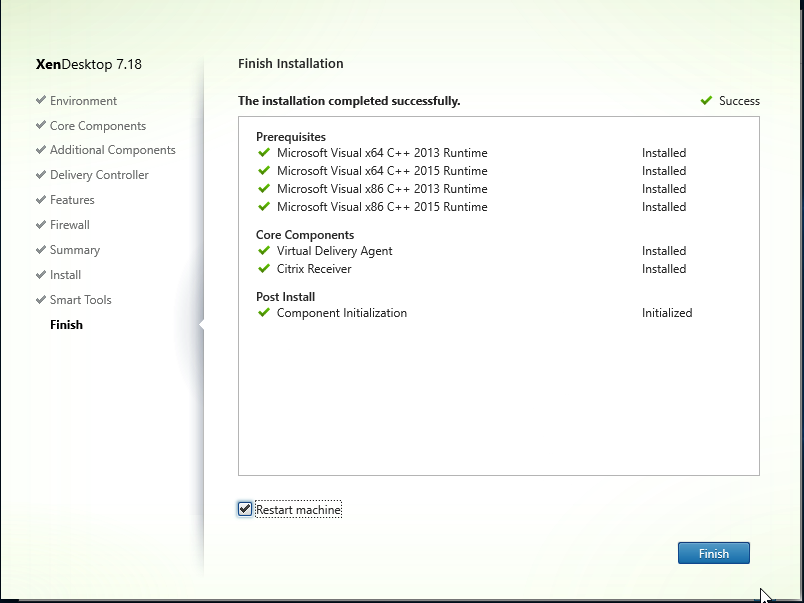
Installation is finished. Click on Next

Reboot the machine – Click Finished
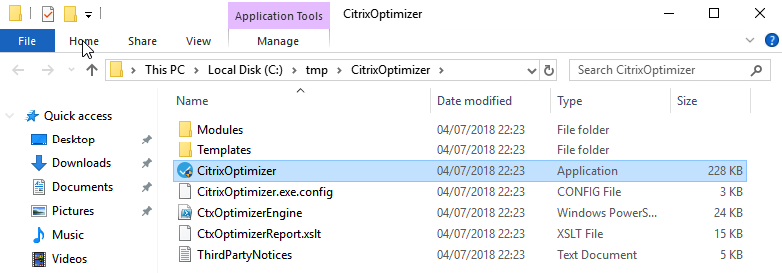
Optimize the image with Citrix Optimizer
Download the Citrix Optimizer software and start CitrixOptimizer.exe
https://support.citrix.com/article/CTX224676
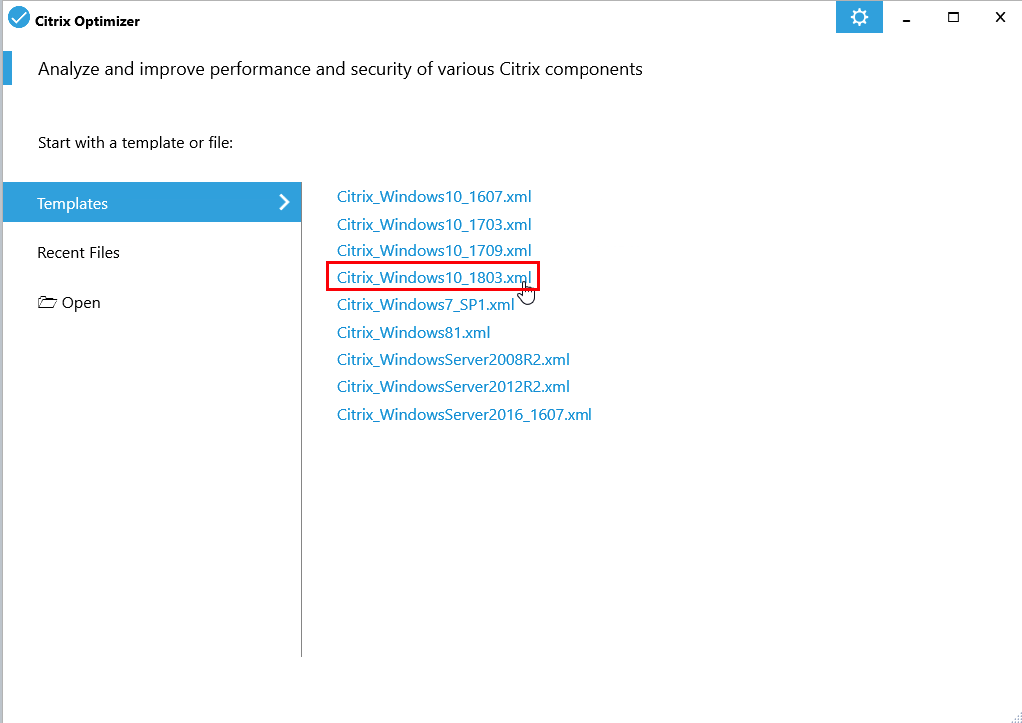
Select the Windows 10 1803 template
Select the services that you want to disable – or choose for the default settings and click on Analyse and Optimize if you agree

Process is completed

Shutdown the Virtual machine

Note: When the VDI Base is completely shut down. Please create a snapshot, otherwise, the Machine Catalog setup won’t detect any Virtual Machines to use as Base!
Select the VM in Prism and click on Take Snapshot

Name it something like WIN10_BASE. C
Click Submit

Create the Nutanix Acropolis Host Connection
Login to the Citrix Cloud via citrix.cloud.com
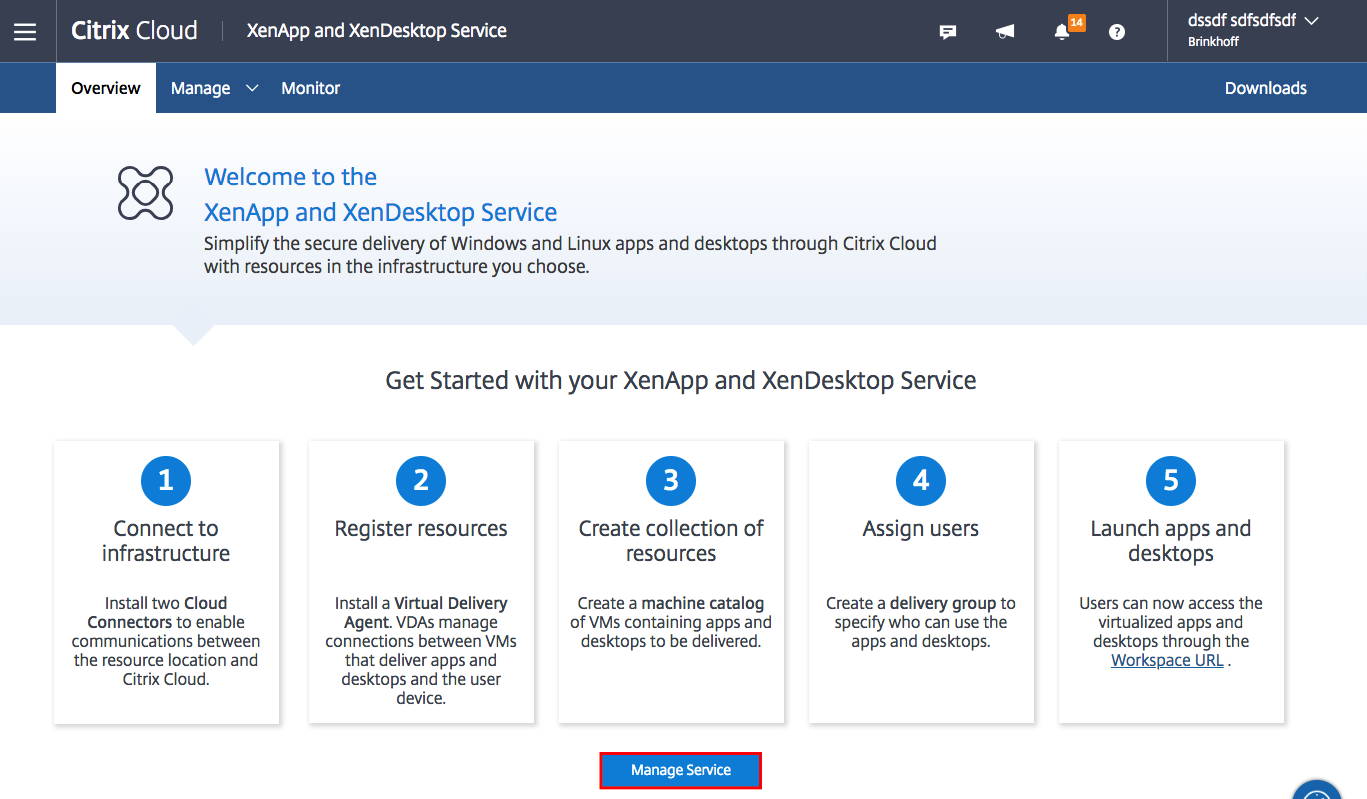
Open the XenApp and XenDesktop – Citrix Studio Console
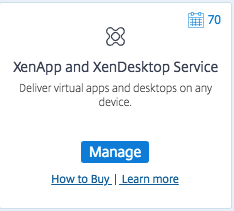
Click on Manage Service
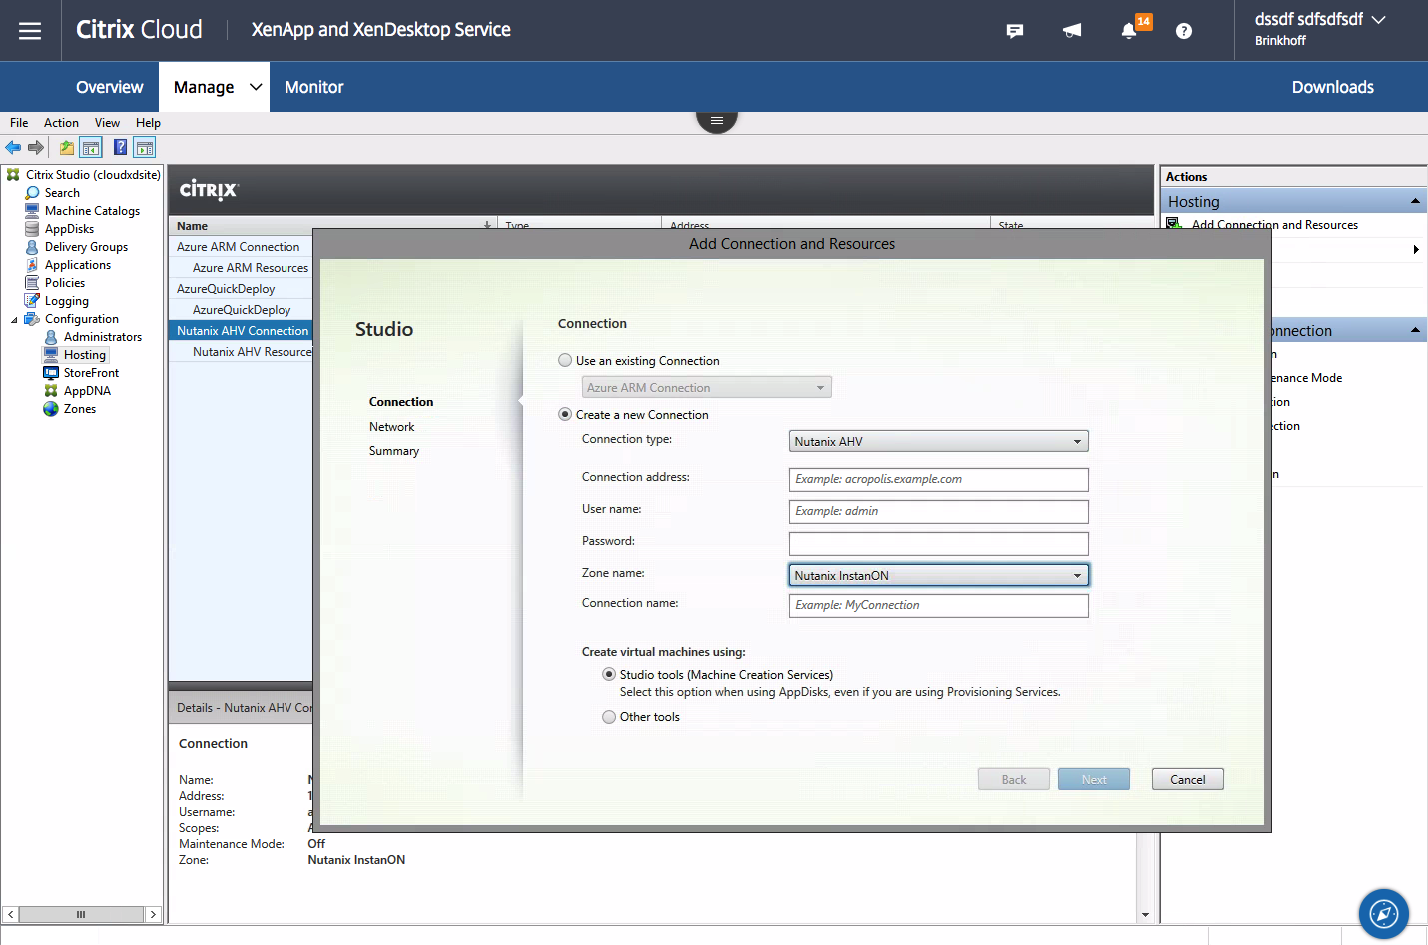
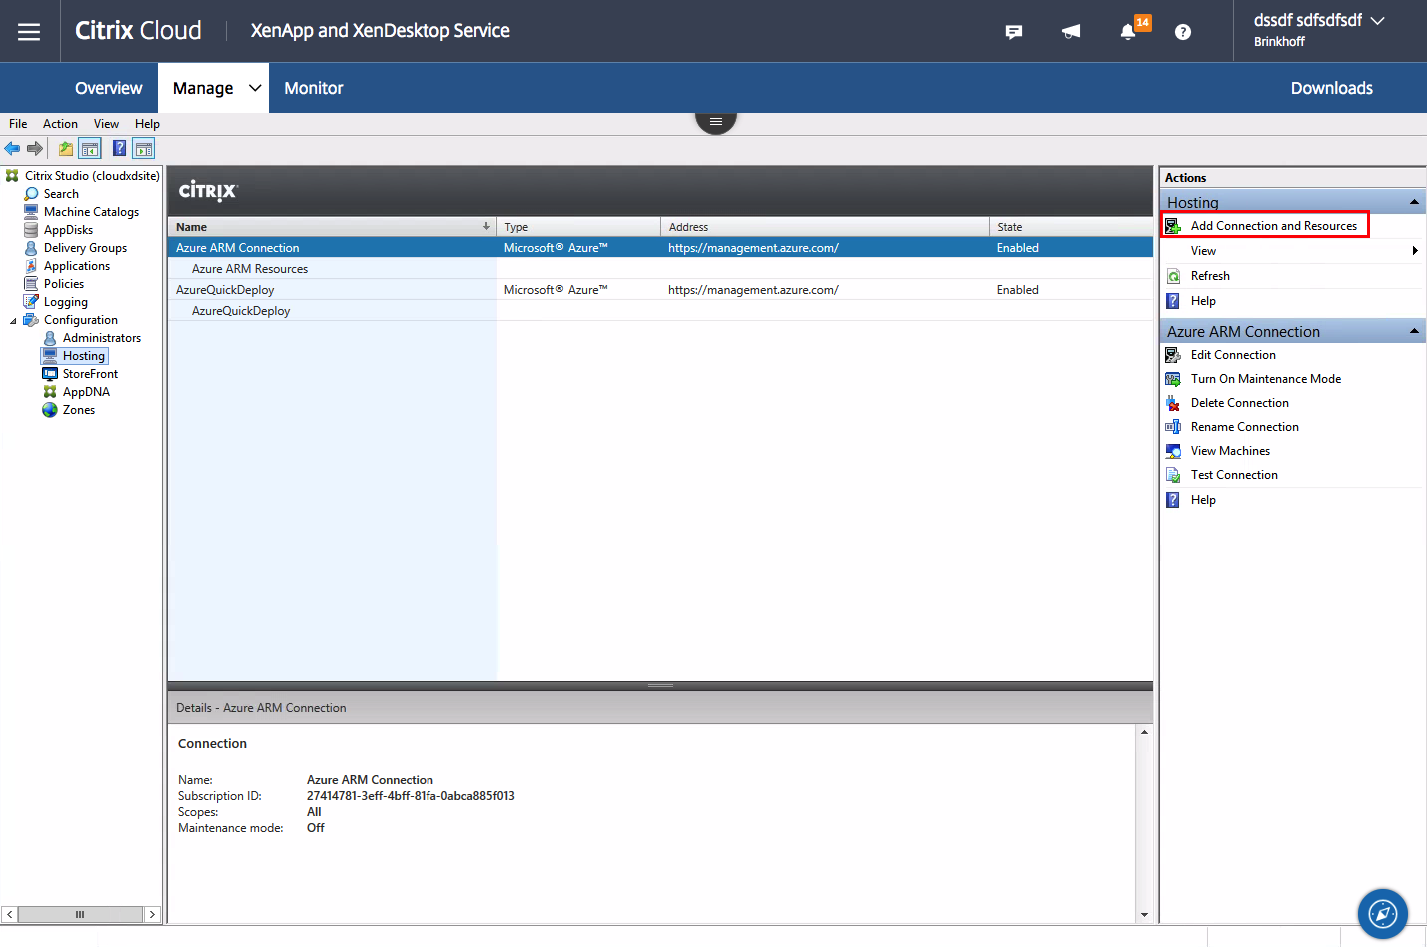
Click on Add Host Connection and Resources
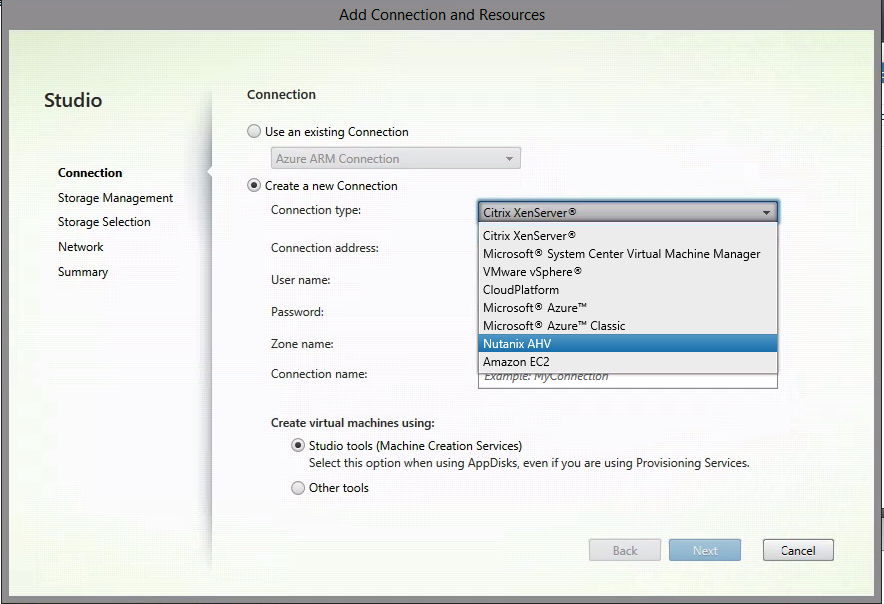
Click on – Create a new Connection and Select Nutanix AHV
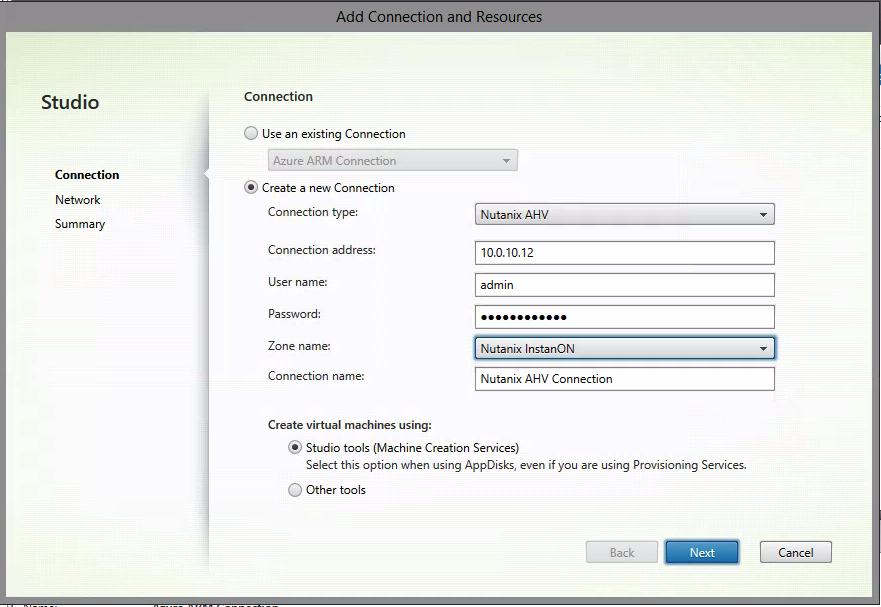
Enter the required information to set up the connection to the Nutanix Cluster environment.
The connection address is the CVM DNS or IP Address
Select the correct Resource Location – Zone name if you have more than one
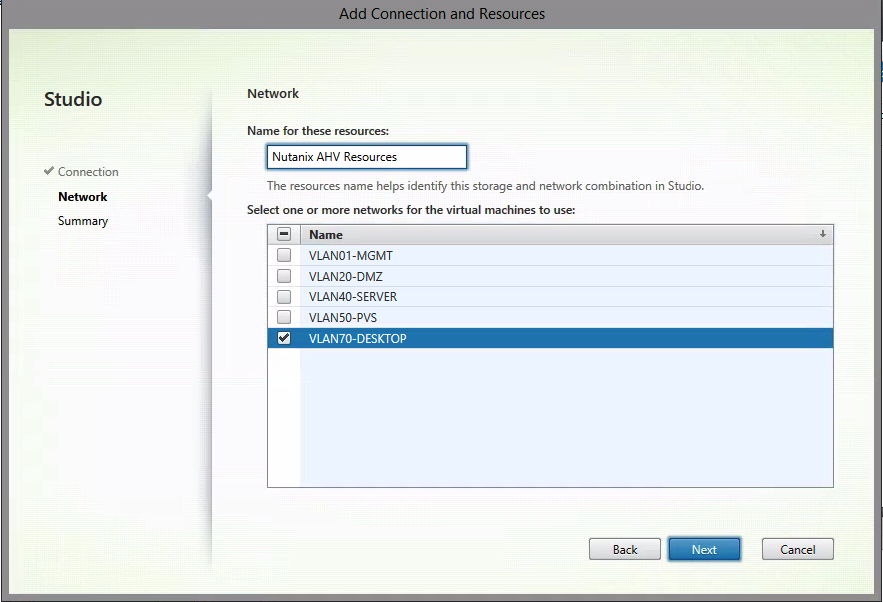
The connection works! We now need to select our default VLAN Network for our VDIs. They’ll be assigned when deploying the machines through MCS
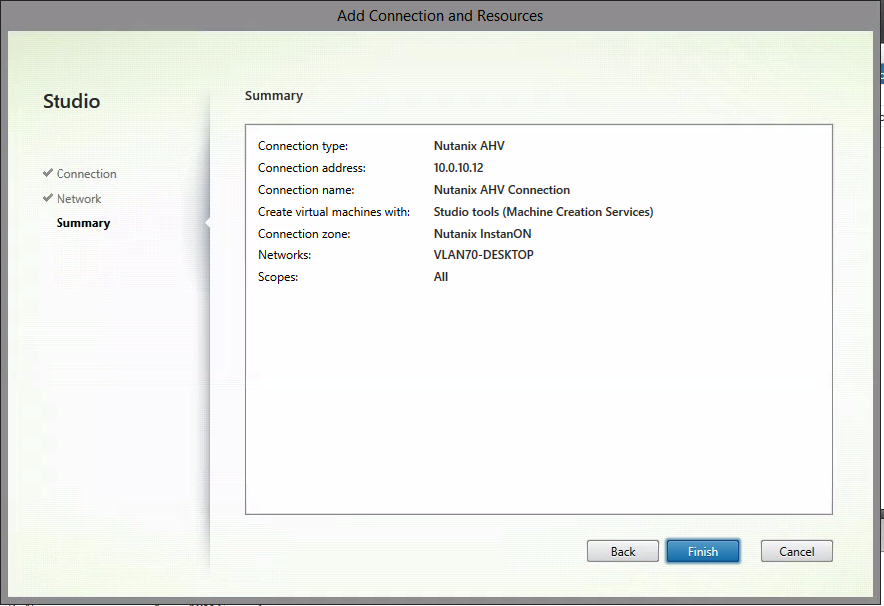
Confirm the summary and click on Finish
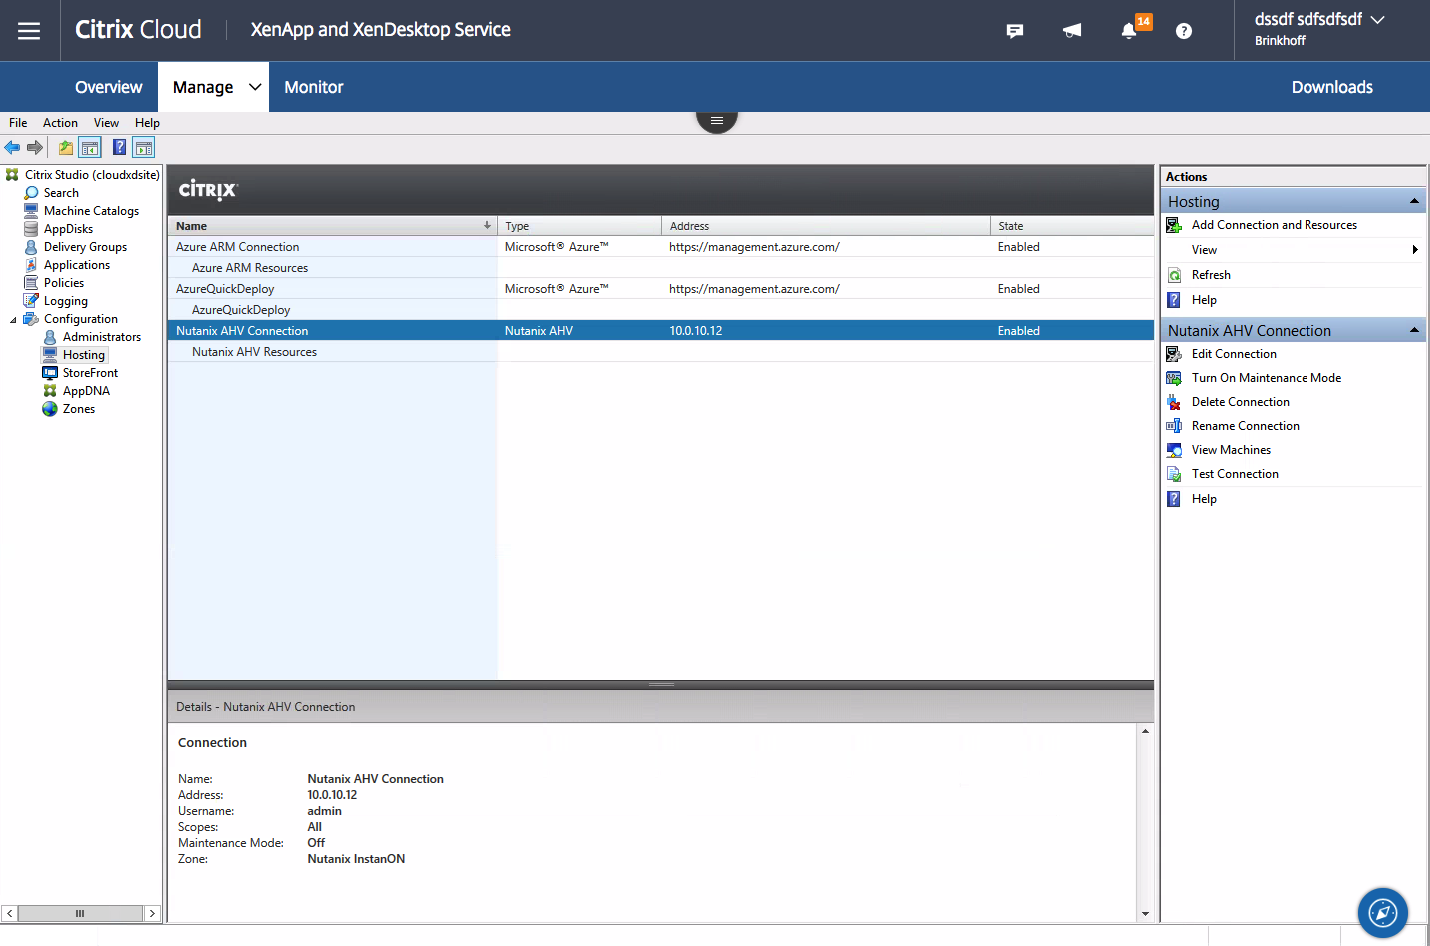
The Connection is now listed and we’re ready to start with the Machine Catalog enrollment!
Configure the MCS AHV Windows 10 VDI Machine Catalog
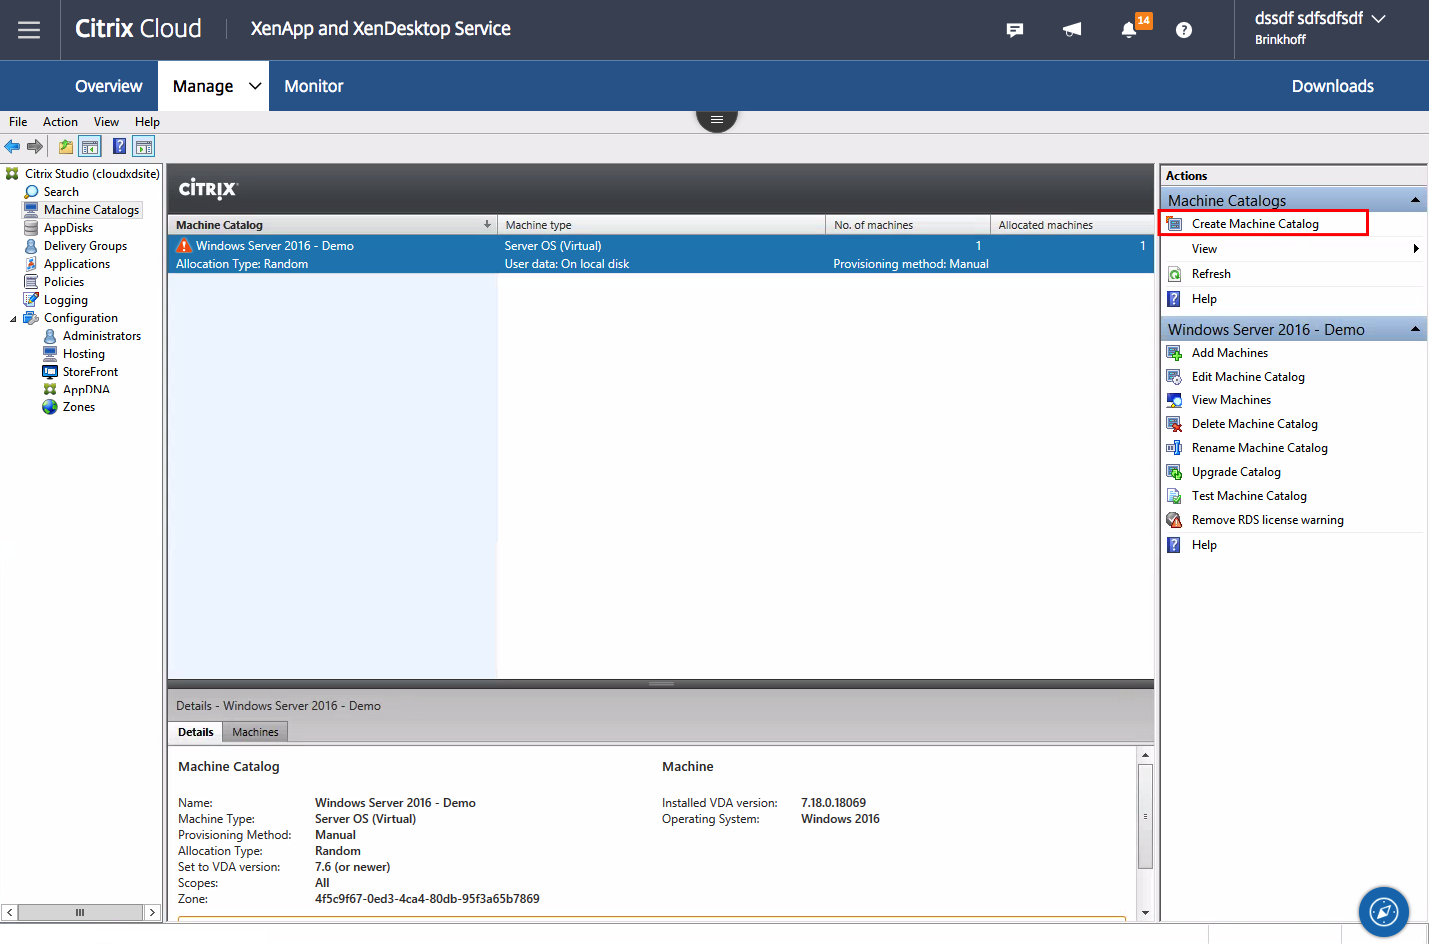
Switch to the Machine Catalogs menu.
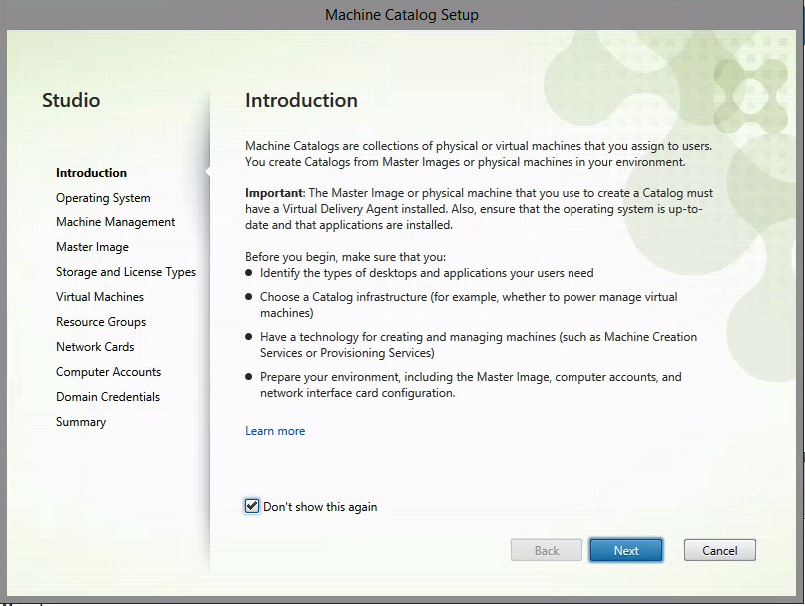
Click on Create Machine Catalog
Click Next
Select Desktop OS. Click Next

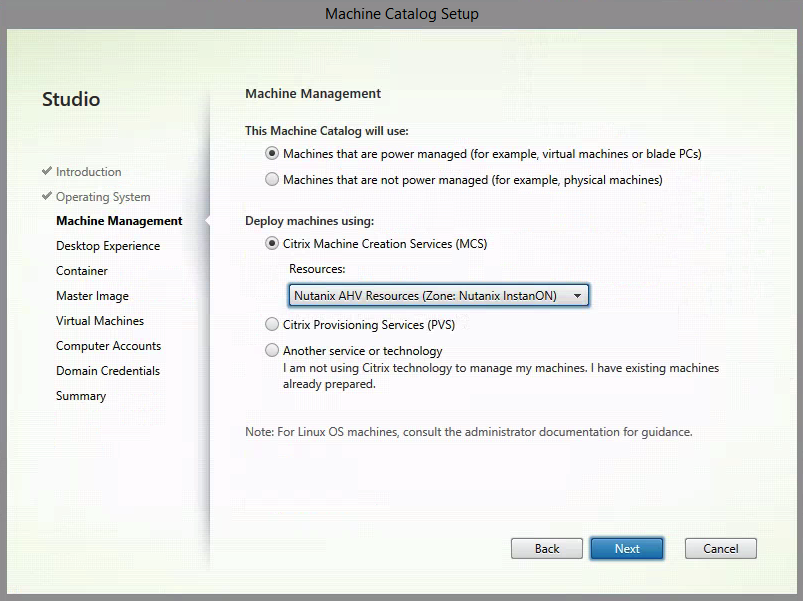
Select Machine Creation Services and the newly created Resource Location for Nutanix InstantON. Click on Next
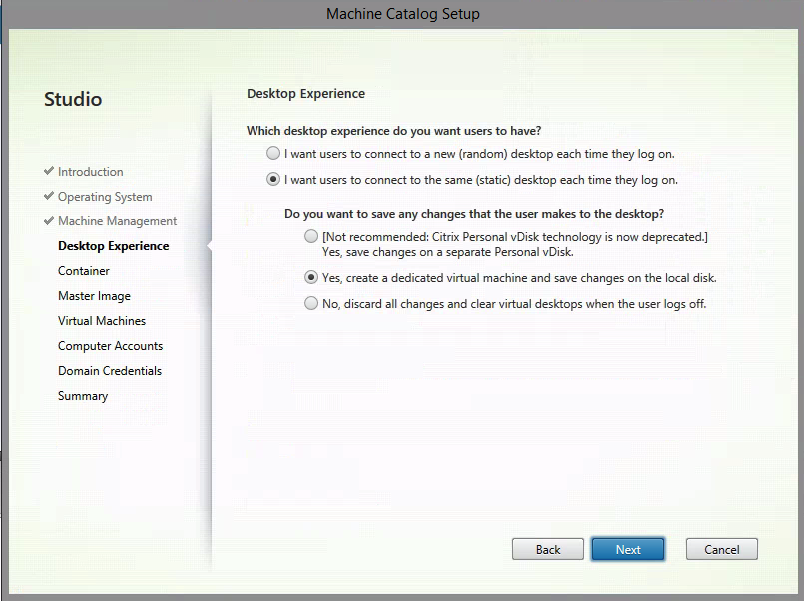
The following settings are very important.
Are you using personal desktops – or pooled desktops? Static – Personal Desktops speaks for themselves, therefore random – pooled desktops can be best compared to random desktop – which mostly results in a non-resistant approach.
The other 2 settings (or 3 actually, but I just deny the Personal vDisk one J) meaning that the differential (OS) disk will be writeable and will save the changes, also after a reboot. The second option will clear the image OS disk.
Choose your Desktop Experience wisely and click on Next
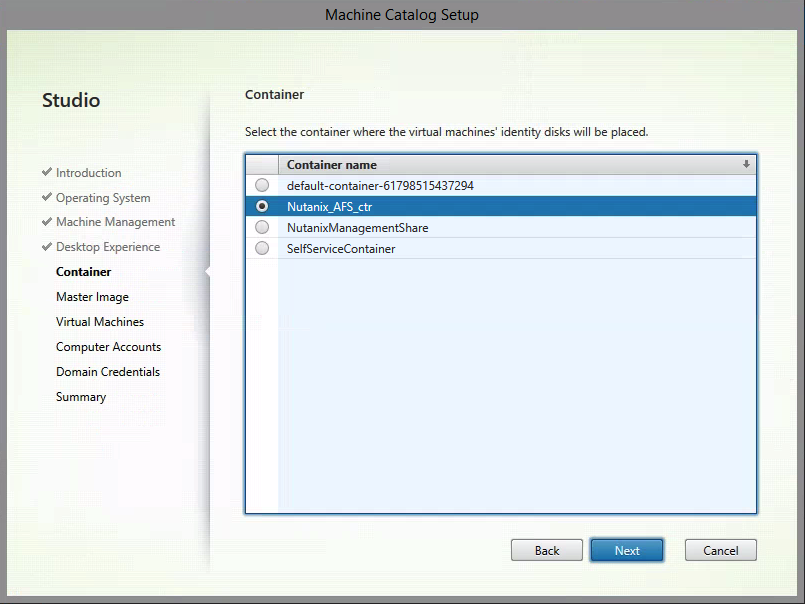
Select your Nutanix Storage Container – to storage the Virtual Desktop in. Click on Next
Select the Snapshot of the Base Image and change the VDA level.
Click on Next

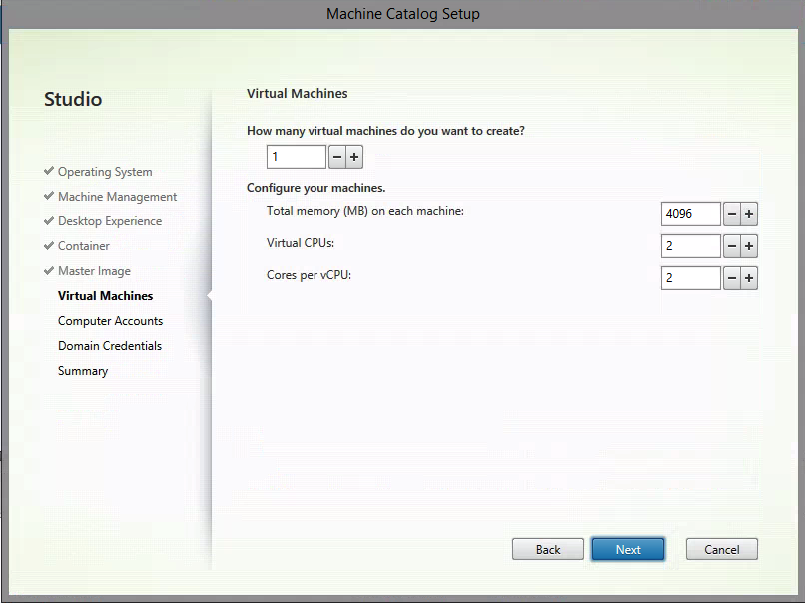
Apply proper sizing’s for your Windows 10 VDIs, I’ll add the Citrix VDI Handbook best practices of Citrix to make your decision proactively.
CPU Sizing
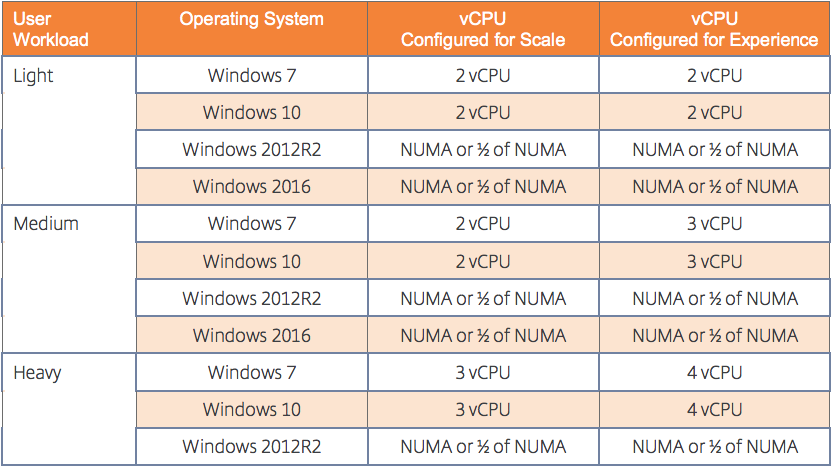
RAM Sizing

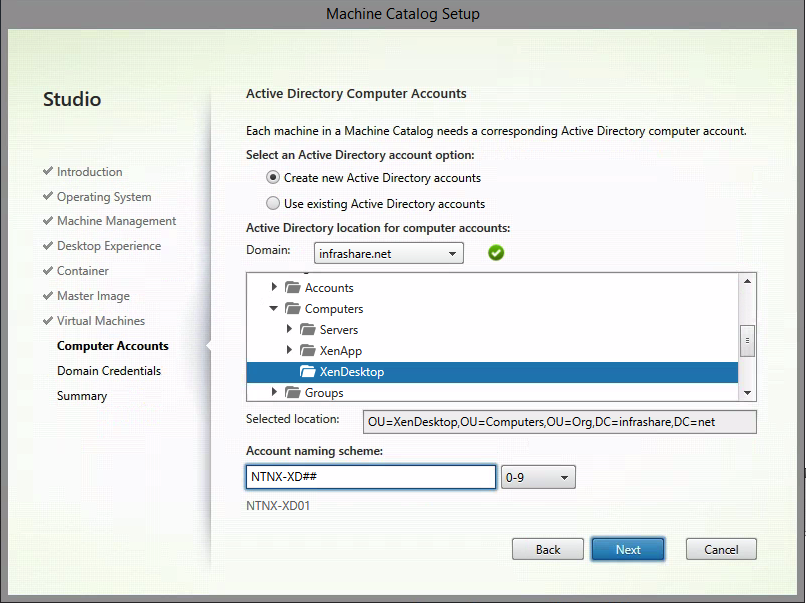
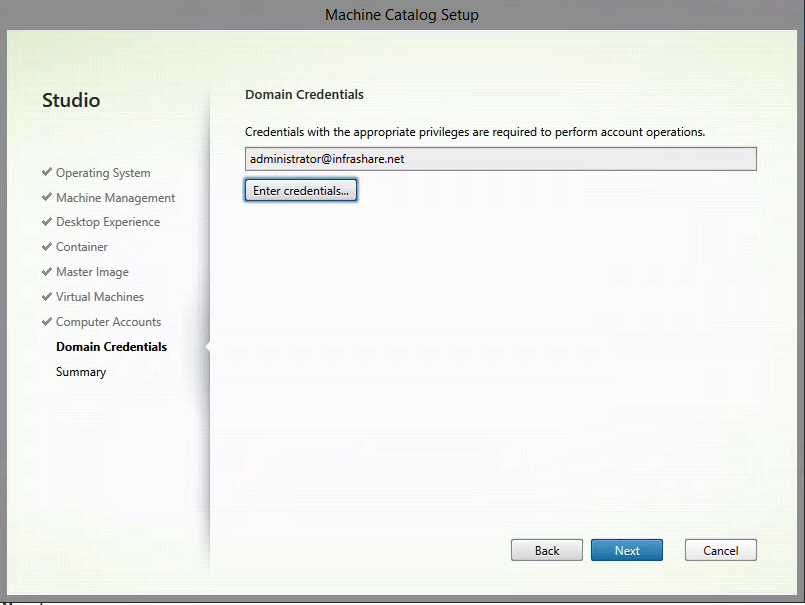
Select an OU to place your Virtual Desktops in, and change the Account Naming Schema to your own naming convention. Click on Next
Click on Enter Credentials to enter the Domain (admin) credentials to provide the Domain join and OU reordering.
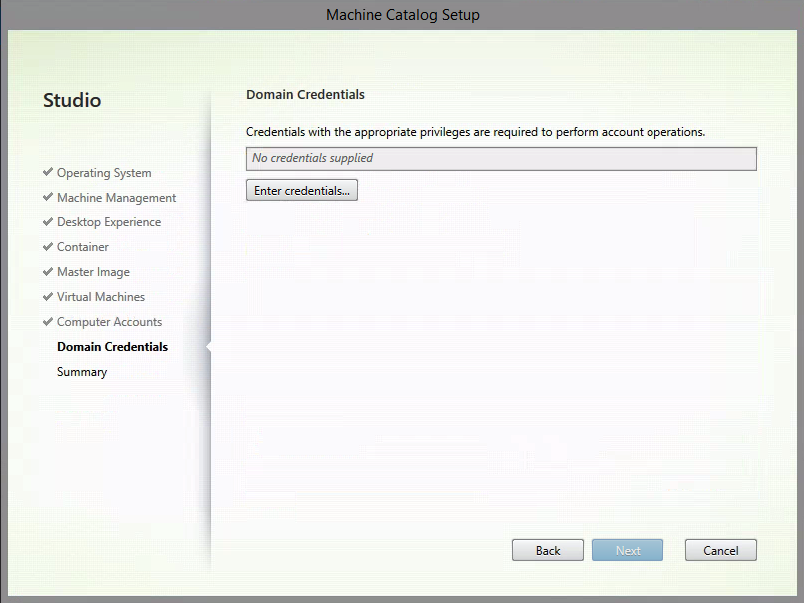
I’m using my Domain Administrator account…

Click on Next
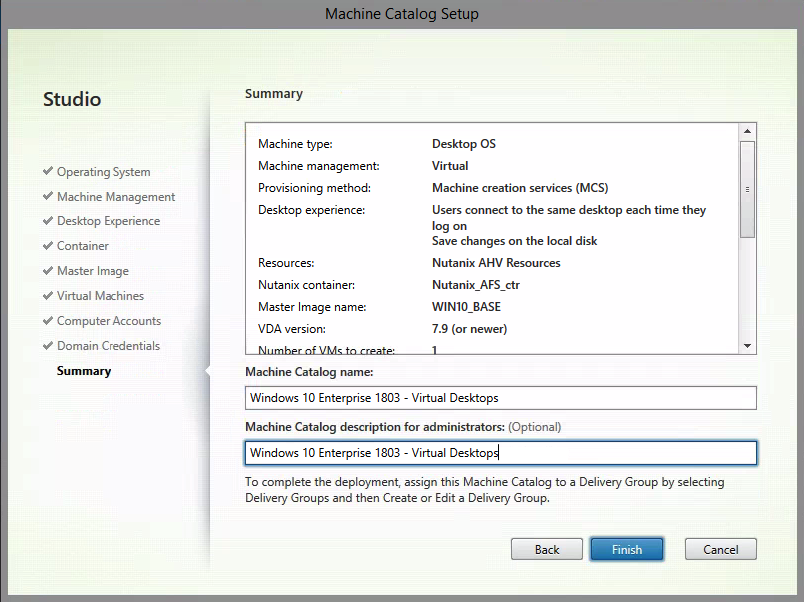
Confirm the summary – Click on Finish
The enrollment is ongoing…
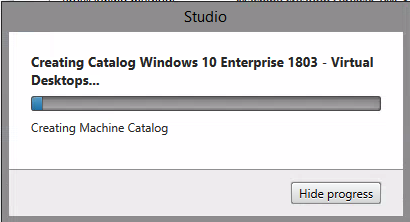
the MCS Preparation – Virtual Machine is created in Acropolis

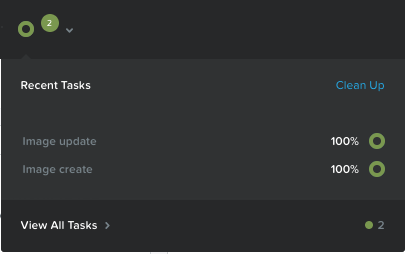
Recent Tasks…
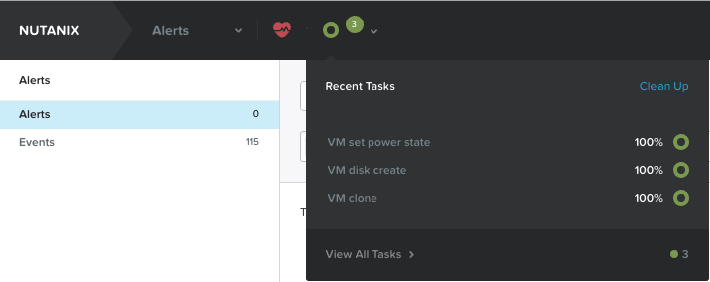
Ok, stop the time… And in almost 1 MINUTE (yes so fast) is…

my NTNX-XD01 is ready to rock!!

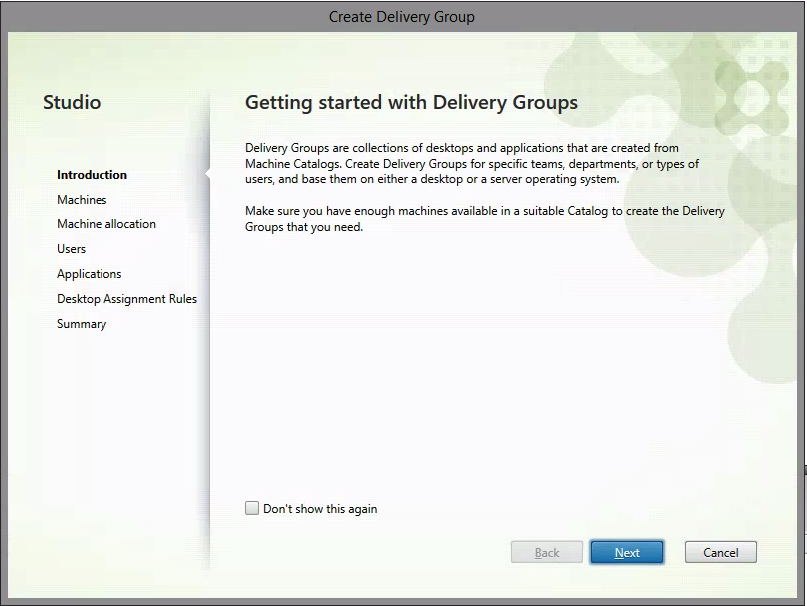
Open the Delivery Group menu in the Citrix Cloud – Studio

Click on Next
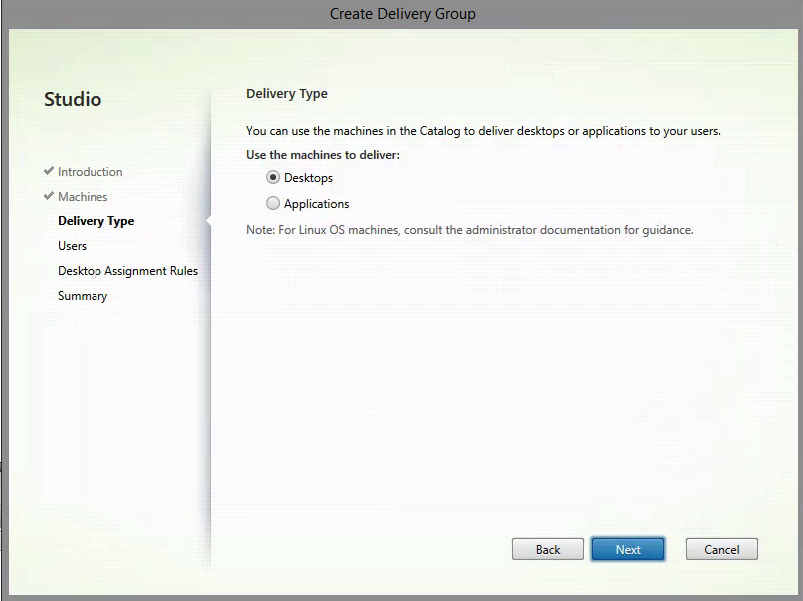
Select the amount of Virtual Desktop to Add. Click on Next

Click on Next
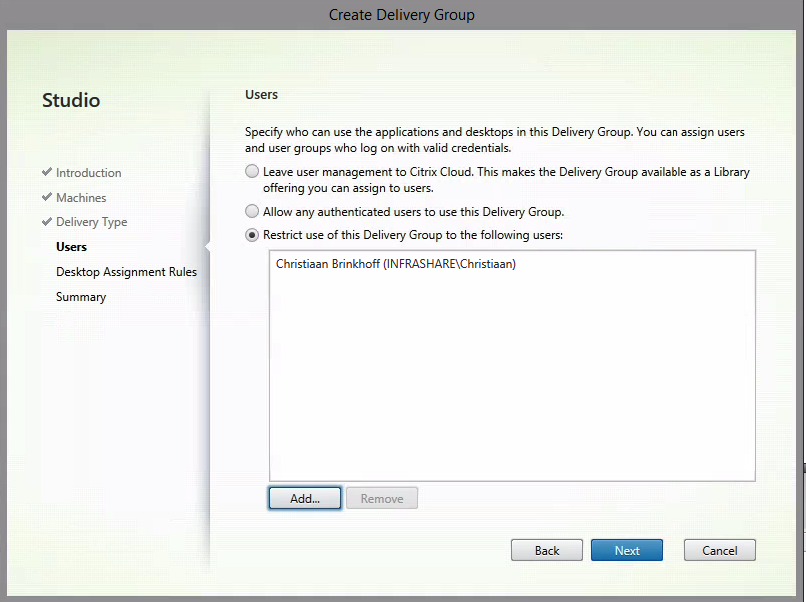
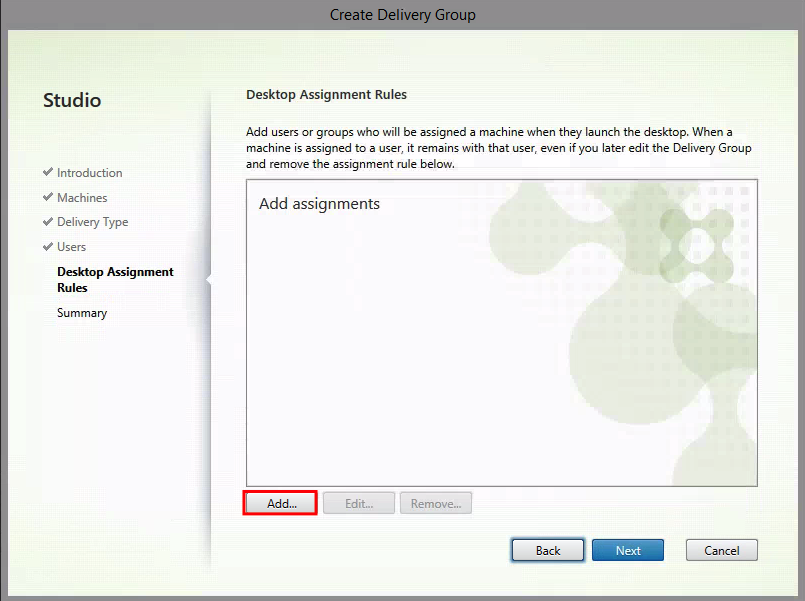
Assign the Users and/or Groups to the Delivery Group
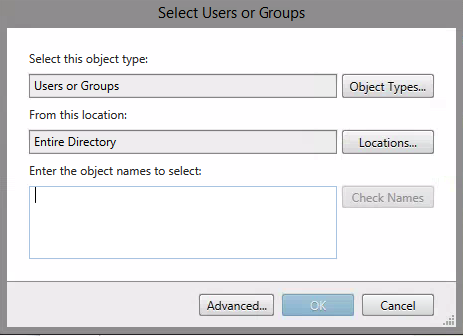
Click on Next
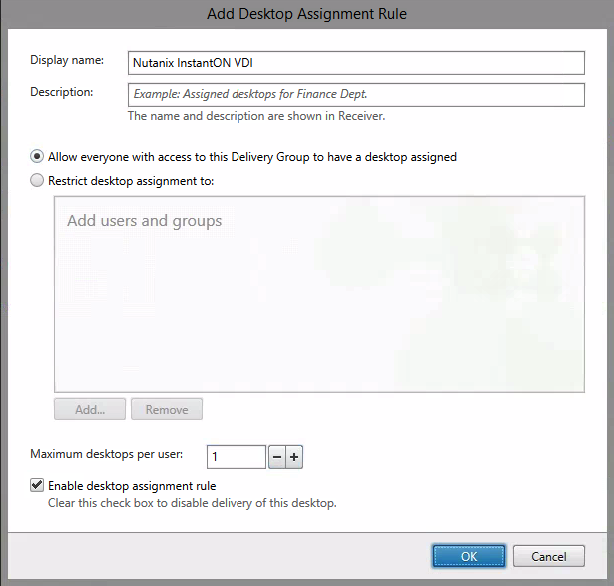
Click on Add
Give a name for the Virtual Desktop. Click on Ok
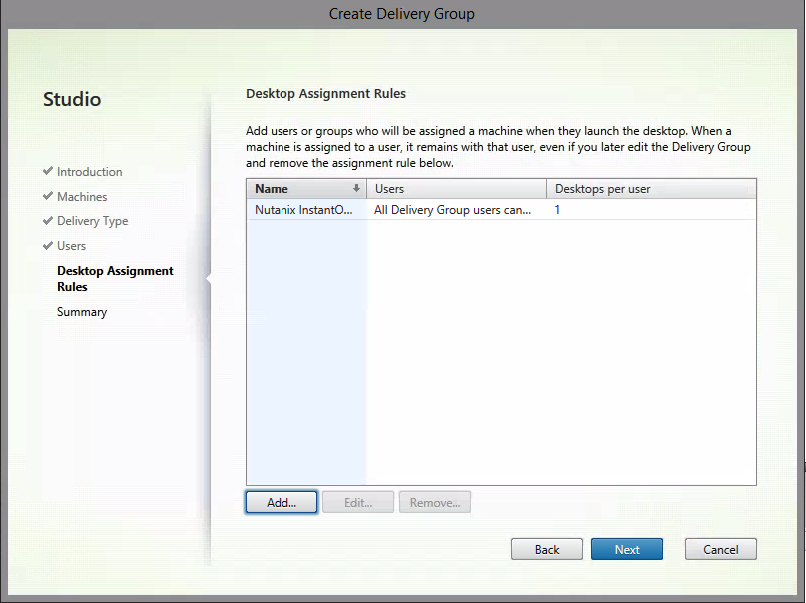
Click Next
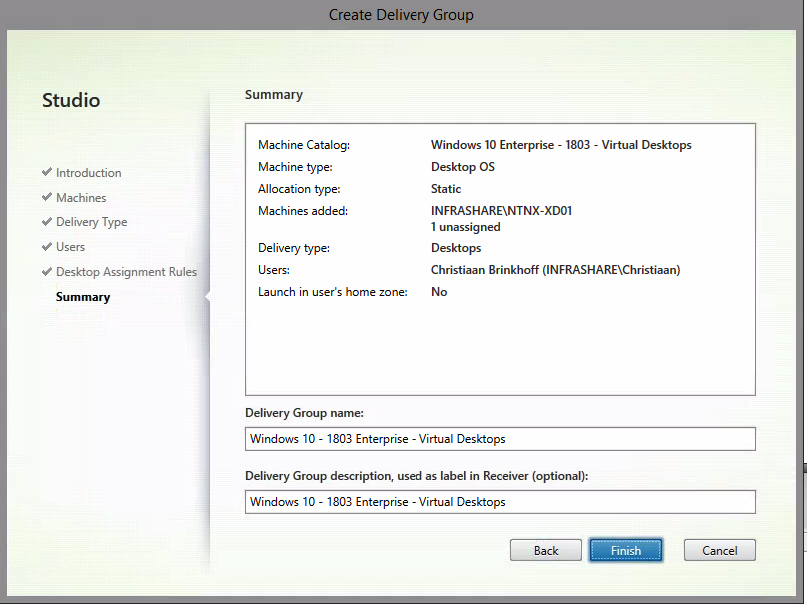
Confirm the summary and Click on Finished
When the Delivery Group is created – Open the Delivery Group
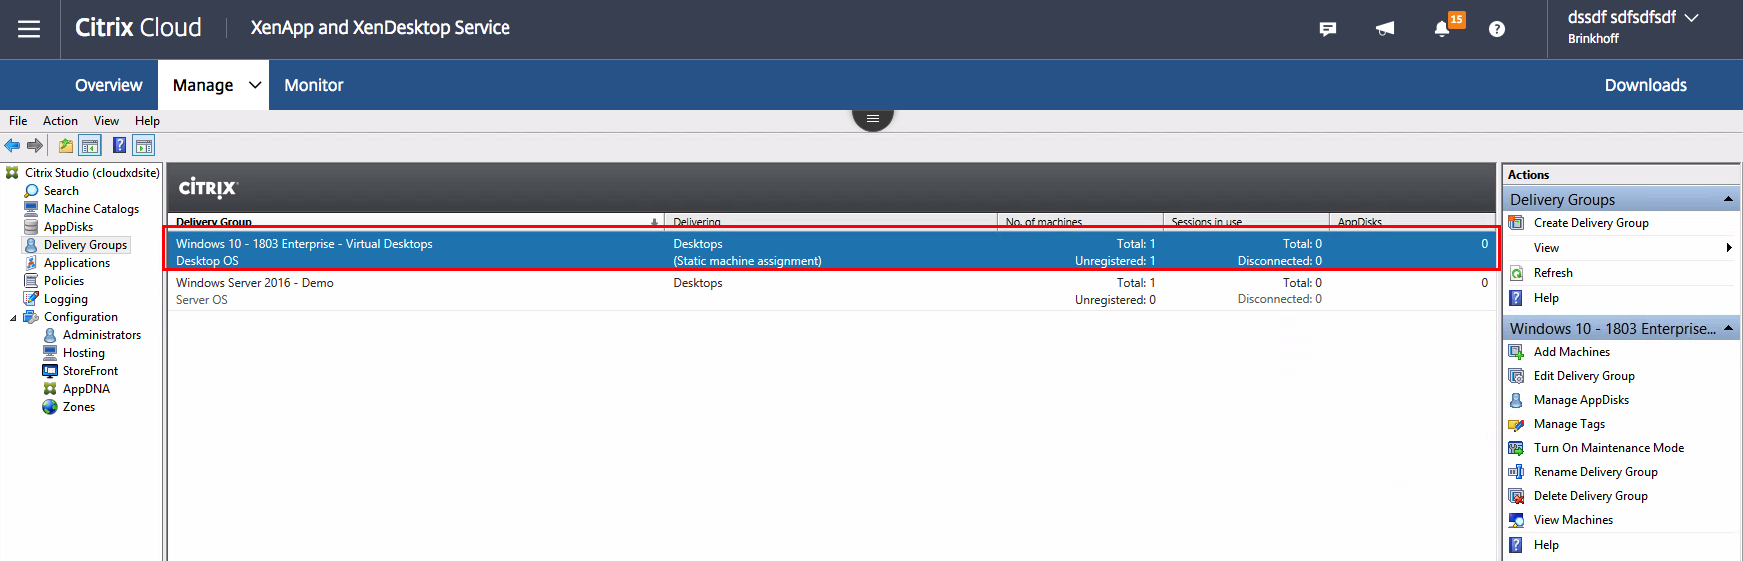
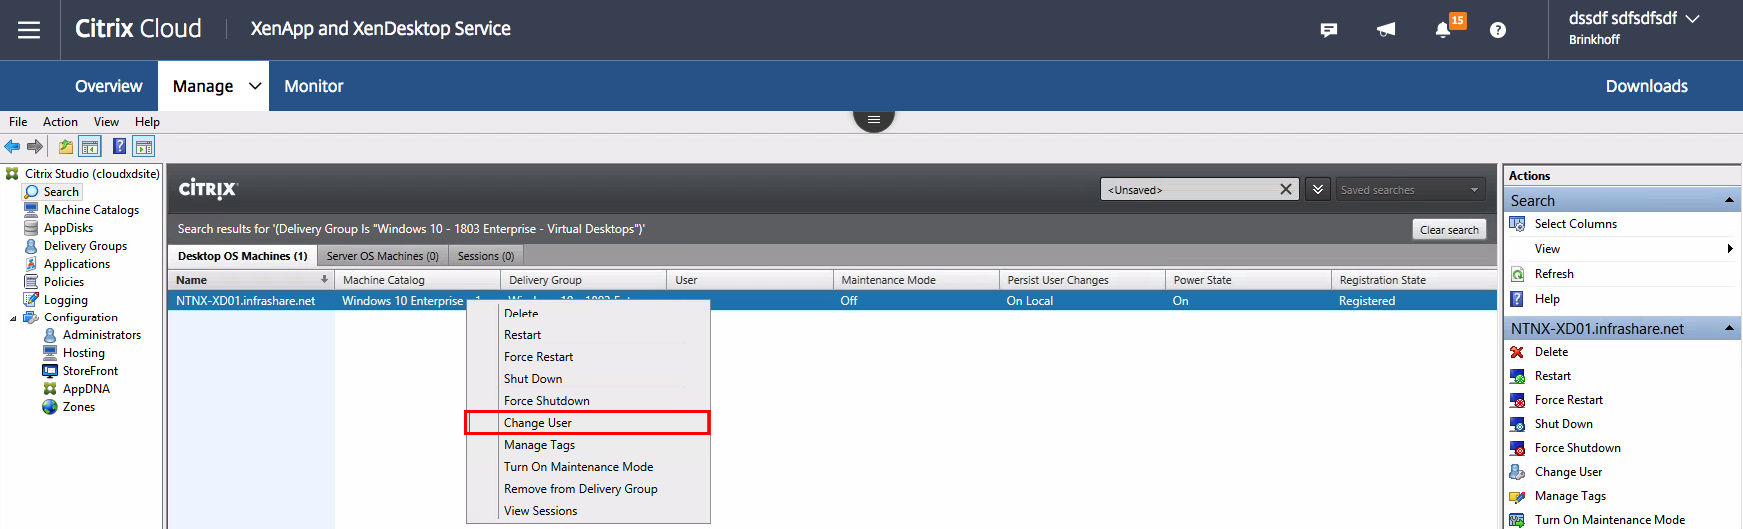
Do a right mouse click on the Desktop that you want to assign and choose for Change User
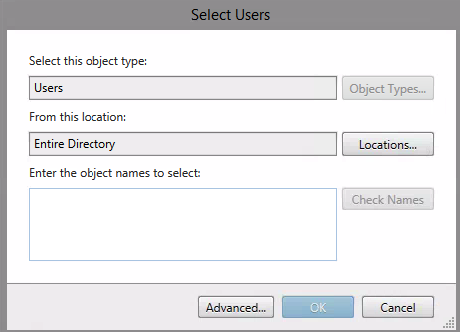
And the final step, Click on Add and search for the user
Click on Ok to finish the Delivery Group setup
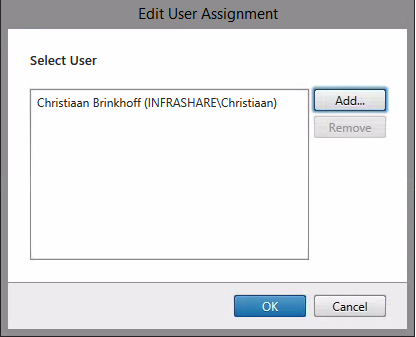
The Virtual Desktop is now assigned to the user!

Test Nutanix Virtual Desktops through the Citrix Workspace
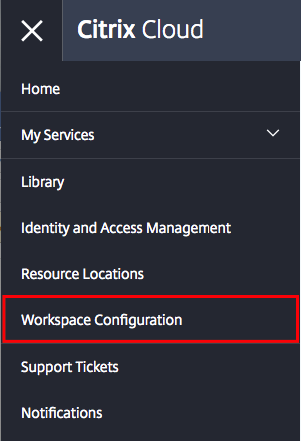
Click on the menu on Workspace Configuration
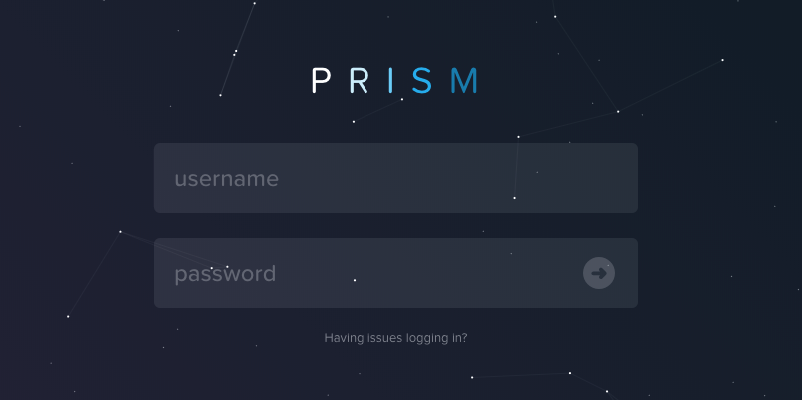
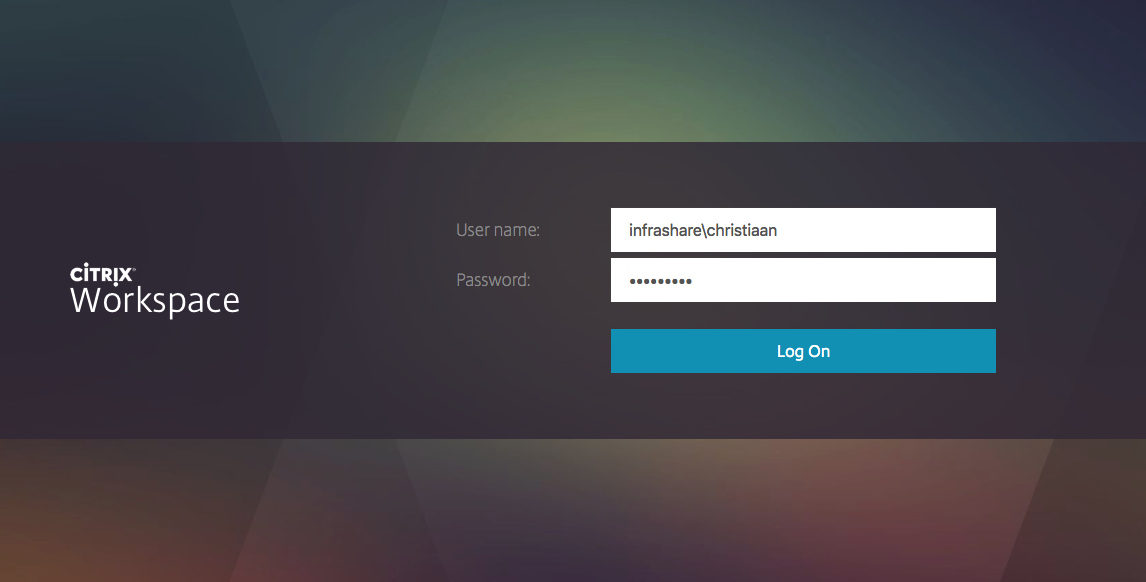
Open your Citrix Workspace URL in a browser

Login with your User Credentials, which we just assign to the Virtual Desktop
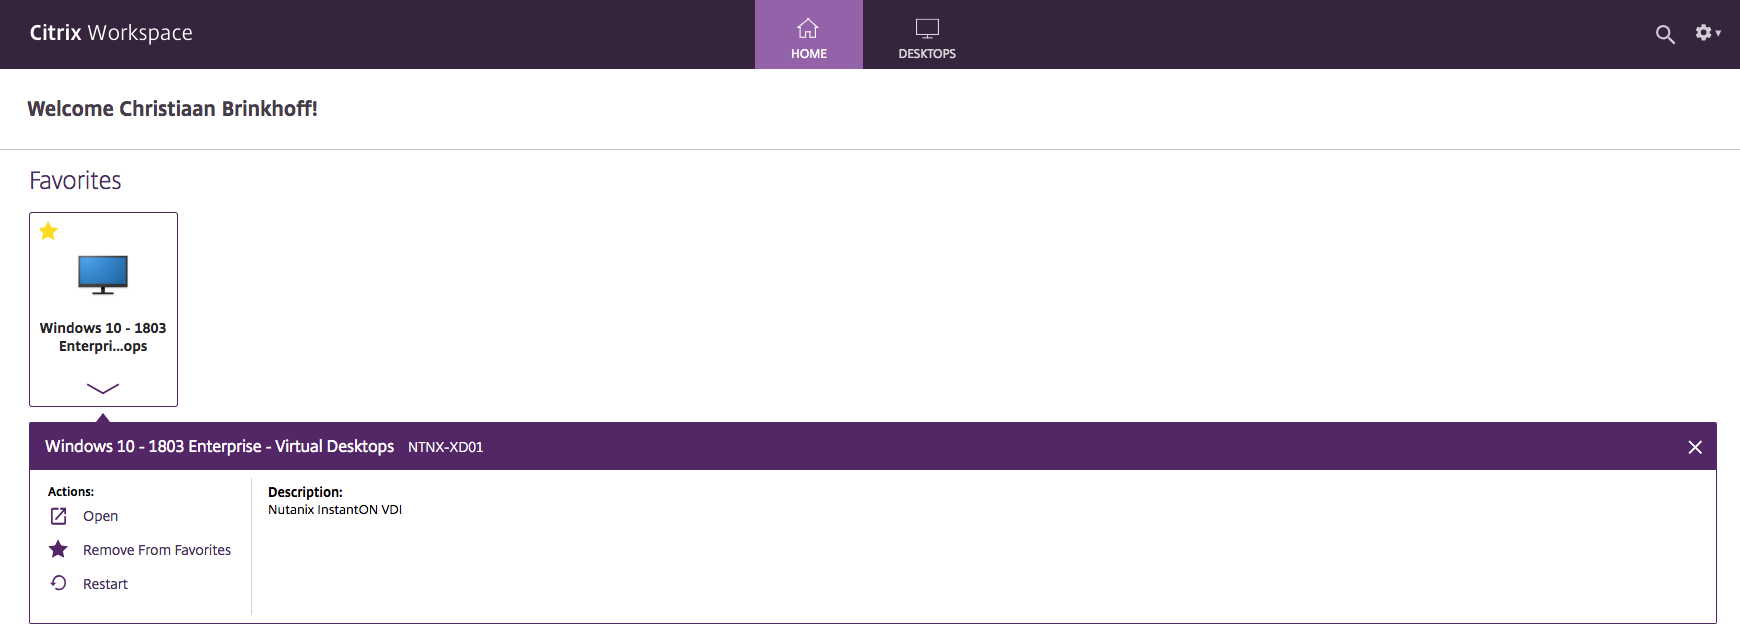
The Windows 10 Virtual Desktop is listed!
Click on the Desktop
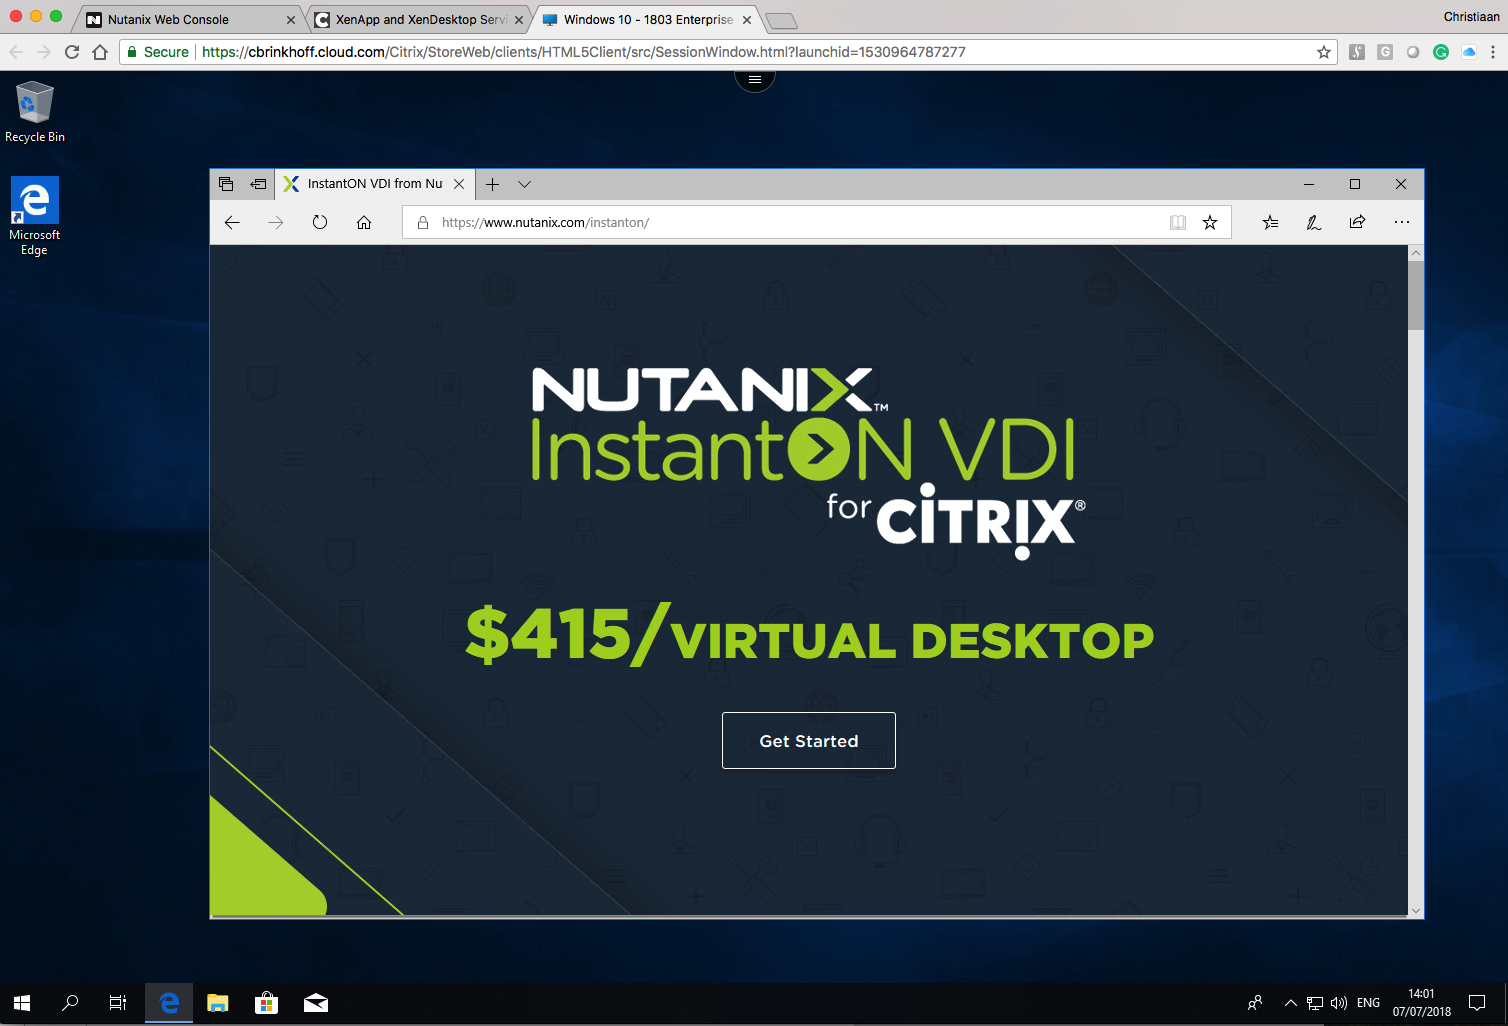
And my session is working directly from my Citrix Workspace in Citrix Cloud!
Experience it yourself – Demo video
See below how Citrix Workspace works with Nutanix InstantON – seamlessly
Thanks for stopping by.
Cheers,
Christiaan Brinkhoff