
Learn about the three different options to remote control (shadow) your Azure Virtual Desktop sessions for helpdesk users


A lot of things around Azure Virtual Desktop (AVD) are improved since the release of the ARM-based version as part of the announcements in this blog. The complete implementation process has been simplified (read more here) and a lot of extra management capabilities are added.
One important component of a virtual desktop environment is user experience. To ensure every user is happy, it is very common to shadow users to walk them through steps to solve problems with a little help from the helpdesk. After explaining the different options you have to remote control sessions within AVD to one of my customers, I thought it’d be helpful to share the procedure with the community.
In this article, you will learn about the three different options (Quick Assist, Remote Assistance, and Remote Desktop Connection – MSTSC) of how you could remote control – shadow the user session to empower your helpdesk employees in your environment.
Note: This article works on both Windows 10 Enterprise single and multi-session.
Table of Contents
Click on the title to jump to that spot in this article:
User session management via the Azure Portal
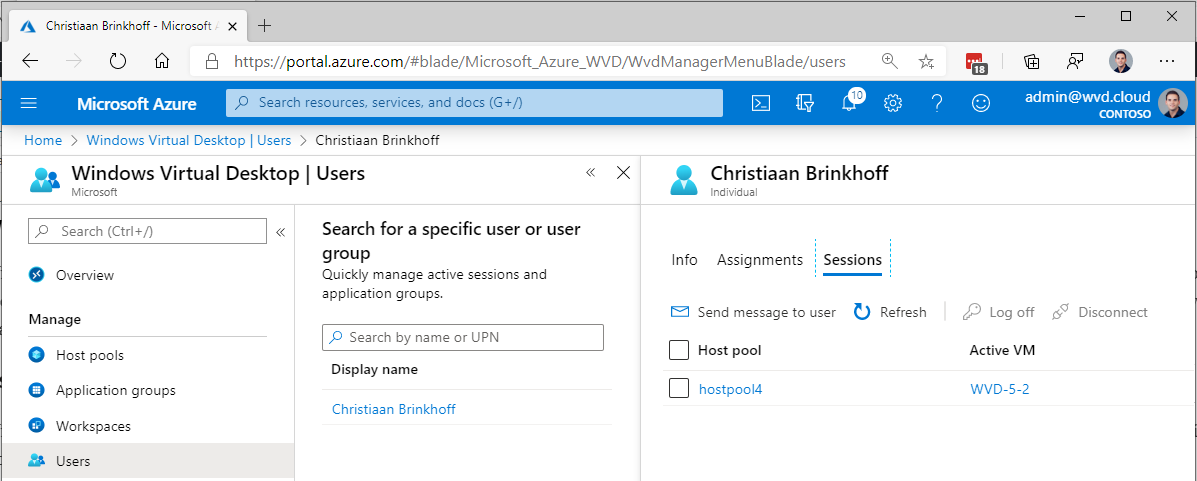
With the new ARM-based – spring update release of Azure Virtual Desktop being available. We also have the option to do more user session troubleshooting directly from the Azure Portal. The user’s menu option gives us the option to search for users, see their active sessions, application assignment, and send them messages during maintenance work.
This allows helpdesk employees to do some first line of support for Azure Virtual Desktop from the Azure Portal. You can also easily detect the session host of the active session as well as the session ID. This is helpful for the steps explained later on in this article.
Option 1 – How to Remote Control sessions with Windows 10 – Quick Assist
Quick assist is a new tool (simpler than Remote Assistance – doesn’t require any pre-configuration) and way of give control of your computer to people you trust over the internet. The other great thing about quick assist is that it’s free to use as part of your Windows 10 license! See below how it works either with video or as walkthrough steps in this article…
Note: The positive thing of Quick Assist could be that anyone with a Windows 10 device on a functioning internet network can use Quick Assist. When you want to secure the access more and disable remote control access from the internet, please use option 2 or 3.
The following steps have to be done by the helpdesk user
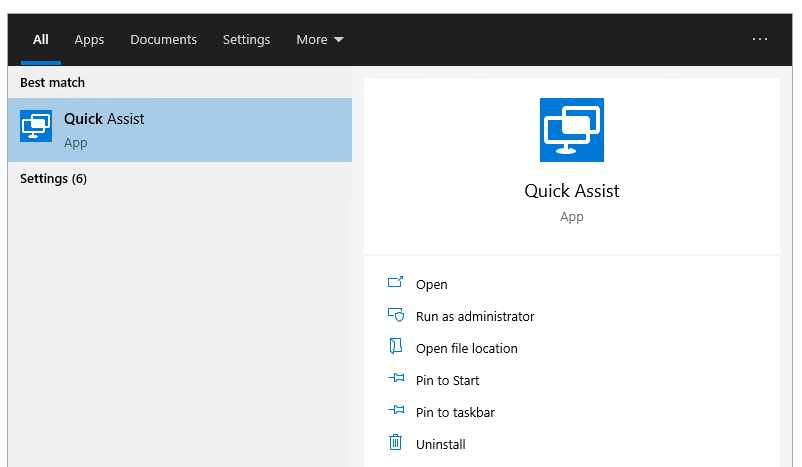
As helpdesk user – you must search for quick Assist on your Windows 10 virtual or physical machine
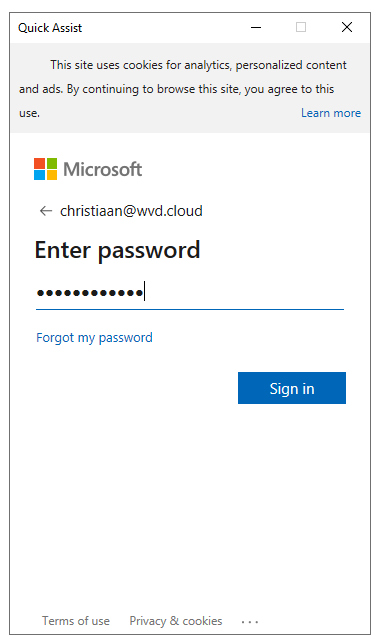
Logon with your Azure AD credentials
Choose for Assist another person
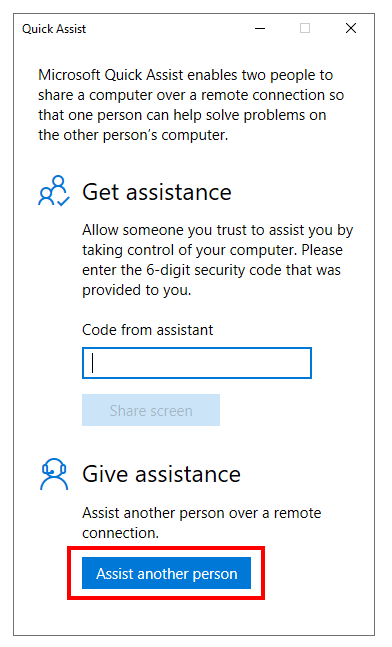
Remember or share the Security code with the user you want to remote control (shadow).
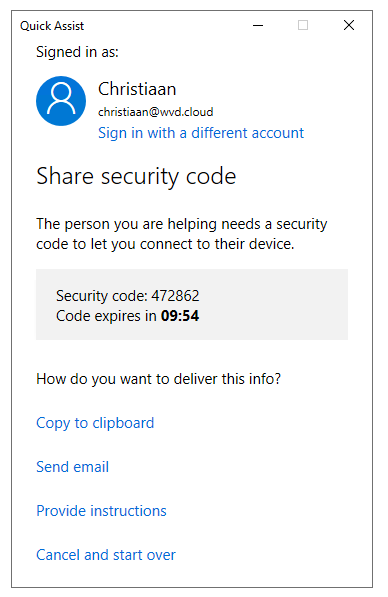
The following steps have to be done by the user
Ask the user you want to remote control (shadow) to open Quick Assist
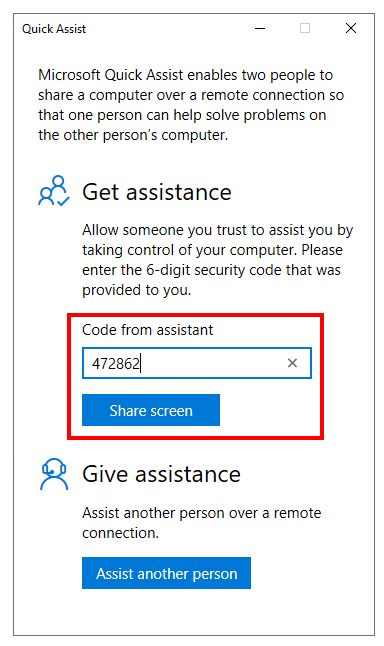
Wait for the session to be loaded…
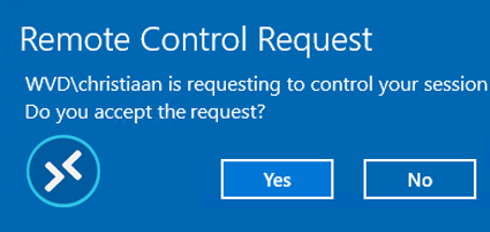
During the loading process – the helpdesk user will be asked for the type of control.

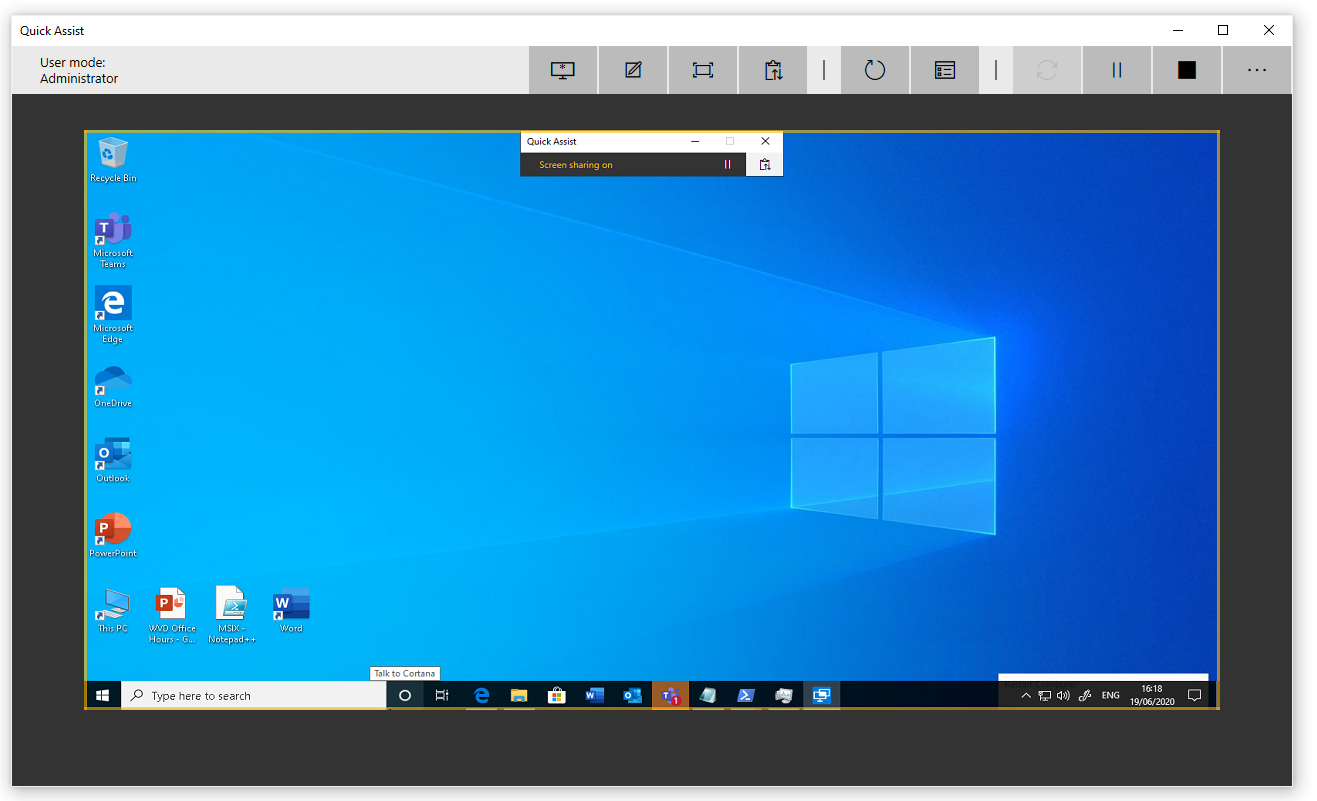
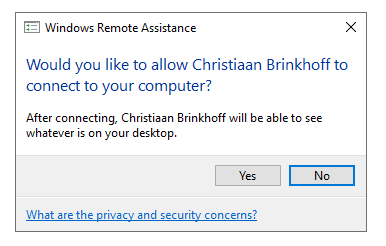
The user will receive the following prompt afterwards.

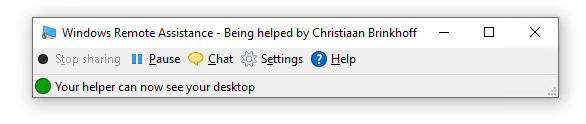
The user will see this – once the helpdesk user took over.
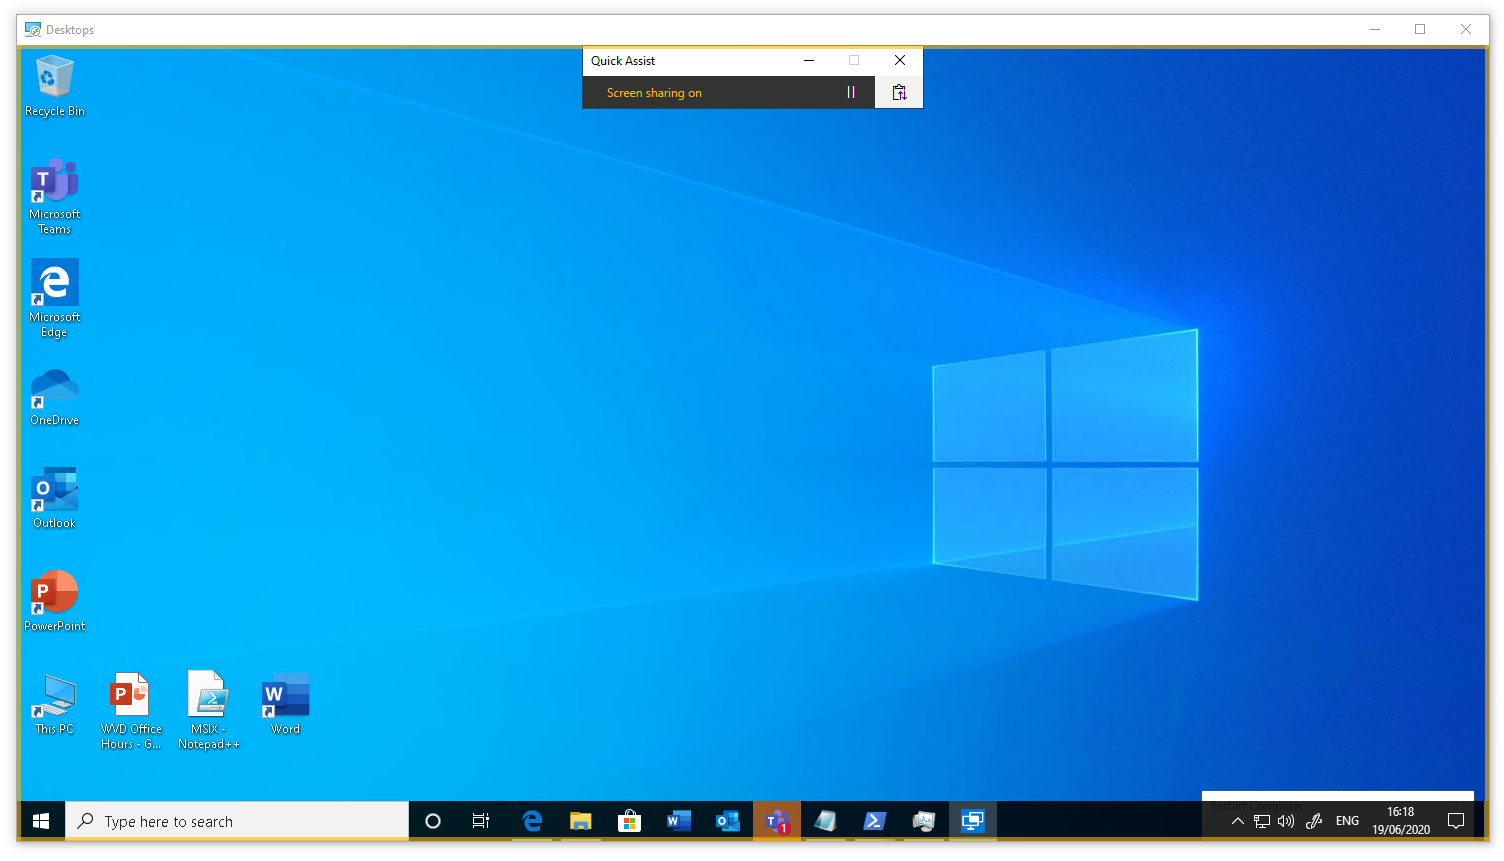
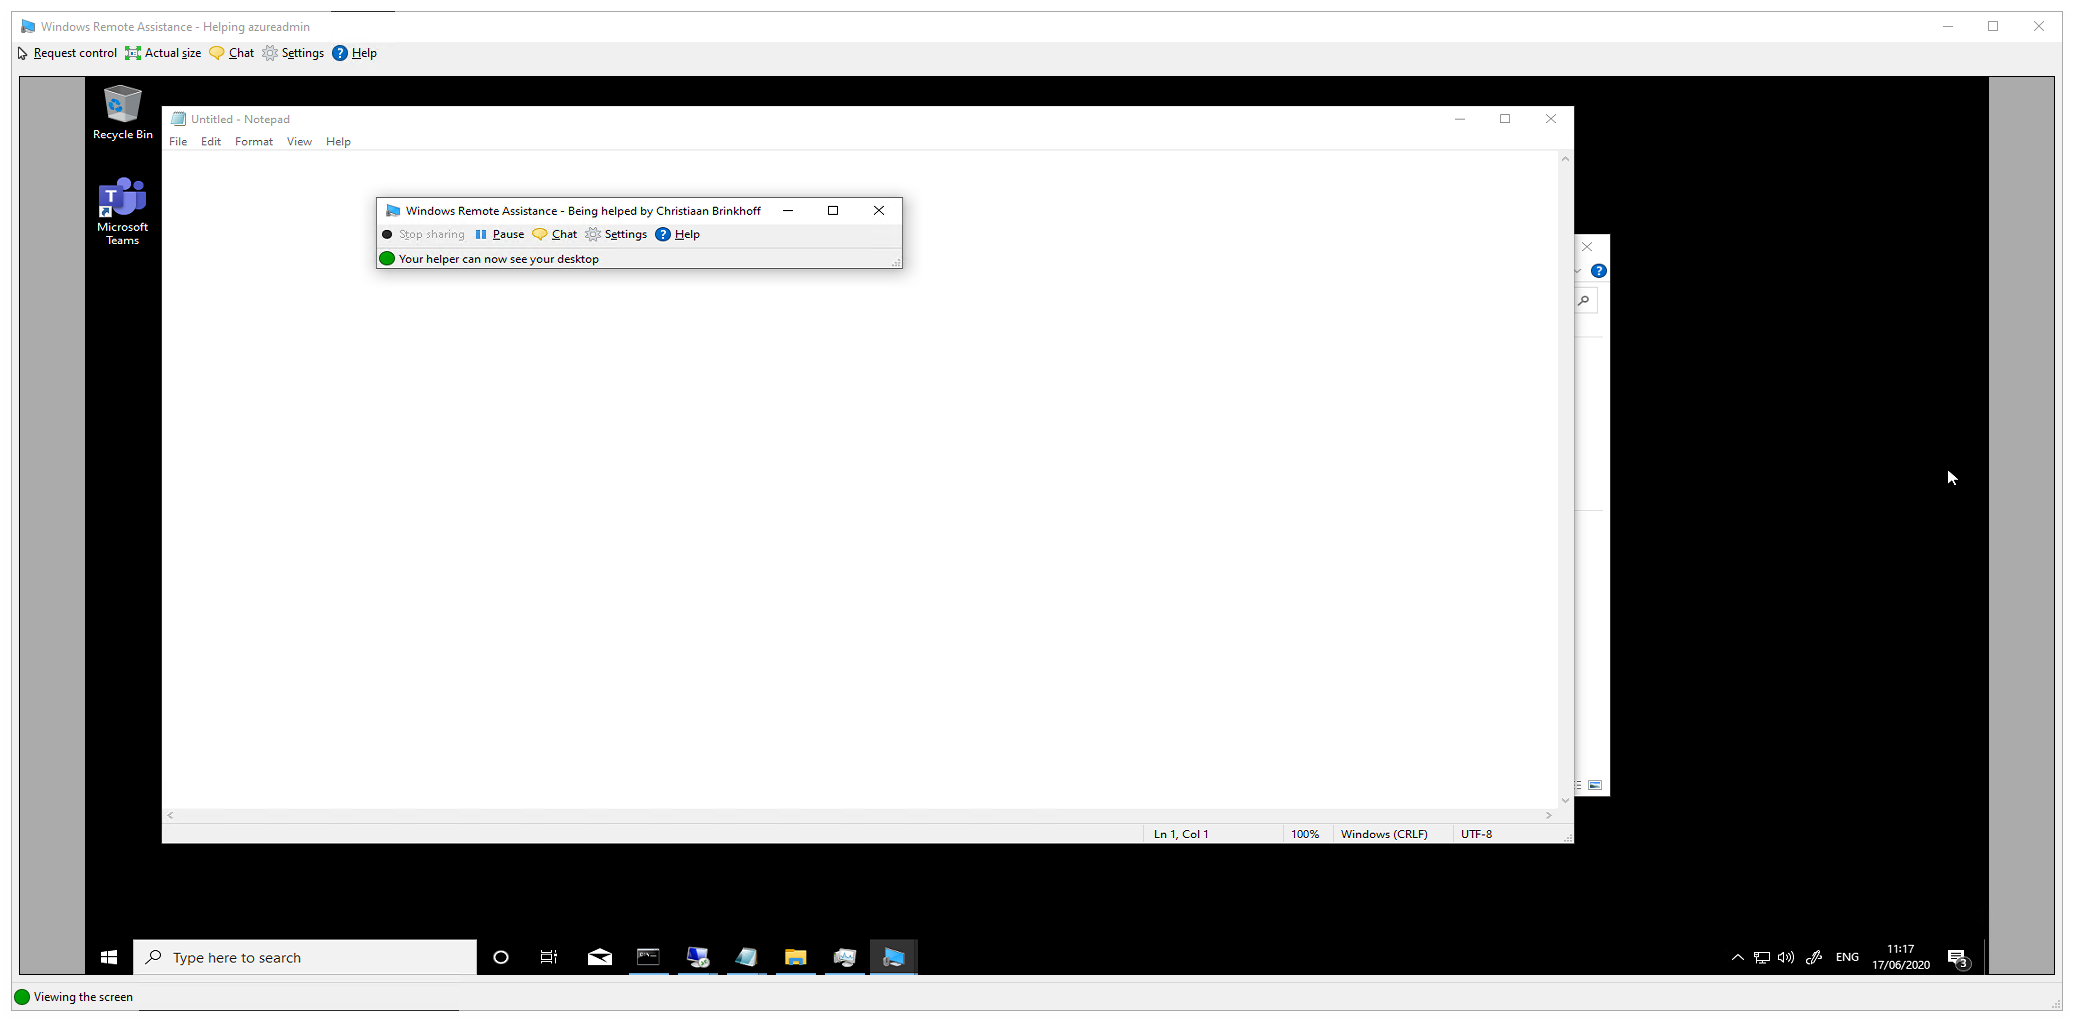
The helpdesk user will see this – you are now ready to troubleshoot via Quick Assist! 😊
Option 2 – How to configure Remote Control sessions via Remote Assistance (MSRA)
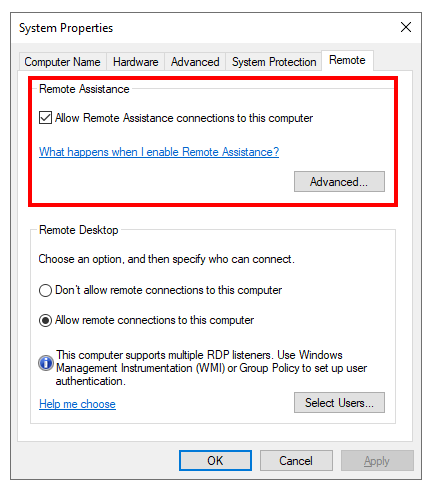
Enable Remote Assistance on your AVD image (session host)
The following steps need to be performed on the Azure Virtual Desktop session host images.
Enable Remote Assistance as service as part of your Azure Virtual Desktop image – session host via the following setting.
You can also activate Remote Assistance (automated) via PowerShell with the command below.
REG ADD "HKLM\SYSTEM\CurrentControlSet\Control\Remote Assistance" /v fAllowToGetHelp /t REG_DWORD /d 1 /f

Configure firewall policies on your AVD image (session host)
netsh advfirewall firewall set rule group="Remote Assistance" new enable=yes

You could also configure the firewall rules via the Allowed apps and features menu
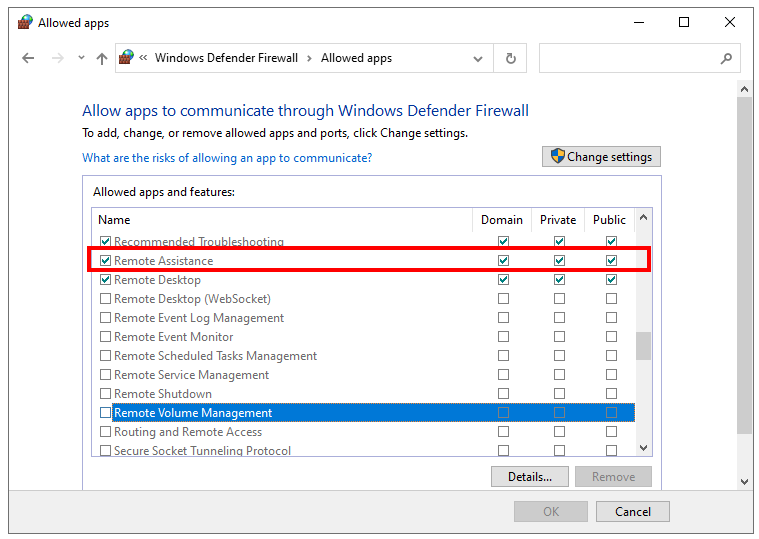
The following Windows Defender Firewall rules should show up after running the PowerShell command. Make sure to verify this before moving to the next step.

Configure Offer Remote Assistance
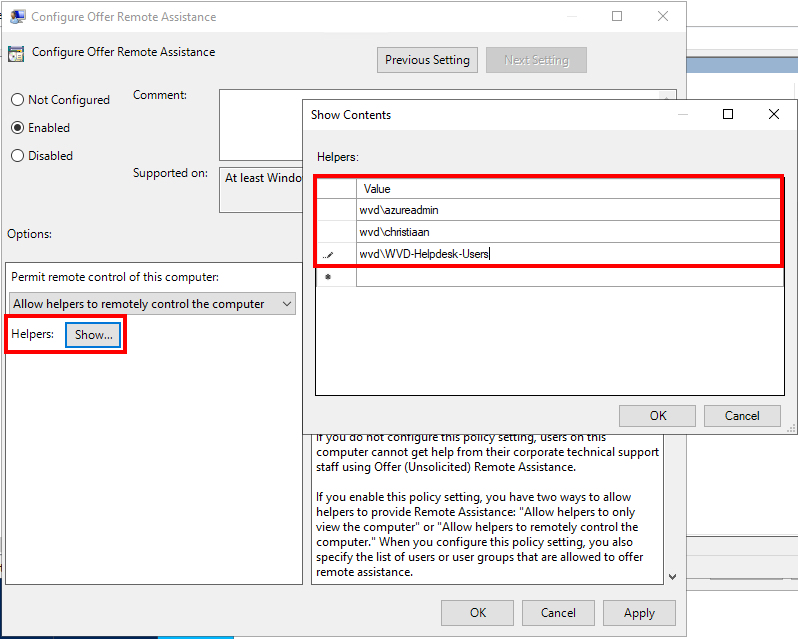
Pre-step: Make sure to create a custom AD Group e.g. AVD-Helpdesk-Users to enable access to Remote Assistance.
Open the Local – or domain Group Policy Management console.
Go to Computer Configuration/Policies/Software Settings/Administrative Templates/System/Remote Assistance and open the Offer Remote Assistance setting
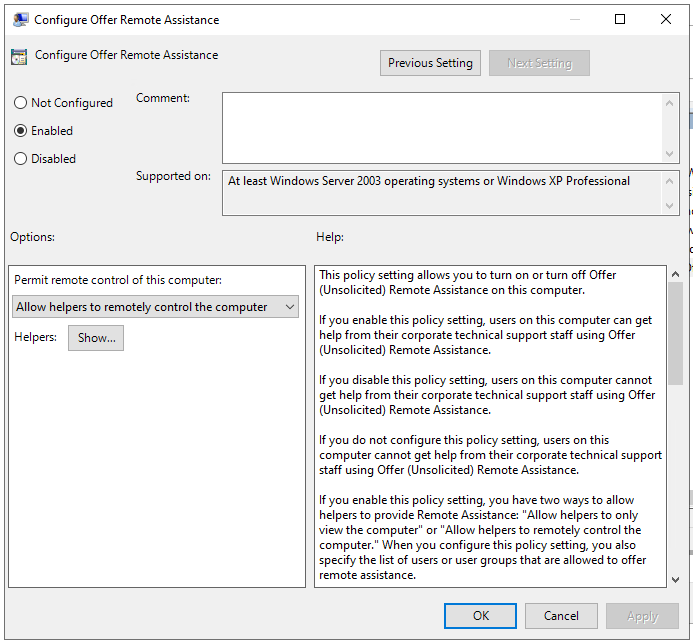
Click on Show, and make sure to enter the users or groups you want to have permissions to offer Remote Assistance, one per line.
Click on ok to confirm.
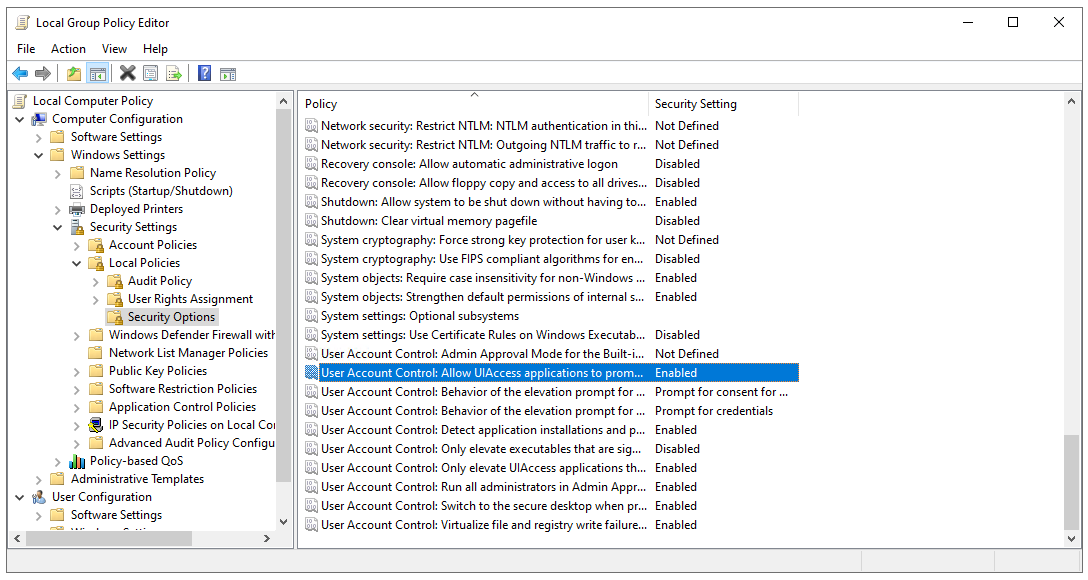
Configure Allow UIAccess applications to prompt for elevation
Go to Computer Configuration\Windows Settings\Security Settings\Local Policies\Security Options
Make sure to enable the following GPO setting – User Account Control: Allow UIAccess applications to prompt for elevation without using the secure desktop – to allow the application to open and take over the user’s session.
You can either configure the setting on domain level or via the local group policy.
Publish Remote Assistance as a Remote App (optional)
The following steps are optional as you could run Remote Assistance as well directly from your Windows 10 physical desktop and/or laptop. You only have to make sure the network of the session hosts can be reached.
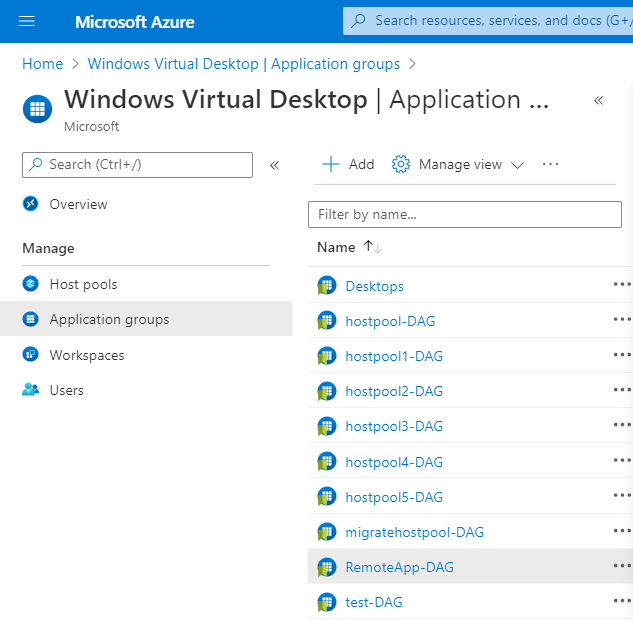
Go to the Azure Virtual Desktop service in the Azure Portal
Select your Remote App – application group
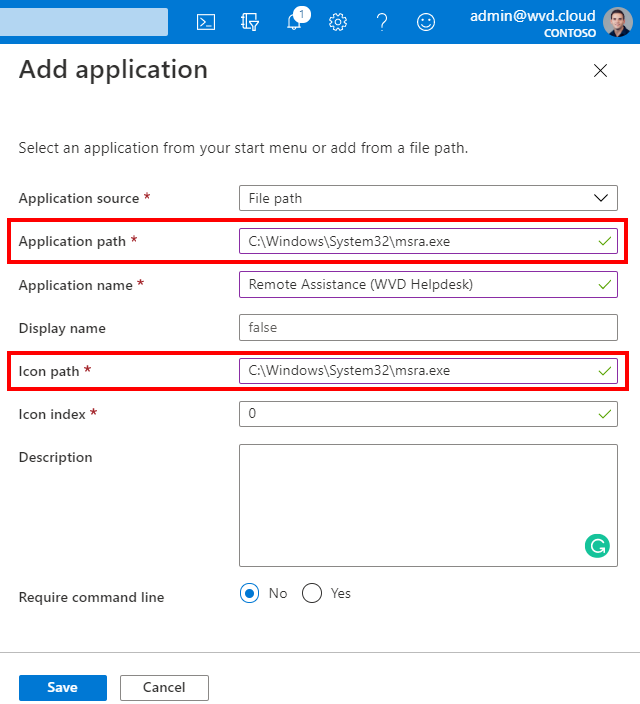
Click on + Add
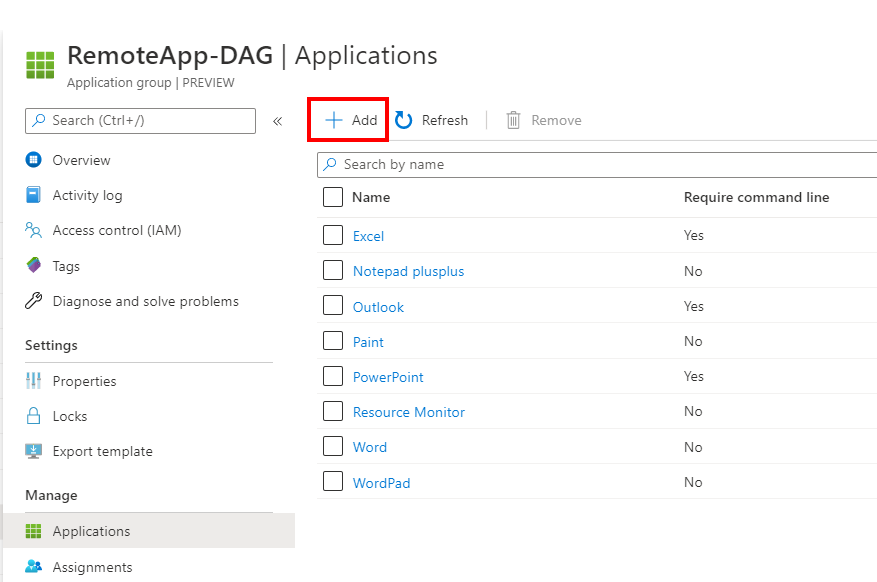
Make sure to add the Remote Assistance executable and perhaps a custom name that refers to helpdesk.
Click on Ok
C:\Windows\System32\msra.exe
Open the Remote Desktop client
Refresh your applications

Remote Assistance is now available – let’s test and verify the connection.
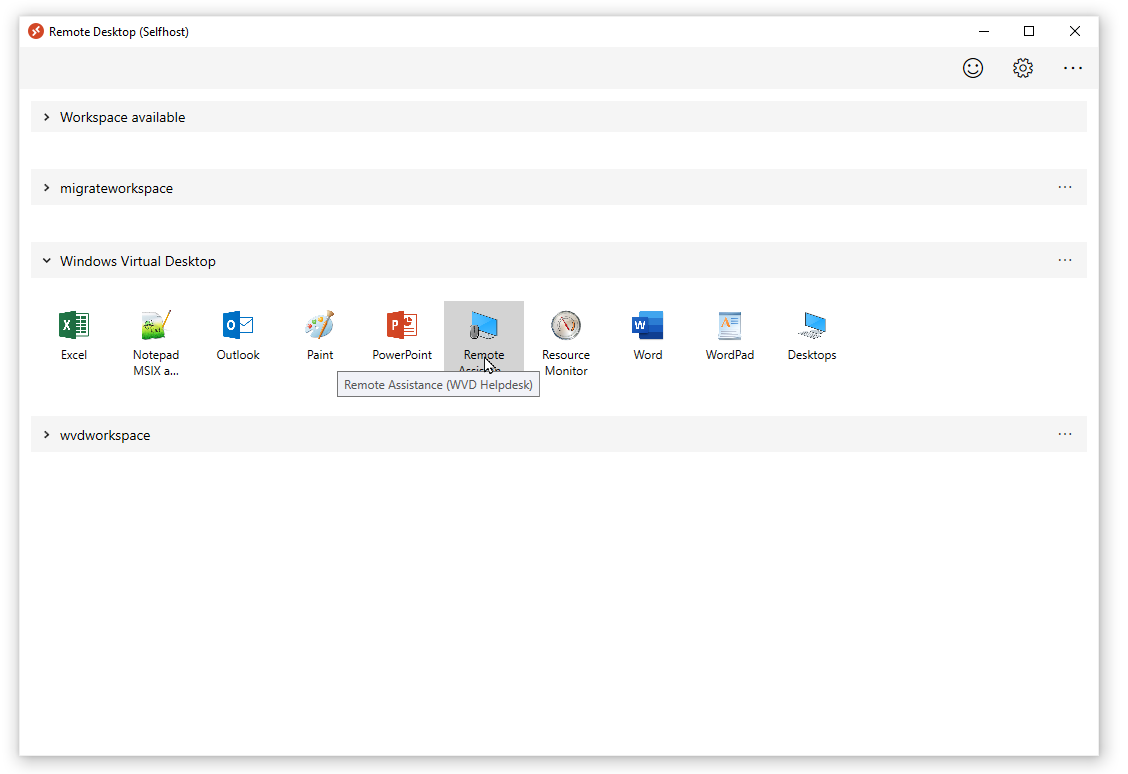
Start the Remote assistance – RemoteApp
Setup a Remote Control session with Remote Assistance – helpdesk procedure
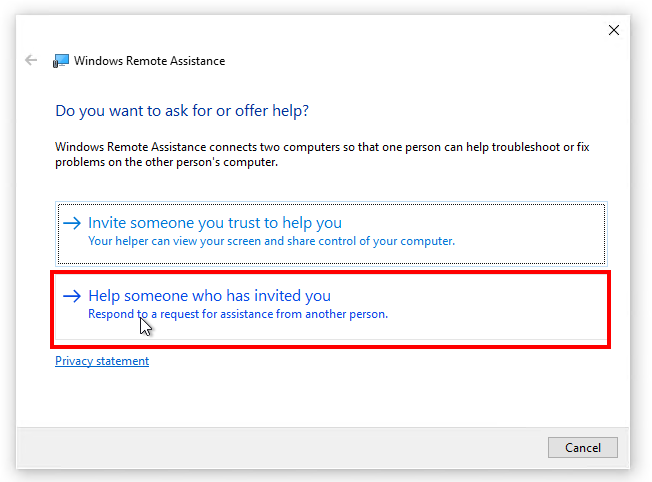
You can run the steps below on either a Windows 10 (physical) desktop or laptop in your network – or alternatively as RemoteApp via Azure Virtual Desktop as described above.
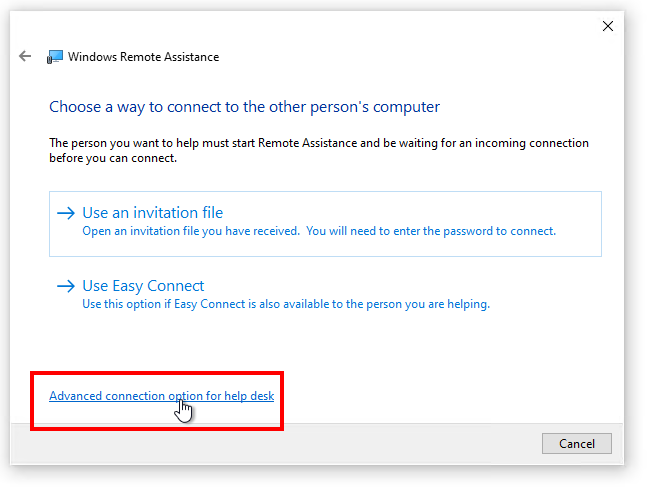
Click on – Help someone who has invited you
Click on – Advanced connection option for help desk
Switch to the Azure Virtual Desktop service in the Azure Portal
Open the Users menu
Search for the user you want to shadow
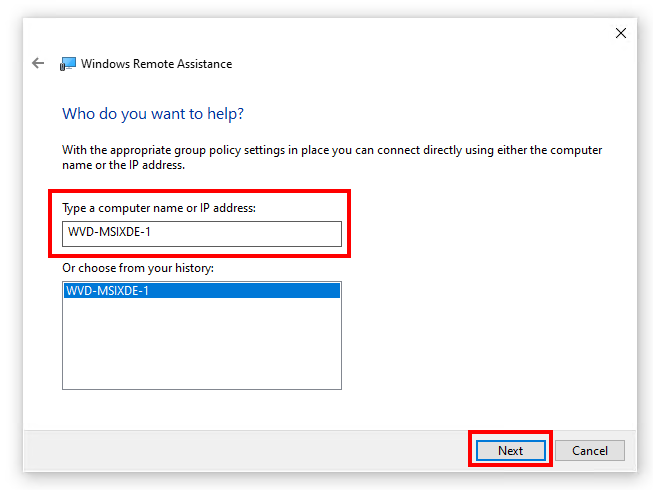
Copy the Active VM entry

Paste the VM entry in the – Type a computer name – section
Click on Next
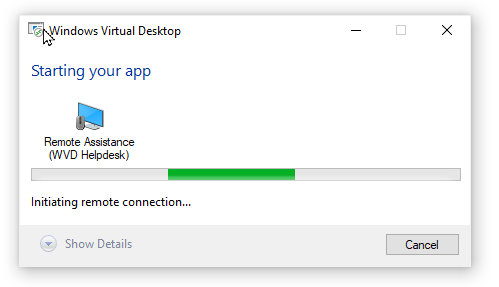
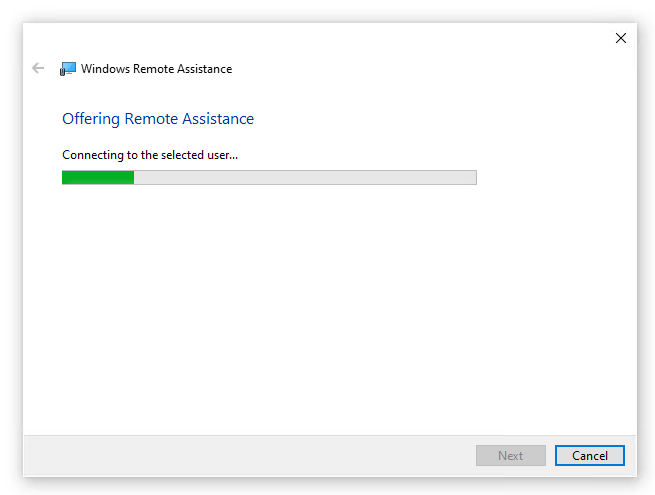
The connection is being established…
When more users are logged on to e.g. Windows 10 Enterprise multi-session – you’ll get the following selection menu.
Select the specific user
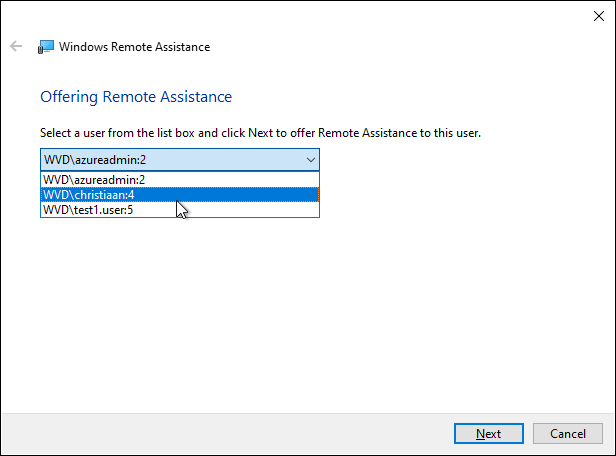
Note: When you are the only user logged on to the session host, you won’t get this screen and Remote Assistance will automatically try to take over the session of the (only) user.
The user will see the following bar in the corner of his AVD session.
The admin will see this – and is now able to take over control and help the specific user.
By pressing – Request control – you can take over the mouse of the user.
Option 3 – How to configure shadowing sessions via Remote Desktop Connection (MSTC)
The alternative option to shadow session is via the Remote Desktop Connection (MSTSC). Remote Assistance works differently, is a bit newer as well has more capabilities to send invitations etc. You can pick what fits best to your company needs.
Configure firewall policies on your AVD image (session host)
Make sure the following three (including shadowing) firewall Groups are opened as well as Remote Desktop is opened in the Windows Defender Firewall.
netsh firewall set service type = remotedesktop mode = enable
- Remote Desktop – Shadow (TCP-In)
- Remote Desktop – User Mode (TCP-In)
- Remote Desktop – User Mode (UDP-In)

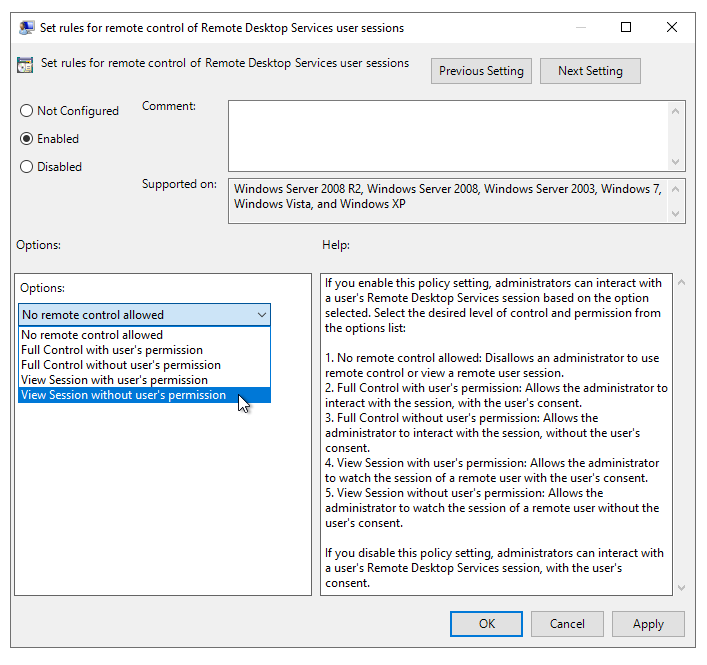
Change the shadowing policy settings
The settings of shadowing sessions must be done via either local or domain policies.
Go to Computer Configuration, Administrative Templates, Windows components, Remote Desktop Services, Remote Session Host, Connections.
Note: Make sure to perform the steps in the image or allocate a GPO to the organizational unit of the session hosts.
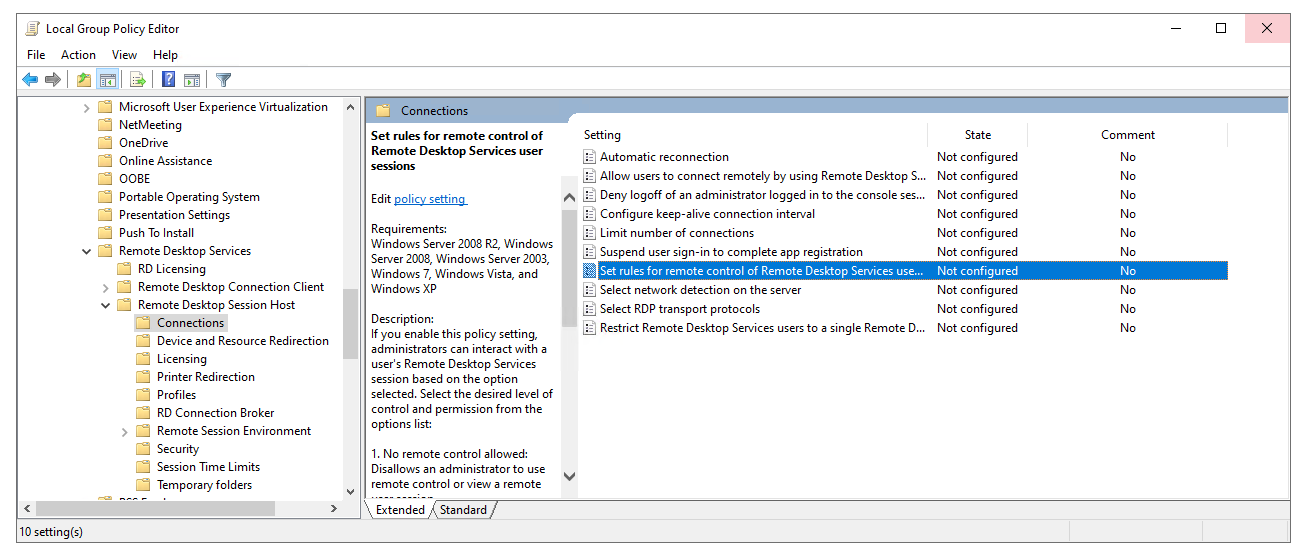
Change the setting below to whatever aligns best with your needs.
Obviously, without the users permission means that you can shadow without getting any prompt + the approval from the end-user beforehand.
How to shadow sessions with MSTC – helpdesk procedure
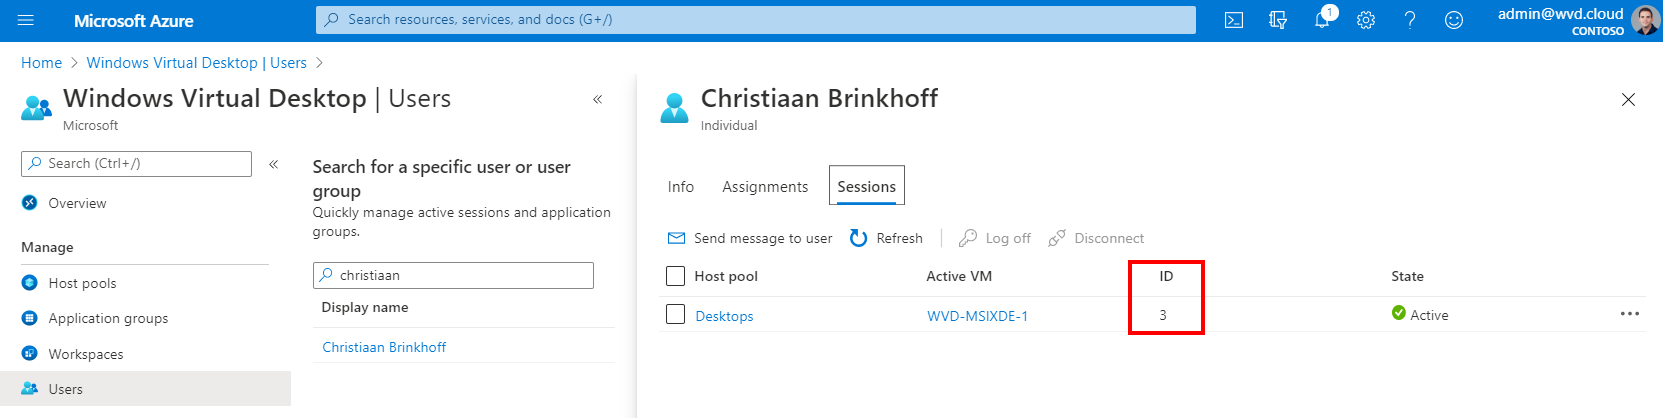
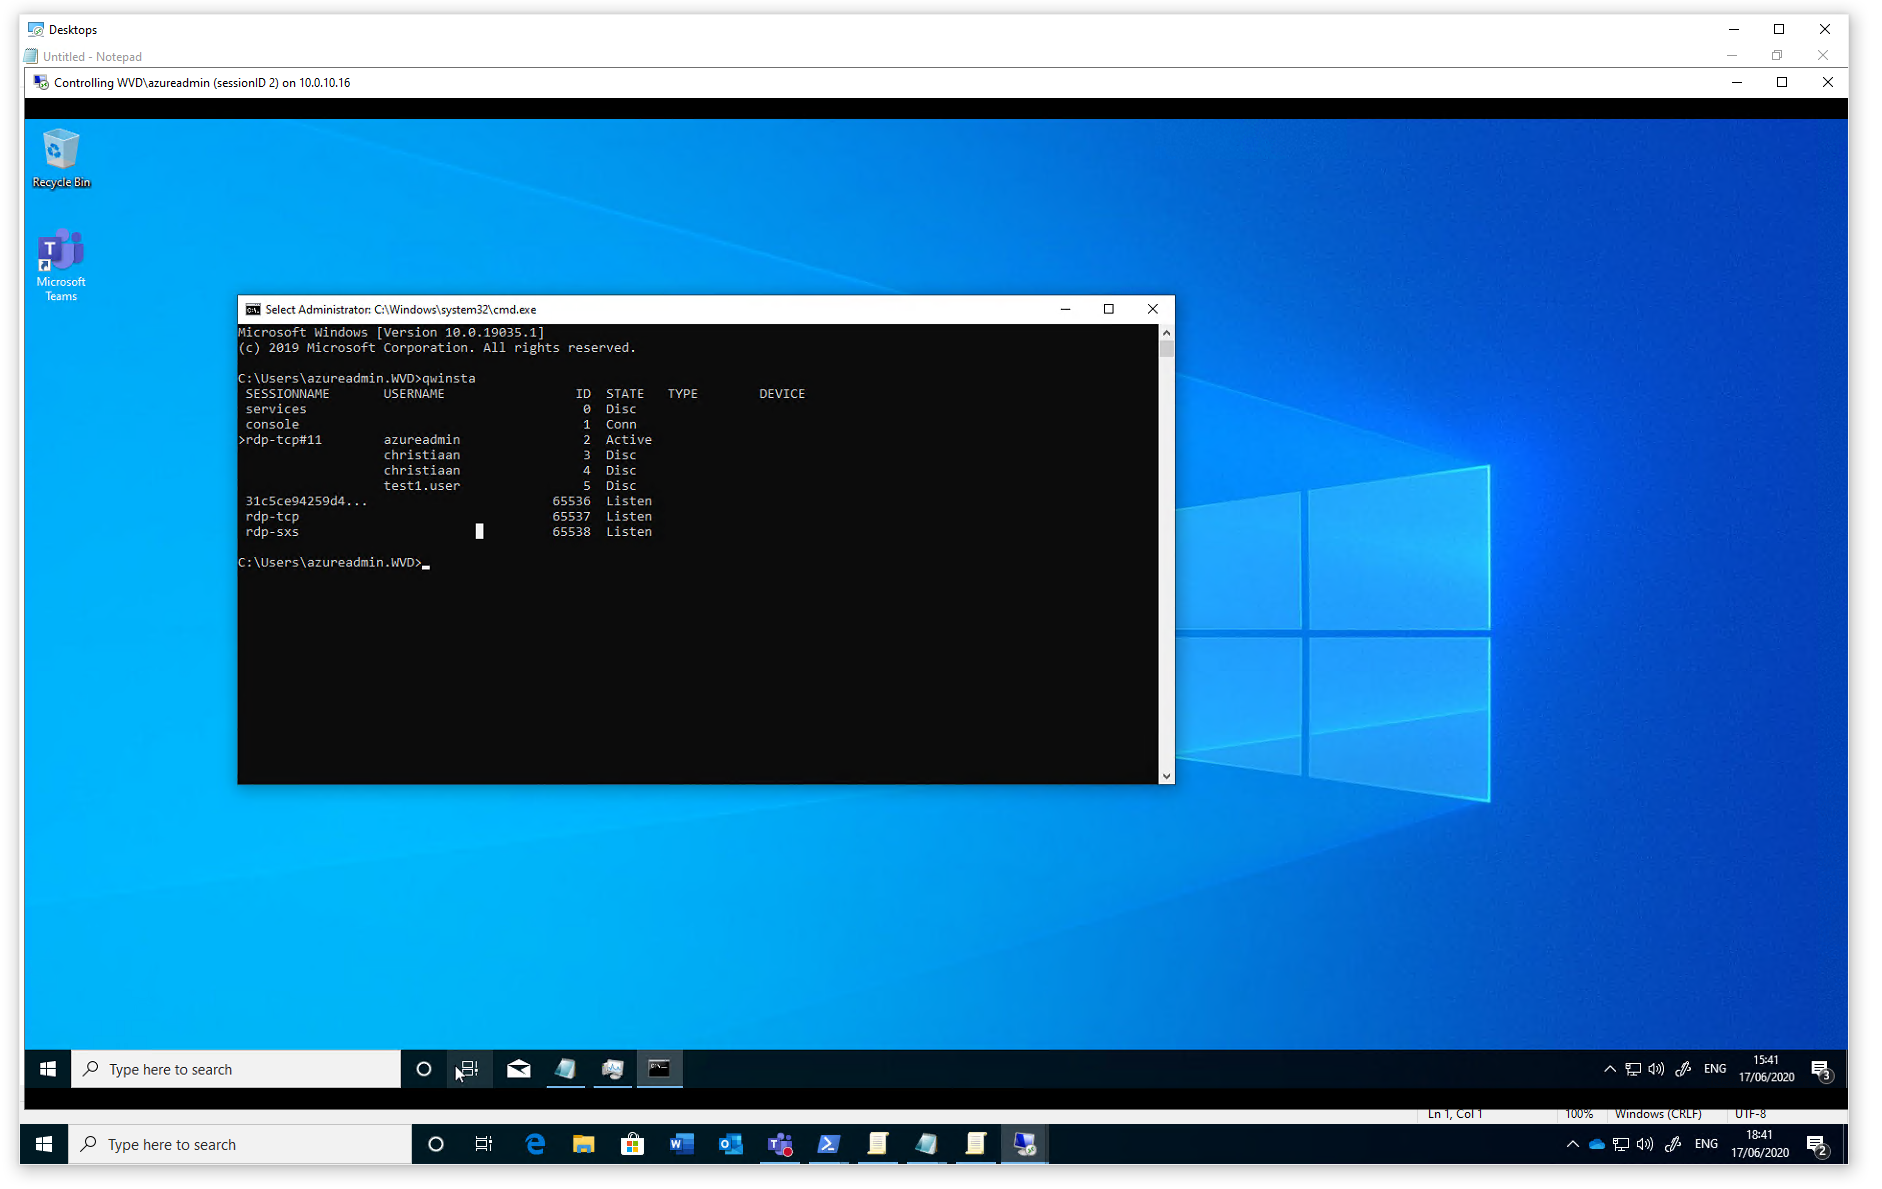
First, we have to detect the session ID of the user. We can easily detect this via the new Azure Portal – users menu.
Open the Users menu
Search for the user you want to shadow
Go to Sessions to collect the right ID number.
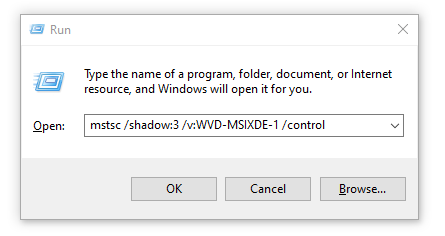
Open the following command.
Note: After Shadow you must put the session ID we just collected.
When you prefer to setup the shadow session with (example) user notification, run.
mstsc /shadow:3 /v:AVD-MSIXDE-1.contoso.com /control
The noConsentPrompt parameter sets up the connection without consent of the user.
mstsc /shadow:3 /v:AVD-MSIXDE-1.contoso.com /control /noConsentPrompt
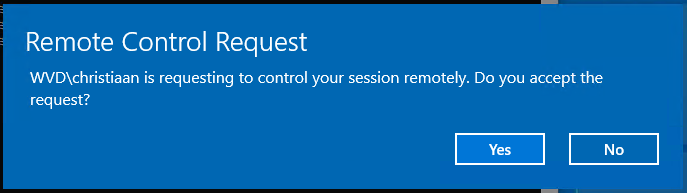
When everything works – the session is being shadowed. 😊
You’ve now learned the three options to remote control or shadow Azure Virtual Desktop user sessions out of the box.
Thank you.